
Tiny wings and happy stitches come together in this Free crochet Bumblebee Pattern with easy instructions, quick finish, and a sweet handmade look for gifts and decor.
A small bumblebee made with crochet can add a playful and cheerful touch to any setting. This project involves using black and yellow yarn to form its striped, rounded body, along with soft white wings and a stitched or embroidered smiling face.
Cozy Favorite Crochet Bumblebee Pattern for Handmade Smiles
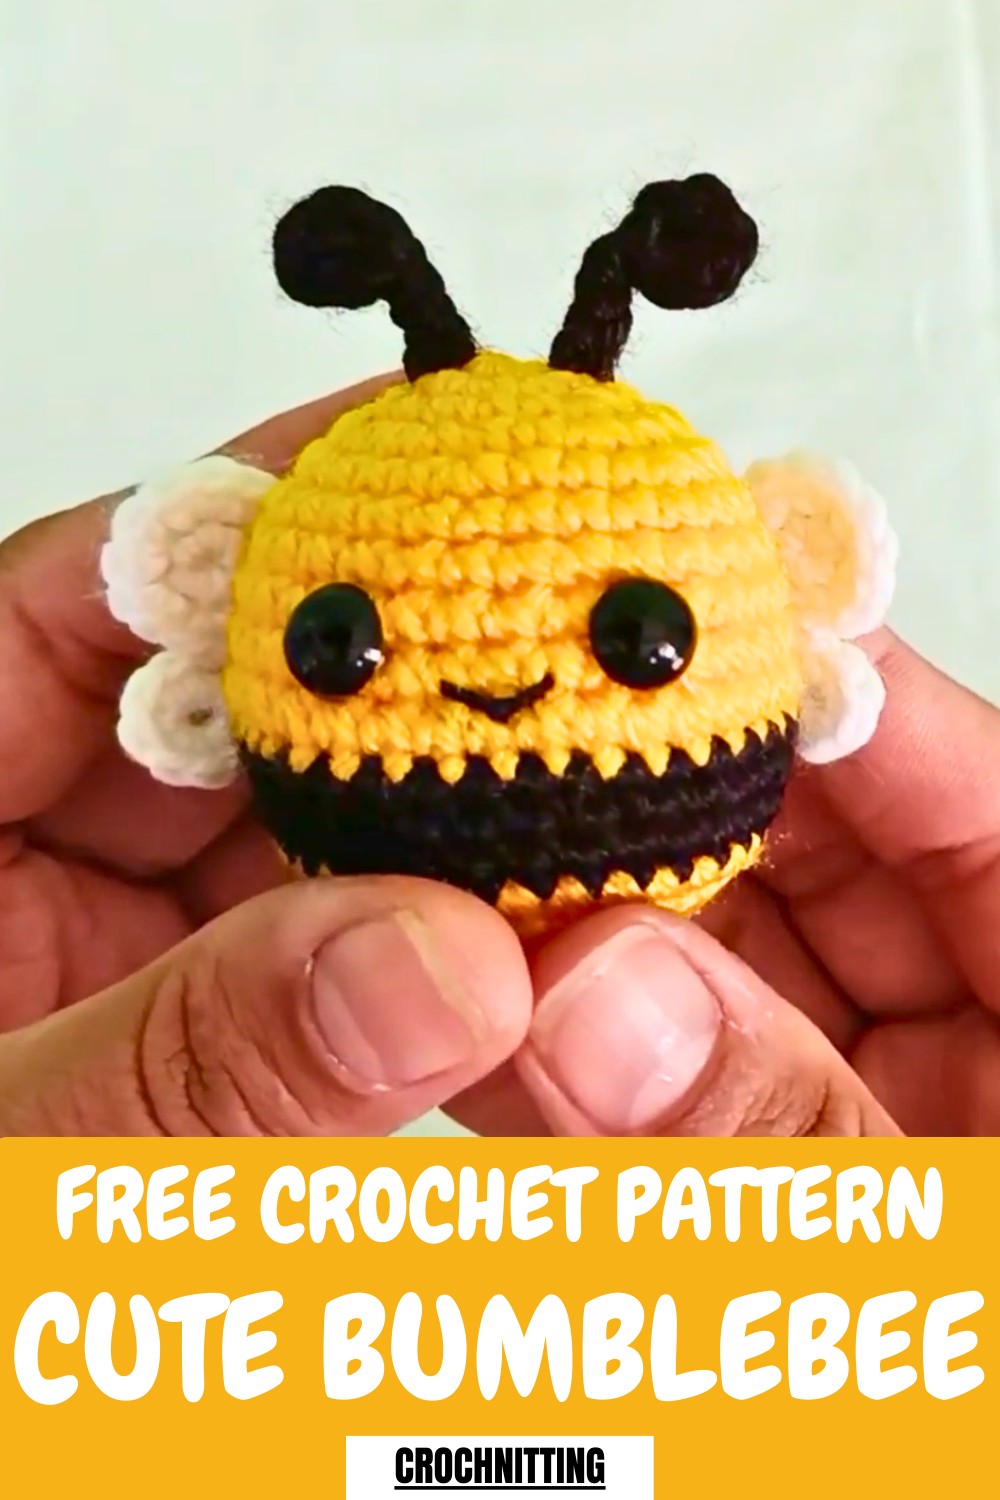
Its design can also be personalized to fit your taste by adjusting details like wing shapes or antennae length. Whether you’re adding it to a collection or gifting it to someone special, a crocheted bumblebee is a delightful way to infuse fun and creativity into any space.
How to Crochet a Cute Honeybee: Step-by-Step Guide
Materials Required
To create this honeybee, gather the following supplies:
- Yarn:
- Yellow (for the top and bottom parts of the body)
- Black (for the middle body part and antenna)
- White (for the wings)
- Wire: 0.4 mm thick wire (optional, adds stiffness to the antenna)
- Safety Eyes: 8 mm size for the eye section
- Thread: Black cotton thread for the smile
- Needles: Sewing needle (for attaching the wings and smile details)
- Hook: 5 mm crochet hook
- Stuffing: Fiber filling for the body
Steps to Crochet the Honeybee
Step 1: Crochet the Antenna
- Cut two pieces of the 0.4 mm thick wire to approximately 9 cm in length (optional).
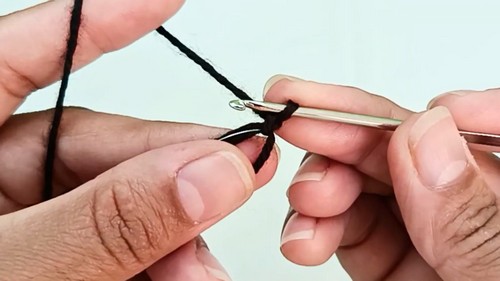
- Make a magic ring: Wrap your yarn around your finger, pull a loop through, and chain one.
- Pass the wire through the first chain and crochet 5 single stitches into the magic ring around the wire.
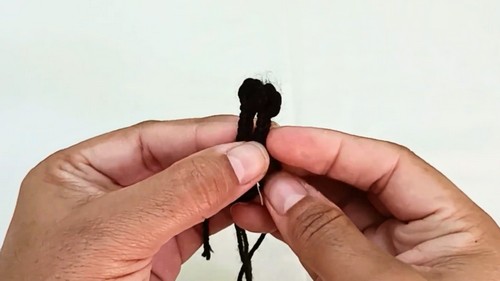
- Adjust the wire ends to equal length, tighten the thread, and close the round with a slip stitch. Repeat the pattern for both antennae.
- Leave a long loop to later attach the antenna to the body.
Step 2: Create the Body
- Start the magic ring for the body and chain one.
- Work 6 single crochets into the magic ring and begin crocheting in spirals without slip stitches.
- Attach a stitch marker to keep track of rounds.
- Round 1: Make 6 increases (one additional single crochet on every stitch). Total: 12 stitches.
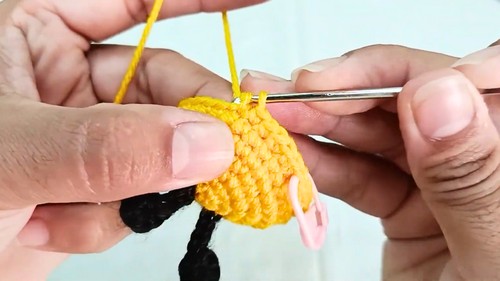
- Round 2: Alternate one single crochet and one increase to form 18 stitches.
- Round 3: Create a set pattern of one single crochet, one increase, one single crochet. Repeat to have 24 stitches.
- Round 1: Make 6 increases (one additional single crochet on every stitch). Total: 12 stitches.
- Add rows of single stitches while maintaining stitch counts for body height.
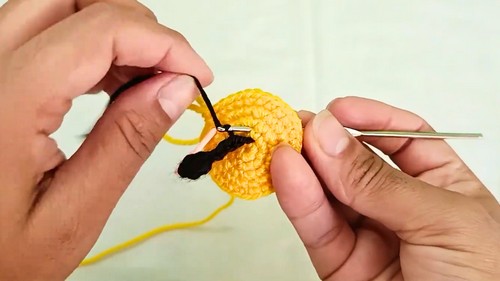
- Switch colors: Attach black yarn for the middle part, continue same counts for two rounds, then switch back to yellow yarn for the bottom part.
Step 3: Stuff the Body
Before continuing with smaller rounds, fill the body with stuffing to give the honeybee a firm, rounded shape.
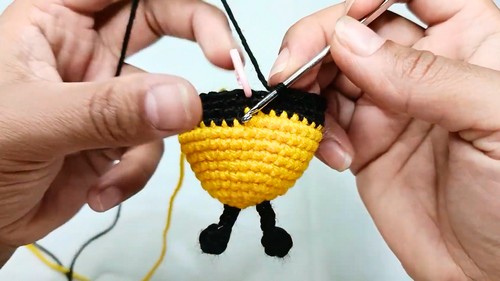
Step 4: Attach the Antennas
- Secure and attach each antenna between the second and third rounds of the body.
- Pull the loops and wires through the body stitches, knot them, and tighten securely.
Step 5: Decrease Stitches for the Base
- Use decreasing stitches to gradually narrow the bottom of the body.
- For example, alternate 3 single stitches with 1 decrease, repeating this set until you reach 6 stitches.
- Close the final hole by sewing it tightly using a needle.
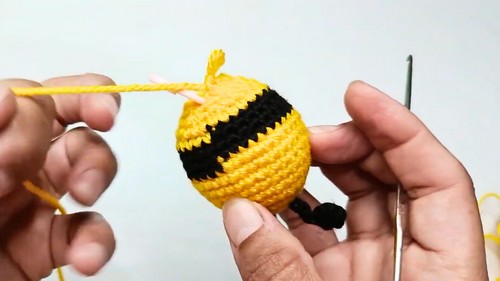
Step 6: Add Eyes and Smile
- Attach the safety eyes between the eighth and ninth rounds. Place them 5 stitches apart.
- Use black cotton thread and a sewing needle to embroider the honeybee’s smile.
Step 7: Crochet the Wings
- Small Wings:
- Begin with a magic ring and chain one.
- Work 8 single crochets into the ring, attach at the first stitch with a single crochet, and finish off.
- Large Wings:
- Begin with a magic ring and chain one.
- Crochet 6 single crochets, tighten the ring, and attach at the first stitch with a slip stitch.
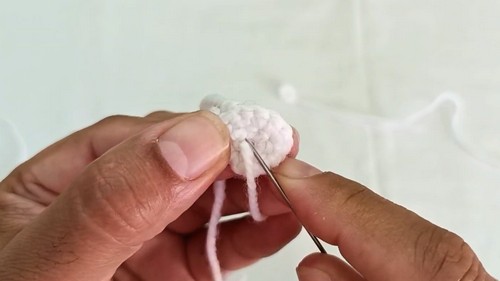
- In the second round, work 6 increases (2 single stitches at each stitch) to form 12 stitches.
Step 8: Attach the Wings
Attach the wings between the designated rounds:
- Large Wings: Between the 7th and 8th round.
- Small Wings: Between the 8th and 9th round.
Secure them tightly with stitches to ensure proper placement.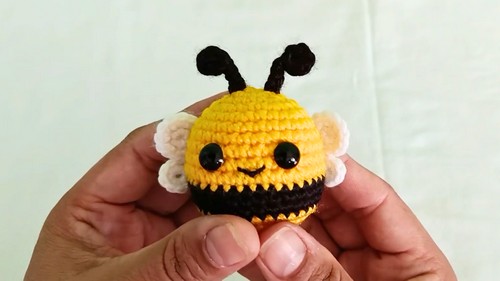
Special Features
- Beginner-Friendly: The video uses detailed explanations, stitch counts, and markers for easy tracking.
- Optional Customizations: You can skip adding wire to the antenna for simplicity.
- Compact Design: The finished honeybee is small yet full of character, making it perfect as a decoration or gift.
Tutor's Suggestions
- Follow every stitch carefully and use a stitch marker to track rounds.
- Watch the video closely to avoid missing crucial techniques, like fastening wings or body stitches.
- Stuff the bee firmly for a smooth and even finish.
Difficulty Level
This project is beginner-friendly with simple stitch patterns (single crochet, increases, decreases) and clear, repeatable instructions. However, patience and attention to detail are required.
Conclusion
By following the steps, you can crochet a charming honeybee for yourself or as a thoughtful handmade gift. The combination of simple shapes, vibrant colors, and detailed features creates a lovely design. Share your creations and connect with other crochet enthusiasts for feedback!
Crochet Tip
When switching yarn colors, pull the loop of the new color through the two loops of the last stitch for a seamless transition.


