
Free Crochet Mini Bag Pattern Perfect for Last Minute Gifts
Make a colorful crochet mini bag with this free pattern, perfect for gifts, parties, or to carry small items in a stylish and fun way.
Tiny crochet bags like these are a delightful addition to anyone’s crocheting repertoire. They are not only cute and practical but also incredibly versatile for various occasions. Whether they’re used as charming party favors, small gift holders, or adorable table decorations for events like birthdays, weddings, or baptisms, these mini bags are a unique way to add a touch of handmade love to your celebration.
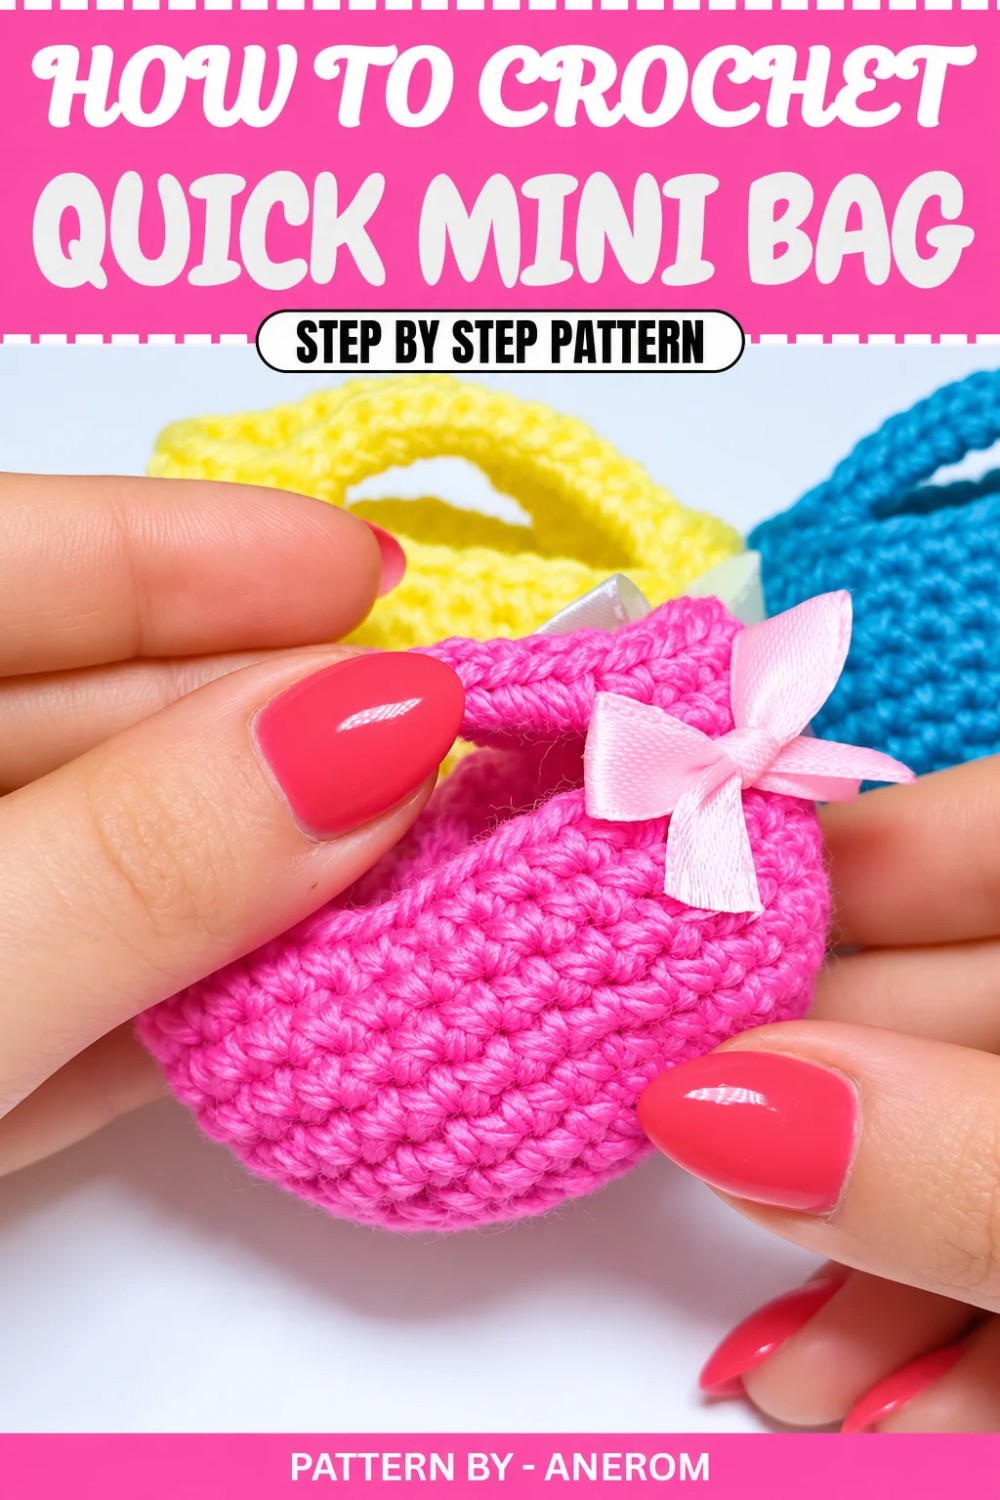
The rounded base gives them a sturdy shape, while the two slim handles, crocheted with chain stitches, add a classic tote bag look. To complete the cheerful vibe, a bow in a complementary color can be added for decoration, though the style and embellishments can be customized to your liking. You can create these mini bags in colors that suit your theme, making each one unique and personal. Made with size 3 acrylic yarn or even cotton, the texture of these bags is soft yet durable, making them perfect for holding candies, small gifts, or keepsakes.
Free Crochet Pattern for a Mini Bag Everyone Will Love Making
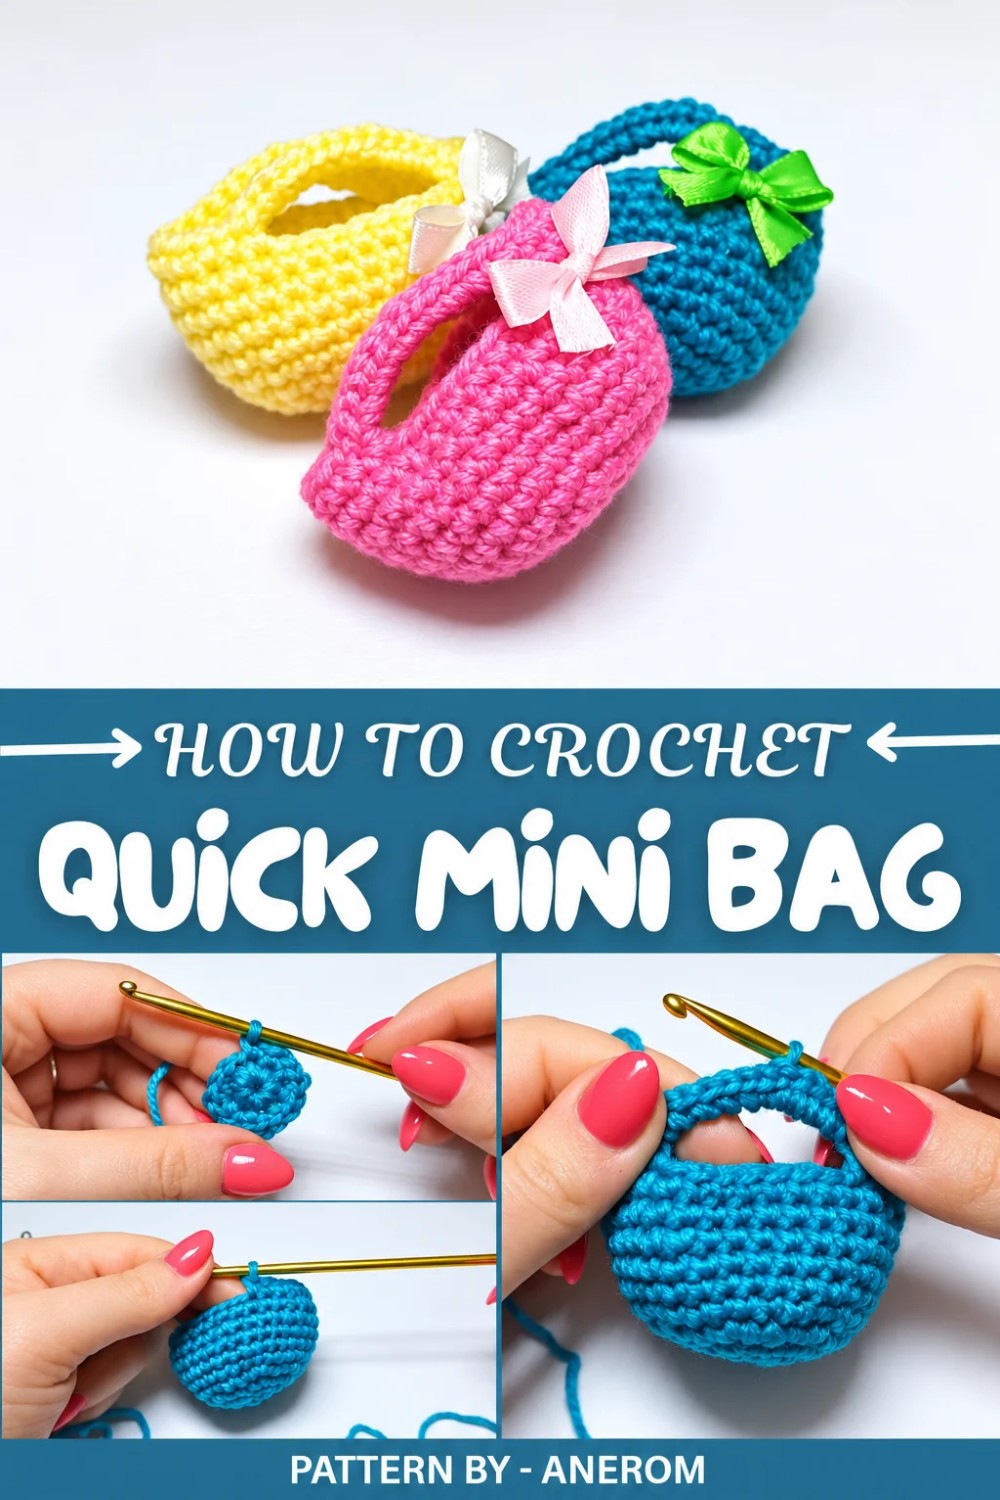
These bags are quick and easy to make. They feature basic crochet techniques such as single crochet stitches, the magic ring, and simple increases, ensuring that even beginners can complete them with ease. The tutorial from Anerom on YouTube provides step-by-step guidance, making it accessible even if you’re new to crochet.
Anerom’s channel is a treasure chest for crochet lovers, offering clear instructions, creative ideas, and projects suited for all skill levels. If you’re looking for a quick and rewarding crochet project, this mini bag pattern is a wonderful way to expand your crocheting playlist.
Simple Crochet Confetti Bag Tutorial
Introduction
In this tutorial, you'll learn how to crochet a simple and adorable confetti bag. This project is quick to make, perfect for party favors, birthdays, baptisms, and other special occasions. The bag is worked in rounds using single crochet stitches, starting from a magic ring, forming the base and the body, followed by handles, and finally decorating with a ribbon. The steps are straightforward, making this pattern a joy for both beginners and experienced crocheters.
Quick Overview Of Pattern
- Worked in continuous rounds (spirals) using single crochet.
- Circular base with regular increases.
- Bag body worked without increases (single crochets only).
- Handles created with chains and single crochet stitches.
- Handles reinforced with single crochets in chain loops.
- Ends are fastened and hidden with a yarn needle.
- Finished with a decorative ribbon or embellishment of choice.
Notes
- Continuous rounds: This pattern does not close each round with a slip stitch. You work in a spiral motion for seamless results.
- Use stitch markers: Mark the start of each round using a stitch marker for accuracy.
- This confetti bag is perfect as a small favor bag but can be repurposed for other uses.
- The decorative element (bow, charm, flower, etc.) is optional and can be customized however you like.
- Recommended yarn is #3 light acrylic yarn, but you can also use cotton of similar weight with the same crochet hook size (3 mm).
- The finished bag features short handles and a slightly rounded body, ideal for small items or confetti.
Skill Level
- Skill Level: Easy / Beginner friendly
Requires knowledge of: - Magic ring
- Single crochet stitch (sc)
- Increasing in single crochet (2 sc in one stitch)
- Chain stitch (ch)
- Slip stitch (sl st)
Materials
- Yarn: #3 light acrylic yarn (or substitute with cotton yarn of the same thickness)
- Crochet hook: 3 mm
- Ribbon: Optional for decoration (color of your choice)
- Scissors
- Stitch marker (or safety pin)
- Yarn needle (for weaving in ends)
- Glue: Hot glue or fabric glue for attaching the ribbon
Measurements / Sizing
Finished size may vary depending on your gauge, yarn, and tension. With the suggested materials, the approximate dimensions are:
- Height: 7–9 cm
- Width: 6–8 cm (at the top)
These measurements make the bag ideal for holding confetti, small trinkets, or other miniature items.
Gauge
Exact gauge is not critical for this project. However, as a reference:
- Gauge:
- 10 single crochet stitches ≈ 4–4.5 cm
- 10 rounds ≈ 4–4.5 cm
If your bag feels too stiff, use a slightly larger hook. If it's too soft or loose, use a smaller hook or tighten your stitches.
Stitch Abbreviations
- ch – chain
- sc – single crochet
- inc – increase (2 sc in the same stitch)
- sl st – slip stitch
- magic ring – magic circle
Special Stitches
Magic Ring (Magic Circle)
- Wrap the yarn around your fingers to create a loop.
- Insert your hook into the loop and pull up a strand of yarn.
- Work the designated stitches into the ring.
- Pull the short end of the yarn to close the circle tightly.
The Crochet Pattern!
Bag Base (Rounds 1 to 4)
Round 1:
- Create a magic ring.
- Work 8 single crochet (sc) into the ring.
- Pull the short yarn tail to close the ring tightly.
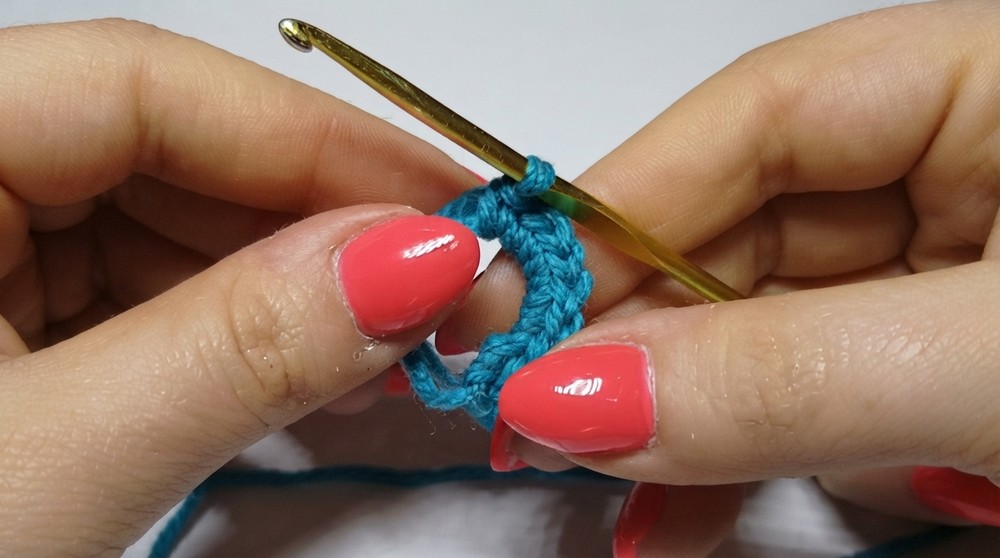
At the end of Round 1: 8 stitches.
Round 2:
- Work 2 sc in each stitch (increase in all 8 stitches).
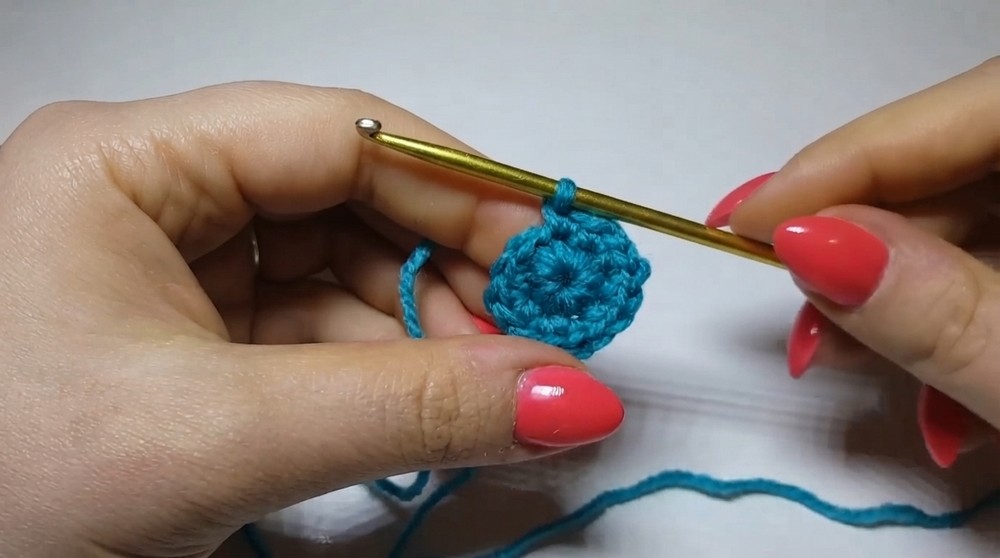
At the end of Round 2: 16 stitches.
Round 3:
- Work 1 sc in the first stitch, place a stitch marker in this first stitch.
- Work an inc (2 sc) in the second stitch.
- Repeat the sequence:
- 1 sc, 1 inc around the round.
At the end of Round 3: 24 stitches.
Round 4:
- Work 1 sc in the first stitch, moving the stitch marker.
- Work 1 sc in the next stitch.
- Work an inc (2 sc) in the third stitch.
- Repeat the sequence:
- 1 sc, 1 sc, 1 inc around the round.
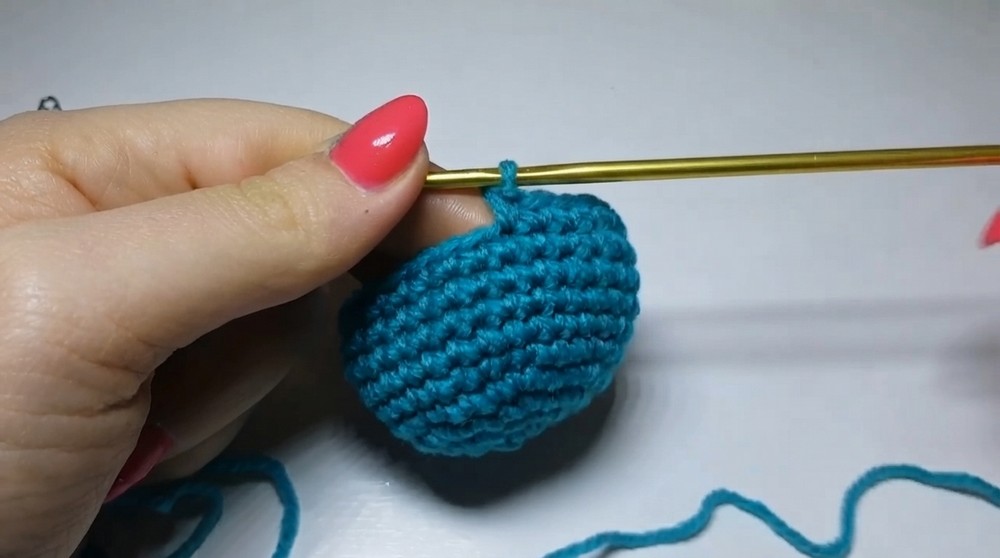
At the end of Round 4: 32 stitches.
Bag Body (Rounds 5 to 10)
For the next 6 rounds, work single crochet stitches (sc) only:
- Start each round by working 1 sc in the first stitch, moving the stitch marker.
- Work 1 sc in every stitch.
At the end of these rounds, the walls of the bag will naturally rise, forming a small purse-like shape.
Handles Creation
Next round:
- Start by working 8 sc.
- Place a stitch marker in the first sc of this round.
- After completing the 8 sc, work 8 chain stitches (ch).
- Skip 8 stitches from the base of the bag and insert the hook into the ninth stitch.
- Work 1 sc in this stitch (this forms the first handle).
- Work another 8 sc following the handle.
- Work another 8 chain stitches (ch).
- Skip 8 stitches from the base and insert the hook into the ninth stitch.
- Work 1 sc to complete the second handle.
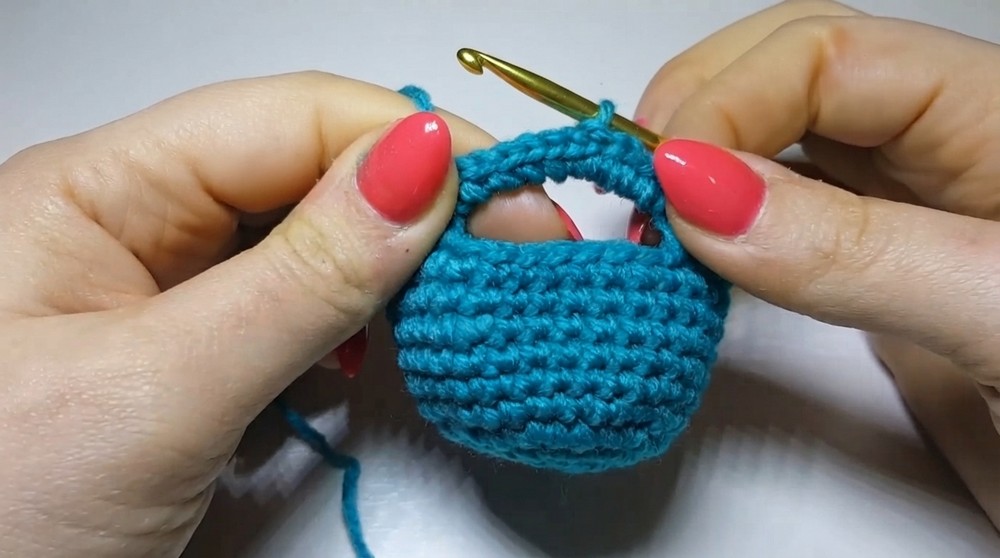
Handle Reinforcement
Next round:
- Work 1 sc in the stitches of the bag base until you reach the first chain loop (first handle).
- In the first chain loop:
- Work 12 sc into the loop to thicken and strengthen the handle.
- Return to the stitches at the base of the bag, working 1 sc in each stitch, until you reach the second chain loop (second handle).
- In the second chain loop:
- Work 12 sc into the loop to reinforce it.
- Close the round with a sl st in the first stitch of the round.
- Cut the yarn and pull it through the loop to fasten off.
Assembly and Finishing Touches
Weaving In Ends
- Insert the yarn tail into a yarn needle.
- Weave the tail securely into the stitches of the bag to hide it.
- Trim off any excess yarn.
Decoration
- Create a simple ribbon bow with the decorative ribbon of your choice.
- Attach the bow to the bag using hot glue or fabric glue. Alternatively, sew it securely in place using a thread and needle.
- The decoration is optional—feel free to customize your bag in any way you like!
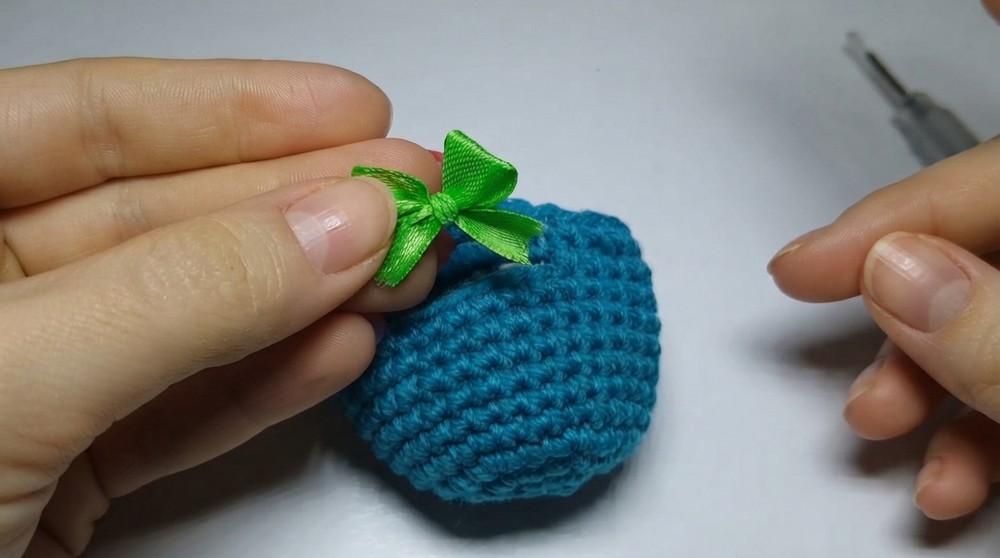
Finished Size
With the suggested materials, your finished bag will measure approximately:
- Height: 7–9 cm
- Width: 6–8 cm
These dimensions make the bag perfect for holding confetti or small items.
Conclusion
This confetti bag is an easy and fun project suitable for all skill levels. With minimal materials and a straightforward technique, you can create lovely handmade bags for special occasions like weddings, birthdays, or baptisms. Once familiar with the pattern, you can experiment with colors and embellishments to customize your creations.