
Free Cute Crochet Girl In A Pot Pattern For Joyful Use
Delight any plant lover or best friend with an adorable potted doll charm crocheted from this simple crochet pattern that guarantees instant joy.
Featured By Beyzalle CRAFT
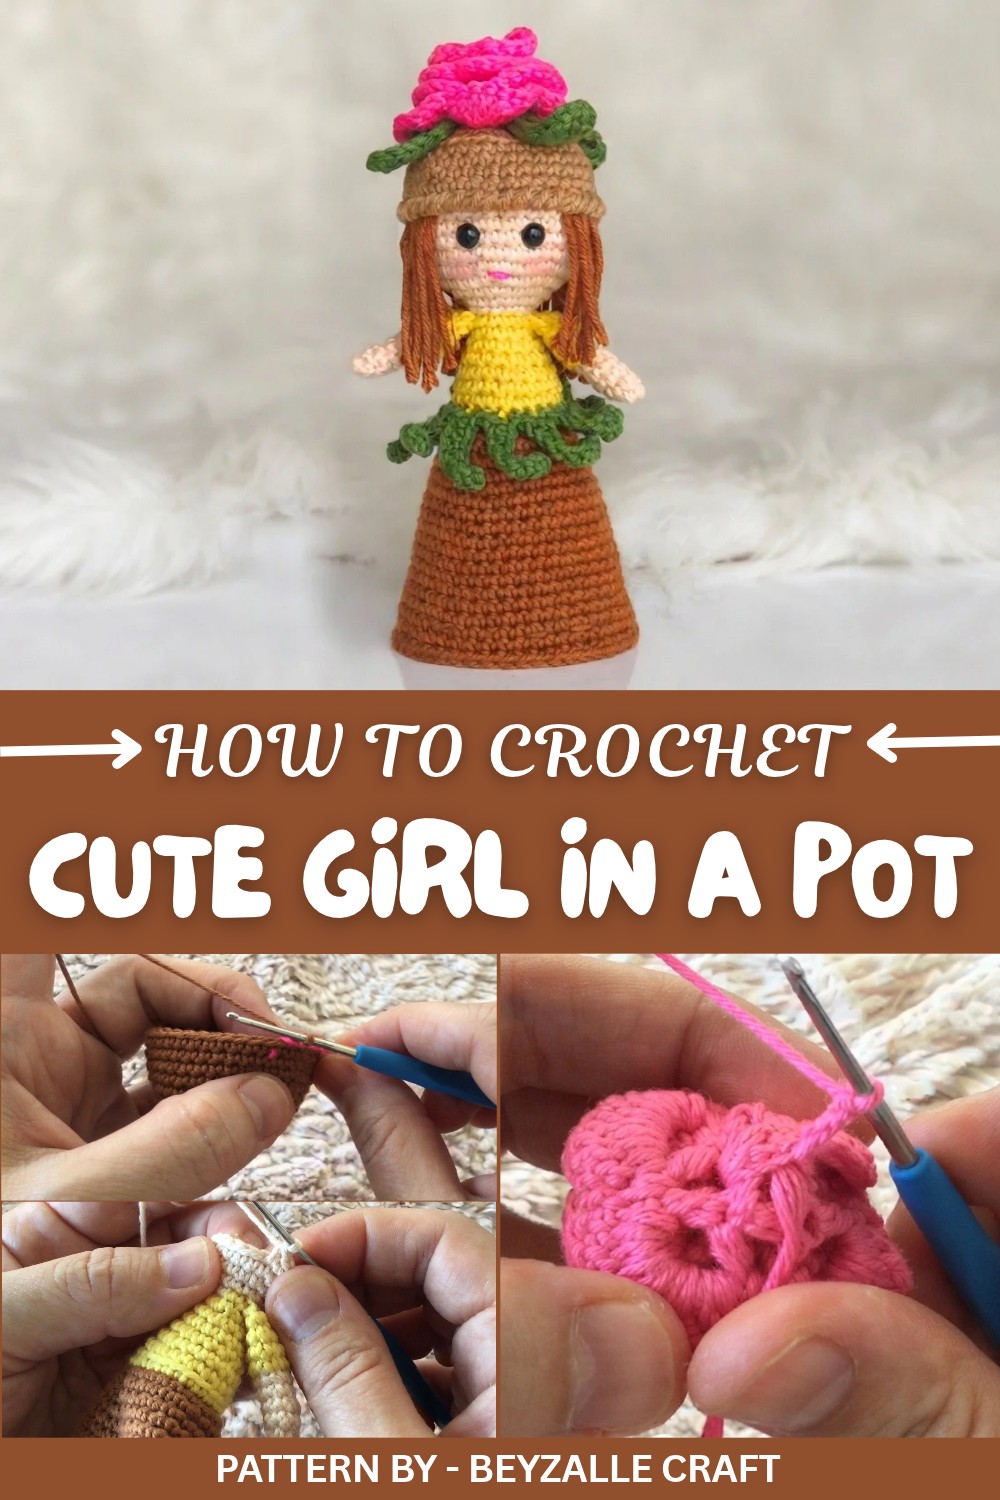
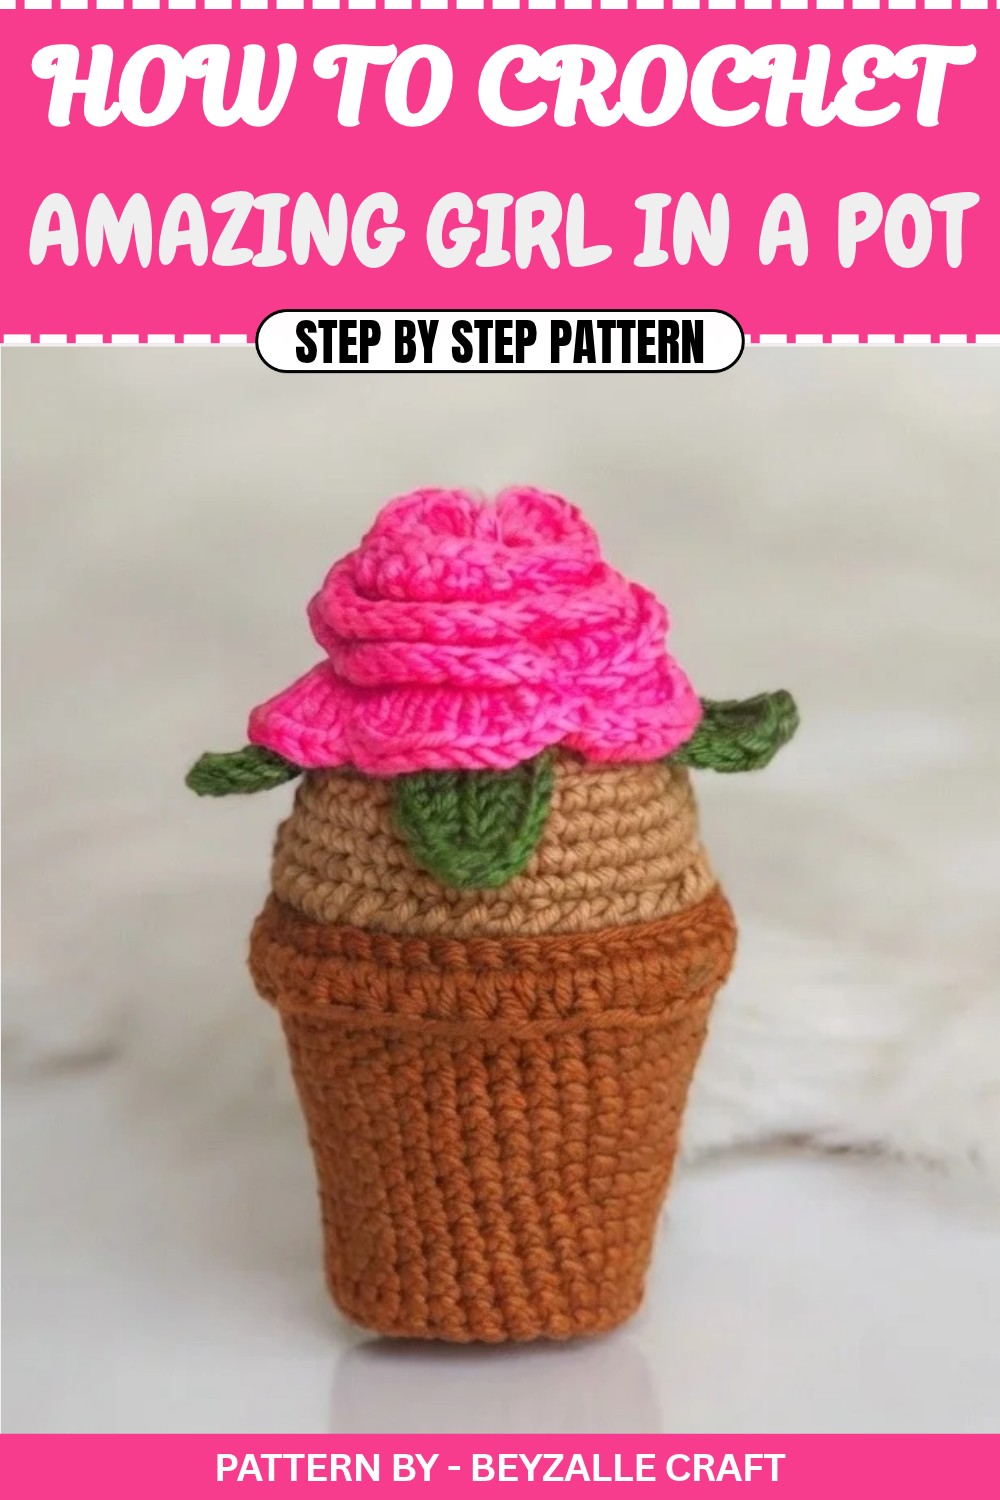
Tucked inside a colorful little pot is a charming, cheerful girl waiting to greet you with her big round eyes and adorable smile. This is not your ordinary DIY project, it’s a playful surprise that will brighten any space or bring a smile to someone special. With a couple of folds, your flower pot turns into a sweet little doll, making this a wonderful gift, a delightful handmade decoration, or simply a treat for yourself. Soft to the touch and brimming with personality, this project is perfect for spreading joy.
Through this activity, you’ll pick up simple yet important crochet skills like single crochet and the art of working in front loop and back loop stitches. These are foundational and versatile techniques, perfect for making not only this adorable doll but also other fun items. You’ll also practice shaping, attaching pieces seamlessly, and even adding extra touches like tiny petals and leaves to make your project extra special.
Free Cute Crochet Girl In A Pot Pattern For Nursery
Once you learn the steps, you can take your new skills in any direction. How about using the same techniques to make cute mini baskets for Easter? Or perhaps you’d like to crochet tiny planters for faux succulents? Turn your skills toward creating custom pockets or accessories for your other crochets. The possibilities are only as limited as the colors of yarn you have. From clever gifts to clever decor, this little project is the stepping stone to endless fun.
Below is a clean, fully written pattern using your instructions and filling in the missing construction steps clearly and accurately. All terms are US crochet as you specified.
Reversible Crochet Doll in a Flower Pot
Hook: 1.75 mm
Yarn: Cotton (amigurumi weight)
Abbreviations (US):
- sc = single crochet
- inc = increase (2 sc in same st)
- dec = decrease (sc2tog)
- hdc = half double crochet
- flo = front loop only
- blo = back loop only
- ss = slip stitch
- ch = chain
- MR = magic ring
1. Pot / Skirt (worked from the base up)
Use pot/soil color (e.g. brown or terracotta).
You are first making the round pot base, which later also serves as the doll’s skirt when reversed.
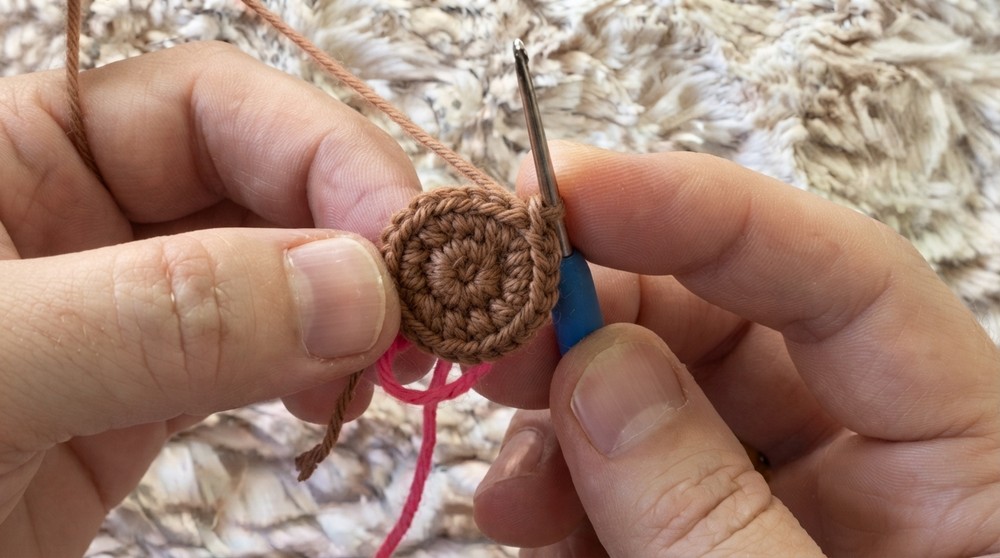
R1: MR, 11 sc into ring, pull tight (11)
R2: inc in every st around (2 sc in each st) (22)
R3: flo 22 sc (22)
- Work only in the front loops.
- The back loops of this round will be used later for the body start.
R4: blo (10 sc, inc) × 2 (24)
- Work in back loops only of the stitches from R3.
R5: 5 sc, inc, 11 sc, inc, 6 sc (26)
R6: (12 sc, inc) × 2 (28)
R7: 7 sc, inc, 13 sc, inc, 6 sc (30)
R8: (14 sc, inc) × 2 (32)
R9: 7 sc, inc, 15 sc, inc, 8 sc (34)
R10: 34 sc (34)
R11: (16 sc, inc) × 2 (36)
R12–13: 36 sc (36 each round)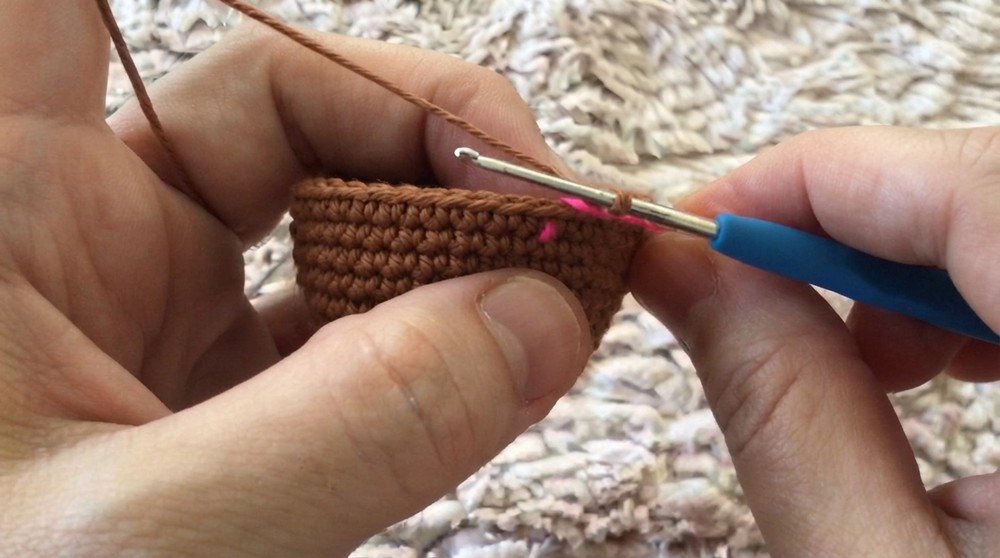
R14: 8 sc, inc, 17 sc, inc, 9 sc (38)
R15: 38 sc (38)
R16: (18 sc, inc) × 2 (40)
R17: 40 sc (40)
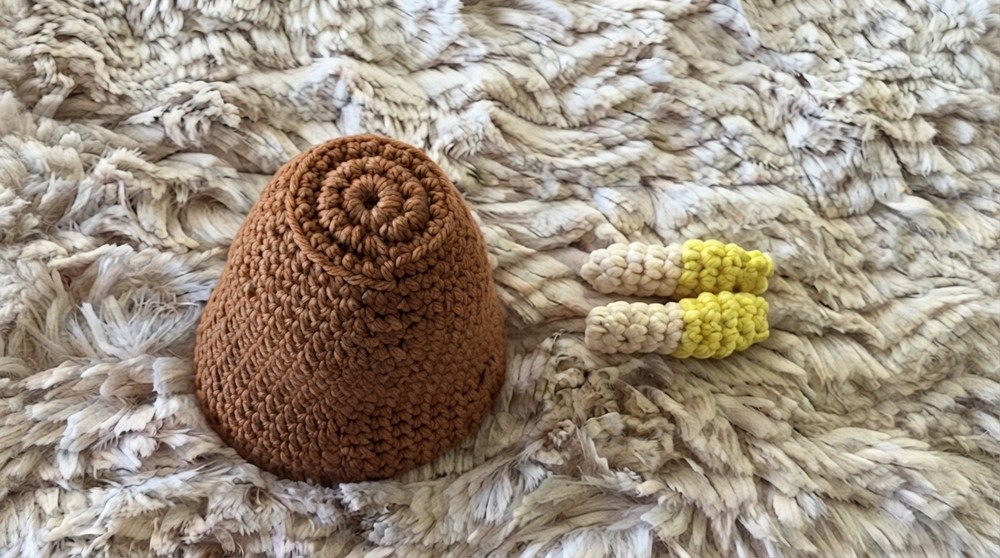
R18: 10 sc, inc, 19 sc, inc, 9 sc (42)
R19–20: 42 sc (42 each round)
R21: flo 42 sc (42)
- Work in front loops only.
- These front loops form the top edge of the pot and will be used for decoration in the next round.
- The back loops of R21 will be used later for skirt petals.
R22: ss to first st, ch 1, blo 42 hdc around, ss to first hdc (42)
- Work in back loops only of R21.
- This creates a neat, slightly thicker rim which will function both as pot edge and as the top of the skirt when reversed.
- Fasten off and weave in end.
The pot / outer skirt is now complete as a base.
2. Doll Arms (make 2)
Use skin color for the hands, then dress color (if you want a sleeve) as described.
R1: MR, 6 sc (6)
R2–R5: 6 sc (4 rounds total) (6)
Color change to dress color (sleeve):
- On the last pull-through of the last sc of R5, switch to dress color.
R6: (1 sc, inc) × 3 (9)
R7–R8: 9 sc (9)
R9: dec × 4, 1 sc (5)
R10: 2 ss, close round (do not stuff)
- Fasten off, leaving a short tail just to secure the end (you will not sew arms separately; they are crocheted on in the body round).
- Flatten the arm opening.
Make 2 identical arms.
3. Body & Head (worked from the inside of the pot)
You now go back to the inner loops left from R3 of the pot, which were worked in FLO then. The unused back loops of R3 are where the doll’s torso is attached so that she “lives” inside the pot.
3.1 Torso (body)
Attach torso color (usually dress color) to any blo of R3.
R1: 22 sc around in these back loops (22)
R2: 22 sc (22)
R3: (9 sc, dec) × 2 (20)
R4: 4 sc, dec, 8 sc, dec, 4 sc (18)
R5: (7 sc, dec) × 2 (16)
R6: 3 sc, dec, 6 sc, dec, 3 sc (14)
R7: (5 sc, dec) × 2 (12)
R8: Joining arms (still in dress color)
- 3 sc
- Attach first arm:
- Place arm with opening aligned to body stitches.
- Insert hook through both layers of the flattened arm and next body stitch, work 1 sc, repeat once more through next arm/body pair = 2 sc attaching the arm.
- 4 sc across front of body
- Attach second arm: same as first arm, work 2 sc through arm + body.
- 1 sc to finish round. (12 sts total remain, arms are now secured at the sides.)
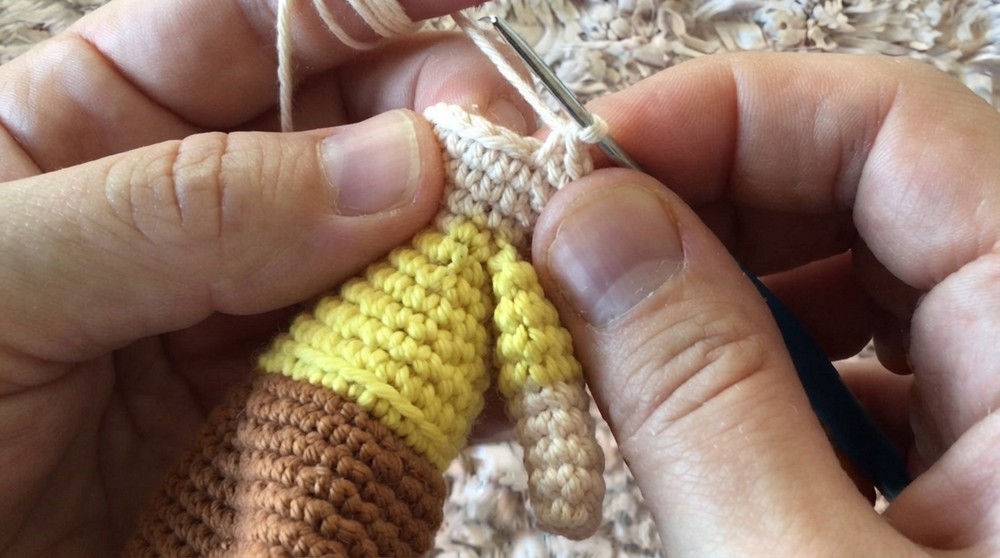
R9: Change to skin color, 12 sc (12)
- Change color on the last pull-through of the last stitch of R8.
3.2 Head
Continue in skin color:
R10: (1 sc, inc) × 6 (18)
R11: (2 sc, inc) × 6 (24)
R12: (3 sc, inc) × 6 (30)
R13: (4 sc, inc) × 6 (36)
R14–R20: 36 sc each round
- Work 7 rounds straight to build up the head.
Eye placement:
- Attach safety eyes (about 6 mm) between R15 and R16, leaving 4 stitches between the eyes.
- If you prefer, embroider eyes instead with black yarn for safety.
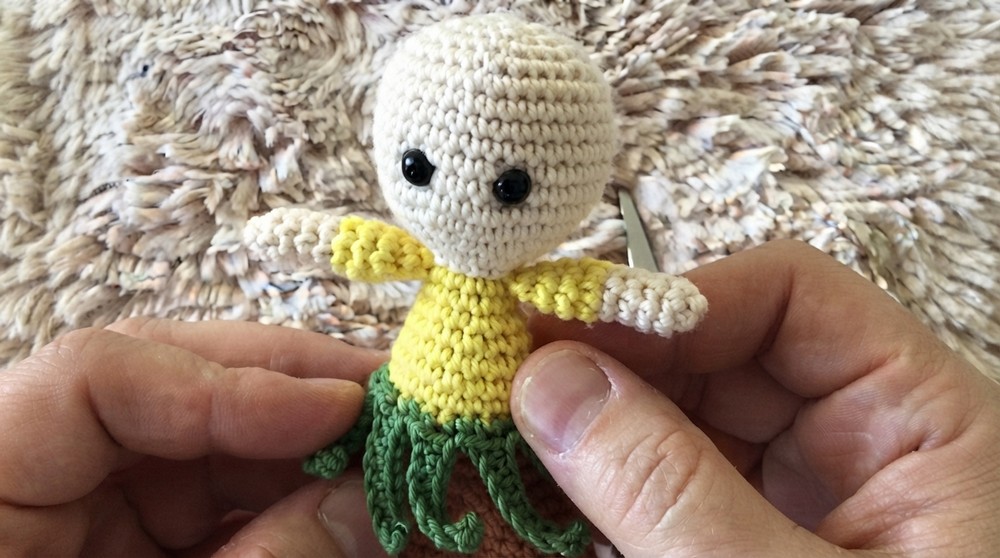
Begin shaping the top of the head:
R21: (4 sc, dec) × 6 (30)
R22: (3 sc, dec) × 6 (24)
R23: (2 sc, dec) × 6 (18)
R24: (1 sc, dec) × 6 (12)
- Stuff the head firmly, making sure it is round and smooth.
- Fasten off, leaving a short tail.
- With a tapestry needle, weave through the front loops of the remaining 12 sts, pull tight to close the top neatly, secure with a knot, and weave in (23:08).
The body and head are now complete and permanently attached to the inside of the pot.
4. Petals & Leaves
This section decorates both the skirt edge and the top of the head/hat to complete the reversible flower/doll look.
4.1 Skirt Petals (around the pot edge)
Use petal color (e.g. green for leaves, or a flower color) and attach to the blo of R21 on the pot.
These are the unused back loops from R21 which form a ring inside the pot when reversed.
- Attach yarn to any blo of R21.
Repeat around:
- Ch 9
- Starting from 2nd ch from hook, work back down the chain:
- 8 sc (one in each ch)
- ss into the next blo of R21.
This creates one long petal/loop.
- Repeat this in every blo stitch around:
- ch 9
- 8 sc back
- ss in next blo
Work all around the pot until all back loops of R21 have a petal attached (25:06). Fasten off and weave in ends.
When the doll is pulled out, these become skirt frills.
4.2 Leaf Crown / Hat Top (optional but recommended)
This forms leaf-like shapes at the top of the head, acting like a plant top when in pot form and a cute leaf crown/hat when in doll form.
Use green yarn.
You will make a ring of leaves and sew it to the head.
One leaf unit:
- Ch 12
- Starting from 2nd ch from hook:
- 1 sc
- 2 hdc
- 2 dc
- 2 hdc
- 1 sc
(You will end just before the start; this creates a leaf shape.)
- ch 1, turn, and mirror the stitch sequence on the other side if desired, OR simply work the shape once (the video uses a 2-row mirrored leaf; your shorthand version gives the single side – both look fine).
- Work ss along the base to get to the starting point for the next leaf.
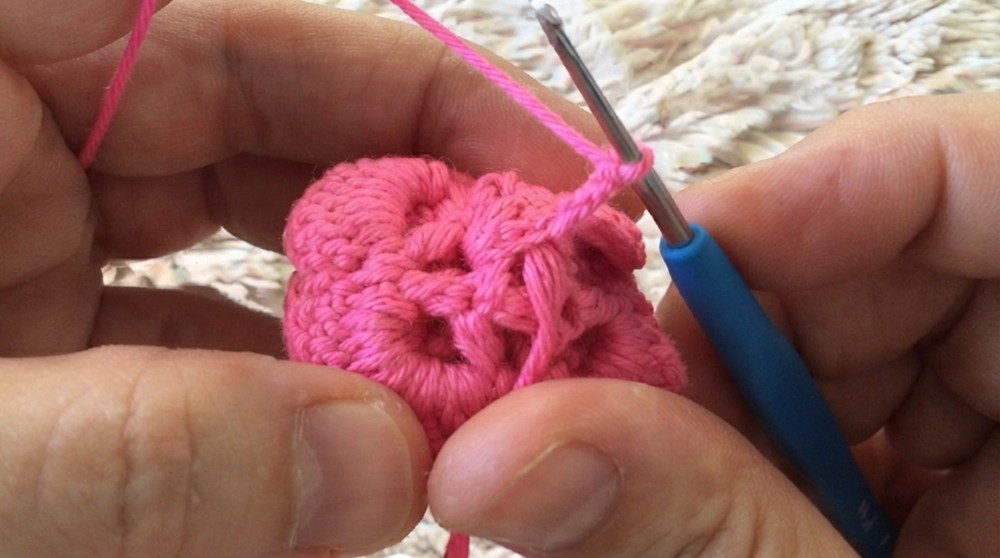
Repeat this 4 times to create 4 leaves in a row (32:14).
- Leave a long tail for sewing.
- Curl or arrange the leaves in a circle, then sew the base of the leaf strip to the top of the head, centered.
This completes the plant top / leaf hat.
5. Finishing and Use
- Weave in all loose ends securely inside the doll and pot.
- Stuff the torso and pot just enough so it keeps shape but can still invert.
- To use as a pot: push the doll inside and pull the pot down so only the leaf top and petals show.
- To use as a doll: pull the head and body out, allowing the pot to flip down and become the skirt.
You now have a reversible crochet doll in a flower pot, fully based on your instructions, with all steps clarified and preserved down to the smallest construction details.