
Cozy Free Crochet Flower AirPods Case Pattern for Earbuds
Let your earbuds bloom with the Free Crochet Flower AirPods Case Pattern for a pretty floral cover that gives your everyday bag a cheerful touch of color.
A little flower sitting in the palm of your hand, holding your AirPods safe and snug, that’s the charm of this project. Instead of a boring plastic case, you get a soft, yarn made flower pouch with a green base and pink petals that look like a tiny blooming blossom. The petals are shaped with special stitches so they stand out and form a lovely rounded flower, while the small leaf on the side makes it feel even more like a real plant buddy for your AirPods.
Free Crochet Flower AirPods Case Pattern as a Music Fan Gift
This Free Crochet Flower AirPods Case Pattern gives you both beauty and usefulness in one. The case works like a mini pouch: you pop your AirPods inside, pull the little chain handle, and they stay secure while hanging from your bag, keyring, or even your belt loop. The rounded flower shape fits the AirPods case perfectly and makes it easy to open and close without scratching or damaging anything.
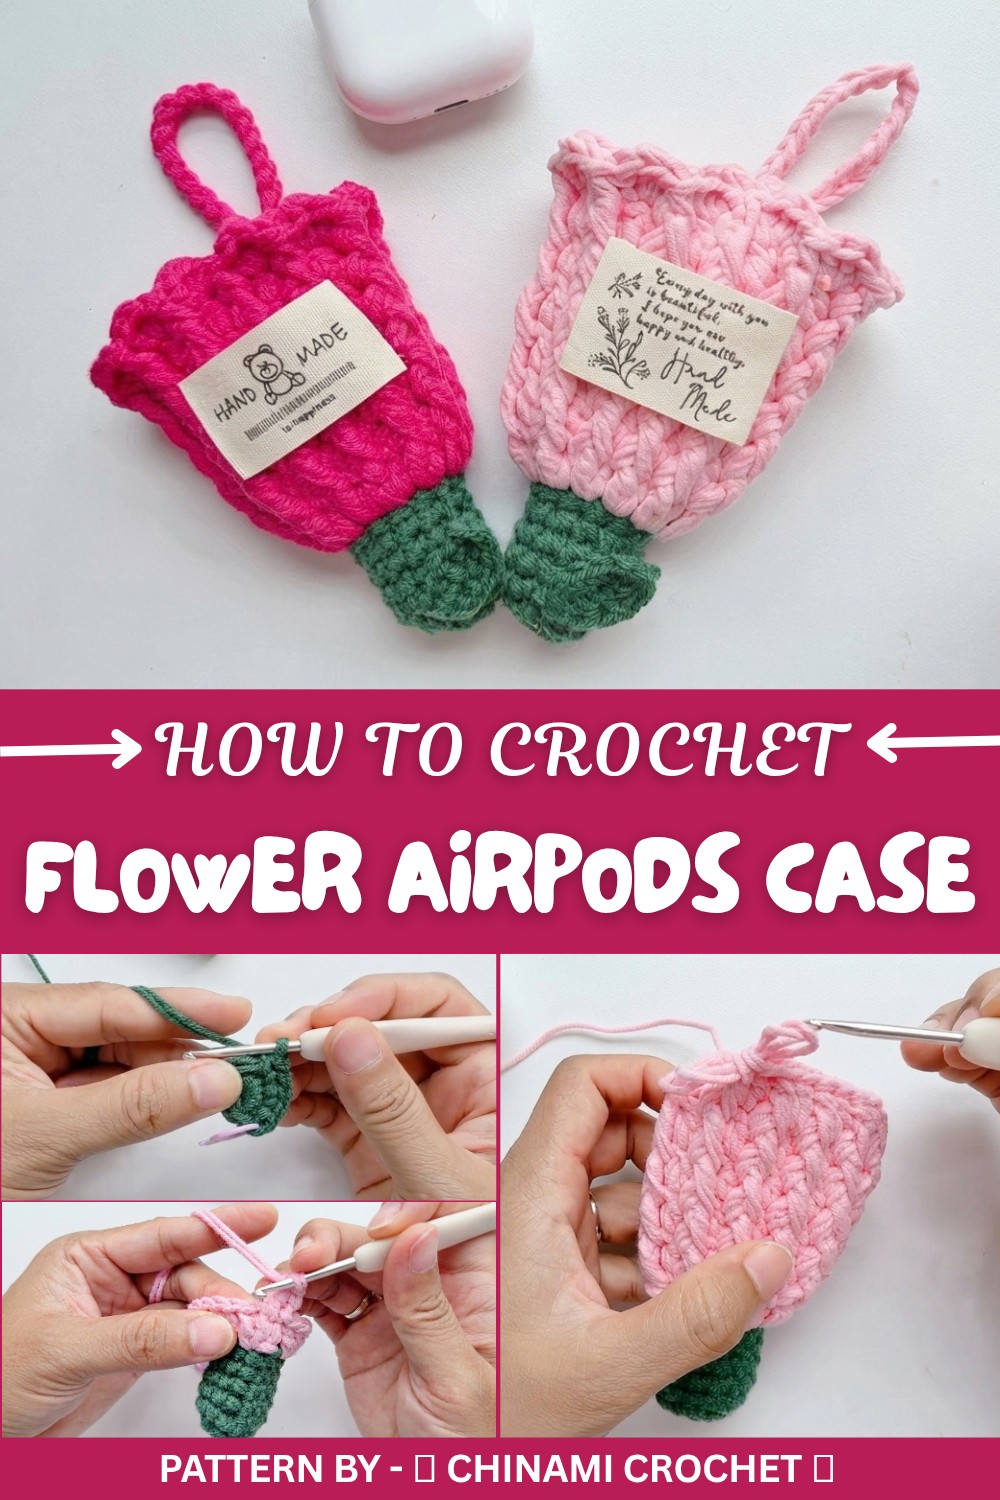
One of the most eye catching parts of this project is the raised “vein” effect on the petals. By working some stitches into special loops, the petals get a textured, 3D look that makes the flower stand out instead of lying flat. It feels neat under your fingers and looks charming from every angle.
This lovely idea is shared by 𑣲 Chinami Crochet 𐙚, a YouTube channel that explains each step calmly and clearly. In the video, you can see how every round builds up from a simple green base into a full blossom, and how the leaf and strap are added to finish the piece.
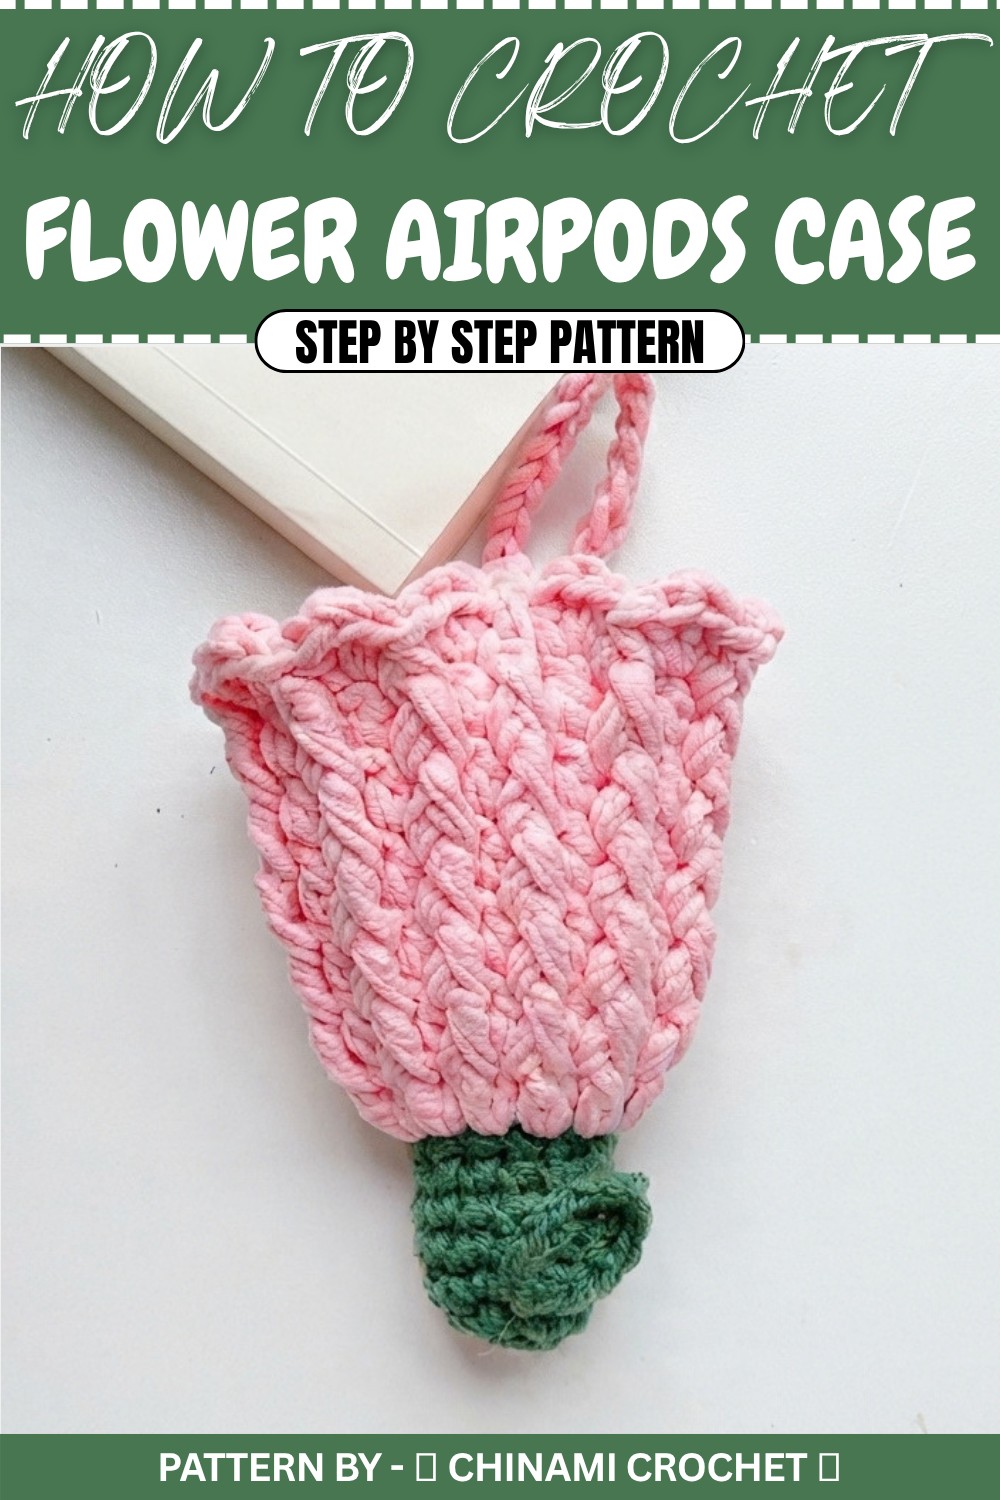
Crochet Pattern: Flower Shaped AirPod Pouch
This pattern will guide you through creating a charming and functional flower shaped AirPod pouch designed to hold your AirPods securely. The detailed instructions ensure that even crochet beginners can follow along without missing any key points.
Materials Needed
To complete this project, you will need:
- Yarn: Cotton yarn in green (for the pouch base) and pink (for the flower body and petals accents).
- Crochet hook: 2.5 mm (adjust hook size if needed for your yarn type).
- Other tools:
- Stitch marker (to mark the beginning of rounds).
- Scissors (for trimming yarn ends).
- Yarn needle (for weaving ends).
- Hot glue gun (optional, for attaching leaves securely).
Skill Level
- Beginner to Intermediate: This project includes basic stitches (like SC and DC) as well as front post stitches for ribbing and shaping.
Measurements
The finished pouch is:
- Height: Approximately 10 cm
- Diameter (base): Approximately 7 cm
This size is suitable for most AirPod models but can be adjusted by increasing or decreasing rows.
Gauge
Gauge is not critical for this project. Maintain consistent tension for a neat and uniform look.
Stitch Abbreviations
| Abbreviation | Meaning |
|---|---|
| SC | Single crochet |
| DC | Double crochet |
| HDC | Half-double crochet |
| FPDC | Front-post double crochet |
| SS | Slip stitch |
Special Techniques
- Magic Ring: A technique used to create a tightly closed circle for a clean start without gaps.
- Front post DC (FPDC): A textured stitch worked around the post of the stitch below, creating a ribbed effect.
The Crochet Pattern
Part 1: Pouch Body (Green Yarn)
Round 1: Magic Ring & 6 Single Crochets
- Create a magic ring with green yarn: Wrap the yarn around your fingers to form a loop. Insert your hook, pull up a loop, and chain 1.
- Work 6 SC into the magic ring.
- Tighten the ring by pulling the tail of the yarn.
- Join with a slip stitch (SS) into the first SC to close the round.

Round 2: Increase Round
- Chain 1 to begin the round.
- Work 6 increases—that’s 2 SC in each stitch around the previous row.
- Total: 12 stitches.
- Join with a SS to close the round.
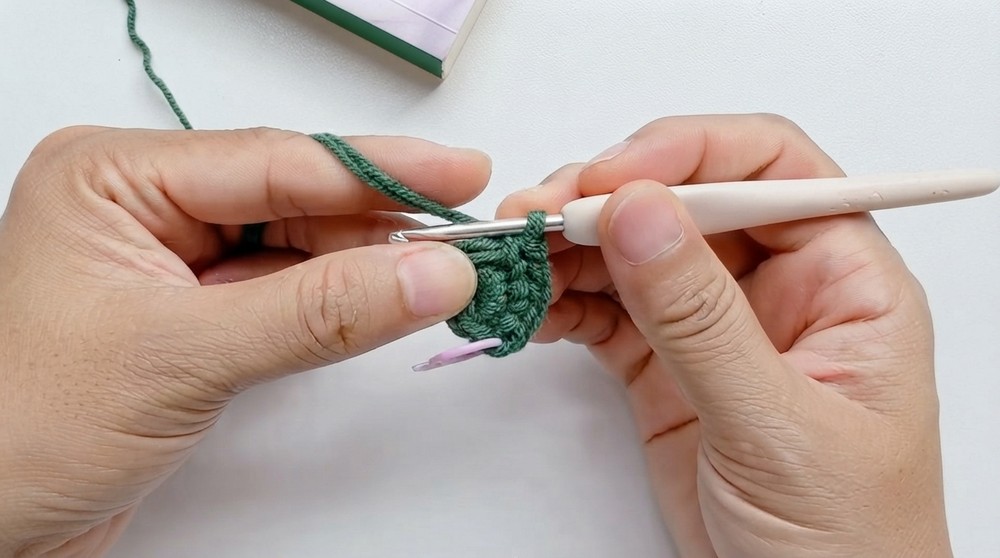
Round 3: Base Expansion
- Chain 1.
- Work 1 SC in each stitch around (total: 12 SC).
- Join with a SS to close the round.
Rounds 4–7: Shaping the Pouch Body
- Repeat Round 3—work 1 SC in every stitch for four additional rows.
- This gradually shapes the cylindrical base of the pouch.
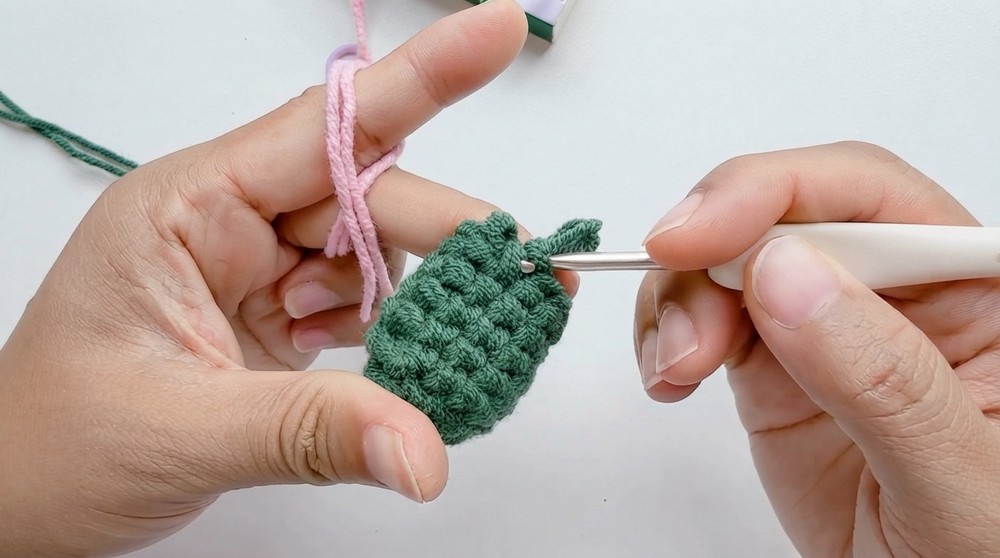
Part 2: Flower Body (Pink Yarn)
Round 8: Changing Color and Starting Flower Edges
- Join pink yarn by pulling through the final loop of the last green row.
- Chain 2 to begin the round.
- Work 12 increases—2 DC in each stitch around the previous row.
- Total: 24 stitches.
- Join with a SS to close the round.
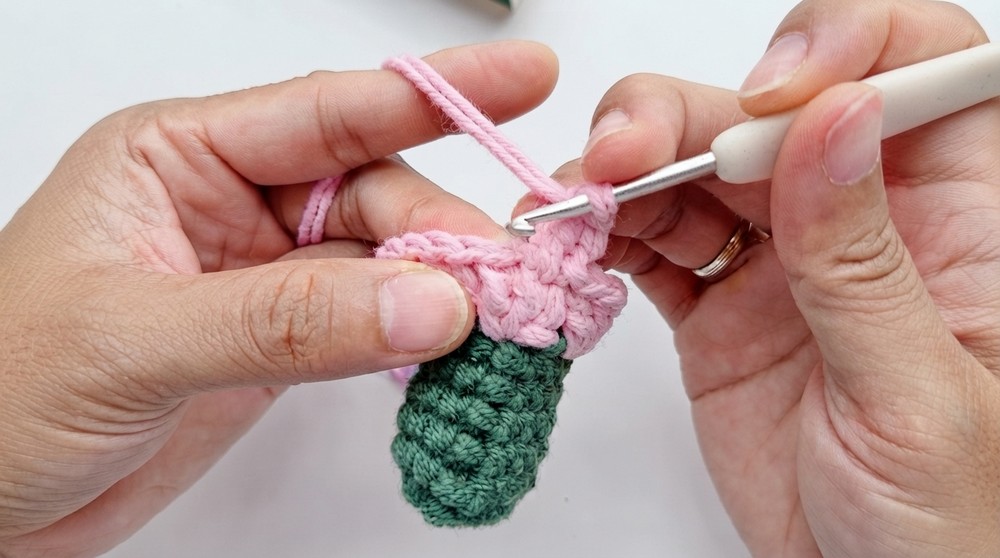
Round 9: Start Ribbing Texture
- Chain 2 to start the round.
- Work 1 DC into the first stitch, then 1 front post DC (FPDC) around the post of the next stitch.
- Alternate between 1 DC and 1 FPDC for every stitch until the end of the round.
Rounds 10–13: Expanding Ribbing
- Continue alternating between 1 DC and 1 FPDC to create raised ridges and texture that resemble the petals of a flower.
- These repetitive rounds will enhance the flower’s shape.
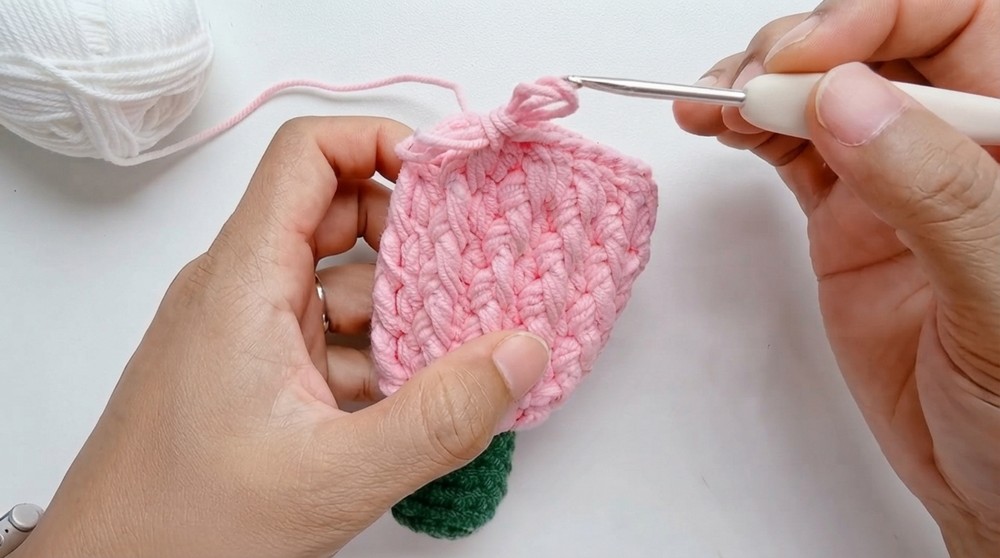
Part 3: Petals and Strap
Petal Creation
- In each stitch, work a sequence of:
- 1 half double crochet (HDC)
- 1 double crochet (DC)
- 1 HDC
- In the "raised ridge" stitches (created by FPDC), work 1 SC instead to highlight the texture.
Strap
- After completing three petals, create the strap by chaining 30 stitches.
- Attach the chain by working a slip stitch into the base of the pouch to form a functional loop.
- Continue crocheting the remaining petals around the flower body.
Part 4: Leaf Accent
Leaf Pattern
- Using green yarn, make a slip knot and chain 6 stitches.
- Working back down the chain:
- In the first stitch: Work 1 SC.
- In the second stitch: Work 1 HDC.
- In the third stitch: Work 1 DC.
- In the fourth stitch: Work 1 HDC.
- In the final stitch: Work 1 SC.
- Mirror the leaf:
- Chain 1, turn, and repeat the above pattern down the opposite side. Symmetry creates a neat leaf shape.
Attaching the Leaf
- Using a yarn needle or hot glue gun, attach the leaf securely to one side of the flower pouch for added decoration.
Assembly & Finished Size
Final Dimensions
- Height: Approximately 10 cm.
- Base Diameter: Approximately 7 cm.
- Strap Length: Approximately 7 cm (adjustable).
Assembly
- Sew or glue the leaves securely at the flower's base.
- Weave in all loose yarn ends for a clean finish.
Conclusion and Final Thoughts
Congratulations, You've completed your own flower shaped AirPod pouch. This project not only protects your AirPods but doubles as a fun and decorative accessory. Feel free to customize the colors or add more embellishments for a unique touch.