
Free Crochet Flower Granny Square Pattern that Blooms on Your Bag
Save this beautiful crochet flower granny square pattern for your next gift idea and turn multiple pieces into a charming bag or a cozy blanket for a loved one.
If you're looking for a fun and creative way to add a touch of whimsy to your crochet projects, the Free Crochet Flower Granny Square Pattern is perfect for you. This project is a delightful combination of timeless granny square techniques and the charm of floral motifs. With its beautiful flower design nestled in the center, it adds a playful yet elegant detail to blankets, cushion covers, or even handbags. The square maintains a classic shape while incorporating petal like textures that create a lot of visual interest.
Pattern By Anubha's Crochet
The style of this pattern is both delicate and versatile, allowing you to experiment with colors for a vibrant, boho effect or stick to pastels for a softer, romantic look. The textured flower sits beautifully raised against the flat background of the granny square, adding dimension to each piece. The craftsmanship of this design truly highlights the beauty of crochet, with intricate stitches working together to mimic the layered appearance of petals.
Free Crochet Flower Granny Square Pattern to Light Up Cozy Corners
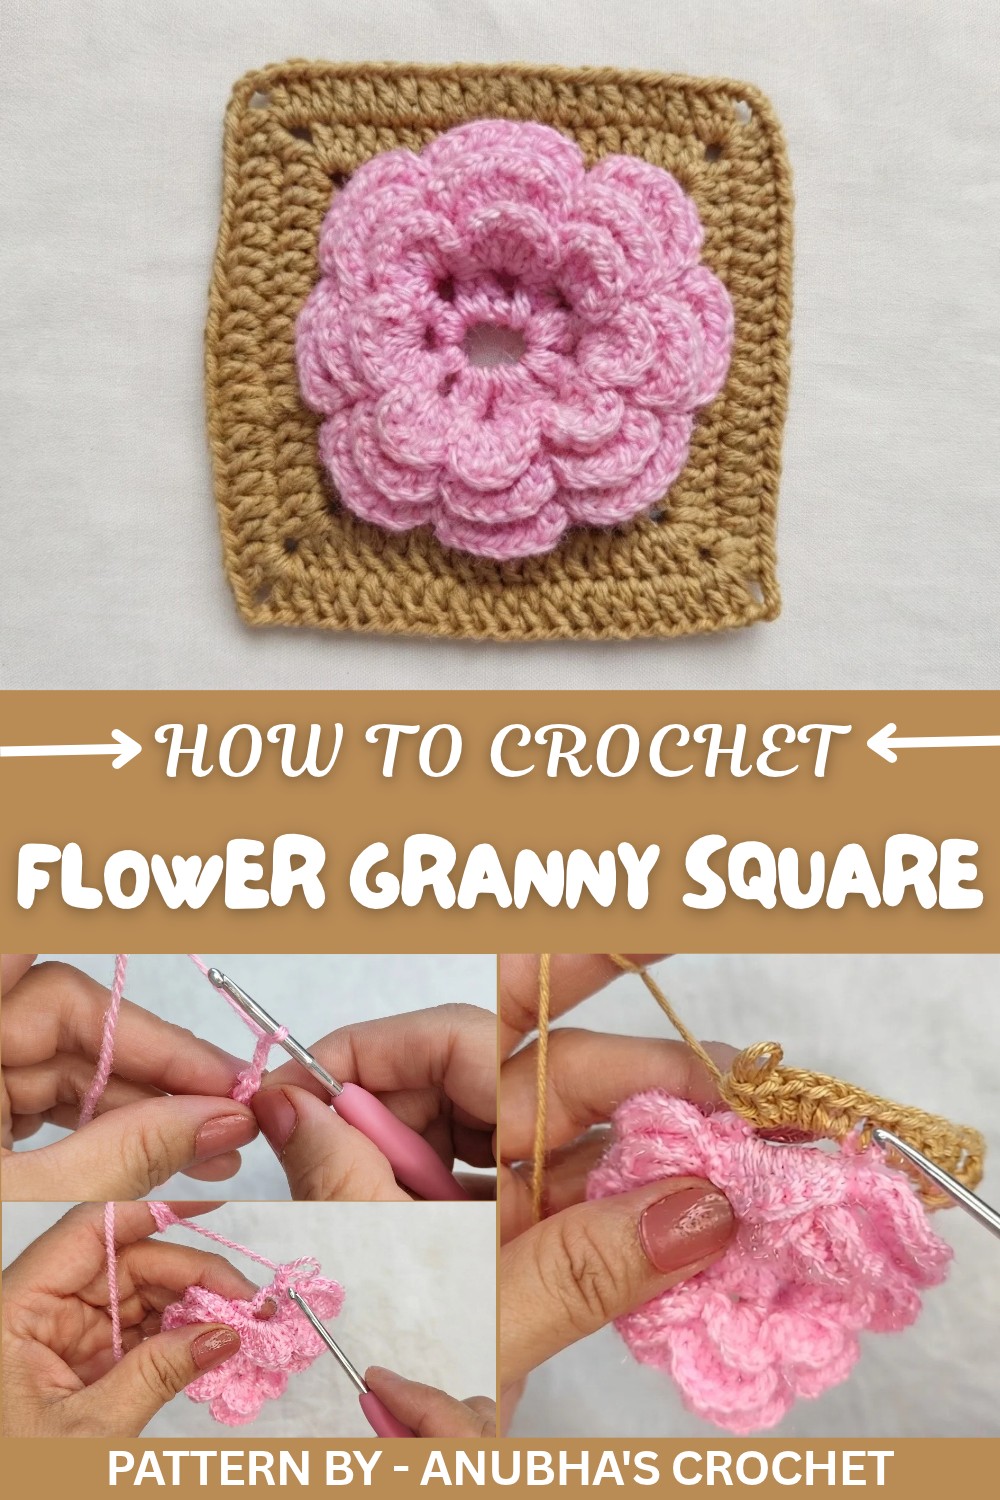
The pattern is built using traditional granny techniques, chains, slip stitches, and double crochets, so if you’re familiar with the basics, you’ll breeze through the construction. The flower’s structure might seem a little advanced in parts, but slowing down on the petal rounds will help you achieve a polished finish. A pro tip: use a yarn with good stitch definition, such as cotton or a smooth acrylic. These types of yarn emphasize the texture of the flower and keep the square looking crisp.
This design was inspired by the vibrant gardens of spring, where every bloom boasts its unique character. Whether you're crafting a statement piece or a keepsake, this pattern offers endless possibilities to showcase your creativity. Grab your hooks, pick your colors, and let’s crochet something beautiful together.
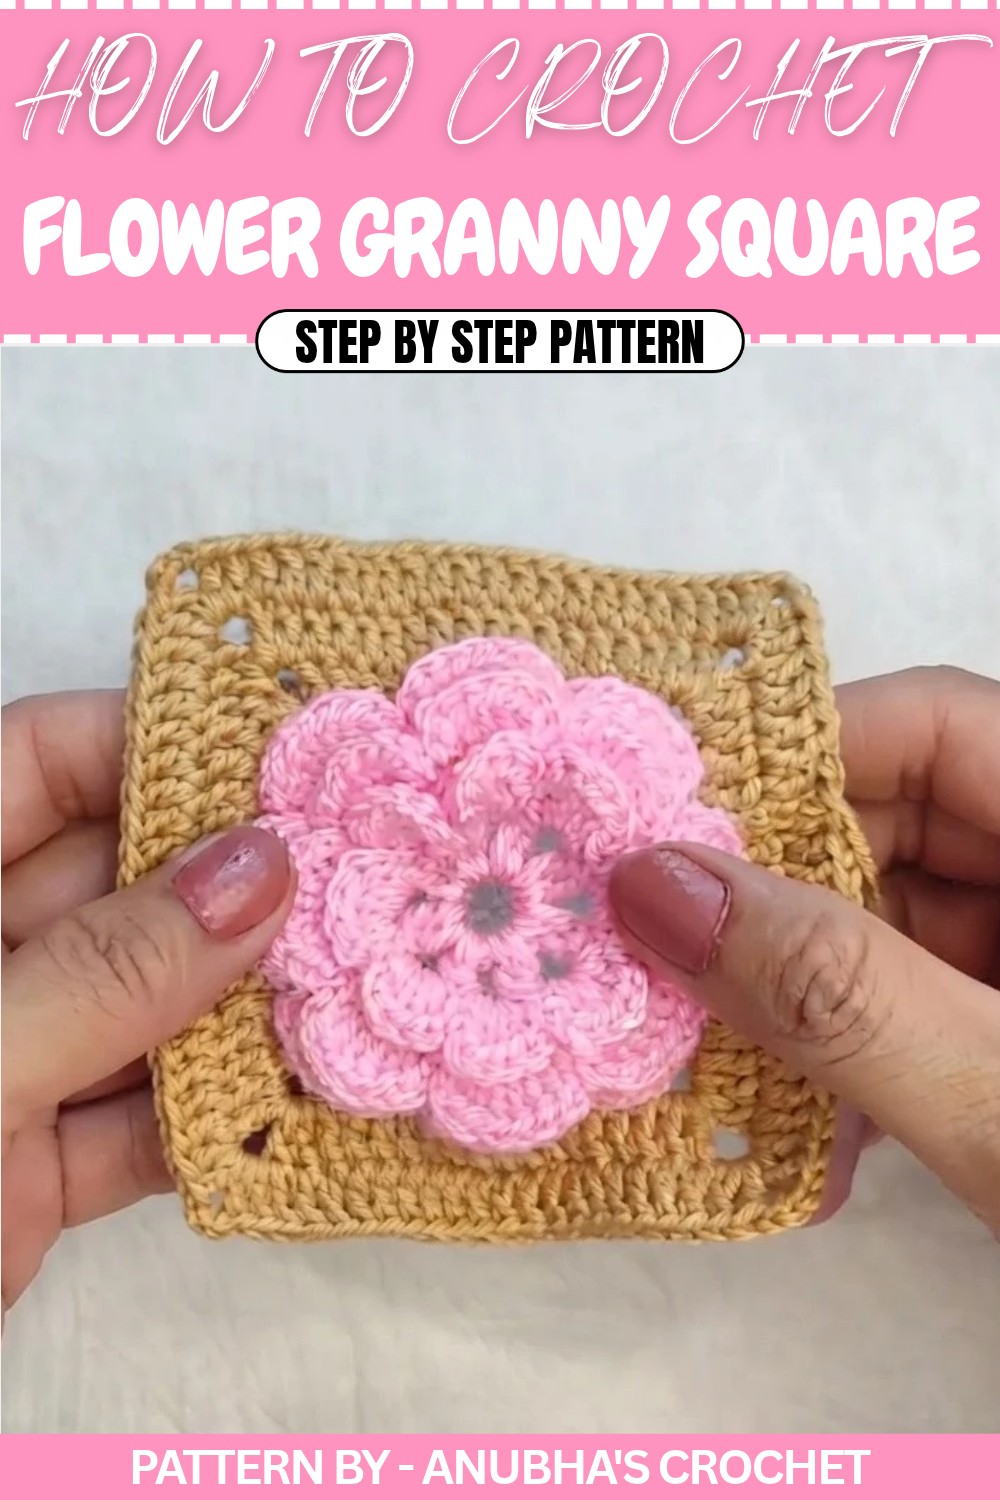
Crochet Flower Granny Square Pattern
Using a 3.0 mm crochet hook and two contrasting colors of yarn, this Flower Granny Square is the perfect project for creating decorative items such as cushion covers, blankets, and bags. The square features beautiful layered petals that form a flower at the center, transitioning into a classic square in the final phase.
Quick Overview of the Pattern
- Project Type: Crochet Flower Granny Square
- Uses: Blankets, cushions, bags, and more
- Skill Requirement: Intermediate beginners
- Main Techniques: Working in rounds, flower petal layers, transforming into a square
Notes
- Maintain even stitches to achieve a neat, symmetrical granny square.
- Count chains and stitches accurately at every step for proper alignment.
- Use contrasting or complementary colors to make the final square visually appealing.
Skill Level
Intermediate beginner. Familiarity with chain stitch, single crochet (sc), double crochet (dc), and slip stitch (sl st) is required.
Materials
- Yarn: Two colors of medium weight yarn (e.g., cotton or acrylic)
- Hook Size: 3.0 mm crochet hook
- Scissors: To cut yarn at finishing points
- Darning Needle: For weaving in loose ends and securing the square
Measurements / Sizing
The finished square size depends on your yarn thickness and the number of rows completed. The flower center will remain prominent, while additional rows will define the square’s size.
Gauge
Gauge is not critical, but tighter tension will produce a sturdier granny square.
Stitch Abbreviations
- ch: Chain
- sc: Single Crochet
- dc: Double Crochet
- sl st: Slip Stitch
Special Stitches
- Cluster of Double Crochet: Cluster involves working multiple double crochet stitches without pulling through the final loops until the end.
- Anchor Loops: Back side loops formed to attach petals and ensure proper layering.
The Crochet Pattern
Phase 1: The Flower Center
1. Create the Ring:
- Start with a slip knot and chain 7.
- Join the first chain with a sl st to form a small ring.
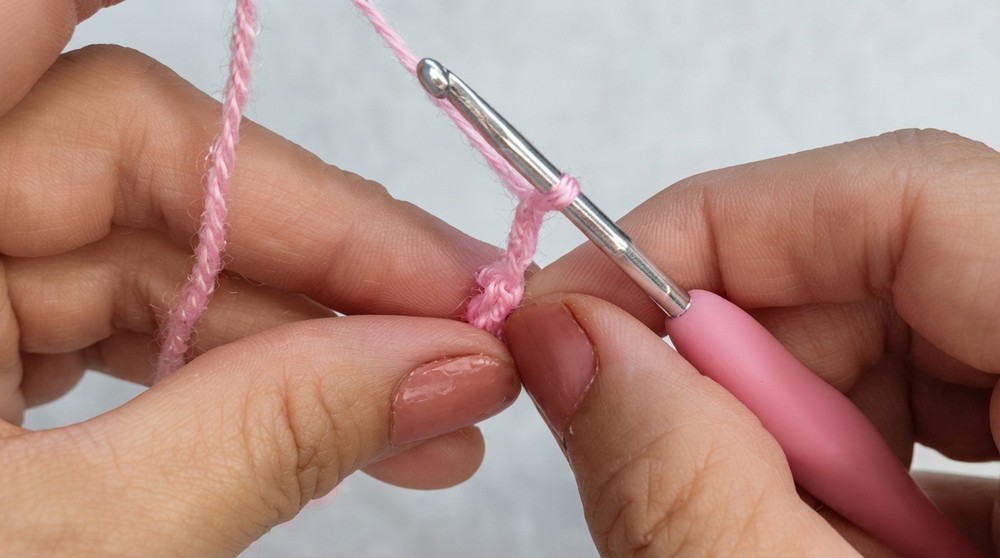
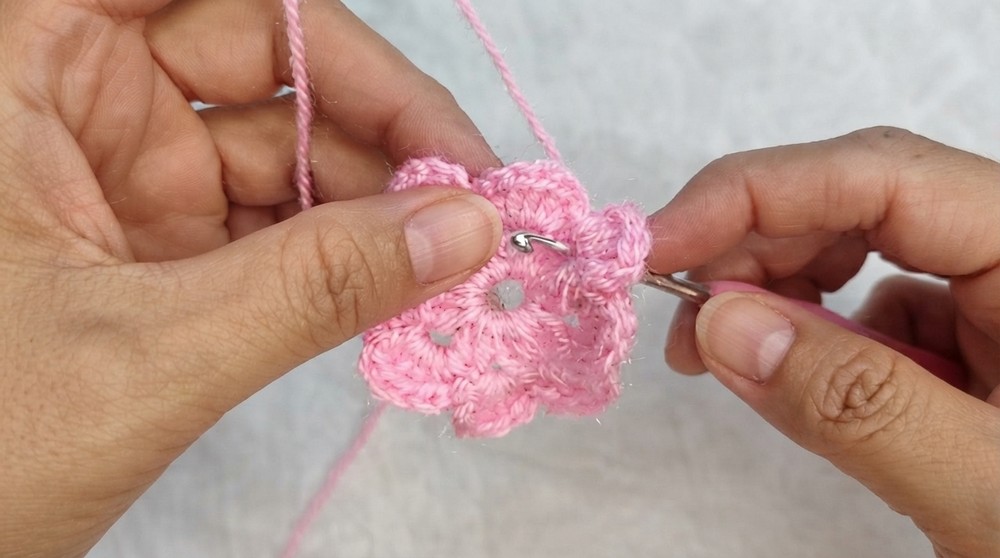
2. Create Petals:
- Chain 3 (counts as your first dc).
- Work a cluster of double crochet in the ring (yarn over, insert hook, pull through, pull through two loops; keep the last loop on the hook).
- After completing the cluster, chain 2.
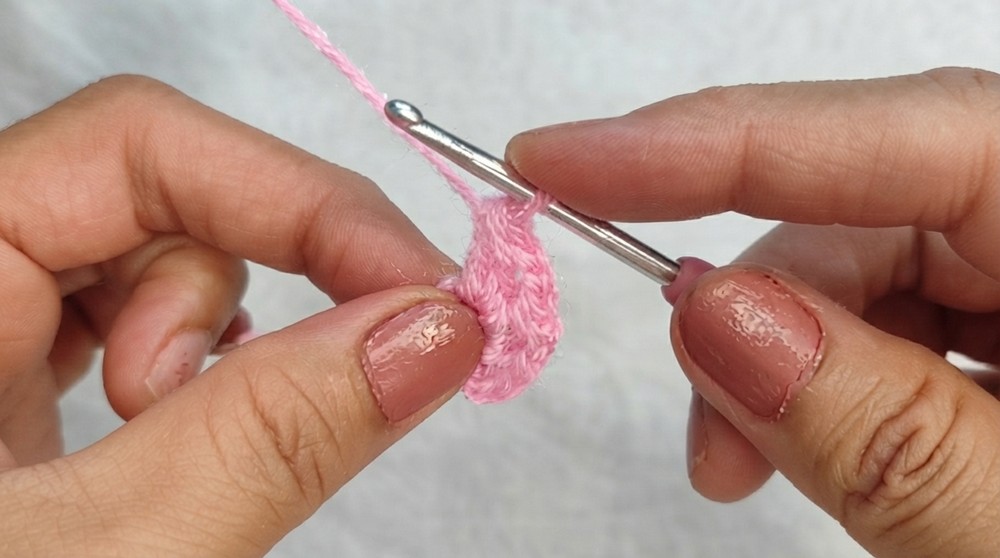
Repeat this sequence:
- Work cluster of dc, chain 2, and continue until you’ve created 8 petals.
3. Join:
- After completing the last petal, chain 2, and join with a sl st to the first petal. This completes the flower’s center.
Phase 2: Flower Petal Layers
1. Layer One (Petals):
- Move into the chain 2 space between petals.
- Work the following pattern into each chain space:
- 1 sc, chain 1, 4 dc, chain 1, 1 sc.
Repeat this in all chain 2 spaces, working evenly across the round to create layered petals.
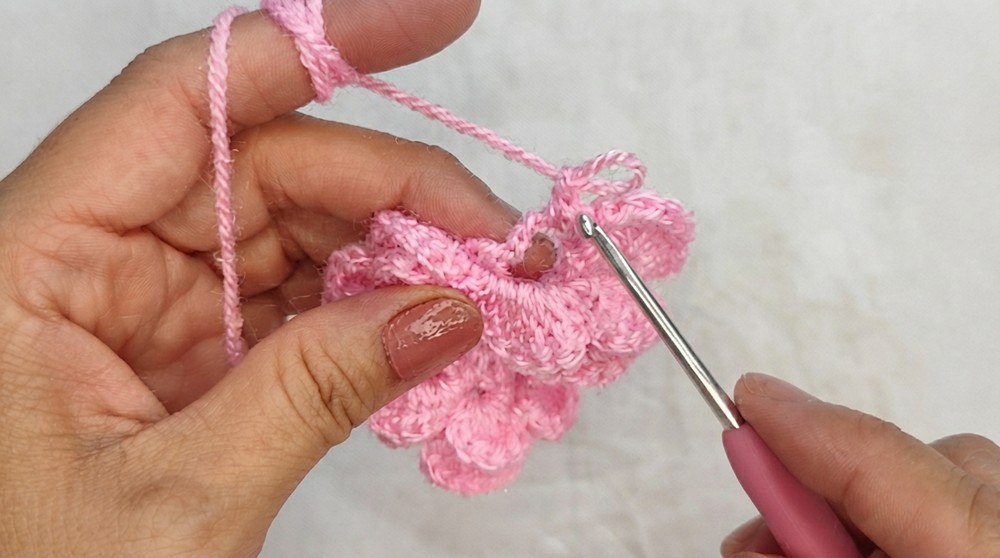
2. Create Anchor Points:
- Use your hook to create back side loops behind the petals:
- Insert the hook behind the petals and pull yarn through. Work 1 sc in the back, followed by chain 4.
- Repeat behind all petals to create 8 anchor loops.
3. Layer Two (Petals):
In each chain 4 loop, work:
- 1 sc, chain 1, 6 dc, chain 1, 1 sc.
Repeat this process for all 8 loops to complete the second layer of petals.
4. Repeat Back Loops Process:
Create anchor points behind the second petal layer, this time using chain 5 between each sc.
5. Layer Three (Petals):
In each chain-5 loop, work:
- 1 sc, chain 1, 7 dc, chain 1, 1 sc.
Repeat this process, ensuring all 8 loops are evenly worked for the third layer of petals.
6. Final Anchor Row:
Create one final anchor row using chain 6 between each sc to set up the base for transitioning to a square.
Phase 3: Turning Into a Square
1. Attach Second Color Yarn:
Use a slip knot to attach your second color yarn at the center hole of the flower.
2. Row 1: Forming Corners and Filling Sides
Work corners in the following sequence:
- 3 dc, chain 3, 3 dc in the same gap to create a corner.
In the spaces between corners, work 6 dc stitches evenly across.
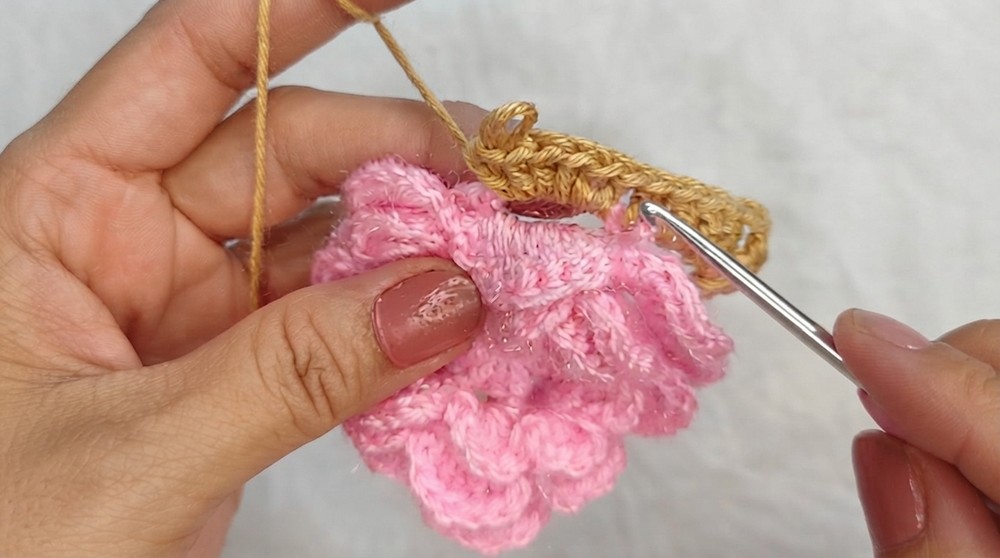
Repeat the corner and side structure around the round to complete the square’s first row.
3. Row 2: Expanding the Square
In each corner gap, work:
- 2 dc, chain 3, 2 dc.
Fill the sides between corners by working double crochet in each stitch to evenly expand the square’s dimensions.
4. Row 3: Final Row & Desired Size
Repeat the corner structure (2 dc, chain 3, 2 dc) and fill the sides with double crochet in every stitch.
You can add more rows following this structure to increase the square's size as needed.
Assembly & Finished Size
- Assembly: Weave in all loose yarn ends using a darning needle after completing the square.
- Finished Size: Customize the final square size by adding additional rows following the corner/sides pattern.
Conclusion
Your Flower Granny Square is complete! This elegant and versatile square can be used in various projects such as cushion covers, blankets, or bags. Feel free to experiment with different color combinations and sizes to enhance your creativity. If you have any doubts or questions, leave a comment.