
Free Crochet Headband Pattern for Simple Cozy Fashion
Boost your handmade style with this free crochet headband pattern and make a cute, cozy accessory that works for winter outfits, gifts, and everyday wear.
Crocheting combines skill and creativity to make something both beautiful and useful. One project that perfectly captures this is the stunning headband featured in a tutorial by Pembe Düğme. In this video, you’ll see how to make an elegant headband that’s not only stylish but also practical for everyday use. Whether it’s for yourself or someone special, this project offers a lovely way to add a handmade touch to your accessories.
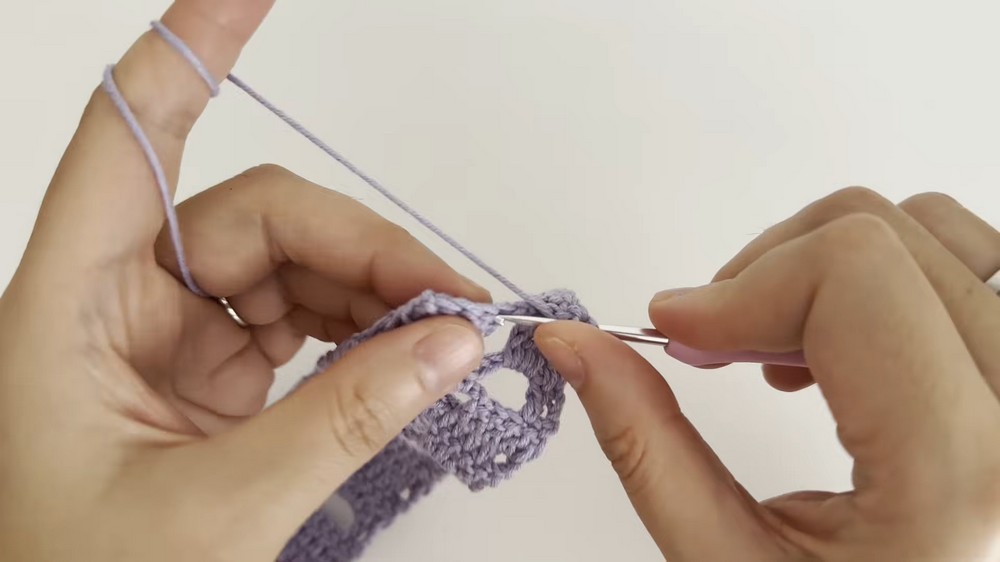
What makes this headband unique is its intricate motif pattern. It alternates between soft, flowing double crochets and delicate chain spaces, giving it a refined, lace like texture. The careful shaping throughout ensures a comfortable fit, making it functional as well as visually appealing. This accessory is not limited to being a headpiece; when extended, it can even work as a charming belt that enhances your outfit.
Free Crochet Headband Pattern You Will Love Making
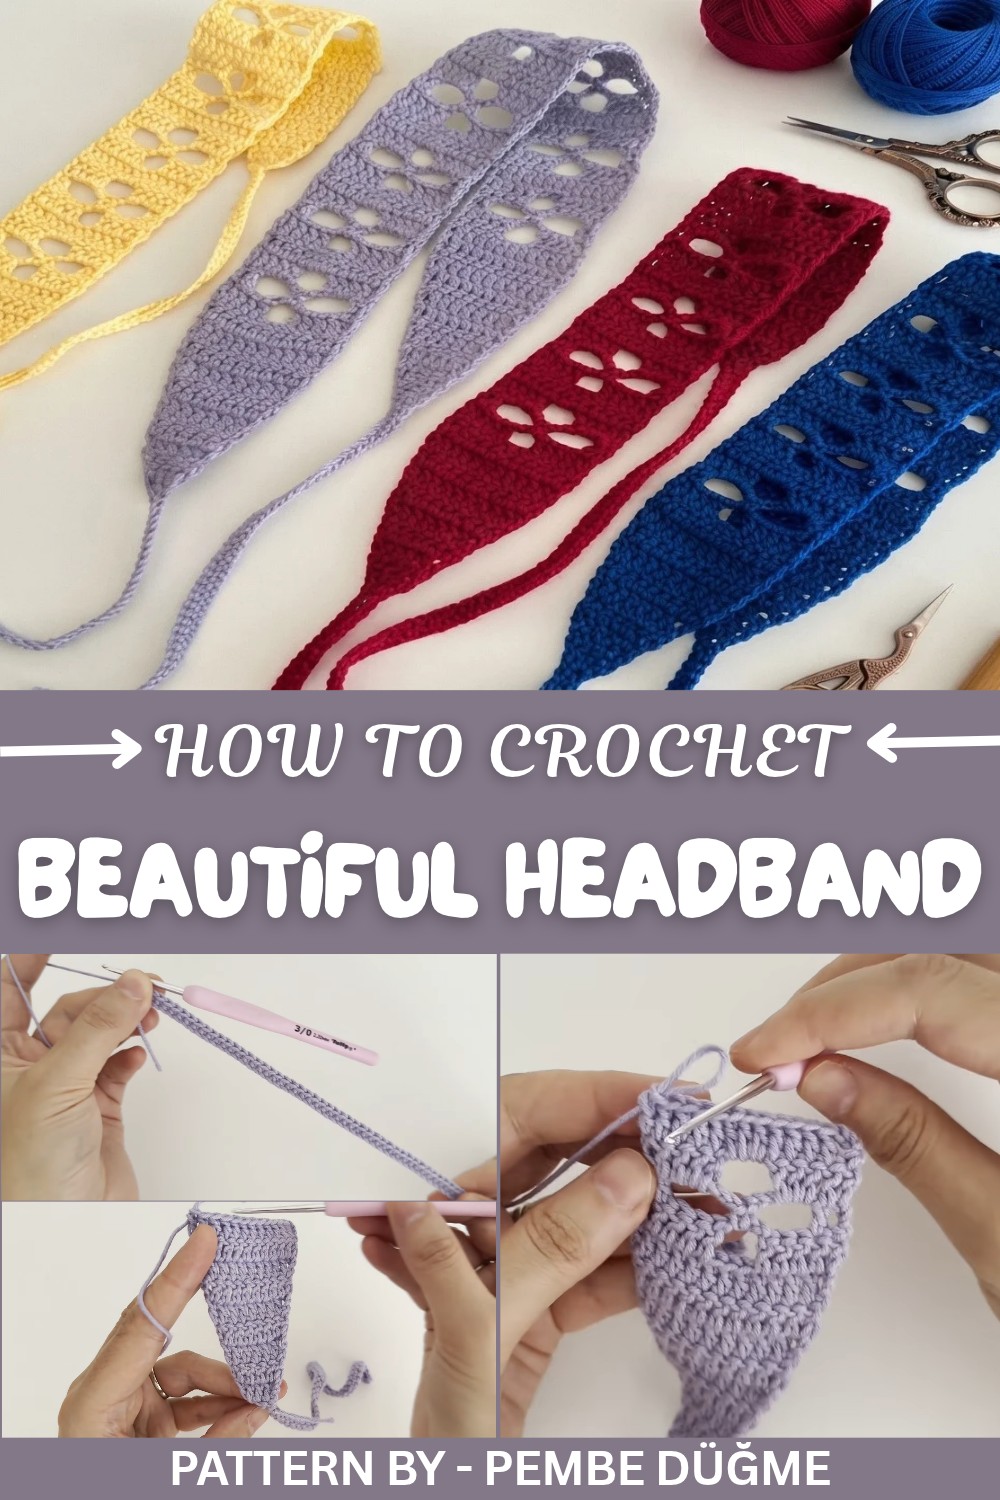
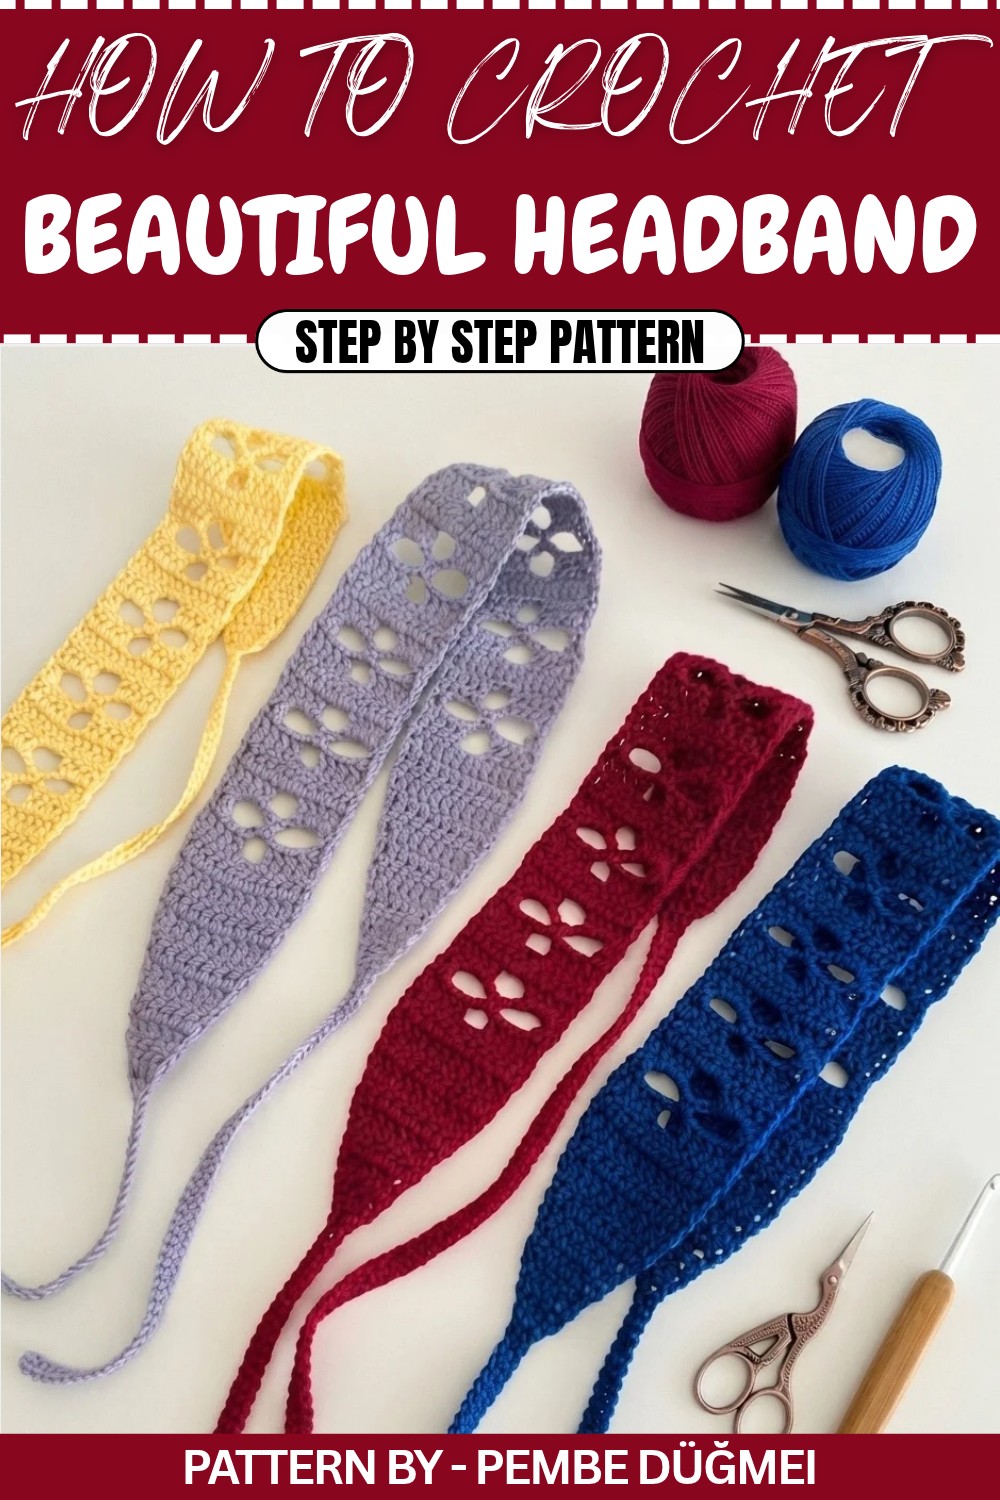
You can adjust the look to match different tastes and occasions by selecting various yarn colors. A gentle lilac shade adds elegance and softness when made for adults, while a cheerful yellow brings energy and fun for children. Its flexibility allows it to be resized for any age or preference, making it a truly thoughtful choice.
With the straightforward techniques used, this project is approachable for beginners while remaining satisfying for advanced crocheters who enjoy skilled handwork. Using nothing more than a crochet hook and cotton yarn, you can make something truly eye catching and suitable for any outfit.
Step by Step Crochet Pattern for Turkish Hairband
In this pattern, we’ll learn how to crochet a hairband, which can be adjusted to various sizes for both adults and children. This versatile design can also be used as a belt accessory. The tutorial features a lavender colored hairband for adults and a yellow one for smaller sizes. You can customize the length and motifs based on your preferences.
Quick Overview of Pattern
- Foundation: Start with chains and single crochets to form the tie portion.
- Motifs Development: Increase the double crochets row by row.
- Model Appearance: Introduce zig zag rows and motifs.
- End of Model: Gradually decrease stitches to complete the other tie portion.
Notes
- The hairband length can be customized by adding motifs or rows.
- Always count your stitches during each step to maintain symmetry.
- Ensure that the ties at both ends have the same number of chains for consistency.
Skill Level
Intermediate: Requires knowledge of single and double crochet, increasing, decreasing stitches, and chain stitches.
Materials
- Yarn: Cotton yarn (your preferred color and brand).
- Hook: 2.20mm crochet hook.
- Scissors: For trimming yarn ends.
- Tapestry Needle: For weaving in ends.
Measurements / Sizing
- Adult Hairband: Approximately 50cm in length without ties (8 motifs).
- Child Hairband: Approximately 35cm in length without ties (6 motifs).
Gauge
Gauge is not essential for this project, as it is adjustable based on your preferences.
Stitch Abbreviations
- ch: Chain.
- sl st: Slip Stitch.
- sc: Single Crochet.
- dc: Double Crochet.
Special Stitches
Double Crochet Increase: Work multiple double crochets into a single stitch to increase the motif size.
Invisible Decrease: Work two stitches into one without leaving obvious gaps.
Construction Instructions
Starting Tie
- Set up:
- Start with a slip knot.
- Chain 51 stitches.
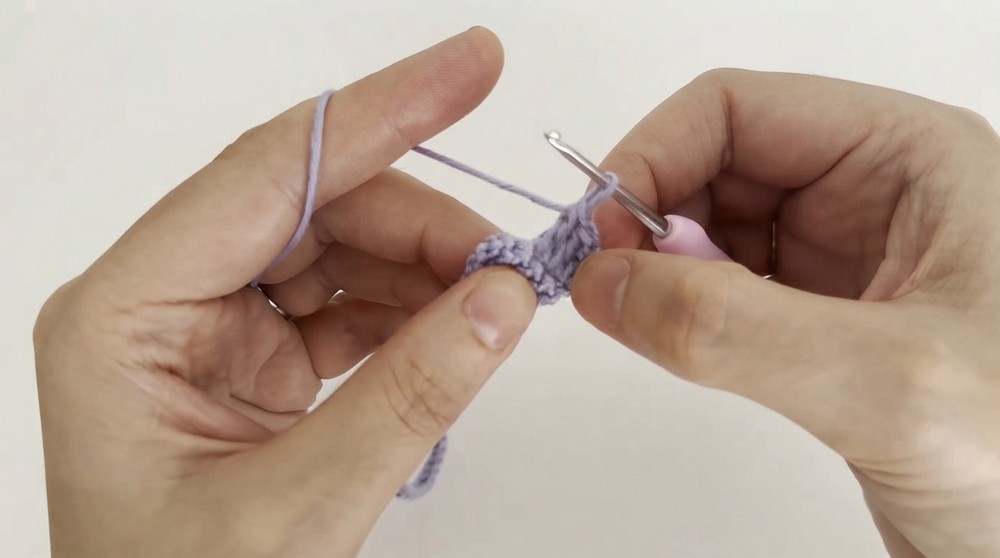
- Single Crochet Row:
- Skip the first chain.
- Work 1 sc into the second chain.
- Continue working 1 sc into each chain across until the row ends.
- You should have 50 sc at the end of the tie.

Transition Rows (Increase to 13 DCs)
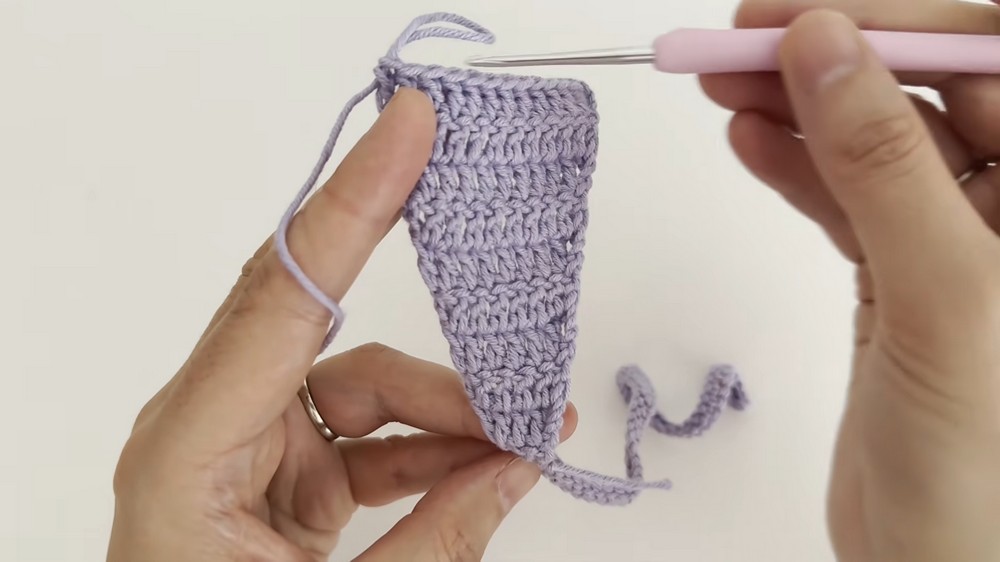
- Row 1 (Start Increasing):
- Chain 3 (counts as the first dc).
- Turn your work.
- Work 1 dc into the base of the chain.
- Continue working 1 dc into each stitch across.
- At the end, insert your hook into the top of the turning chain, and work 1 dc.
- Subsequent Rows (Increasing):
- Always chain 3 at the start of each row.
- Work 1 dc into the base of the chain at the beginning.
- Continue working 1 dc into each stitch across the row.
- Be sure to work 1 dc into the top of the chain at the end of the row.
- Row Goal:
- Continue increasing until your rows have 13 DCs.
- You will achieve 13 DCs by the 10th row.
Motif Pattern ("Pinterest" Style)
Row 1:
- Start: Chain 3.
- Work 5 DCs.
- Chain 3, skip the next 3 stitches.
- Work 5 DCs into the next stitches.

Row 2:
- Start: Chain 3, work 2 DCs into the first two stitches.
- Chain 5, insert your hook into the middle of the 3 chain space from Row 1, and work 1 sc to anchor it.
- Chain 5, skip the next 3 stitches, and work 2 DCs into the last two stitches.
Row 3:
- Start: Chain 3, work 2 DCs into the first two stitches.
- Work 3 DCs into the first 5 chain space, then chain 3.
- Work 3 DCs into the next 5 chain space.
- Finish the row with 2 DCs into the last two stitches.
Intermediate Row
- Plain DC Row:
- Chain 3 at the start of the row.
- Work 1 DC into each stitch across (including the chains at the ends).
- You should end with 13 DCs.
Repeating the Pattern
- Motif Sequence:
- Repeat Row 1, Row 2, and Row 3 of the Motif Pattern.
- Follow each motif sequence with an Intermediate Row of 13 DCs.
- Row Goal:
- Repeat these steps until you have the desired hairband length.
Adult Hairband: 8 Motifs (Approx. 50cm).
Child Hairband: 6 Motifs (Approx. 35cm).
Finishing Rows (Decreasing for Closure)
- Set up Decrease Rows:
- Reduce stitches by performing hidden decreases at start and end of each row.

Hidden Decrease Instructions:
- Yarn over, insert hook into the first stitch, pull through a loop.
- Insert your hook into the next stitch, pull through another loop.
- You now have 3 loops on your hook. Yarn over and pull through all 3 loops to complete the decrease.
- Row by row Decrease:
- Row 1: Decrease to 12 DCs.
- Row 2: Decrease to 11 DCs.
- Row 3: Decrease to 10 DCs.
- Continue decreasing at the edges until there are 3 DCs remaining.
Closing Tie
- Chain Stitch Row:
- After reducing to 3 DCs, chain 1.
- Join the remaining 3 stitches with sc using a slip stitch.
- Second Tie:
- Chain 51 stitches to form the next tie.
- Work sc into each chain, moving backward to the base.
- Secure:
- Insert hook into the base and work a sl st to finish the second tie.
- Fasten off the yarn and trim.
Final Assembly
- Weaving in Ends:
- Use a tapestry needle to weave in loose ends for a clean finish.
- Blocking:
- Lightly block the hairband to smooth the motifs and ties if desired.
Measurement Recap
- Adult Hairband: 8 motifs (50cm).
- Child Hairband: 6 motifs (35cm).
Conclusion
Your crochet hairband is complete! This piece features beautiful motifs and ties for added versatility. Customize it in any color or length, and enjoy wearing or gifting this timeless accessory.