
How To Crochet Starfish Earrings Pattern for Summer Vibes
Quickly show off beachy style with the Free Crochet Starfish Earrings Pattern for playful, ocean-inspired jewelry anyone can make.
Bright and full of charm, these starfish earrings bring a cheerful splash of seaside fun to any outfit. Using double crochet, half double crochet, and slip stitches, the pattern shapes a lovely starfish with five graceful arms that curve naturally, giving the earrings a soft and stylish look. They’re light and comfortable, perfect for everyday wear or special occasions when you want to add a playful, handmade touch.
Other Ideas Using This Pattern
Adjusting the size or combining several starfish pieces can result in charming brooches, cute keychains, or lovely appliqués to decorate bags or hats. Using different yarn colors or adding tiny beads offers even more ways to make each piece unique. This pattern is a simple yet versatile way to practice stitches while making eye-catching accessories inspired by the ocean.
Free Crochet Starfish Earrings Pattern for Effortless Glam

The project begins with a magic ring where 15 double crochet stitches form a solid base. The arms of the star use a combination of chains and various crochet stitches to build texture and dimension. Some stitches are worked incompletely to create joins that make the starfish’s points pop, adding an interesting detail without complicating the process. After finishing the crochet part, a mix of water and glue solidifies the shape, helping the earrings keep their form over time. Attaching earring hooks completes the accessory, ready to brighten your look or surprise someone with a thoughtful gift.
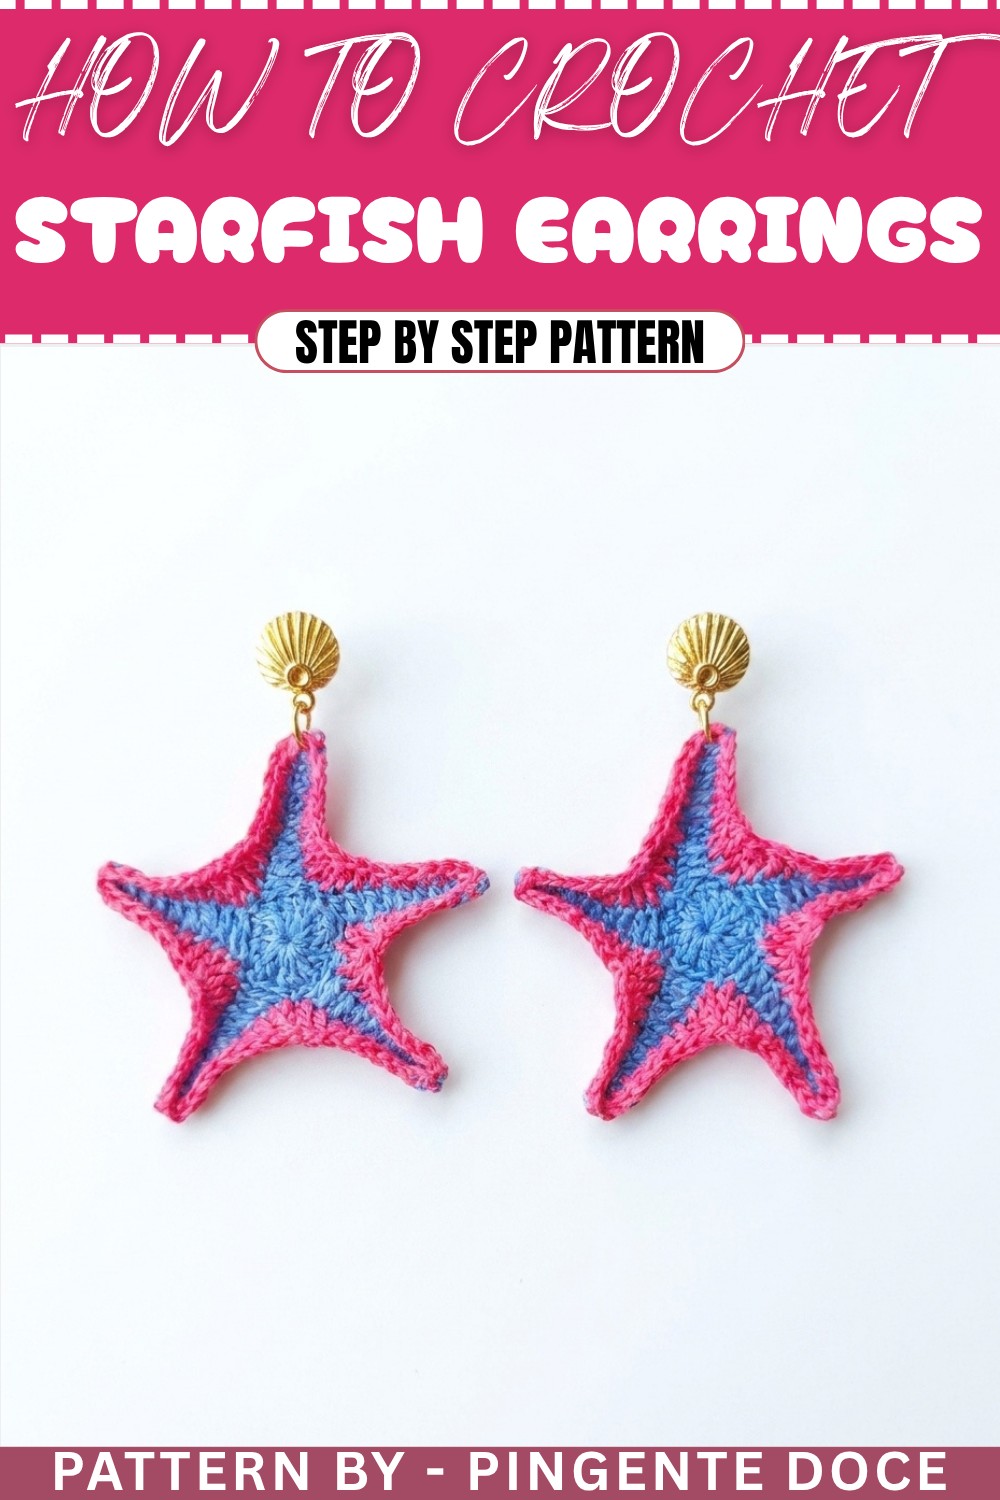
Crochet Pattern: Starfish Earrings
Turn simple crochet stitches into a beautiful, vibrant, and stylish pair of starfish-inspired earrings. This pattern provides an easy-to-follow, step-by-step guide to create this unique accessory. Lightweight and elegant, these earrings can add a touch of handmade charm to your wardrobe. They’re super quick to make, so they're perfect for gifts, personal use, or even to sell at markets.
Uses of This Pattern
- Accessorize: Perfect for beach outings, casual wear, or summer vibes.
- Gifting: A thoughtful and personalized gift for friends or loved ones.
- Creative Income: Great for creating custom, handmade jewelry to sell or market.
Skill Level & Terminology
- Skill Level: Beginner/Confident Beginner
- Terminology: US crochet terms are used throughout.
Materials & Tools
- Yarn: Crochet thread or lightweight cotton yarn in two contrasting colors (e.g., blue and white).
- Crochet Hook: 1.5mm hook or appropriate hook size for your yarn.
- Jump Rings: Small rings for connecting the starfish to the earring hook.
- Earring Hooks: 2 pieces.
- Tapestry/Sewing Needle: For weaving in loose ends.
- Scissors: For cutting excess yarn.
- Water and Glue Mixture: For stiffening the earrings to maintain their shape.
Gauge
Gauge is not critical for this pattern because the earrings are small, decorative pieces. However, maintaining consistent tension for tight, neat stitches is important.
Abbreviations
- sl st – Slip Stitch
- ch – Chain
- sc – Single Crochet
- hdc – Half Double Crochet
- dc – Double Crochet
- yo – Yarn Over
Special Stitch Instructions
Double Crochet (dc):
- Yarn over (yo).
- Insert the hook into the desired stitch.
- Yo again, and pull up a loop (3 loops on hook).
- Yo, pull through the first two loops.
- Yo again, and pull through the remaining two loops.
Half Double Crochet (hdc):
- Yarn over (yo).
- Insert the hook into the desired stitch.
- Yo again and pull up a loop (3 loops on hook).
- Yo and pull through all three loops for one half double crochet.
Incomplete Double Crochet Stitch:
This stitch is used to bring multiple double crochets together.
- Yarn over and insert hook into the stitch, then pull up a loop (3 loops on hook).
- Yarn over, pull through two loops (2 loops remain on the hook).
- Stop without finishing the last step.
- Continue making incomplete double crochets in the required stitches, pulling through two loops each time until you have 4 loops left on the hook.
- Yarn over and pull through all the loops on the hook.
Finished Size
Each starfish earring is approximately 2 inches in diameter, excluding the earring findings.
What You’ll Learn From This Pattern
- How to create a magic ring.
- The use of basic stitches such as slip stitch (sl st), single crochet (sc), half double crochet (hdc), double crochet (dc).
- Techniques for color changes and creating detailed edges.
- How to harden crochet pieces for jewelry with a glue and water solution.
- Attaching findings to turn crochet pieces into stylish accessories.
The Pattern
Part 1: Inner Starfish Base
- Magic Ring and Foundation Round:
- Create a magic ring and secure it by chaining 3 chains (acts as your first double crochet).
- Work 14 dc into the ring. Including the starting chain, there will now be 15 dc.
- Pull the loose end of the magic ring to close the loop.
- sl st into the top of the third ch from the starting chain to close the round.
The magic ring creates a seamless and tidy center for the starfish. If you find it challenging, you can begin by chaining 4 and joining with a slip stitch instead.

Part 2: First Starfish Points
- Create Points:
- ch 10.
- Skip the first ch from the hook, and sc in the second and third ch.
- hdc in the next 4 chs (one stitch in each chain).
- dc in the final 3 chs of the chain.
- Skip 2 dc at the base, then work a sl st into the third dc.
- Repeat for Additional Points:
- Work four more starfish points using the same instructions as above:
- ch 10.
- Skip 1 chain, and sc in the next 2 chains.
- hdc in the next 4 chains.
- dc in the final 3 chains.
- Skip 2 stitches at the base and sl st into the third dc.
By the end of this part, your starfish will have five complete points!
- Work four more starfish points using the same instructions as above:
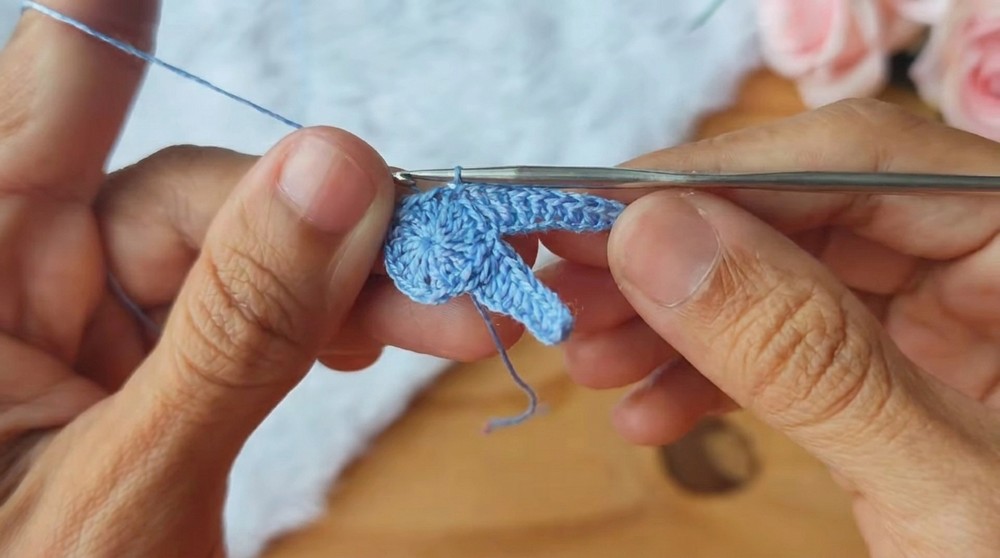
Part 3: Adding Contrasting Color and Shaping the Starfish
- Change Yarn Color:
- Attach the new color yarn to one of the sl st at the base of a starfish point using a slip knot.
- Make 2 ch, which serves as your first hdc.
- Outline and Shape Each Point:
- Begin with dc in the first st at the base of the point. Work another dc in the next st.
- Work 4 hdc stitches in the next 4 sts.
- Work 5 sc, continuing down the point and at the base of the chain from the previous row.
- Repeat for Each Point:
- Repeat this sequence to outline the entire starfish with a contrasting color, continuing over all five points.
- Join and Finish:
- At the end of the last point, join your yarn to the starting chain using a sl st.
- Ch 1, cut your yarn, and fasten off.
Switching to a contrasting color adds depth and dimension to your starfish. This step defines the points and enhances the overall appearance of the earring.


Assembly & Finishing
- Weave in Ends:
- Use a tapestry needle to hide any loose yarn ends by weaving them securely through the stitches on the back of the starfish. Trim off any excess yarn.
- Apply Stiffener:
- Mix equal parts white glue and water and dip your starfish into the solution.
- For a softer result, only apply the stiffener to the back of the piece. For a firmer earring, soak the entire starfish in the mixture.
- Lay flat on a plastic-covered surface, shape the points into a natural star position, and allow to dry completely.
- Add Jewelry Findings:
- Use a jump ring to attach the earring hook to one of the starfish points.
- Make sure all findings are securely closed with jewelry pliers.

Difficulties & Solutions
Difficulty: Mastering the Magic Ring
The magic ring can be tricky for beginners to master.
- Solution: Practice creating the loop several times. Alternatively, start the first round with ch 4 and join with a sl st to form a loop.
Difficulty: Consistent Tension in Slip Stitches
Slip stitches can easily become too tight, making the piece curl.
- Solution: Ensure you’re not pulling the stitches too tightly when creating slip stitches; maintain a smooth and even tension. Switch to a larger hook if needed.
Difficulty: Stiffening the Earrings
Applying the glue-and-water solution evenly can be challenging.
- Solution: Use a small brush or a sponge to apply the solution evenly to ensure the piece hardens without becoming too stiff or bulky.
Why You’ll Love This Pattern
This starfish earring pattern is the perfect project for creating stylish and unique accessories. The vibrant, organic shapes of the starfish give off a beachy, elegant vibe and offer endless customization options. You’ll love how quickly you can make multiple pairs for yourself, your friends, or even to sell. The step-by-step process simplifies each round, so whether you’re a beginner or more seasoned crocheter, you can enjoy the process and achieve professional-quality results.