
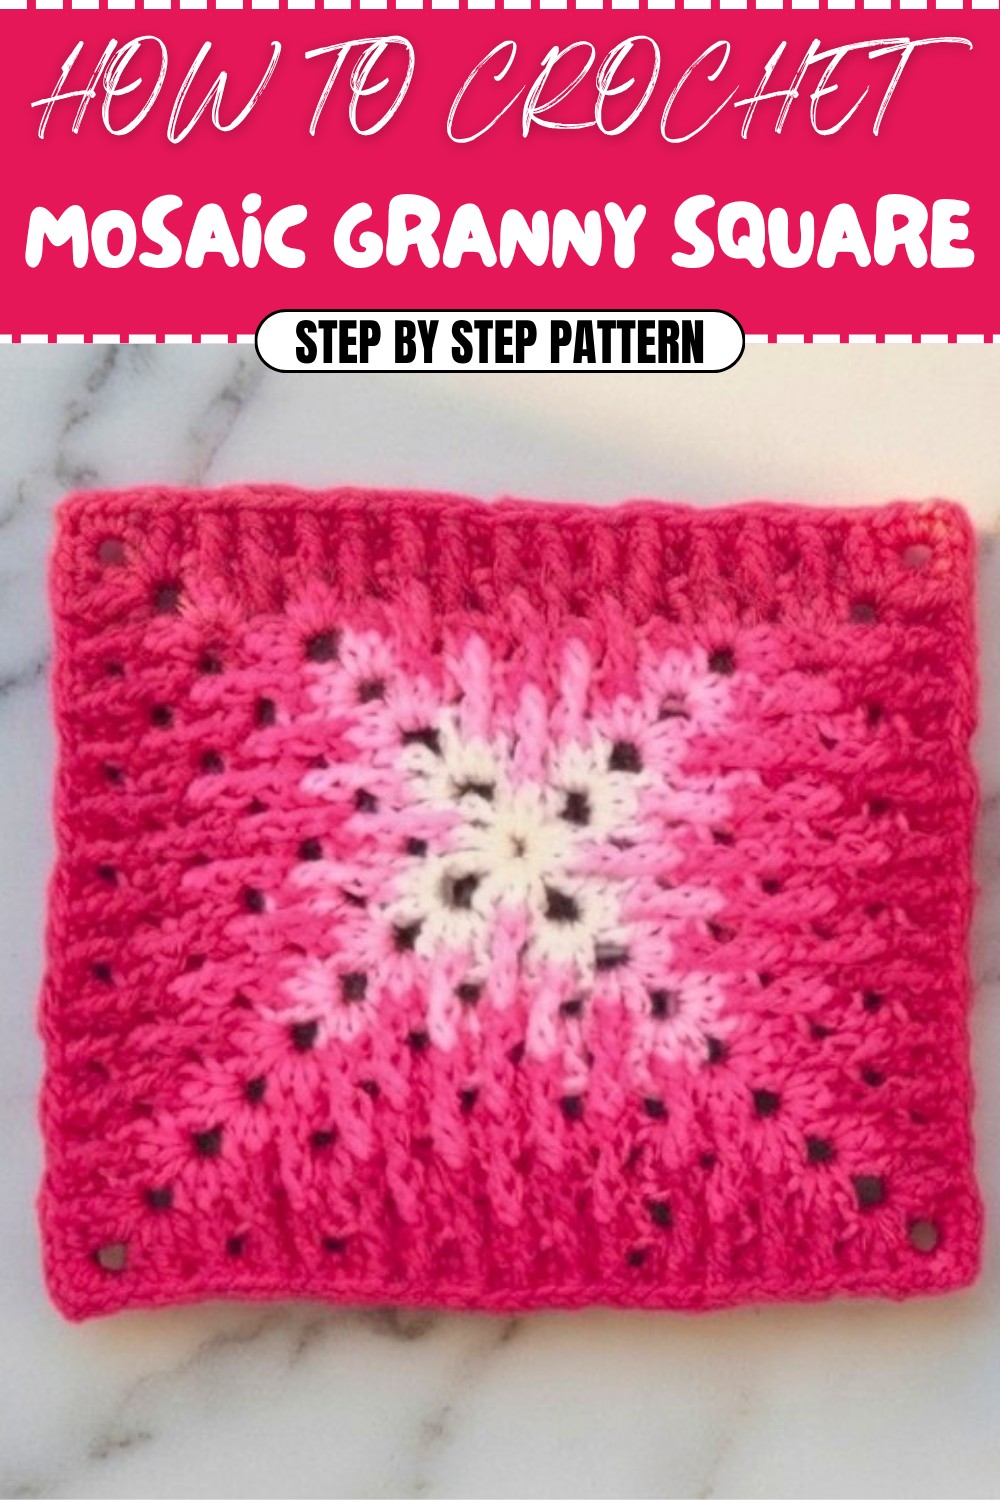
Easy & Fun Crochet Mosaic Granny Square Pattern for Beginners
Right away refresh your projects with vibrant color using a Free Crochet Mosaic Granny Square Pattern for a bold, modern touch.
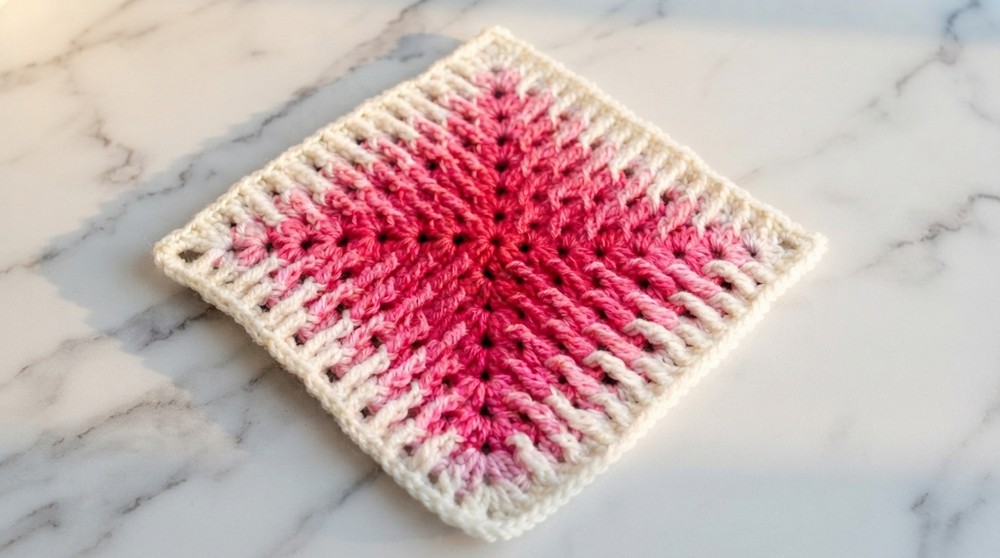
There’s something truly satisfying about watching colorful yarn turn into beautiful, eye-catching squares that you can use for so many projects. This particular crochet square is special because it uses a creative stitch technique to make a stunning mosaic effect, giving your work a textured and elegant look. The pattern is simple enough for beginners, yet it creates a unique design that looks intricate and professional.
Ready to Crochet Try This Free Mosaic Granny Square Pattern Today
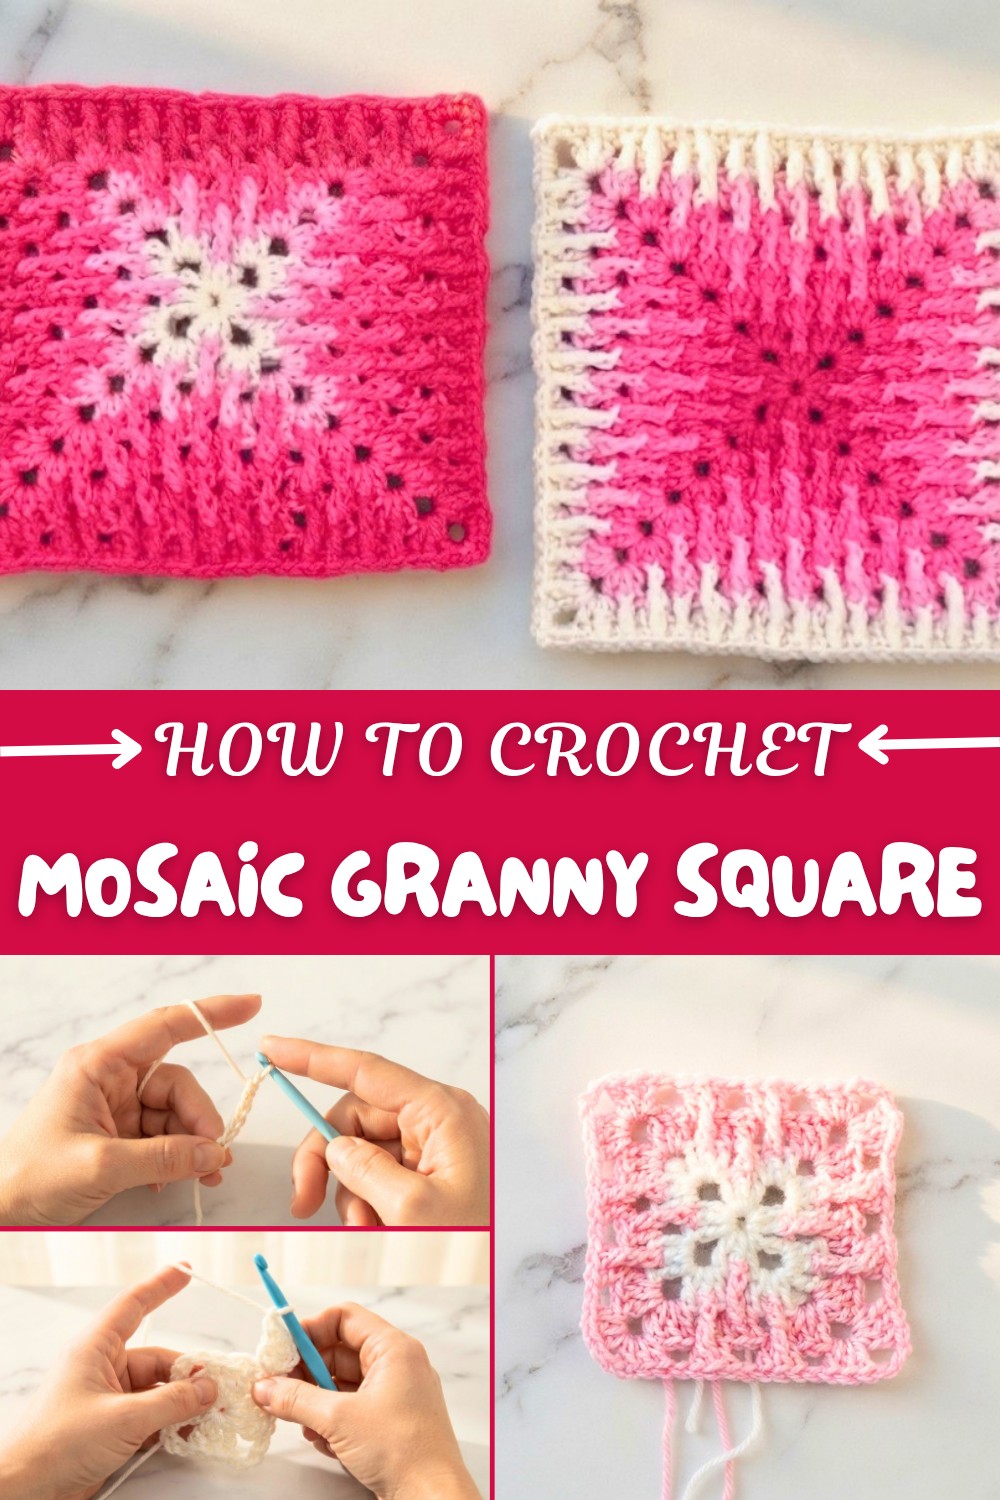
The heart of this pattern is formed by granny clusters using double crochet stitches and charming drop stitches made with extended front post triple crochets. These drop stitches add a lovely dimension by “dropping” into the row below, which gives the mosaic its signature raised texture. The squares start with a basic chain ring and build corner clusters that create a perfect square shape with neat edges. Working in rounds, you’ll move from solid granny clusters to airy chain spaces, adding beauty and lightness to the design.
One of the best parts about this mosaic granny square is how it can bring together colours in a fresh, modern way. You can easily change yarn colors at the end of rounds to make each square pop with vibrant or soft hues. The final round switches to a mix of single crochet and front post half double crochet stitches to create a neat finishing edge, making your squares ready to join together smoothly.
More Fun Ideas for This Pattern
This versatile stitch combination doesn’t just make lovely squares—it’s great for many other crochet projects too! Use these mosaic blocks to create cozy blankets, stylish cushion covers, eye-catching tote bags, or even warm scarves and shawls. Because the pattern is modular and easy to customize, you can mix and match colors and sizes to make one-of-a-kind pieces. Learning this mosaic technique sets a solid foundation for exploring other textured crochet designs while making beautiful, practical items.
Mosaic Granny Square Crochet Pattern: Step-by-Step Guide
This mosaic granny square pattern combines traditional granny square clusters with extended front post stitches to create a unique textured design. It's perfect for those who want to learn new crochet techniques while crafting a functional and aesthetic piece. The square’s symmetrical shape works well with contrasting colors to highlight the mosaic effect.
Skill Level:
Intermediate
Terminology:
US crochet terms are used in this pattern.
What You’ll Learn From This Pattern
- How to create granny clusters for foundational squares.
- Techniques to work front post stitches and extended front post stitches for mosaic textures.
- How to seamlessly change yarn colors and work evenly into corners.
This project is wonderfully adaptable, allowing experimentation with different colors and yarn types for personalized creations.
Materials & Tools
- Yarn: Size 4 medium-weight yarn (choose at least two contrasting colors).
- Crochet Hook: Size 5 mm (H/8).
- Notions: Yarn needle for weaving in ends, scissors.
Gauge
Gauge is not critical for this pattern, but for reference:
4 clusters x 4 rows = 4 inches.
Abbreviations List
Below are the abbreviations you'll use:
- ch: Chain
- sc: Single Crochet
- dc: Double Crochet
- fpdc: Front Post Double Crochet
- efpdc: Extended Front Post Double Crochet
- hdc: Half Double Crochet
- sl st: Slip Stitch
- st(s): Stitch(es)
Special Stitch Instructions
Extended Front Post Double Crochet (efpdc):
This stitch creates elongated vertical lines that cover spaces between stitches.
- Yarn over twice.
- Insert hook around the indicated stitch one round below (from front to back and out again to the front).
- Pull up a loop; you should have 4 loops on the hook.
- Yarn over and pull through one loop (optional extended step).
- Yarn over and pull through the next two loops (3 loops remain).
- Yarn over again and pull through the final two loops.
Finished Size
Final dimensions will depend on the number of rounds completed. For reference:
- Small square: Approx. 6 inches x 6 inches (after 5 rounds).
- Easily adjusted for larger sizes by repeating the pattern.
The Pattern Itself
Starting Your Project
Begin your square with a magic ring or chain loop. From there, build granny clusters to form the foundation and edges, then add textured drop stitches for the mosaic effect.
Round 1: Forming the Foundation Ring
- Slip Knot & Chain: Begin with a slip knot and chain 4.
- Form Ring: Join the chain into a loop with a sl st.
- Start Granny Clusters:
- Chain 3, counts as the first dc.
- Work 2 dc into the center of the ring (creates the first cluster).
- Chain 3 for corner space.
- Work 3 dc into the ring for the next cluster.
- Repeat 3 dc clusters with 3 ch spaces until you have 4 clusters in total.
- Close the round with a sl st.
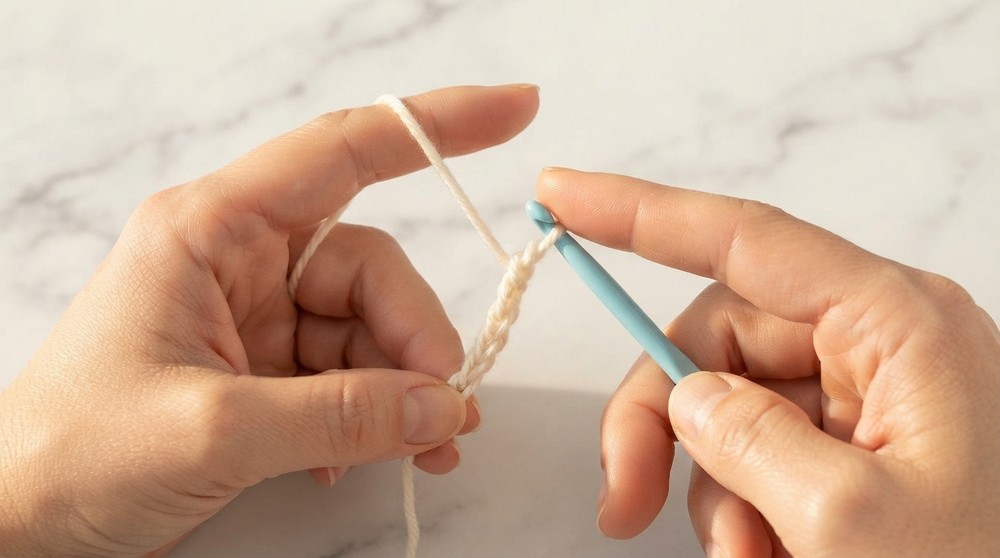
This first round creates the base of your square with clearly defined corners. If there’s tightness in the ring, slide your stitches left for more space.
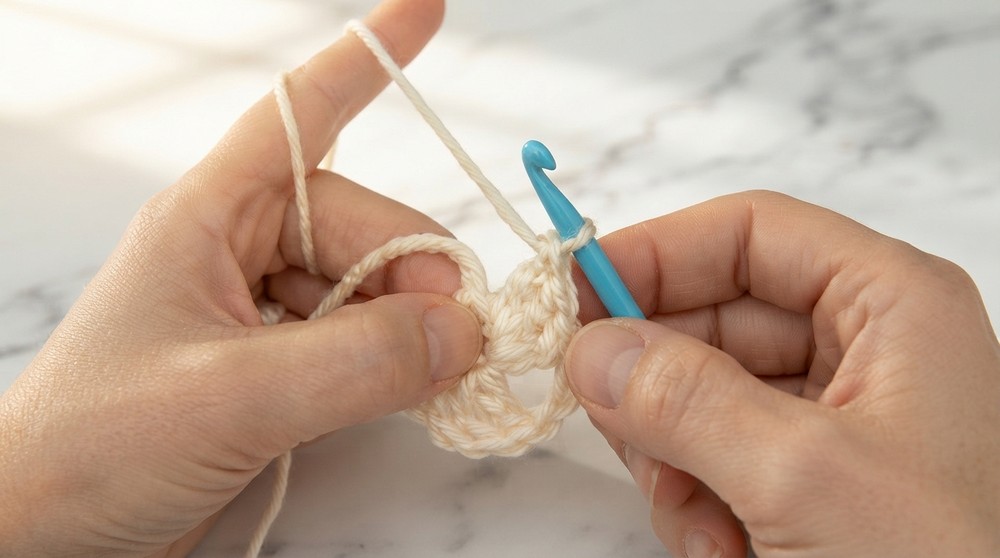
Round 2: Building Layers
- Adjust position: Instead of chaining 3, ch 1 and join the active yarn with a hdc into the corner space. This centers your yarn in the corner chain space.
- Start Granny Cluster:
- Chain 3, counts as the first dc.
- Work 2 dc into the corner space (forms half a cluster).
- Chain 1.
- Next Corner Cluster: Skip the next cluster and work into the next corner chain space:
- Work 3 dc, ch 3 (corner), and another 3 dc into the same space.
- Continue around: Work 1 ch space between clusters and repeat the corner pattern (3 dc, 3 ch, 3 dc) in all four corners.
- Close the round with a sl st.

At the end of Round 2, the square begins to take shape, with corners clearly defined for further expansion.
Round 3: Adding Drop Stitches
- Choose a new yarn color and attach it to any corner chain space with a standing dc.
- Corner Cluster:
- Work 2 dc, ch 3 (for corner), and another 3 dc into the corner space.
- Chain 1 & Drop Stitch:
- Skip the next cluster and work dc into the next space.
- In the middle of this cluster, work an efpdc (see Special Stitch Instructions):
- Yarn over twice, insert into the post one round below, pull up and extend the loop.
- Complete as a fpdc to drop the stitch.
- Finish the cluster with 1 dc in the next space.
- Continue pattern: Repeat the chain space, double crochet, drop stitch sequence across the round.
- Close the round with a sl st.
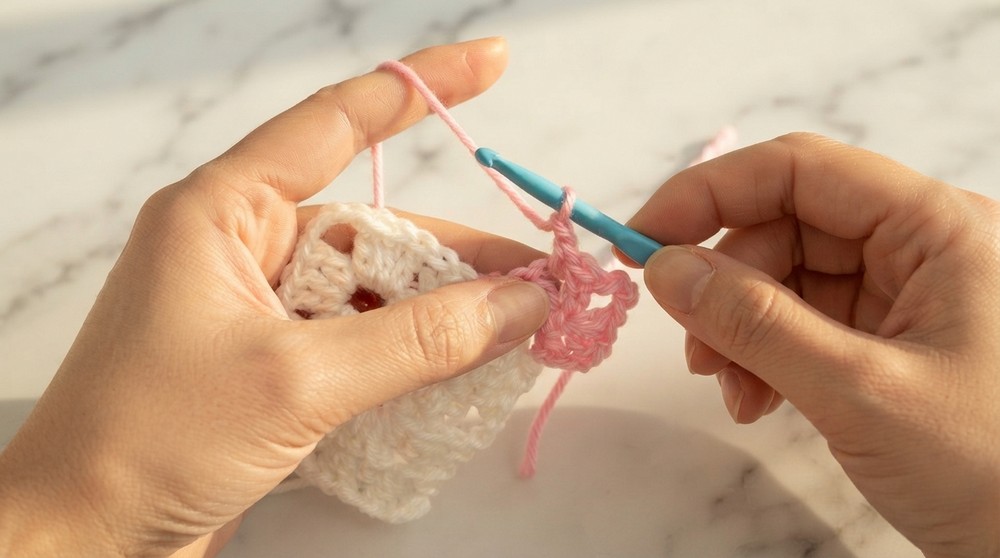
The drop stitches add texture and dimension to the square, transforming it into a visually appealing mosaic design.
Repeating Rounds
Repeat the pattern from Round 3, adding new drop stitches and granny clusters to enlarge the square. Each round adds height and width while maintaining balance through symmetrical corners.
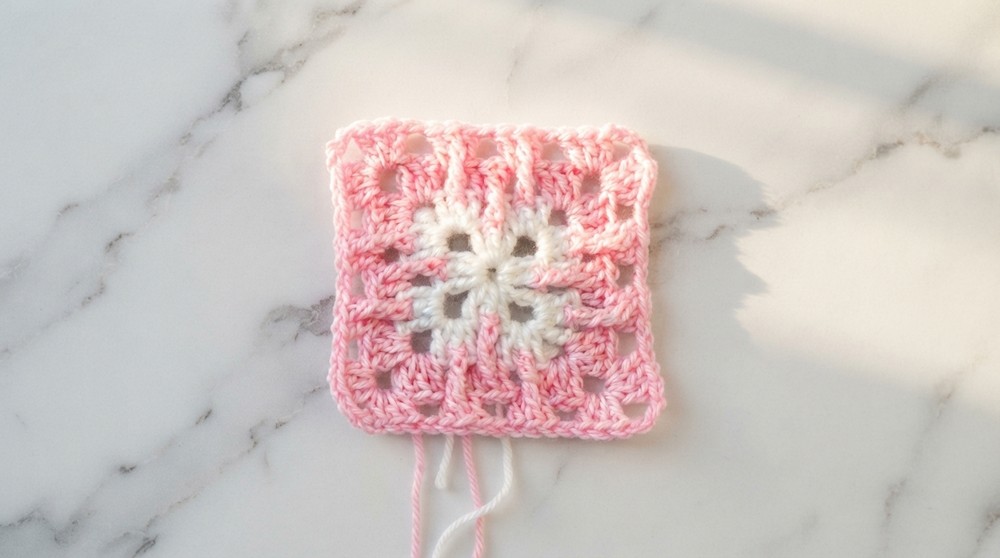
Edging (Final Round)
- Switch to Single Crochet: Begin with sc above every dc in the previous round.
- Drop Stitch Adjustments:
- Short drops: Work a front post hdc into shorter posts.
- Tall drops: Work an efpdc into taller chain spaces.
- Alternate single crochets and drop stitches where needed.
- Corners: In the corner chain spaces, work 2 sc, ch 2, 2 sc to maintain a sharp 90° angle.
- Continue the sequence: Work evenly along all sides.
- Close with a sl st and fasten off the yarn.
Edging ties the mosaic design together for a clean, finished square ready to connect or display.
Assembly & Finishing
- Weave in loose ends: Use a yarn needle to secure all loose ends neatly.
- Blocking: Lightly block your square to refine its shape and bring out the details of the mosaic pattern.
Difficulties & Solutions
- Drop Stitches: For first-timers, extended front post stitches may feel challenging. Practice separately before attempting the full pattern.
- Tight Corners: Ensure that corner chain spaces have enough stitches to maintain square symmetry.
- Changing Colors: Pull loose yarn ends neatly to the back and weave them in for seamless transitions.
Why You'll Love This Pattern
The mosaic granny square is a perfect combination of traditional elements and modern textures. You'll love its adaptability, enabling you to experiment with colors and yarns to create customized pieces. It’s a great pattern to grow your skills and create stunning, versatile crochet projects for your home or as thoughtful gifts.