
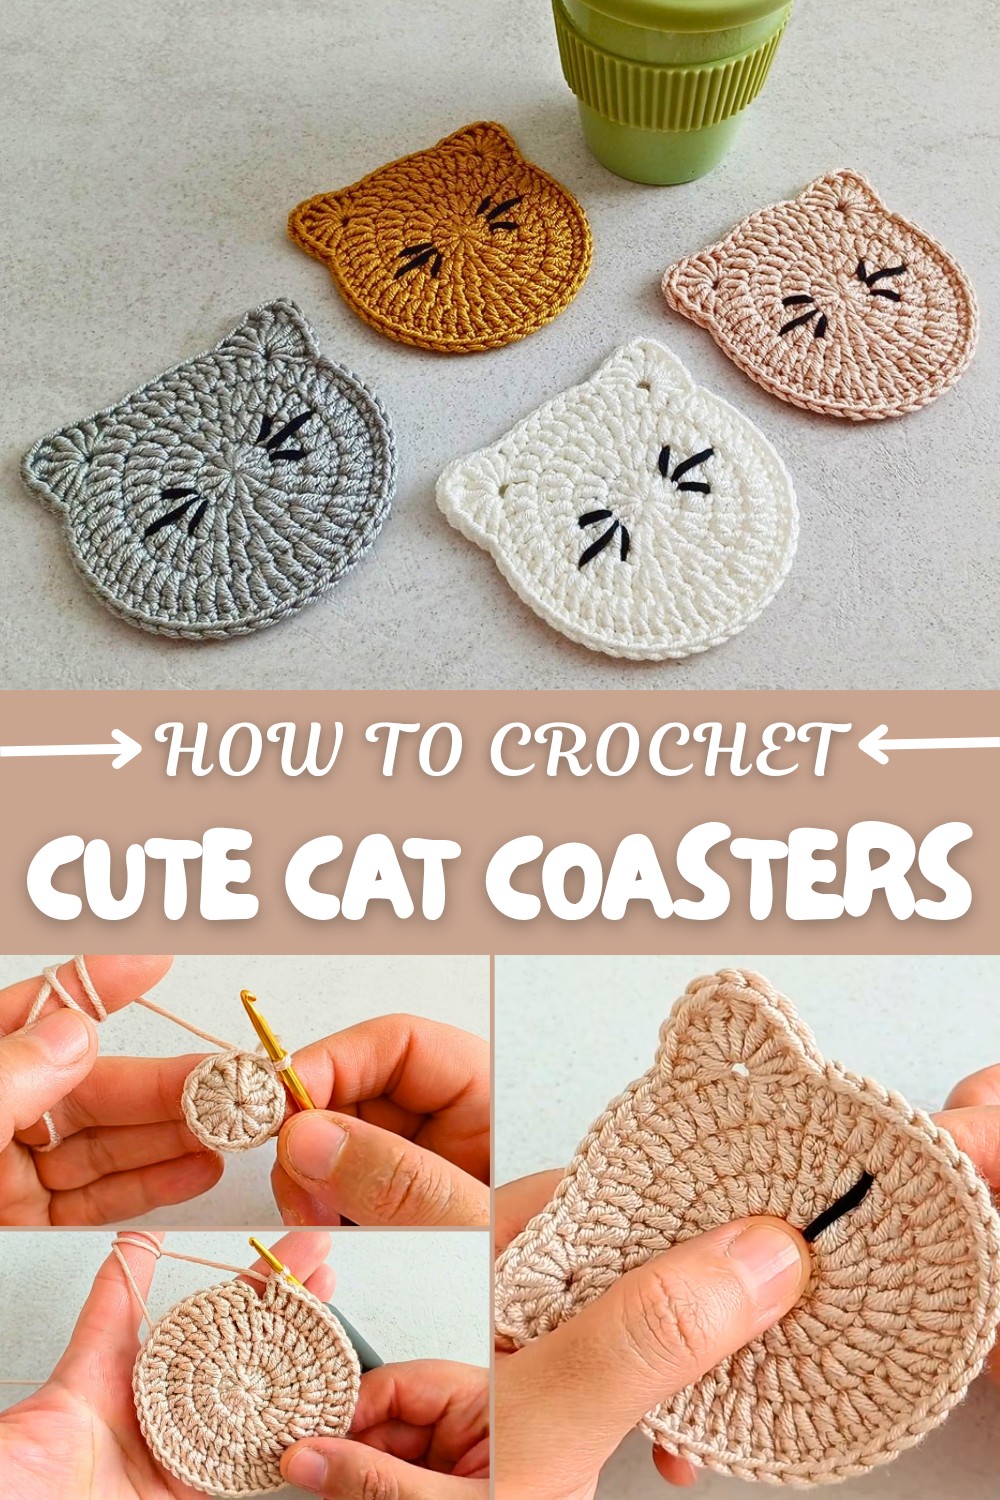
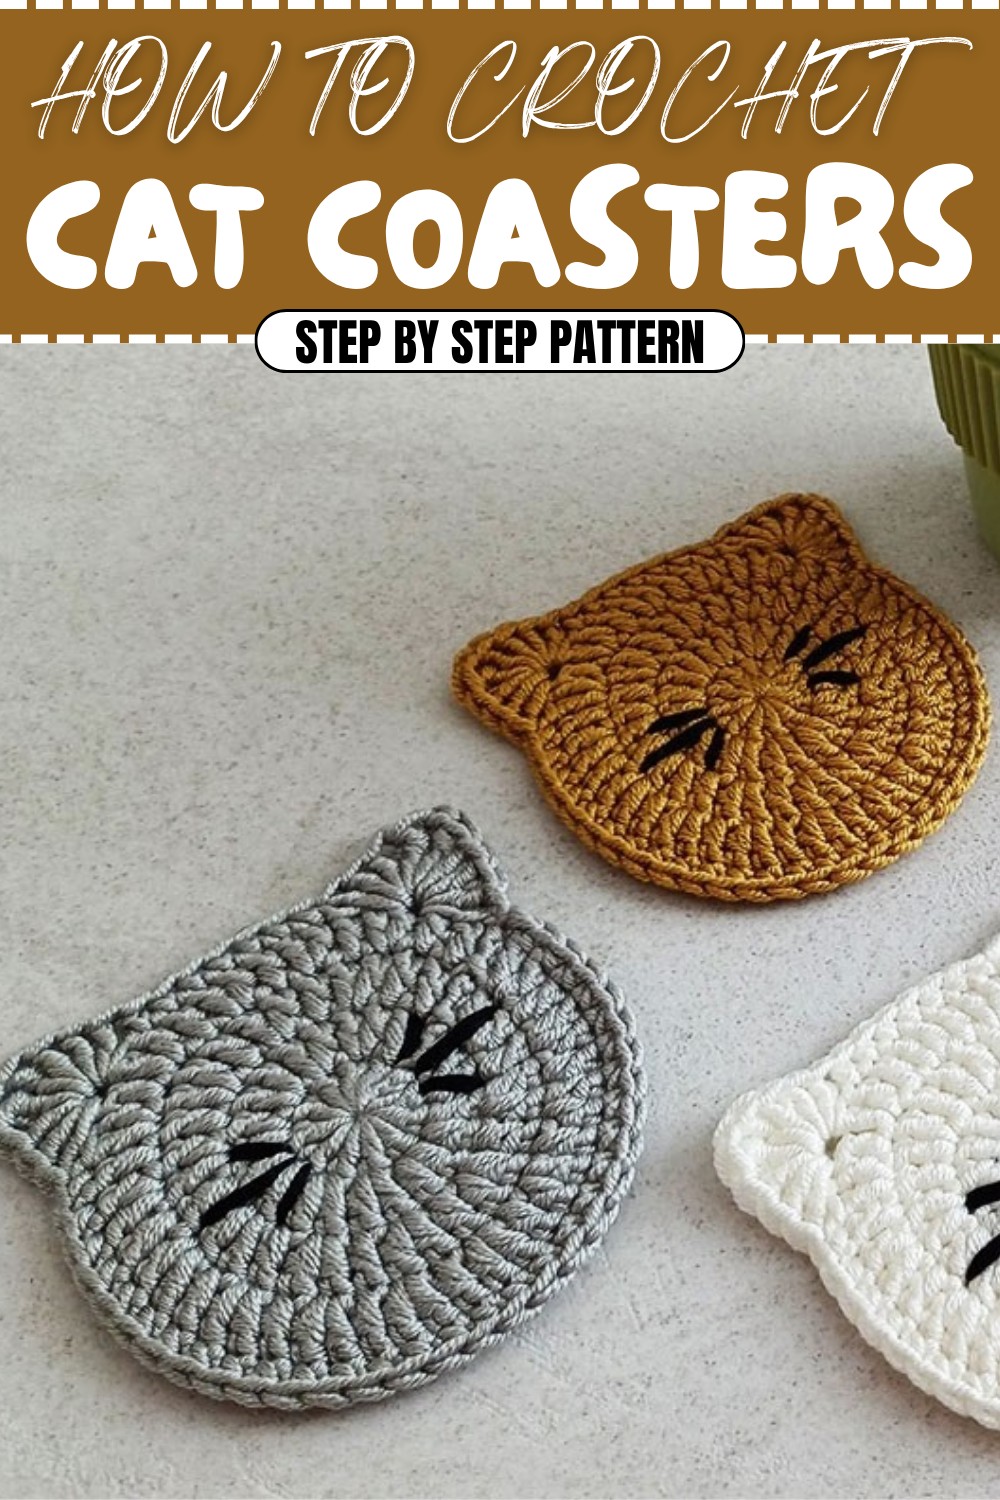
Easy and Quick Crochet Cat Coaster Pattern for Beginners
Make every sip special with the Free Crochet Cat Coaster Pattern for fun, cozy cat coasters perfect for gifting or sharing.
Adding handmade accents to your home can bring a special touch of warmth and personality, and this project is a perfect example. With a 3 mm crochet hook and soft acrylic yarn, you’ll create an adorable cat-shaped coaster that’s both cute and functional. The pattern begins with a magic yarn ring and uses rows of double crochet stitches to form a sturdy and textured base, making it easy for beginners to follow and enjoy.
How You Can Easily Crochet Free Cat Coaster Pattern for Every Mug
Throughout the project, you’ll work with special stitches like triple crochet, chains, and slip stitches, which help to shape charming details such as the cat’s ears and paws. The instructions guide you step-by-step, starting with foundation chains, followed by double crochets that define the body, and then cleverly incorporating triple crochets and chains for the finer facial features. Finishing with single crochet edging and slip stitch accents gives your coaster a clean and polished finish.
What Else Can You Crochet?
After mastering this pattern, you’ll find many other creative projects within reach. The combination of stitches here is ideal for crocheting different animal coasters, like owls or puppies, and can be adapted for small placemats or fun kitchen décor. These techniques also lend themselves well to making potholders, decorative appliqués for clothing, or even small wall hangings. This cozy cat coaster is just the beginning of many enjoyable and useful crochet projects!
Crochet Pattern: Beginner-Friendly Decorative Circle
This project is a simple decorative circle pattern, great for beginners or anyone eager to practice basic crochet stitches. By starting with a magic ring and working rounds of increasing double crochets (dc) combined with decorative edges, you’ll create a beautiful circular motif that can serve as a coaster, appliqué, or decorative element in other projects. The pattern also introduces triple crochet (tr) for added texture.
Here’s what this project teaches:
- Creating and working with a magic ring.
- Mastering double crochet increases to build circular shapes.
- Adding a decorative finish using triple crochet and single crochet.
Skill Level & Terminology
- Skill Level: Beginner
- Terminology: This pattern uses US crochet terms.
Materials & Tools
To complete the pattern, you’ll need:
- Hook: 3mm crochet hook.
- Yarn: Acrylic yarn in any color of your choice (light/medium-weight works best).
- Scissors: For cutting yarn.
- Yarn Needle: For weaving in your ends.
Gauge
- Since this is a decorative piece, gauge is not critical. However, for reference:
Three completed rounds of the circle should measure approximately 10–12 cm in diameter, depending on tension and yarn weight.
Abbreviations List
Here are the stitches and symbols used in this pattern:
- ch: chain
- sl st: slip stitch
- sc: single crochet
- dc: double crochet
- tr: triple crochet
Special Stitch Instructions
- Magic Ring: The magic ring is a technique to create a tight, adjustable loop for starting crochet in the round. To create one, wrap yarn around your fingers to form a loop, insert the hook into the loop, yarn over, pull through, and secure with a starting chain.
Finished Size
The completed decorative circle will measure approximately 12–14 cm in diameter, depending on yarn weight and hook size.
The Pattern Itself
Getting Started: Magic Ring
- Create a magic ring to begin the base of the circle.
- Work Row 1 directly into the ring.
Explanation: The magic ring serves as the starting point for your circle and ensures a neat, finished look at the center.
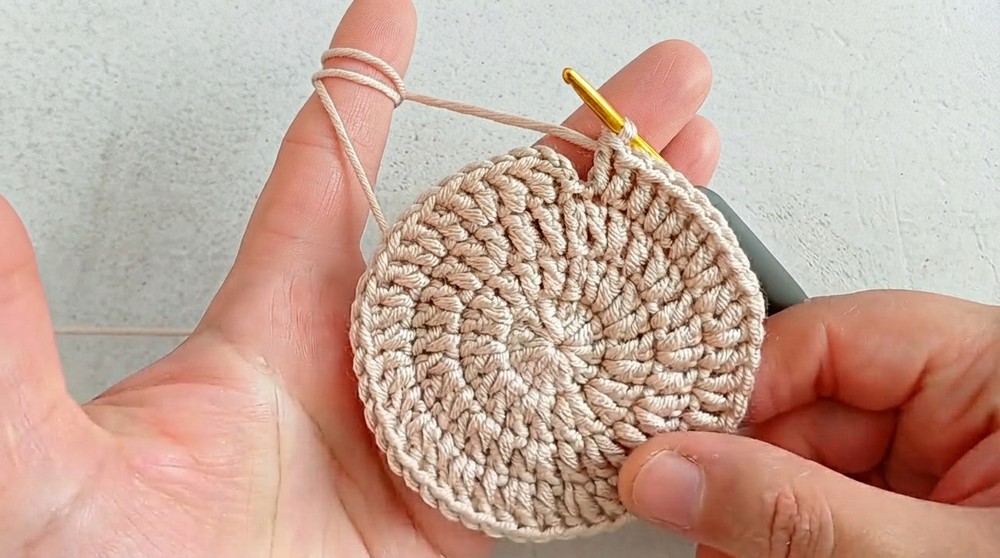
Step 1: Row 1 (Foundation Round)
- Ch 3 (counts as the first dc).
- Work 11 dc into the magic ring.
- Join with a sl st into the top of the initial chain-3.
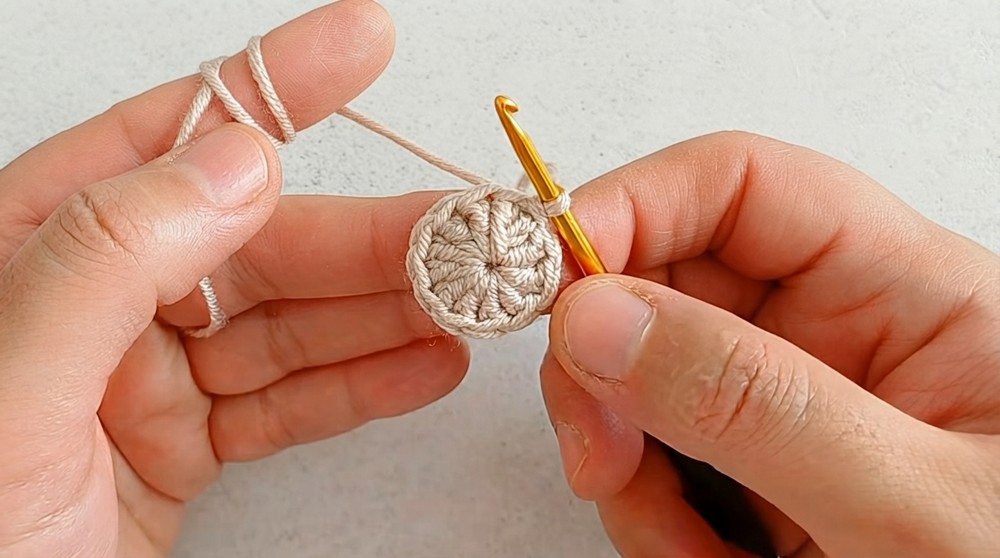
You will have a total of 12 stitches in this round.
Explanation: The foundation round forms the base of your circle. The chain-3 acts as a substitute for the first double crochet.
Step 2: Row 2 (Increasing the Circle)
- Ch 3 (counts as the first dc).
- Work 2 dc in each stitch around.
- Complete the round by joining with a sl st into the top of the chain-3.
You will have a total of 24 stitches in this round.
Explanation: By adding two dc in each stitch, the circle grows evenly. This is the foundation for achieving a flat circle.
Step 3: Row 3 (More Increases)
- Ch 3 (counts as the first dc).
- Work the following pattern around the circle:
- 2 dc in the first stitch, then 1 dc in the next stitch.
Repeat this pattern (2 dc, 1 dc) until the end of the round.
- 2 dc in the first stitch, then 1 dc in the next stitch.
- Join with a sl st into the top of the chain-3.
You will have 36 stitches by completing this round.
Explanation: This round introduces staggered increases, alternating two dc and one dc to continue growing the circle evenly.
Step 4: Row 4 (Shaping the Circle with Texture)
- Ch 3 (counts as the first dc).
- Work the following sequence around the circle:
- 2 dc in the first stitch, then 1 dc in the next stitch.
Repeat the pattern (2 dc, 1 dc) to complete this round.
- 2 dc in the first stitch, then 1 dc in the next stitch.
- Join with a sl st into the top of the chain-3.
This round also has 36 stitches, but the texture gets accentuated.
Explanation: Even though this is a repeat of the previous round, it helps create a visually balanced structure for the circle.
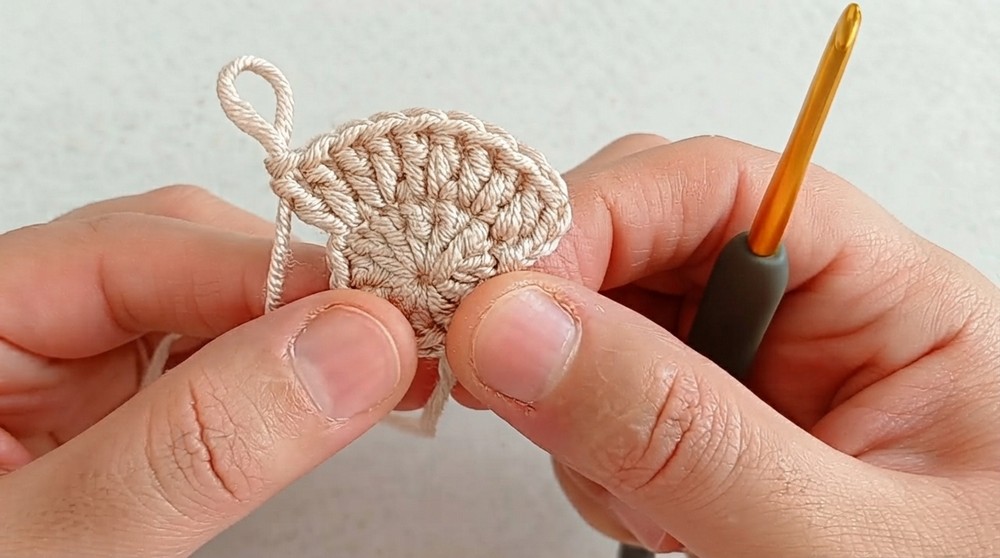
Step 5: Decorative Edges
- In the 3rd stitch of the current row, work:
- 1 tr, ch 1, 1 tr, followed by 3 dc.
- Skip two stitches, and continue working this pattern around the circle to form small triangular designs.
- After completing the round, secure by joining with a sl st into the base of the first tr.
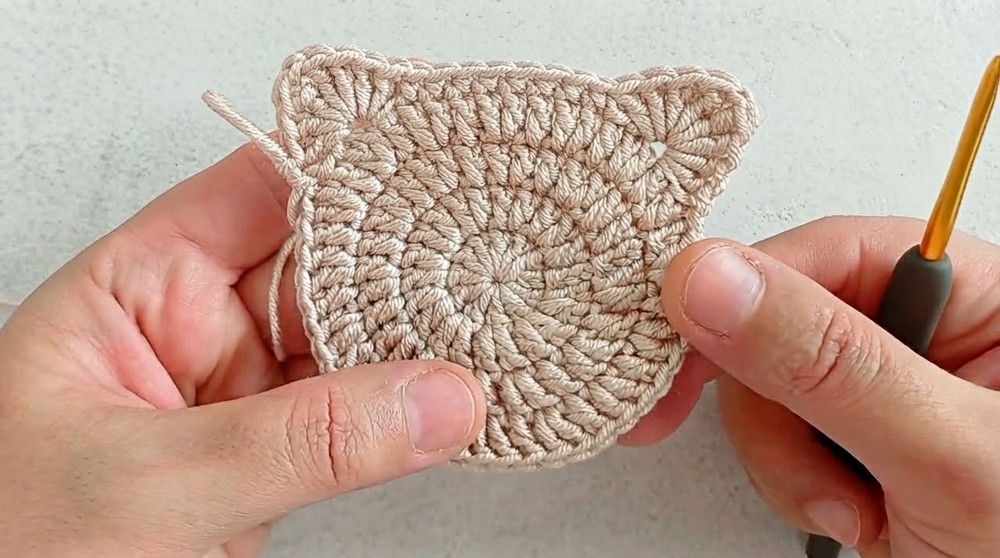
Explanation: Special decorative edges like this add textural variety and serve as a nice, eye-catching finish to your circle. Be sure to space your stitches evenly!
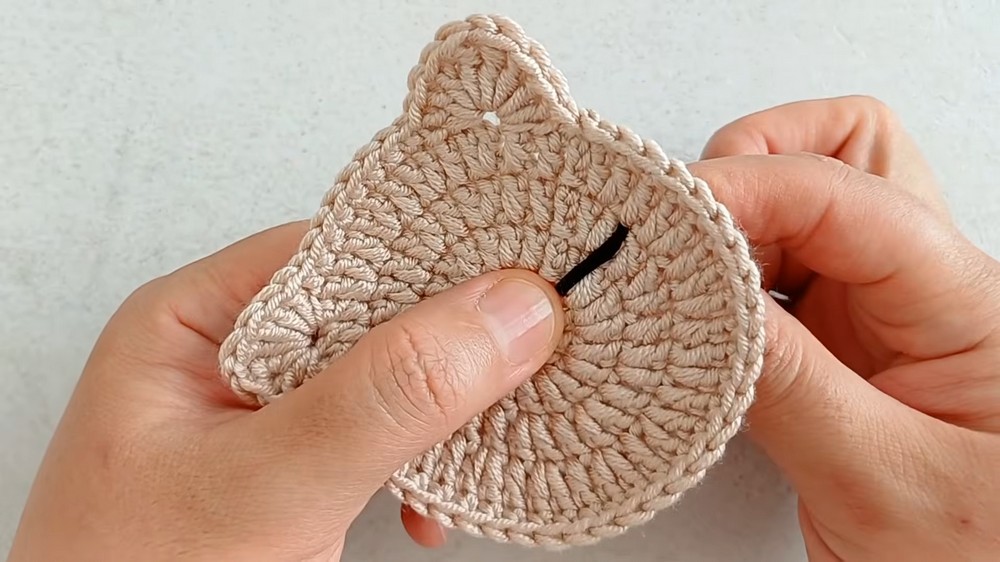
Step 6: Single Crochet Edging
- To create a tidy finish, work sc stitches around the edge of the circle.
- When complete, join with a sl st, follow with ch 1, and fasten off.
Explanation: The single crochet edging cleans up the design, making the edges look complete and professional.
Assembly & Finishing
- Weave in Ends: Use a yarn needle to carefully weave in all loose ends.
- Block (Optional): Lightly block the piece to lay flat if needed.
- Use it as a coaster, attach to larger projects, or frame it as a decorative element.
What You’ll Learn from This Pattern
- The magic ring technique is an essential beginner skill, helping create a perfect, adjustable center for any circular piece.
- Working with increases teaches spatial understanding for maintaining proper shaping.
- This project introduces decorative edges, teaching how texture and unique finishing stitches can elevate even a simple design.
Why We Love This Pattern
This beginner-friendly circle is quick, versatile, and an ideal project for building confidence in crocheting in the round. Whether you’re learning for fun or want a practical piece, this pattern is a fantastic go-to. The ability to customize the edges and size gives you the freedom to experiment and grow as a crocheter—you're bound to be proud of the results!