
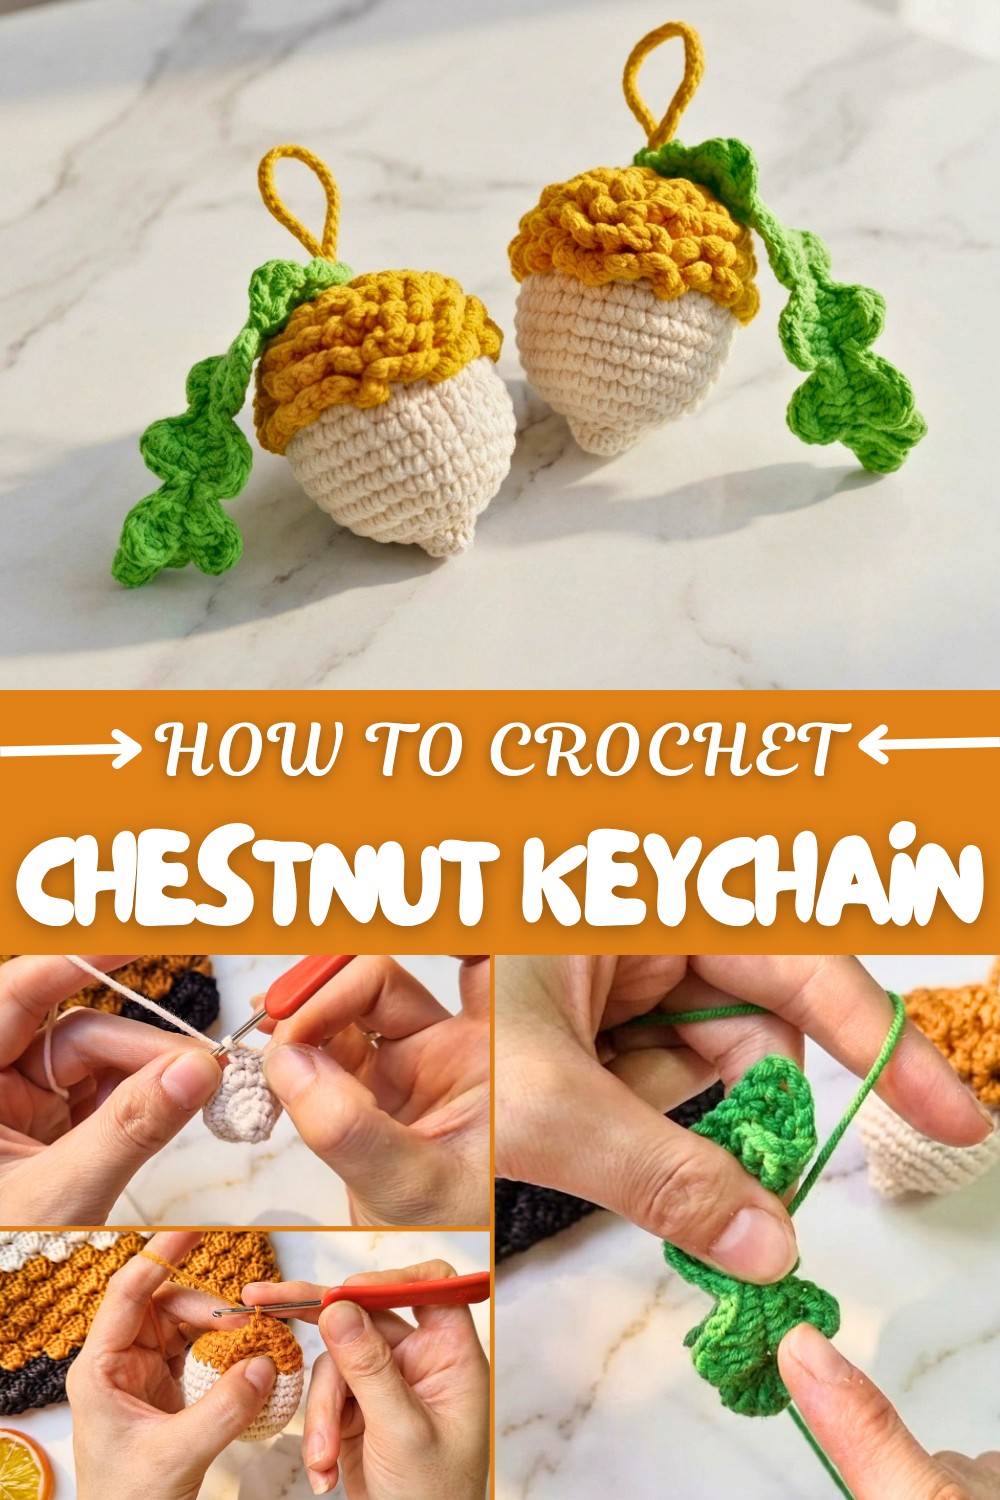
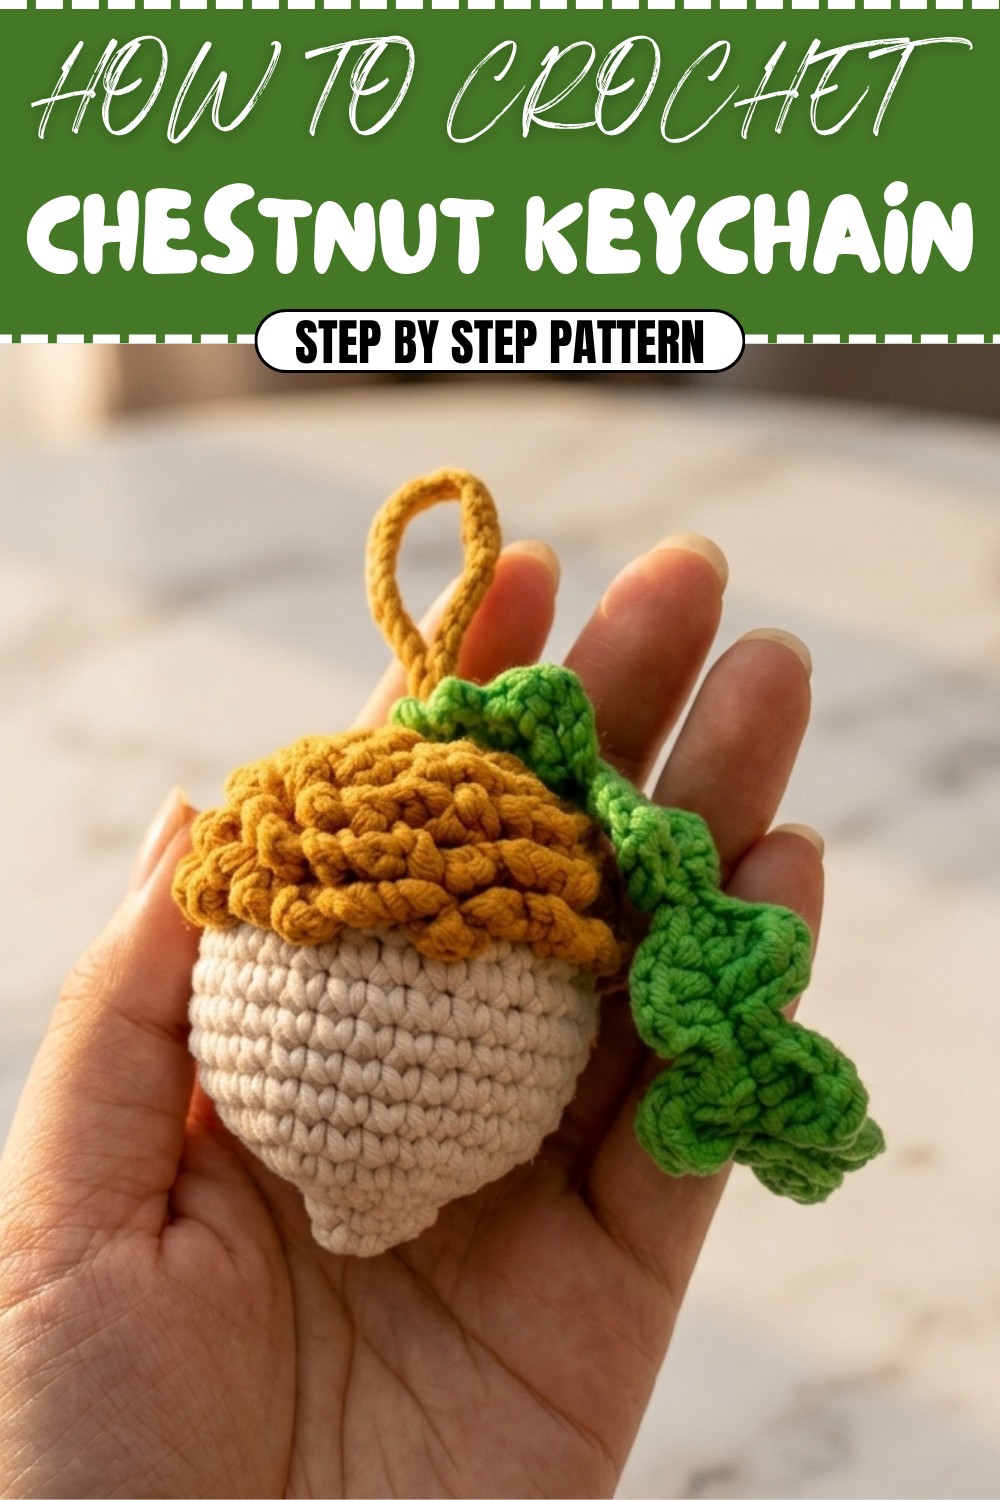
Crochet Chestnut Keychain Pattern for Chic Handmade Keepsakes
Upgrade your fall fashion using the Free Crochet Chestnut Keychain Pattern, designed for easy, eye-catching handmade flair.
There’s something truly special about turning simple yarn into a little piece of nature that you can carry with you every day! This crochet chestnut keychain brings a touch of autumn’s warmth right to your keys or bag. Using basic single crochet stitches worked in rounds, you’ll create a smooth, round chestnut shape that’s both soft and sturdy. The addition of leafy details made with half double crochet and double crochet stitches gives the design a charming, lifelike feel that’s fun and satisfying to make.
How to Crochet a Chestnut Keychain with Free Pattern for Autumn Charm
This pattern is designed with beginners in mind, making it easy to follow even if you’re new to crochet. You’ll practice key skills like increasing stitches, working in the round, and changing colors thoughtfully to add depth and character to your chestnut. The tactile texture you create with these stitches not only makes your keychain visually appealing but also durable enough for everyday use.
What Else Can You Crochet
After making this chestnut keychain, you’ll be ready to explore more delightful nature-inspired projects using the same stitches and techniques. Try creating tiny acorns, leaves, or pine cones to form a cute miniature forest collection. These little crochet charms make perfect decorations, gift toppers, or personalized keychains. You can also use the skills you’ve learned here to design cozy appliqués for scarves, hats, or home décor. This pattern opens the door to endless creative possibilities in your crochet journey!
Chestnut Keychain Pattern
Welcome to this crochet pattern for creating a Chestnut Keychain pattern. This project combines simple crochet techniques to create an elegant and versatile piece that can serve as a functional keychain or an eye-catching decoration. Whether you're a hobbyist or a beginner, this pattern will guide you step-by-step through the process.
Skill Level & Terminology
- Skill Level: Beginner
- Terminology: US Crochet Terms
Materials & Tools
- Yarn: LM CON 125g (or any medium-weight yarn of your choice)
- Hook Size: 2.5mm crochet hook
- Other Tools: Scissors, darning needle, and optional stuffing (e.g., cotton or polyester fiber).
- Optional: Beads for embellishment
Gauge
- Gauge is optional for this project. However, if you'd like a specific size, aim for 6 single crochet stitches (sc) per inch with the 2.5mm crochet hook.
Abbreviations List
- ch: Chain
- sc: Single Crochet
- sl st: Slip Stitch
- inc: Increase (2 sc in the same stitch)
- dec: Decrease (Single crochet two stitches together)
- hdc: Half Double Crochet
- dc: Double Crochet
- tr: Treble Crochet
Special Stitch Instructions
- Increase (inc): Work 2 single crochets in the same stitch.
- Decrease (dec): Insert the hook into the next stitch, pull up a loop. Insert the hook into the following stitch, pull up another loop. Yarn over and pull through all loops.
Finished Size
- Ball: Approximately 4cm (1.5 inches) in diameter (depending on yarn and stuffing).
- Entire Keychain Length (including leaf): Approximately 8–10cm (3–4 inches).
The Pattern Itself
Note for Beginners: If you prefer reading text instructions, scroll to the summary after each section.
Step 1: Create the Base Circle
- Make a magic ring.
- Round 1: Work 6 sc into the magic ring. Pull the ring tight and sl st to the first sc to close. (6 sts)
- Round 2: Work 2 sc in each stitch (inc) around. (12 sts)
- Round 3: (1 sc, inc) in each stitch around. (18 sts)
- Round 4: (2 sc, inc) in each stitch around. (24 sts)
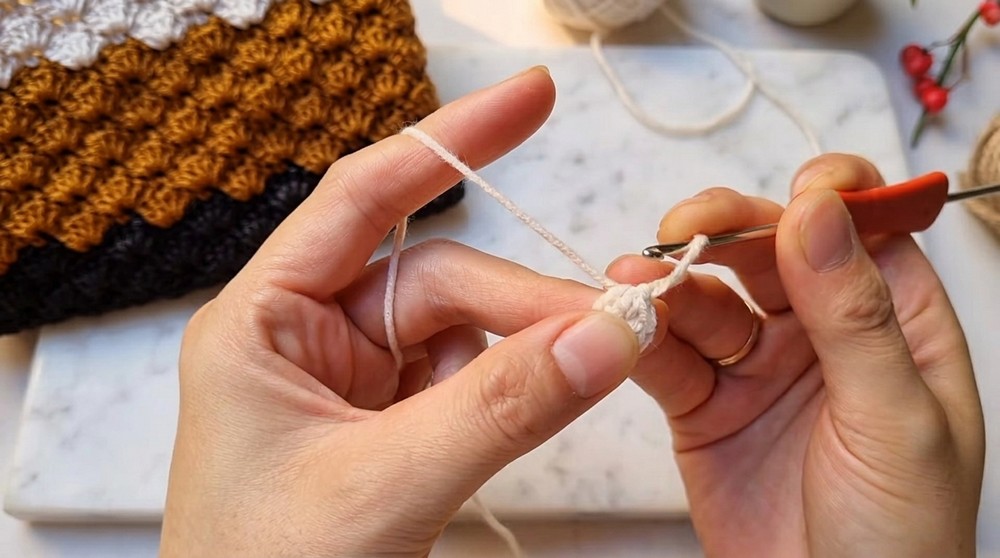
Summary: Start with a magic circle and expand it to a firm base circle. Adjust the tightness of your stitches to ensure durability for a keychain.
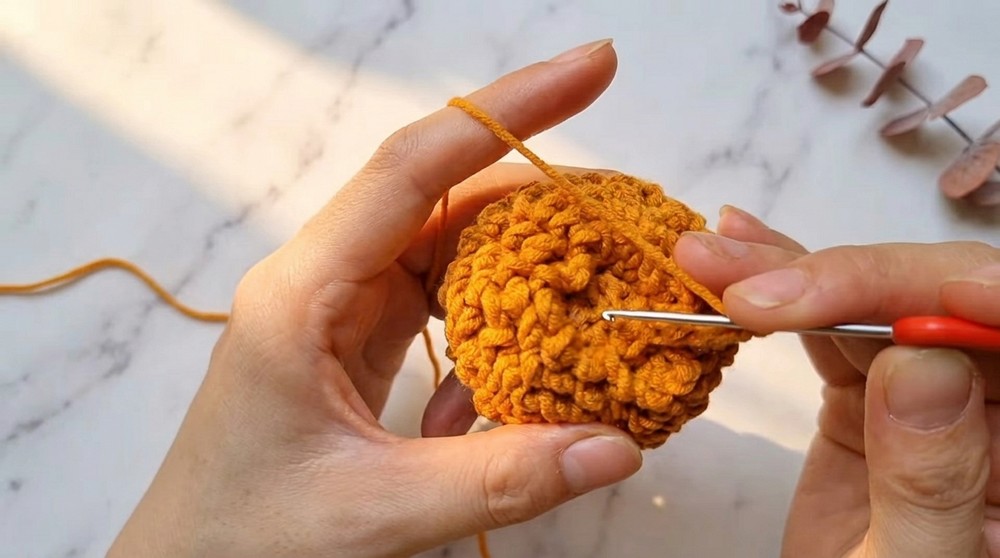
Step 2: Build the Sphere
- Rounds 5–9: Sc in each stitch around. No increases. (24 sts)
- Begin stuffing your ball with fiber filling. Add a small amount and adjust as you continue.
- Round 10: (2 sc, dec) around. (18 sts)
- Round 11: (1 sc, dec) around. (12 sts)
- Round 12: (dec) around. (6 sts)
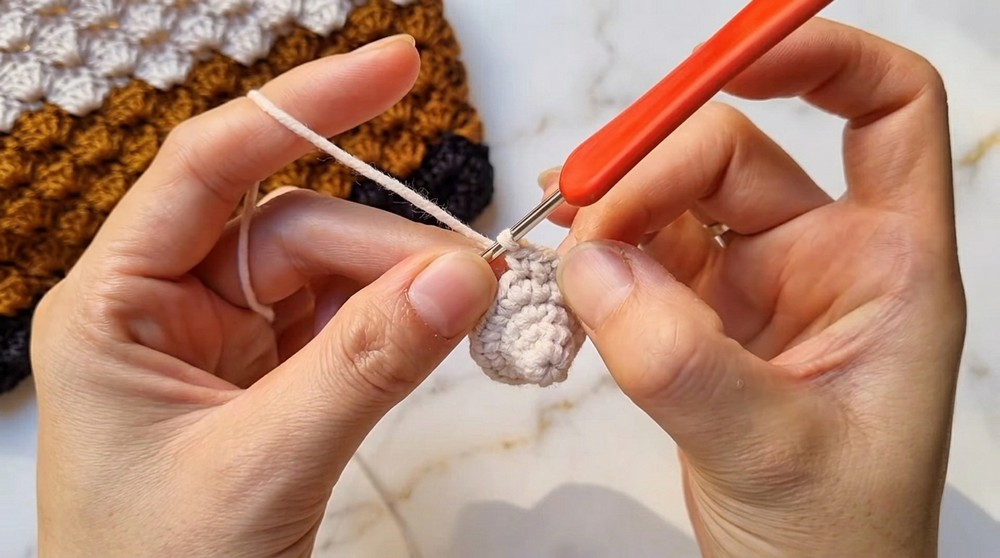
Finish off by pulling the yarn tail tight to close the sphere.
Summary: Build the body of the bead by crocheting evenly, stuffing firmly, and gradually decreasing to close the sphere.
Step 3: Add Details to the Bead
- Attach the second yarn color. Use a slip knot and join at the back of the bead.
- Crochet 3 sc into one stitch, followed by a slip stitch into the next. Repeat around to create decorative ridges.
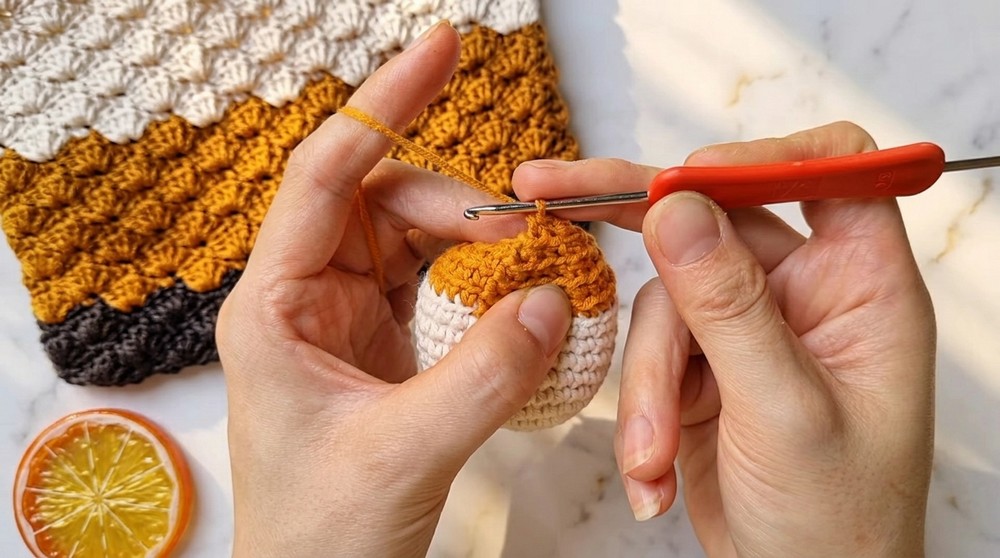
Summary: Enhance the bead's surface by adding textured ridges. Experiment with colors to create a vibrant look.
Step 4: Create the Leaf
- Create a foundation chain of 24 chains (ch).
- Work back along the chain using the following sequence:
- 1 sc in 2nd ch from hook
- 1 hdc in next ch
- 1 dc in next ch
- 1 tr in next ch
- Add a picot (ch 4, sl st into first ch) for the leaf tip.
- Continue:
- 1 tr in next ch
- 1 dc in next ch
- 1 hdc in next ch
- 1 sc in next ch
- Turn to the other side of the chain, and repeat the pattern symmetrically to form the other half of the leaf.
- Finish off, leaving a long tail for sewing.

Summary: The leaf starts with a long chain and builds symmetry by mirroring stitches on both sides of the chain.
Step 5: Assembly
- Attach the bead:
- Thread the bead with a strong cord through the center. Secure tightly to avoid loosening.
- Attach the leaf:
- Use the long tail on the leaf to sew it securely to the bead.
- Add a keychain attachment:
- Create a 30-chain loop, fold it in half, and sew to the top of the bead.
Summary: Assemble the parts with precise stitching to ensure stability. This is the final step where the project takes its shape.
Optional Embellishments
- Thread small decorative beads into the yarn loop for an added touch.
- Use metallic or bright-colored yarn for the leaf to make it pop!
Assembly & Finishing
- Stuffing: Ensure the bead is tightly stuffed for structure. Avoid overstuffing, as it may deform the shape.
- Sewing: Use a darning needle for carefully attaching the leaf and yarn loops. This helps avoid fraying or uneven joins.
- Trimming: Cut off any excess yarn after securing knots and hiding yarn tails.
Conclusion
This Split Bead Keychain with Leaf uses simple stitches—single crochet, slip stitch, and basic increases/decreases—to create a delightful piece. Whether used as a keychain or decorative charm, it’s sure to bring personality to any space.
If you're new to crochet, consider practicing each stitch on a small swatch before starting the project. And don’t forget—personalize the look with unique yarn colors and embellishments!