
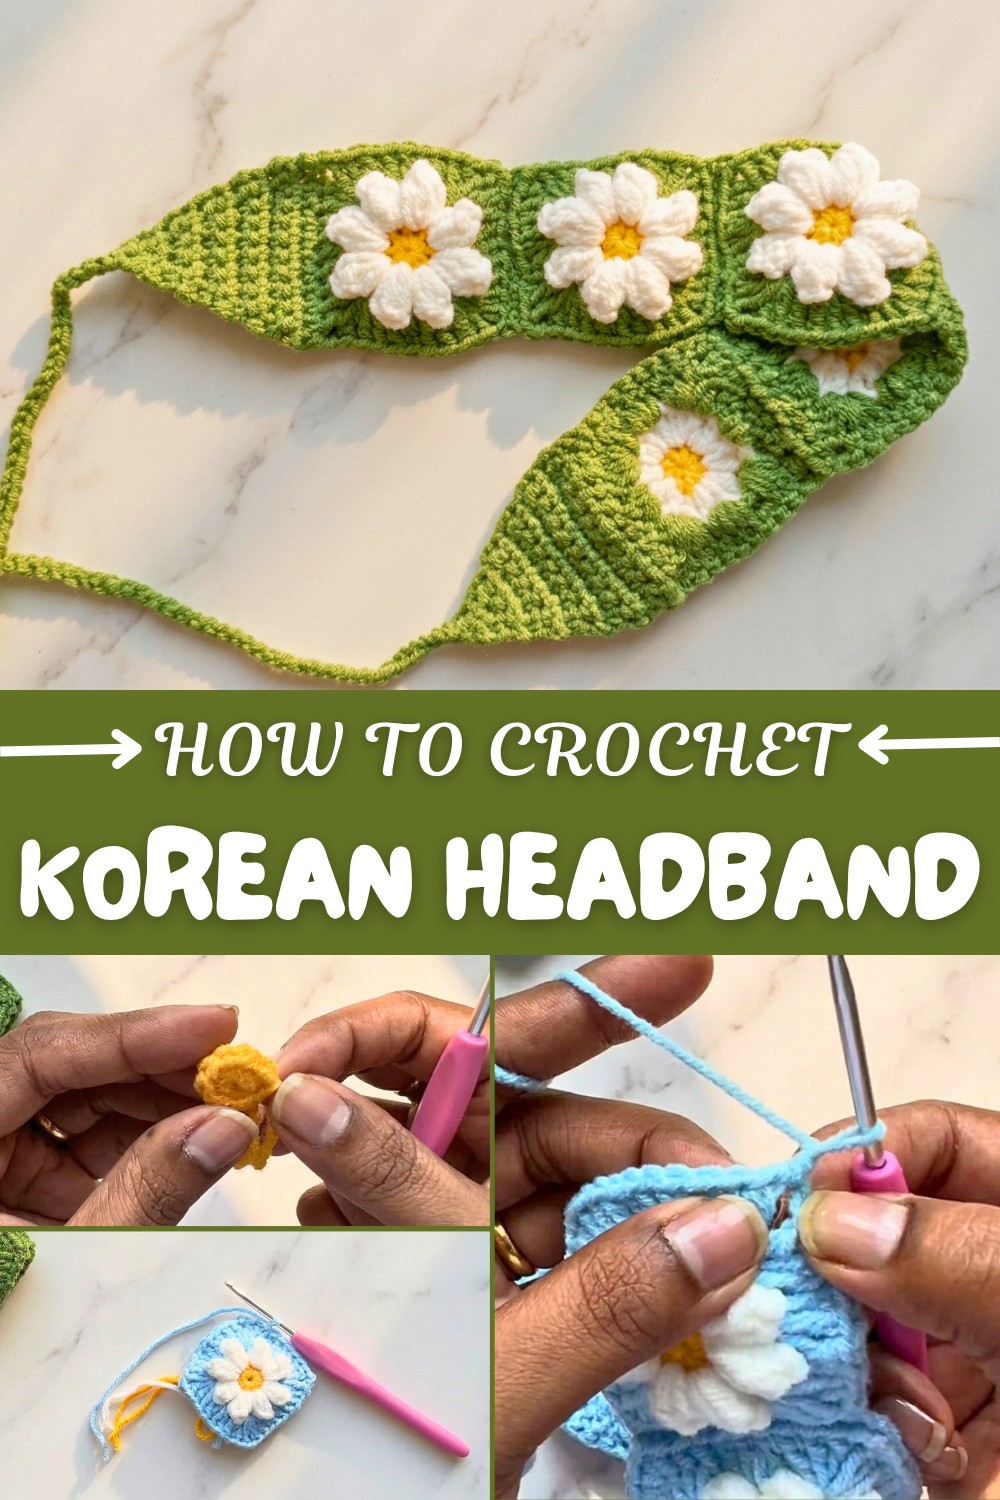
Modern Crochet Korean Headband Pattern for Everyday Looks
Upgrade your accessory game using a Free Crochet Korean Headband Pattern, perfect for adding a cute, cultural touch to your wardrobe.
Crocheting something beautiful with just yarn and a hook can be so satisfying, especially when it turns into a lovely accessory you can wear every day. This charming headband is simple to make and uses basic crochet stitches like single crochet, double crochet, and slip stitch. These stitches work together to form textured squares and delicate flower petals that add a feminine touch to the design. With just a few colors and a 3mm crochet hook, you can create this soft, stretchy headband that feels comfortable and looks stylish.
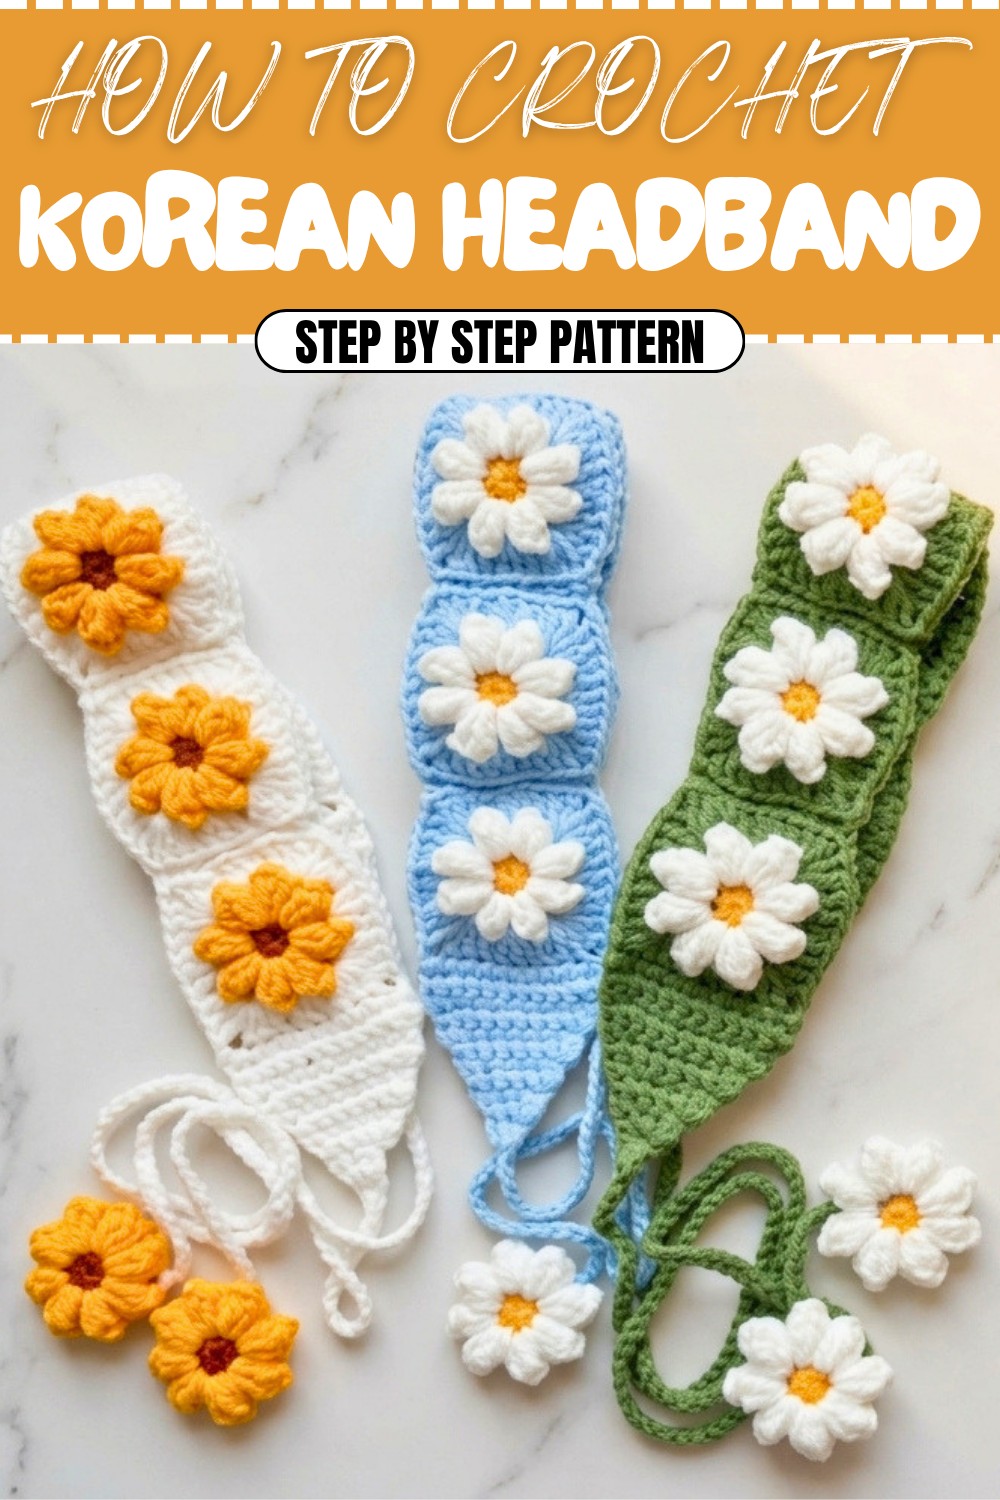
Creative Crochet Korean Headband Pattern Free Step-by-Step Fashion Tips
The process starts with crafting small flower motifs beginning from a magic circle and building up petals using double crochet clusters. These flowers then become the centerpieces of the headband. You’ll turn them into squares by working around the petals with double crochets and chain spaces, shaping the structure and creating neat corners. After making multiple squares, you join them together by stitching through the back loops for a clean finish. The headband is finished by crocheting long rectangular ties with decreases, allowing you to adjust the size or use it as a belt if you prefer.
One great thing about this pattern is the versatility of the stitches you’ll learn. Single crochet and double crochet are foundational stitches in crochet, giving you the skills to move on to all sorts of other projects. Once you have mastered making the flower squares and joining them, you can easily adapt this technique to create different accessories or home decor. For instance, you could make cozy scarves, decorative blankets, or cute little coasters. Playing with colors and yarn textures can add your own personal flair, making each creation truly unique and special.
Crochet Pattern: Korean-Inspired Headband with Flowers
This Korean-inspired headband with attached flowers is both fashionable and easy to make! It’s a beginner-friendly project that allows you to experiment with colors, enhance your crochet skills, and create a beautiful accessory for yourself or to gift someone. The project involves basic stitches like single crochet (sc), double crochet (dc), slip stitches (sl st), and requires assembling small flowers into squares for the final piece.
This guide will walk you through step-by-step instructions to create the headband and attach decorative flowers, ensuring a polished and professional-looking result.
Skill Level & Terminology
- Skill Level: Beginner to Intermediate
- Crochet Terminology: US terms
Materials & Tools
- Yarn:
- Blended cotton or wool yarn in coordinating colors:
- Yellow: For the flower center
- White: For the flower petals
- Sky Blue: For the square base and band
- Blended cotton or wool yarn in coordinating colors:
- Hook Size: 2.5 mm or 3.0 mm (appropriate for 4-ply yarn).
- Tapestry Needle: For sewing and weaving in ends.
- Scissors
Gauge
Gauge is not critical for this project. However, ensure your stitches are tight but flexible to maintain the shape of the squares and petals.
Abbreviations List
- ch: Chain
- sl st: Slip Stitch
- sc: Single Crochet
- dc: Double Crochet
Special Stitch Instructions
Magic Circle:
- Wrap the yarn over your index finger to form a loop (crossing over to create an "X").
- Insert your hook into the loop, pull up a loop, yarn over, and pull through to secure the circle.
Double Crochet (dc):
- Yarn over, insert the hook into the required stitch or space, pull up a loop (three loops on hook).
- Yarn over and pull through two loops.
- Yarn over again and pull through the remaining two loops on the hook.
Finished Size
With the suggested yarn and hook, the finished headband will measure approximately 20–22 inches (adjustable) depending on the number of squares and band length.
The Pattern Itself
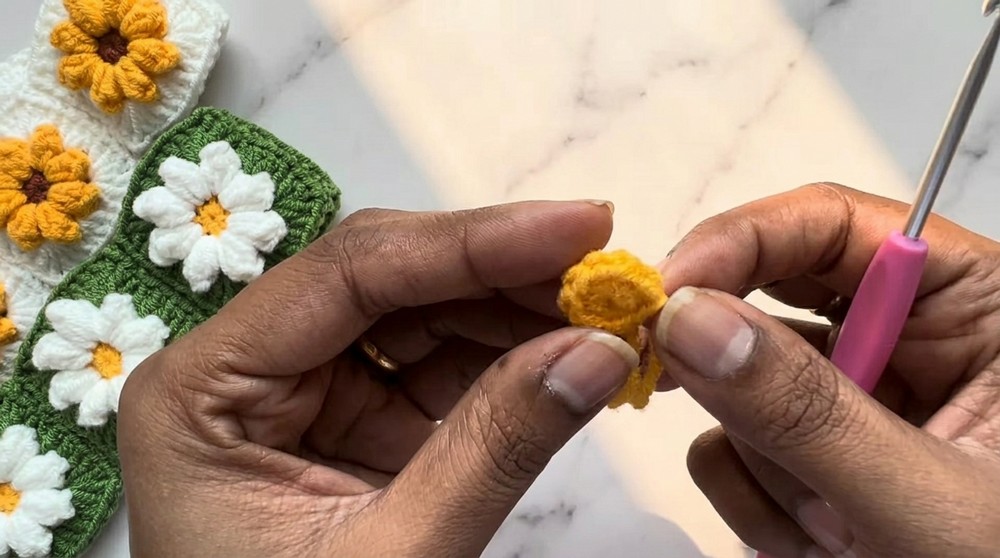
Step 1: Magic Circle and Flower Center
- Magic Circle:
- Start with a yellow yarn and create a magic circle.
- Round 1:
- Work 8 single crochets (sc) into the magic circle. Pull the tail to tighten the center. [8 stitches]
- Slip Stitch to Join:
- Insert your hook into the first single crochet, yarn over, and pull through all loops to complete the round.
- Fasten Off:
- Chain 1 and cut the yellow yarn, leaving a short tail for weaving in later.
Tip: This forms the foundation of the flower. Ensure the circle is tightened to create a neat center.
Step 2: Flower Petals
- Attach White Yarn:
- Insert your hook into any single crochet with the white yarn, then pull up a loop and tie a simple knot to secure.
- Round 2:
- Chain 2 (counts as the first dc), work 3 double crochets in the same stitch (total of 4 dc).
- Loosen your loop and remove the hook. Insert the hook into the base of the first petal (first chain stitch), pull the loose loop through, and tighten to create the petal.
- Chain 2 to move to the next stitch.
- Repeat Around to Form 8 Petals:
- In each single crochet from Round 1: Work 4 double crochets, tighten the petal as described above, and chain 2. [8 petals total]
- Slip Stitch to Join:
- Insert into the base of the first petal and complete with a slip stitch. Chain 1 and fasten off.
Explanation: The white petals form a raised look with neat edges. All petals should be evenly spaced for symmetry.

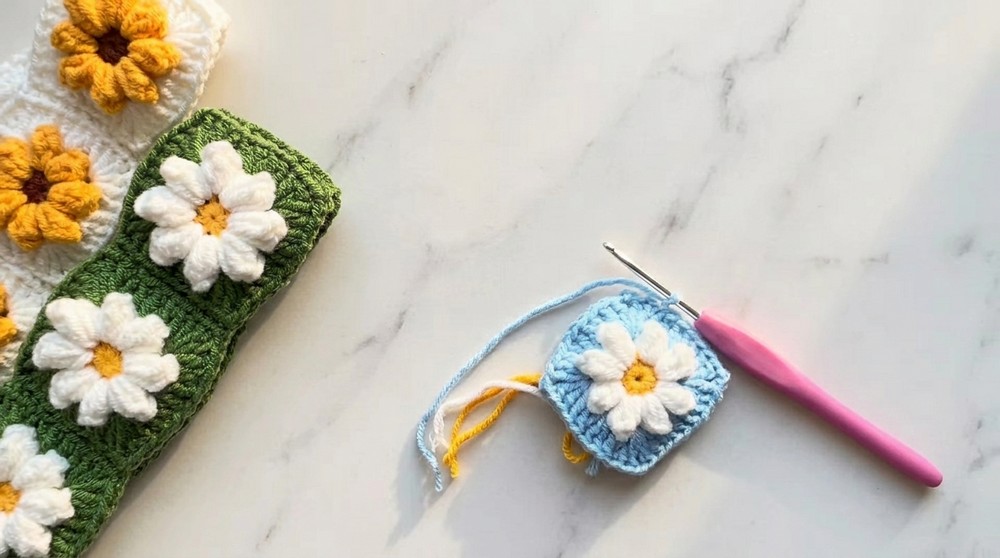
Step 3: Converting the Flower into a Square
- Attach Blue Yarn to Any Chain Gap:
- Secure the blue yarn in one of the chain-2 spaces between the petals by tying a knot.
- Round 3 (First Corner):
- Chain 2 (counts as 1 dc) and work 2 more double crochets in the same gap.
- Chain 2 (to form the corner) and work another 3 double crochets in the same gap.
- Next Gaps:
- In the next chain space: Work 3 double crochets only (no corner).
- Repeat Corner Formation:
- Alternate between 3 dc in one gap and 3 dc, chain 2, 3 dc in the next gap to form corners for the square.
- Join the Square:
- Slip stitch into the starting double crochet, chain 1, and fasten off.
- Weave in Ends:
- Hide all loose ends into the stitches using a tapestry needle.
Tip: This square will form part of the headband once multiple squares are joined together.
Step 4: Assembling the Squares
- Create 5 Squares:
- Repeat Steps 1–3 to create a total of 5 squares (or more for a longer band).
- Join Squares:
- Place two squares side-by-side with the edges aligned. Use the blue yarn and a tapestry needle to sew them together using the back loop only stitching technique.
- Knot securely, weave in ends, and trim excess yarn.
- Repeat until all squares are joined.
Explanation: Joining with the back loop creates seamless and sturdy square connections.
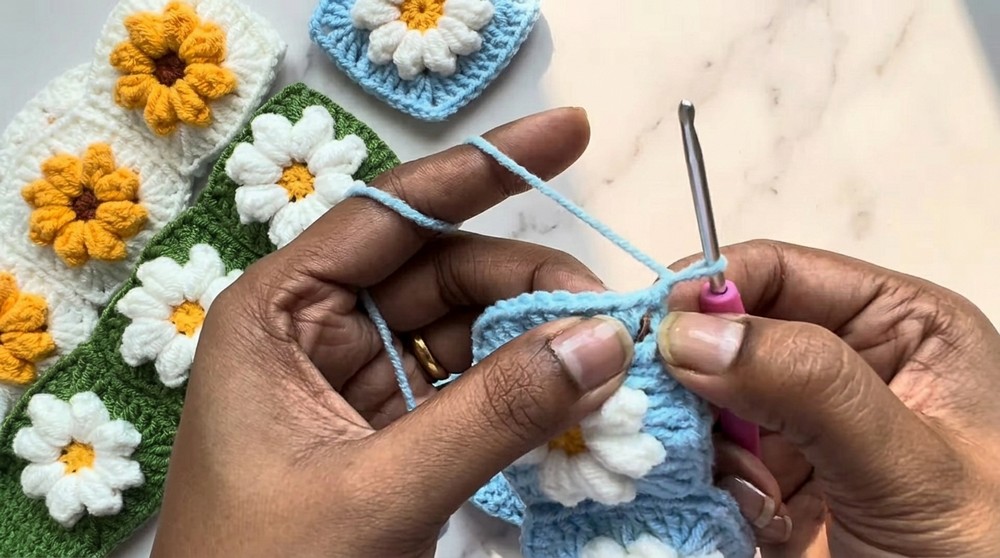
Step 5: Creating the Band Ties
- Attach Blue Yarn to One End Square:
- Tie a knot securely at one corner, insert your hook, and pull up a loop.
- First Row:
- Work 12 single crochets (sc) evenly across the edge of the square.
- Decrease for Triangle Shape:
- Chain 1, turn your work, sc decrease over the first two stitches. Then single crochet in the remaining stitches.
- Repeat this step each row until only 1 single crochet remains.
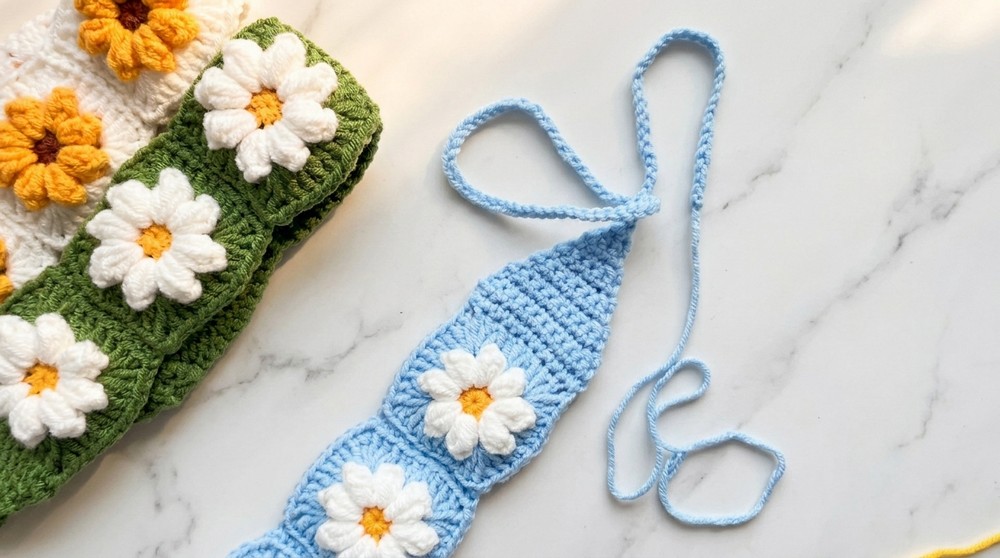
- Adding Length for the Tie:
- Chain 80 (or desired length for tying). Fasten off.
- Repeat:
- Repeat the same process on the other end of the headband.
Tip: The ties allow for easy adjustment and add a streamlined finish to the headband.
- Repeat the same process on the other end of the headband.
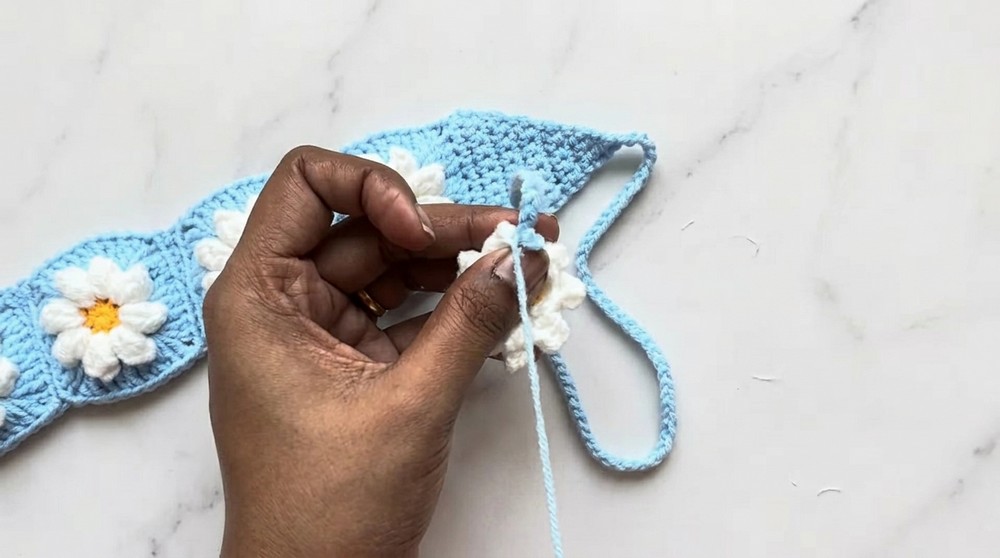
Assembly & Finishing
- Attach Flowers to Ends:
- Create small flowers following Steps 1–2. Use the tapestry needle to sew flowers securely onto each end of the tie.
- Final Touches:
- Check for loose ends and weave them into the squares or band for a neat finish.
- Style Your Headband:
- Your Korean-inspired headband is now complete! Adjust the ties for a snug fit and wear with pride.
Difficulties and Solutions
Difficulty: Maintaining an even shape for the squares.
- Solution: Work with consistent tension and use stitch markers to maintain clarity on stitch placement.
Difficulty: Joining squares neatly.
- Solution: Use the back-loop stitching method for clean edges and ensure corners align perfectly during assembly.
With careful attention to detail and some patience, you’ll achieve a professional finish!
Why I Love This Pattern
This headband combines functionality and style with an elegant flower design and customizable length. The granny-style square formation makes it ideal for practicing foundational crochet skills while exploring color combinations. Whether worn as an accessory or gifted, this pattern is always a charming and rewarding project.