
Free Coffee Cup Keychain Pattern with Sweet Textured Details
Brighten your accessories with a charming free crochet coffee cup keychain pattern perfect for adding cozy personality to your collection.
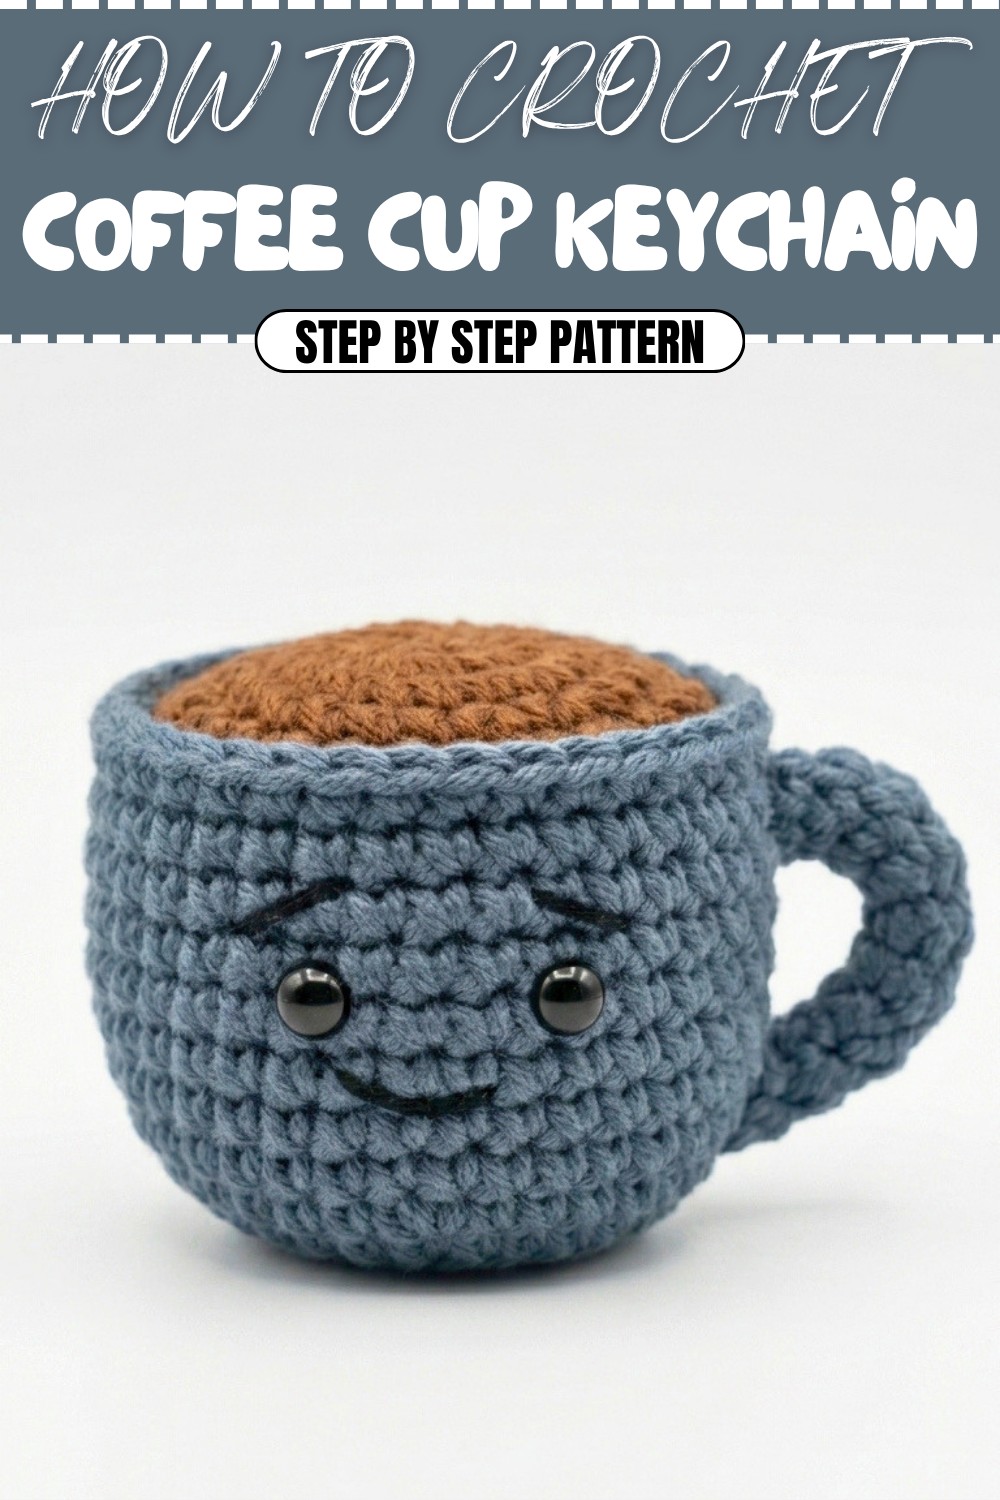
If you’re looking for a delightful and charming accessory to brighten your day, the free crochet coffee cup keychain pattern is just the thing! This little project transforms simple yarn into a cute, three-dimensional coffee cup that doubles as a bag charm, keychain, or even a tiny table decoration. With its rounded cup shape and a textured coffee surface on top, this piece combines playful form and cozy feel, making it extra appealing. What really makes it stand out are the attached 6 mm safety eyes and embroidered smiling face, which give the coffee cup a friendly personality.
Easy Free Coffee Cup Keychain Pattern for Beginner Crocheters
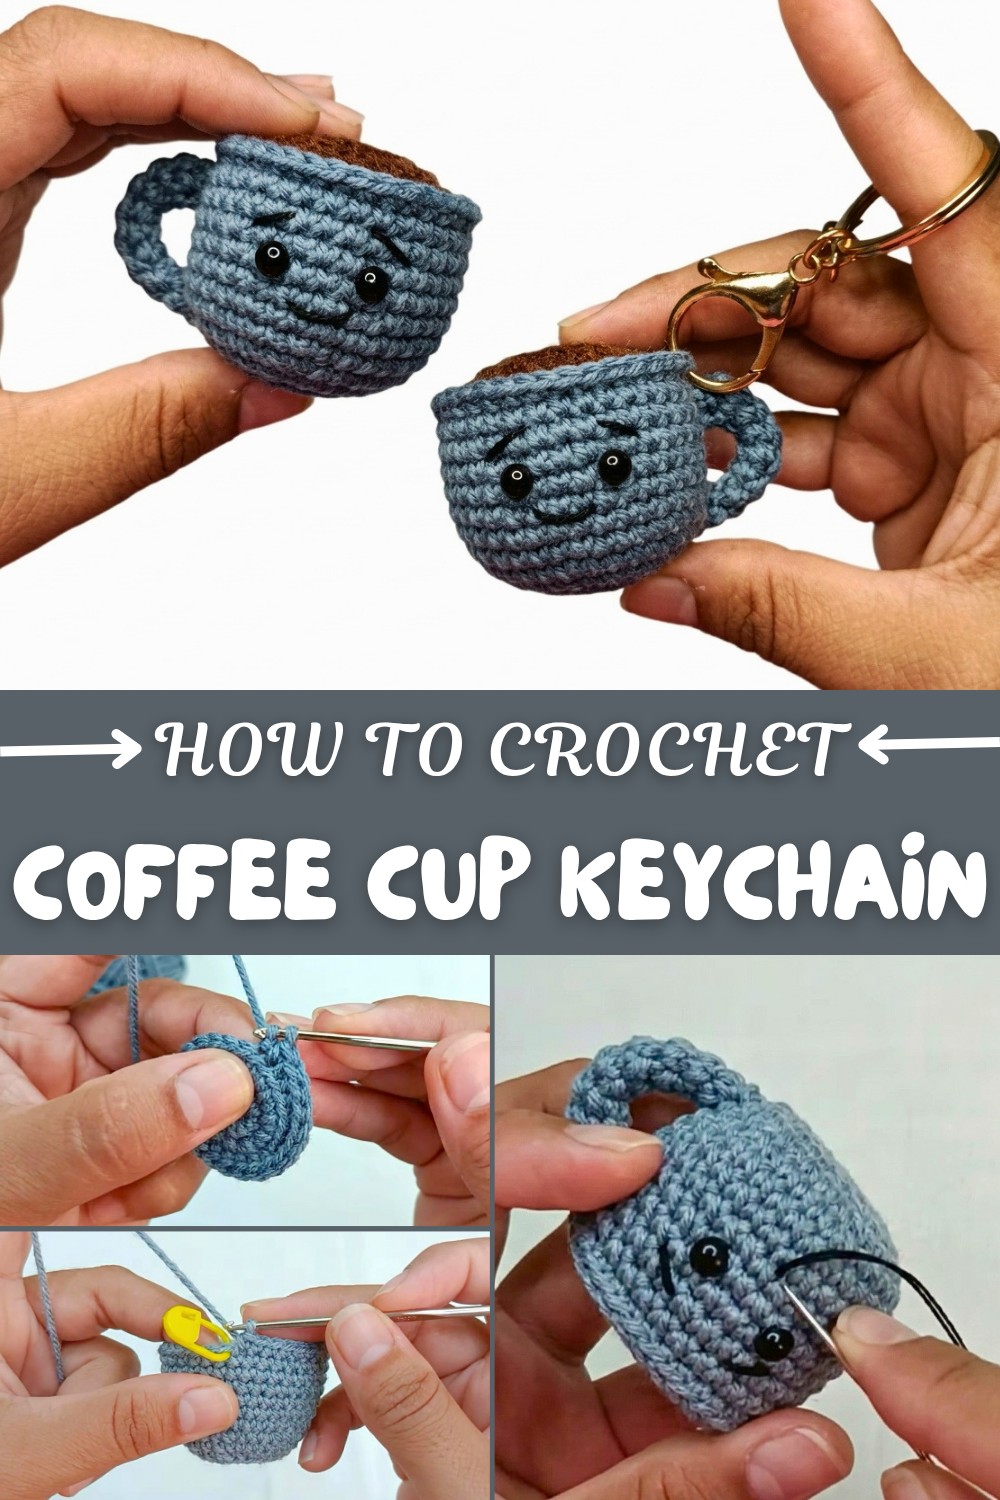
This pattern is perfect for anyone who loves quick, portable projects or wants to create heartfelt gifts for coffee enthusiasts. The finished size is compact—roughly 5.5 cm in diameter for the cup—but you can easily customize the handle length or stitch density by playing with hook sizes and yarn thickness. Construction involves crocheting the cup body and coffee part separately using a magic ring base, then joining them with single crochet stitches. Working some rounds in the back loops adds texture and subtle shaping, while the handle is formed with consistent single crochet rounds, offering stability and balance.
I was inspired by the idea of turning everyday warmth into a small keepsake, so I chose soft, smooth yarns that highlight the stitch texture without adding bulk. Cotton embroidery threads help add those cute facial details, making the coffee cup truly unique. This project makes wonderful gifts for birthdays, holidays, or just because. Feel free to experiment with different color combos or add charms to personalize yours—it’s a fun way to bring a bit of cozy charm wherever you go!
Crochet Coffee Cup Amigurumi Pattern
Summary
This step-by-step crochet pattern guides you in making a charming coffee cup that can be used as a bag accessory, keychain, or table décor. The finished soft cup features a realistic coffee “surface,” an attached handle, safety eyes, and embroidered facial details for a cute and expressive finish. With detailed, clear instructions, it is ideal for confident beginners or those with some experience in working in the round and basic shaping.
Measurements / Sizing (Optional Schematic)
- Finished Size: Approximately 7 cm (2.75 in) tall and 6 cm (2.4 in) across the rim (gauge and yarn will affect final size).
- Handle length: Approximately 5.5 cm (2.16 in).
Materials
- Yarn:
- Steel Grey yarn (cup and handle)
- Brown yarn (coffee surface)
- Crochet hooks: 1.90 mm (for cup/handle), 1.40 mm (for coffee surface) or sizes to meet gauge and suit your yarn
- Toy stuffing / fiberfill
- 6 mm safety eyes
- Cotton embroidery thread (for face details)
- Darning/tapestry needle
- Scissors
- Stitch markers
You’ll need white yarn for the cup, brown yarn for the coffee surface, 6 mm safety eyes, cotton thread for embroidery, and two crochet hooks (1.90 mm and 1.40 mm) for neat detail.
Skill Level
Advanced Beginner / Easy
Requires knowledge of working in the round, single crochet (sc), increases, decreases, magic ring, changing hook size, and simple sewing for assembly.
Pattern Notes
- Work rounds continuously unless otherwise instructed; use a stitch marker at the beginning of rounds.
- Use smaller hook for coffee "surface" for a neat and slightly tight fit on top of the cup.
- Changing hook sizes gives a more detailed, shaped effect without visible holes.
- When attaching the coffee to the cup, always crochet through both pieces for a secure join.
- Embroidery and eye placement can be adjusted for a custom look.
Gauge (and Stitch Pattern if applicable)
- Gauge is not critical for amigurumi, but tighter stitches prevent stuffing from showing through.
- Main stitch: single crochet (sc), worked in continuous spiral rounds.
- Stitches per round and total rounds determine proportions.
Stitch Abbreviations
- sc = single crochet
- inc = increase (2 sc in same stitch)
- sl st = slip stitch
- MR = magic ring
- ch = chain
- st(s) = stitch(es)
- BLO = back loop only
Special Stitches
- Magic Ring (MR): Make an adjustable loop and work the first round into it for a seamless start.
- Back Loop Only (BLO): Insert hook under only the back loop (furthest from you) of the stitch to create a subtle edge at the top rim.
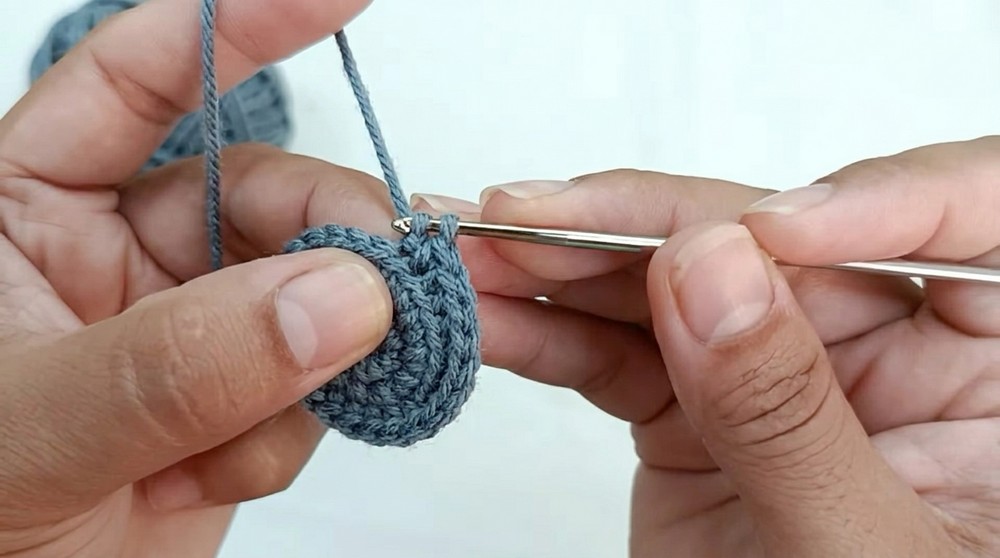
- Invisible Finish for closing: Use a tapestry needle and the last round’s stitches to close the round neatly.
The Crochet Pattern!
Cup (Main Body)
Use Steel Grey yarn and 1.90 mm hook:
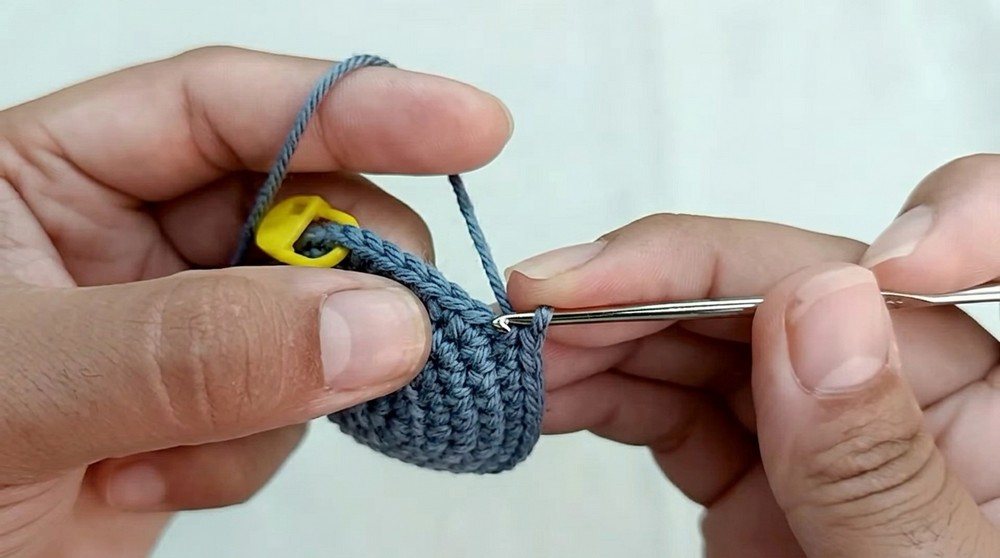
Round 1:
MR, ch 1, 6 sc in ring (6)
Round 2:
2 sc in each st around (inc in each st) (12)
Starting with a magic ring, you crochet six single stitches forming the cup’s base, gradually increasing stitches to shape a rounded body.
Round 3:
Inc in each st around (24)
Round 4:
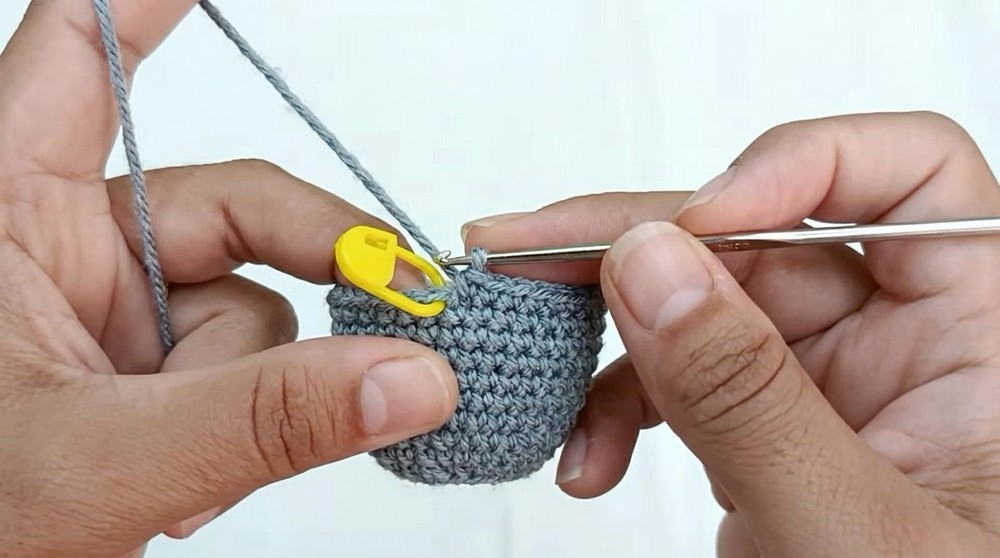
(Work in BLO) sc in each st around (24)
Round 5:
(Sc in next 3 sts, inc in next st) x 6 times (30)
Round 6:
(Sc in next 4 sts, inc in next st) x 6 times (36)
Rounds 7–13:
Sc in each st around (36)
(Total of 7 rounds, counting from round 7.)
Finish:
Sl st to next st, fasten off, leaving a long yarn tail for sewing later. Do not stuff yet.
Coffee Surface
Use brown yarn and 1.40 mm hook:
Round 1:
MR, ch 1, 6 sc in ring (6)
Round 2:
2 sc in each st around (12)
Round 3:
2 sc in each st around (24)
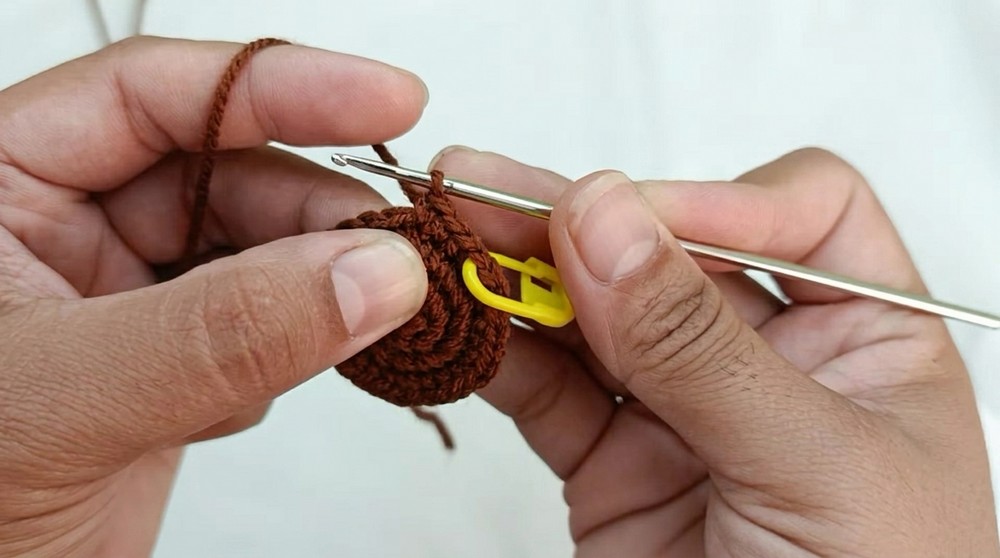
The textured coffee surface is made separately with brown yarn, then joined to the cup for a charming 3D look, with light stuffing added for soft structure.
Round 4:
(Sc in next 3 sts, inc in next st) x 6 times (30)
Round 5:
(Sc in next 4 sts, inc in next st) x 6 times (36)
Finish:
Sl st to next st, fasten off, leaving a long tail for joining.
Close last stitch neatly using needle (insert needle through both loops of next stitch, then back through first loop of last stitch) for an invisible join.
Weave in the tail.
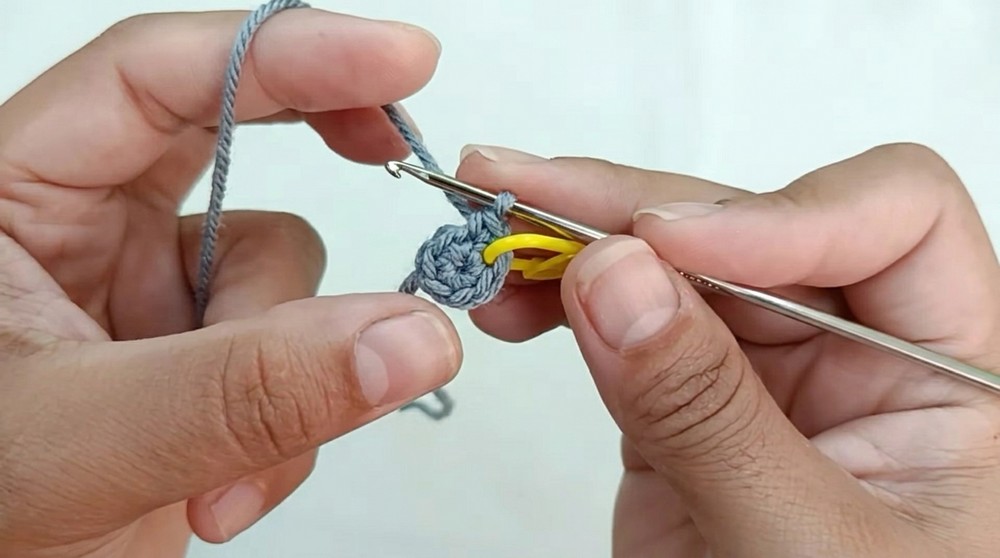
Assembly – Joining the Two Parts
- Place the coffee piece flat on top of the cup—the stitches should align.
- With the long yarn tail from the cup, crochet together through both loops of a cup stitch and through the back loop only of each corresponding coffee surface stitch; work sc all the way around to join both pieces securely, leaving a small opening for stuffing.
- Stuff cup firmly, shaping it evenly.
- Continue joining until closed.
- Sl st to finish, fasten off and hide yarn ends inside.
Handle
Steel Grey yarn & 1.90 mm hook:
Round 1:
MR, 5 sc in ring (5)
Rounds 2–9:
Sc in each st around (5 per round, total 8 rounds after MR)
Finish:
Fasten off, leaving a long tail.
Assembly:
Sew handle to the side of the cup—attach both ends securely, about halfway down the side.
The handle is crocheted as a narrow oval and sewn on securely. Placement of safety eyes between specific rounds adds personality, while embroidered eyebrows and a smiling mouth bring the face to life.
Facial Features & Final Details
- Place safety eyes between rounds 10 and 11, spaced with 3 stitches in between.
- Use cotton embroidery thread and needle to add:
- Eyebrows above the eyes as preferred.
- A small smiling mouth below the eyes.
- Weave in all ends. Shape cup, fluff out, and your smiling accessory is ready!
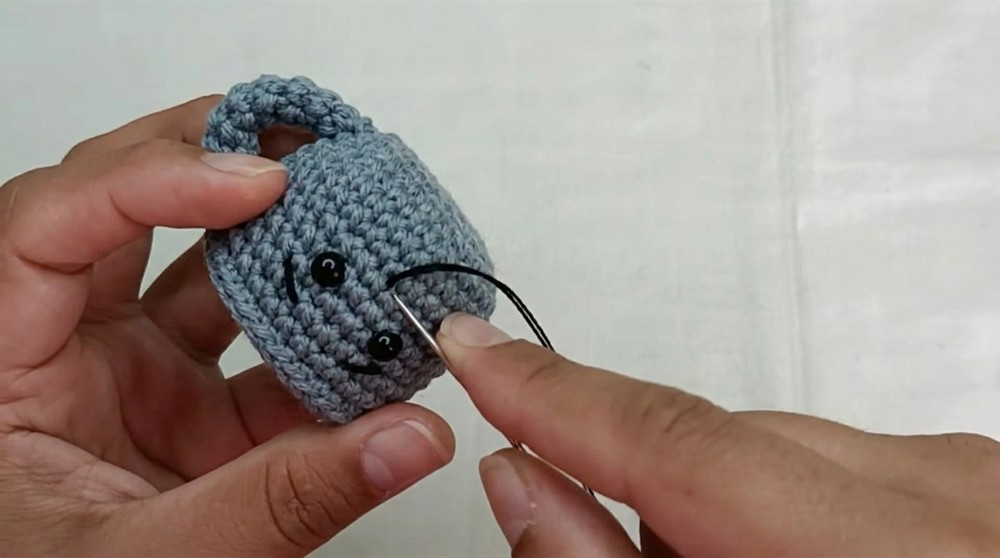
Finishing touches include weaving in ends and final adjustments. This cute and compact keychain makes a lovely handmade accessory or gift, combining simple techniques with creative flair.
Assembly & Finished Size
- Cup body: 13 rounds; base and walls worked in spiral.
- Coffee surface: Crochet as a flat circle; join to top using single crochet seams, stuff cup before completely closing.
- Handle: Eight small rounds worked in spiral; both ends sewn securely to side.
- Attach safety eyes firmly between rounds 10–11 with three stitches between their placement.
- Embroider mouth and brows with embroidery thread for an expressive and cute face.
- Finished amigurumi cup measures approximately 7 cm tall by 6 cm wide (excluding handle). Handle adds further width and cute detail.