
Free Crochet Gingerbread Man Pattern for Festive Flair
Spark holiday smiles using a free crochet gingerbread man pattern, perfect for ornaments, gifts, and memorable handmade moments.
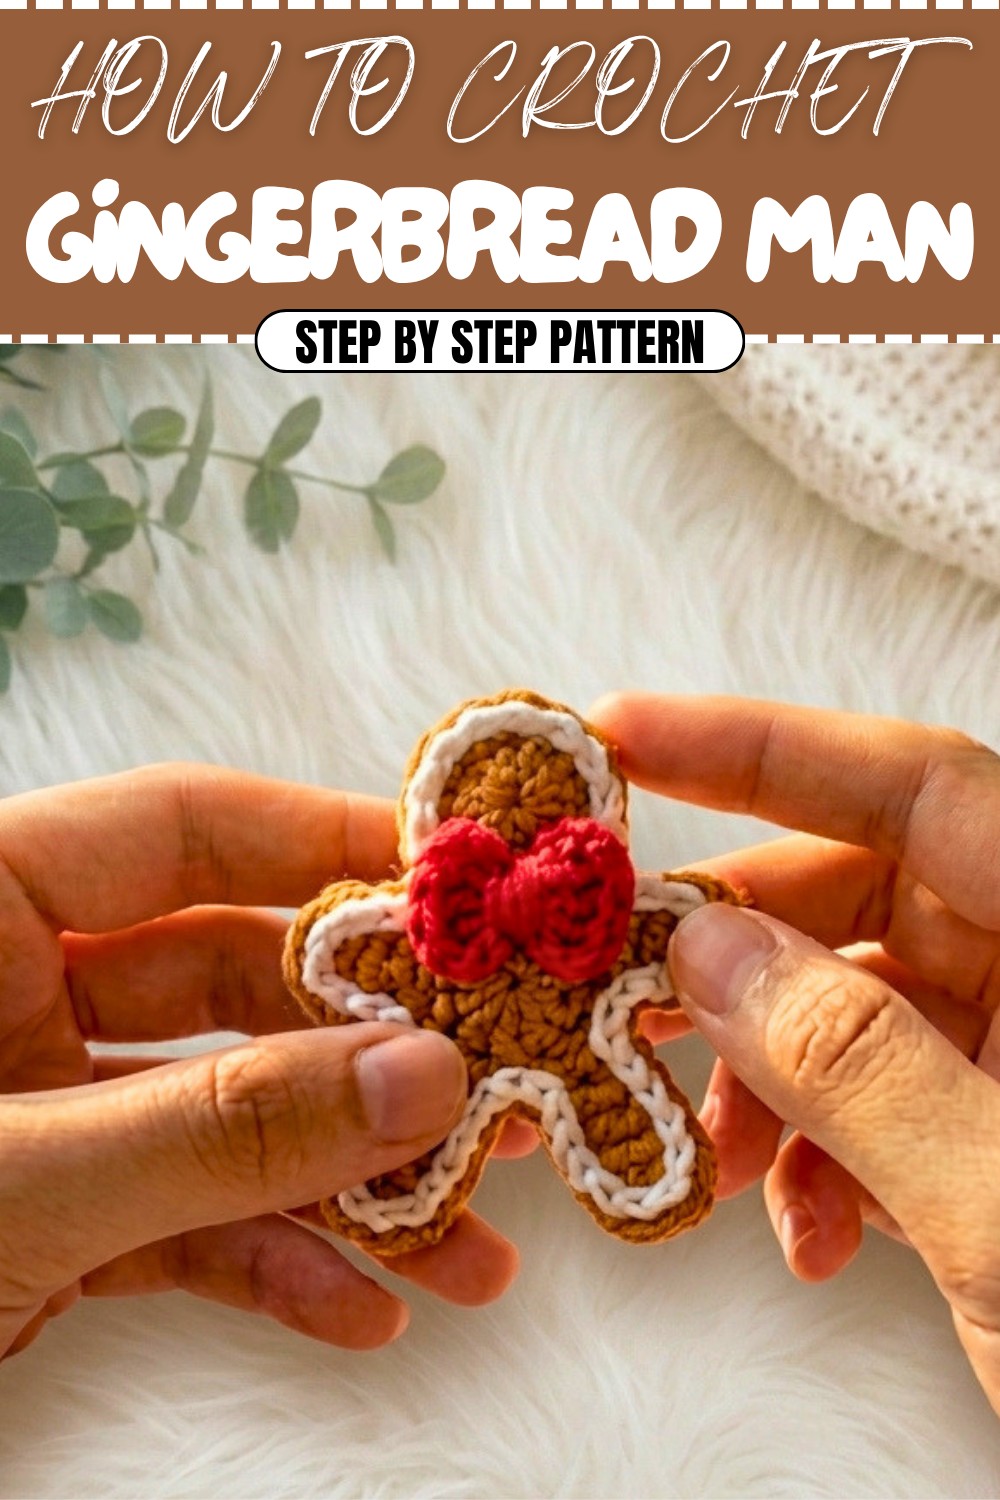
There’s just something about a cheerful little gingerbread man that makes you smile, isn’t there? This crochet gingerbread man pattern is the perfect way to bring festive charm to your holiday decor or gift-giving. With its adorable round head, plump little limbs, and a cute bowtie, it’s sure to spread holiday cheer wherever it goes. The pattern is simple, yet it allows room for customization—add festive colors, adorable safety eyes, or even a tiny heart-shaped patch. The soft gingerbread brown yarn contrasted with white stitches for the “frosting” gives it a classic festive look. To make it even more special, you only need basic crochet skills, such as chain stitches, double crochets, single crochets, and slip stitches. However, this project is also a great stepping stone for those looking to refine their skills and add more personality to their amigurumi creations.
Crochet Gingerbread Man Pattern for Christmas Home Decor Bliss
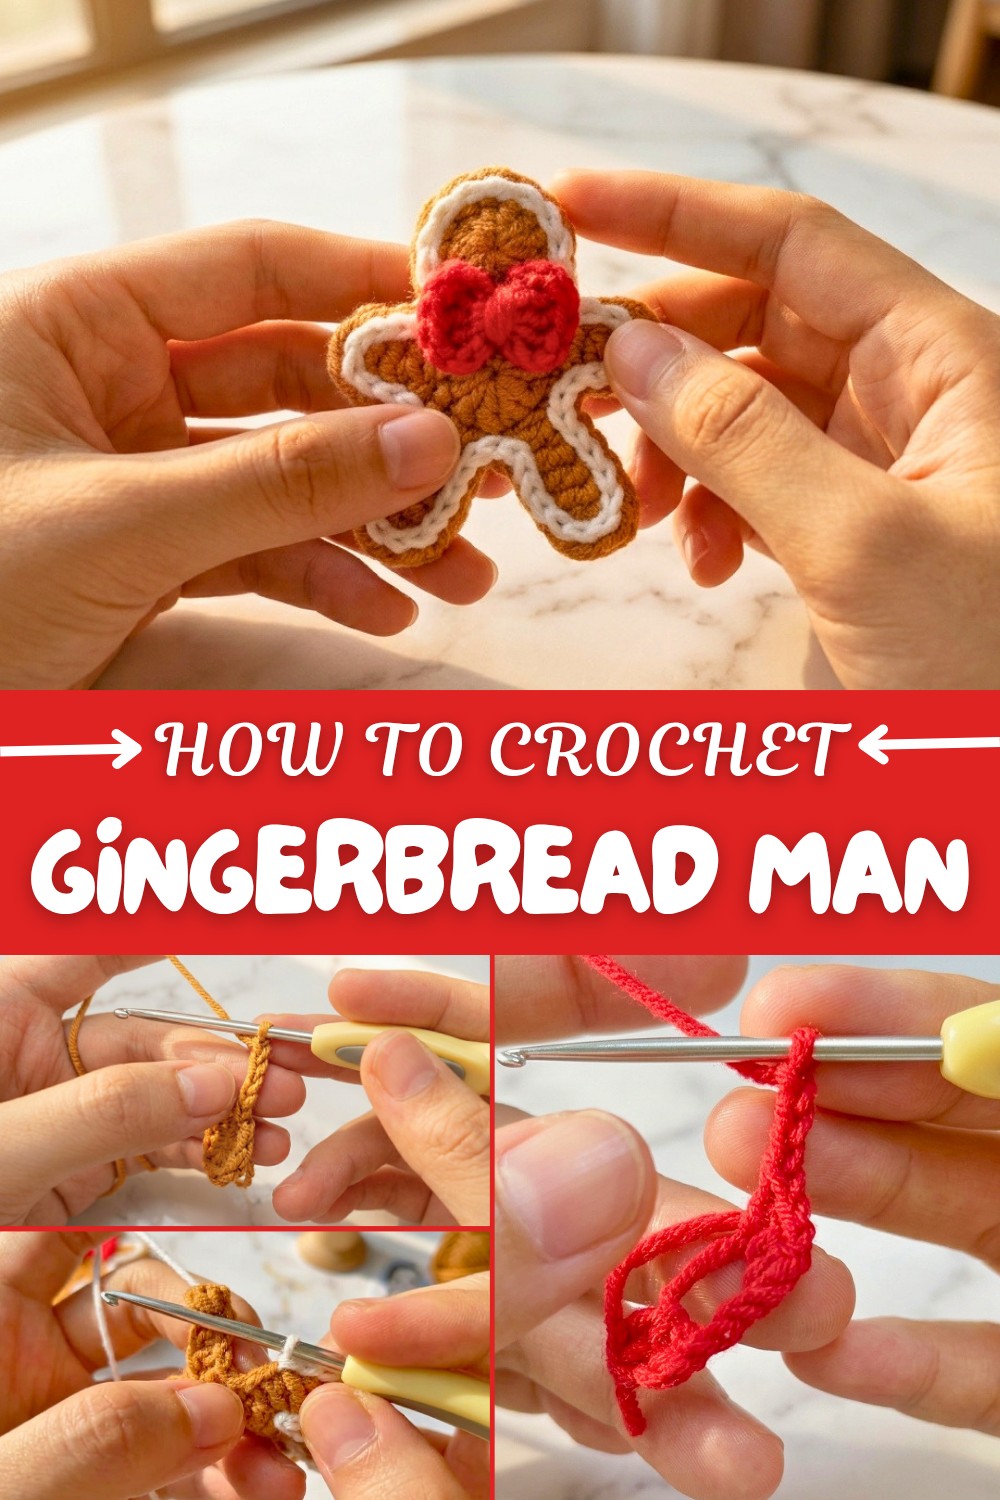
The magic ring technique provides a seamless way to start both the head and body, and you'll get to learn functional methods like seamless stitching when joining the parts together. A fun bonus of this pattern is crocheting the bowtie, which adds a special decorative touch to the gingerbread man’s neck, and it’s a useful skill you can replicate for other amigurumi characters. This little pattern can be made with minimal materials, making it a cost-effective and enjoyable project for the holiday season.
Creative Ideas and Applications
Once you’ve mastered this pattern, you can get creative and expand your crochet repertoire with ideas like:
- Tree ornaments: Add a loop and hang your gingerbread man on your Christmas tree.
- Holiday garlands: Make a chain of gingerbread people to decorate mantels or walls.
- Personalized gifts: Add names or little details like scarves or sweaters for each family member.
- Amigurumi sets: Expand this pattern into a gingerbread family with various sizes and accessories.
Highlights of This Pattern
- Fun and festive holiday decoration.
- Uses basic stitches yet offers opportunities to learn techniques like seamless finishes.
- Perfect for Christmas gifts or as a centerpiece for holiday crafts.
- Great for beginners looking to experiment with more advanced amigurumi techniques.
Take your time and enjoy the process as you crochet your very own delightful gingerbread man!
Gingerbread Man Crochet Pattern
Introduction
In this project, you will crochet:
- A round head
- A body with arms and legs worked from chains
- A contrasting edging
- A small bow as decoration
The finished piece is perfect as a hanging ornament, applique, or part of festive décor.
What You’ll Learn
- Creating round shapes for amigurumi using the magic ring technique and double crochets.
- Slip stitching for clean edges and decorative frosting details.
- Basic assembly techniques, like using seamless sutures to join pieces for a neat finish.
Skill Level & Terminology
- Skill Level: Confident Beginner / Intermediate (comfortable with basic stitches and magic ring)
- Terms Used: US crochet terminology
You should already know how to make a magic ring, chains, double crochet, slip stitch, and how to sew pieces together.
Materials & Tools
- Yarn
- Main color: Brown (gingerbread body)
- Contrast color: White (edging/“icing”)
- Bow color: Red (or any contrast color you like)
- Hook: 2.0 mm crochet hook (as in the video) or size to match your yarn
- Tapestry / Darning Needle: For sewing and “seamless” joins
- Scissors
- Hot Glue Gun or Strong Craft Glue (optional, for gluing pieces rather than sewing)
- Optional: Embroidery thread, beads, or safety eyes for facial details
You can substitute with any similar-weight yarn and appropriate hook; just note the finished size may change.
Gauge
Gauge is not critical for this pattern because the gingerbread man is a flat decorative item. However, to get a firm, neat shape:
- Aim for tight, even stitches so the shape looks crisp.
- As a reference: with a 2.0 mm hook and fine cotton yarn, the head circle (12 dc in magic ring) should measure about 2.5–3 cm across.
If your head circle is much larger, use a smaller hook; if much smaller, use a slightly larger hook.
Abbreviations
All terms in US crochet:
- mr – magic ring
- ch – chain
- sl st – slip stitch
- dc – double crochet
- st(s) – stitch(es)
- lp(s) – loop(s)
- RS – right side
- WS – wrong side
Special Stitch Instructions
Magic Ring (mr)
Form a ring with the yarn:
- Wrap yarn around two fingers to form a loop.
- Insert hook under the front strand, grab the back strand and pull through.
- Ch 1 (or ch 3 for dc) to secure and work required stitches into the loop.
- Pull yarn tail to close the ring tightly.
Double Crochet (dc)
- Yarn over, insert hook into stitch, yarn over and pull up a loop (3 loops on hook).
- Yarn over, pull through 2 loops, yarn over, pull through remaining 2 loops.
Slip Stitch (sl st)
- Insert hook into stitch, yarn over, pull through the stitch and the loop on the hook in one motion.
These are the only stitches used in the piece besides chains, making this pattern technically simple but detail-focused.
Finished Size
With a 2.0 mm hook and fine cotton yarn:
- Height (head to feet): approx. 8–10 cm (3–4 inches)
- Width (hand to hand): approx. 6–7 cm (2.5–3 inches)
Size will vary slightly based on your yarn and tension.
The Pattern Itself
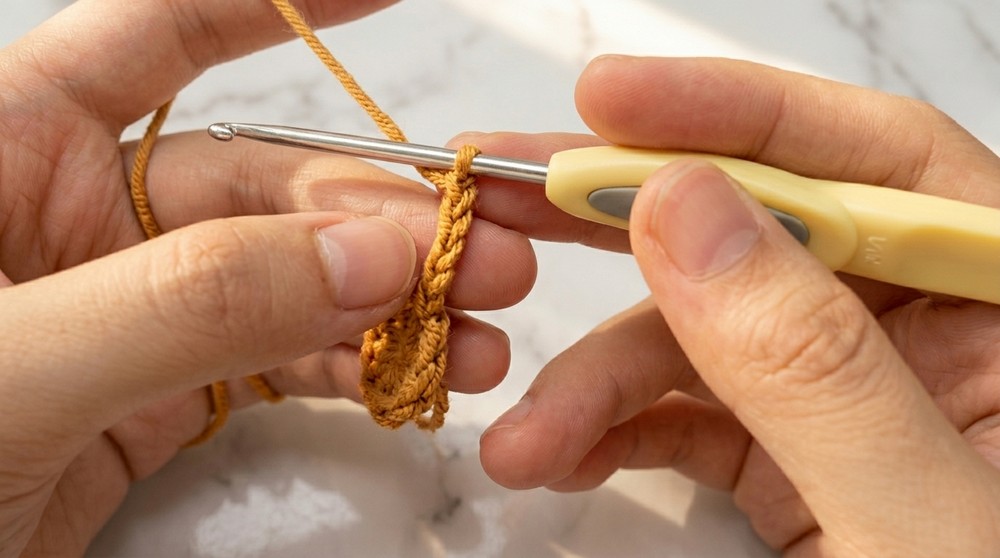
1. Head (make 1)
- Round 1
- Make a magic ring (mr).
- Ch 3 (counts as turning height only – it is not counted as a stitch).
- Work 12 dc into the mr.
- Pull tail to tighten the ring.
- Cut yarn leaving a tail for joining.
- Using a needle, make a seamless join:
- Insert needle into the first dc of the round.
- Then insert the needle into the center of the “V” of the last dc.
- Pull gently to form a smooth, fake stitch.
- Tie a small knot with the beginning tail on the back and trim, leaving a short end.
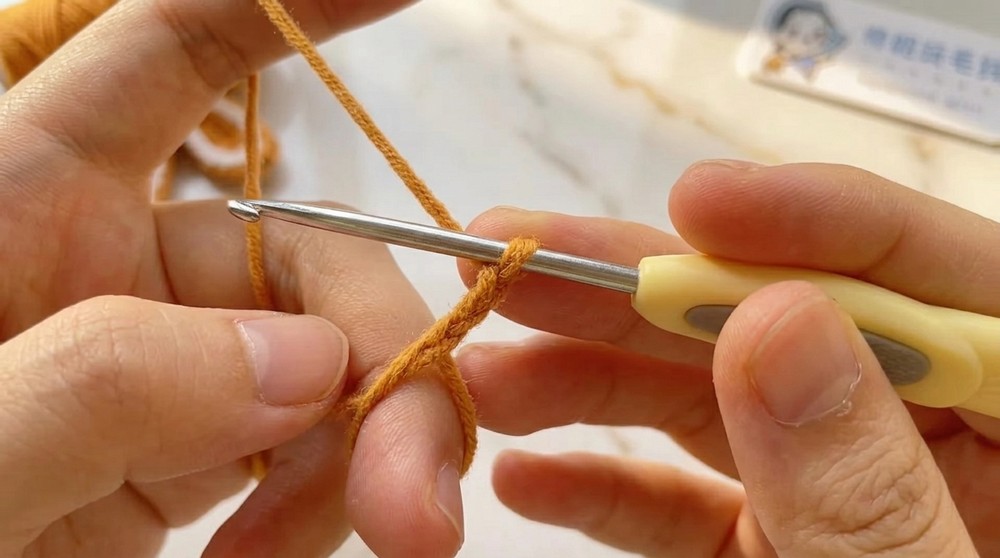
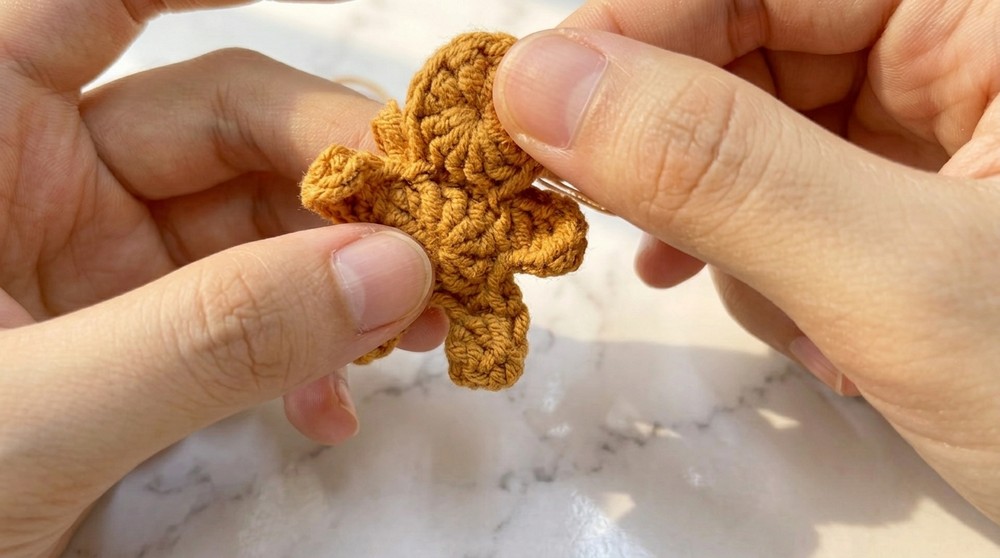
You start the head as a flat circle: make a magic ring, then crochet 12 double crochets into it. After tightening the ring, you close the round neatly with a needle so there is no visible join. This creates a small brown circle for the gingerbread head.
2. Body (make 1)
- Round 1: Body Circle
- Make a mr.
- Work 10 dc into the mr.
- Pull tail to tighten.
- Sl st into the first dc to close the round.
- This slip stitch does not count as a stitch in later steps.
- Arm 1
- Ch 5 (make these chains slightly loose).
- Turn the work so you can see the back bumps / back loops of the chain.
- Working into the 3rd chain from the hook, in back loop only:
- 1 dc in 3rd back loop from hook.
- 1 dc in next back loop.
- 1 dc in next back loop (total 3 dc for the arm).
- Skip describing the tiny remaining chain at the tip; you have formed one arm.
- Return to Body
- Find the next stitch on the round where you began the chain for the arm.
- Sl st in next st.
- Sl st in the next st again (two slip stitches along the body’s edge).
- Leg 1
- Ch 7.
- Turn and work into back loops:
- Starting in the 3rd chain from hook, work 5 dc back along the chain, 1 dc in each back loop.
- This forms the first leg.
- Back to Body Again
- Sl st in next st on the body.
- Sl st in the next st.
- Leg 2
- Repeat Leg 1:
- Ch 7.
- Work 5 dc in back loops from 3rd ch from hook.
- Sl st in next st on body.
- Sl st in next st.
- Repeat Leg 1:
- Arm 2
- Repeat Arm 1:
- Ch 5.
- Work 3 dc in back loops starting in 3rd ch from hook.
- Sl st in next st of body to secure.
- Repeat Arm 1:
- Cut the yarn, pull through to fasten off.
Explanation:
You first crochet a small circle for the body. From this circle, you chain out and work double crochets back along the chains to form the arms and legs. After each limb, you slip stitch back into the body’s edge. By the end, you have a flat body shape with two arms and two legs attached.
3. Joining Head and Body
- Place head and body RS up, aligning the top of the body with the bottom of the head.
- Thread a tapestry needle with brown yarn (or a tail from the body).
- Whip stitch or overcast stitch through the edge stitches of the head and the top of the body, working neatly across.
- Once secure, tie a small knot on the WS and trim, leaving a short tail.
Now you sew the circle (head) onto the top of the body piece. Just stitch through both pieces several times so that the head sits centered and firmly attached above the body.
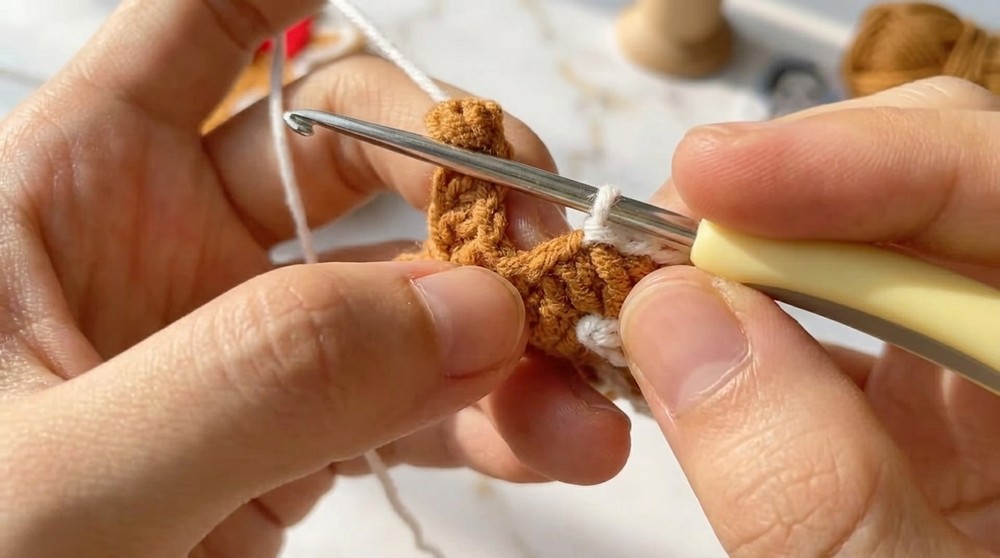
4. White Edging (“Icing” Border)
- With white yarn and 2.0 mm hook:
- Attach the yarn at any stitch along the edge (for example, at a leg).
- Insert hook into edge st, yo, pull through both loops → sl st to join.
- Work 1 sl st in each stitch around the entire outer edge:
- Around legs, arms, sides, and head.
- Keep tension consistent but not too tight to avoid curling.
- At the end:
- Cut the yarn, leaving a small tail.
- Use needle to perform a seamless slip-stitch join:
- Insert needle under both loops of the first sl st.
- Then insert into the center of the last sl st’s “V”.
- Pull gently to form an invisible join.
- Tie a tiny knot on the back if desired and trim ends.
Plain explanation:
You go all the way around the gingerbread man, putting a slip stitch into each stitch along the edge using white yarn. This creates a pretty icing-like border outlining the whole shape. Finish by closing the border neatly with a needle.
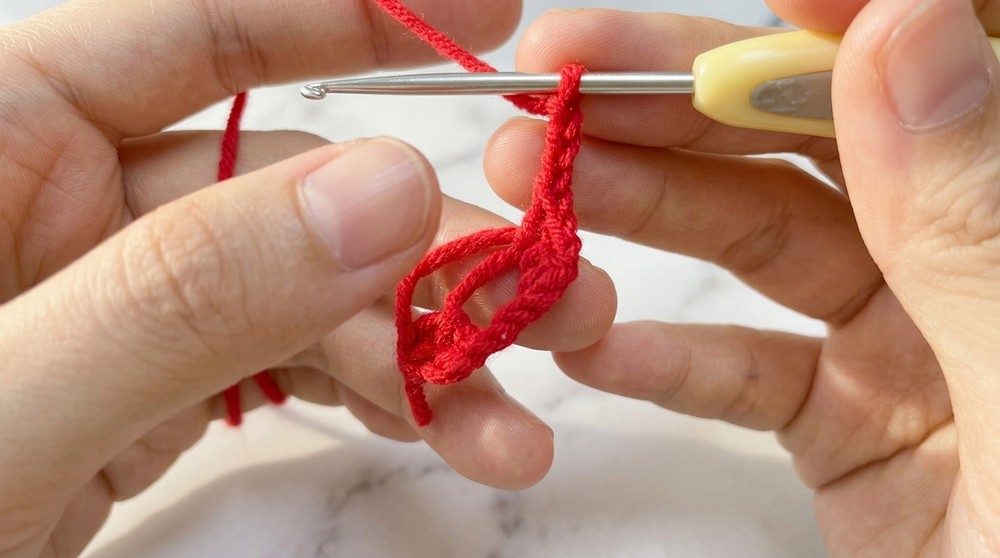
5. Bow (make 1)
- With red yarn and 2.0 mm hook:
- Make a mr.
- Ch 3.
- Work 3 dc into the ring.
- Ch 3, then sl st into the ring (this completes one side of the bow).
- Ch 3 again.
- Work 3 dc into the ring.
- Ch 3, sl st into the ring.
- Cut yarn, pulling the tail through.
- Tighten the magic ring by pulling the starting tail.
- Shaping the Bow
- Identify the front (the side where the stitches look smooth and neat).
- Use the long tail to wrap tightly several times around the center of the bow, cinching it to form the classic bow shape.
- Secure with a knot on the back.
Plain explanation:
You create the bow inside a magic ring, making two “petals” of dc separated by chains. After tightening the ring, you wrap yarn around the middle so it looks like a small bow tie. The wrapping pulls the center together and gives it shape.
Assembly & Finishing
- Attach the Bow
- Position the bow at the neck of the gingerbread man (where head and body meet).
- Attach by:
- Sewing with the bow’s yarn tail, or
- Using a hot glue gun or heated glue stick to glue the bow in place (as in the video).
- Press gently to secure and let glue dry completely if using.
- Optional Facial Features & Details
- Embroider eyes, mouth, and buttons using black and colored yarn or thread, or glue small beads/buttons.
- You may add a hanging loop at the top by attaching a piece of yarn or ribbon.
- Final Tidying
- Weave in any remaining yarn ends on the back.
- Trim excess tails neatly, making sure not to cut through any knots.
Plain explanation:
In this last step, you decorate and finish your gingerbread man. Sew or glue the little bow on the neck, add eyes or buttons if you like, and hide all loose ends. You can also add a loop so it can hang as an ornament.
This completes your crochet gingerbread man pattern. You can now make multiple pieces as ornaments, gift tags, or decorations. Experiment with different colors and bow styles to create your own festive set.