
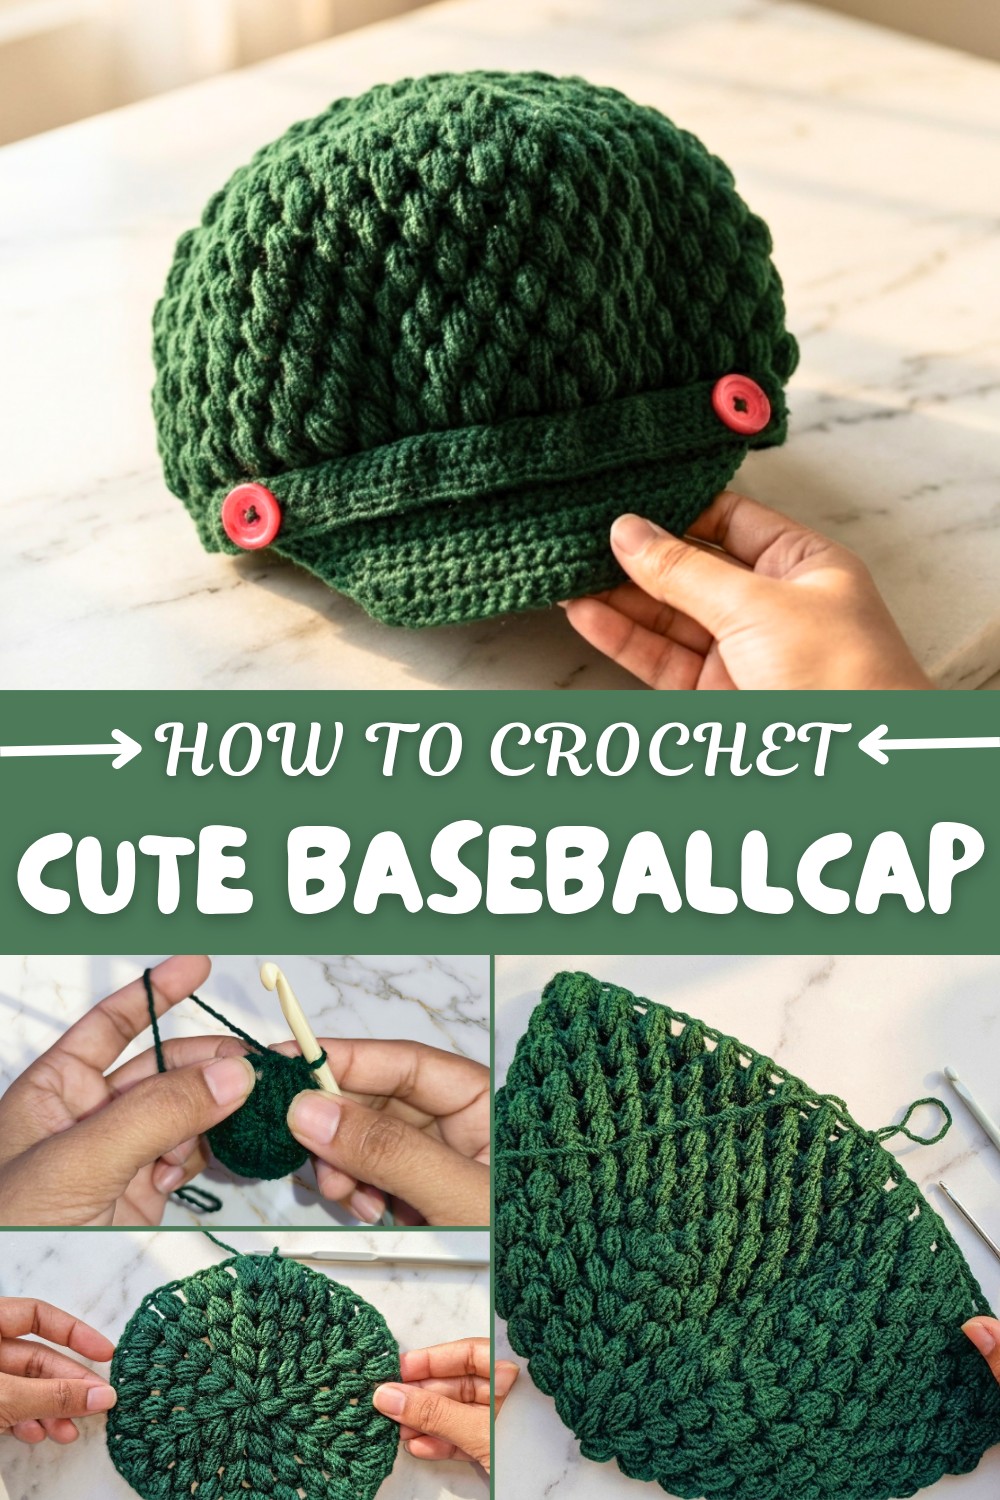
Cute & Free Crochet Baseballcap Pattern For Fashion
Crochet a cool and comfy baseball cap for kids aged 10 to 12 with this free pattern that's easy to follow and perfect for adding a playful touch.
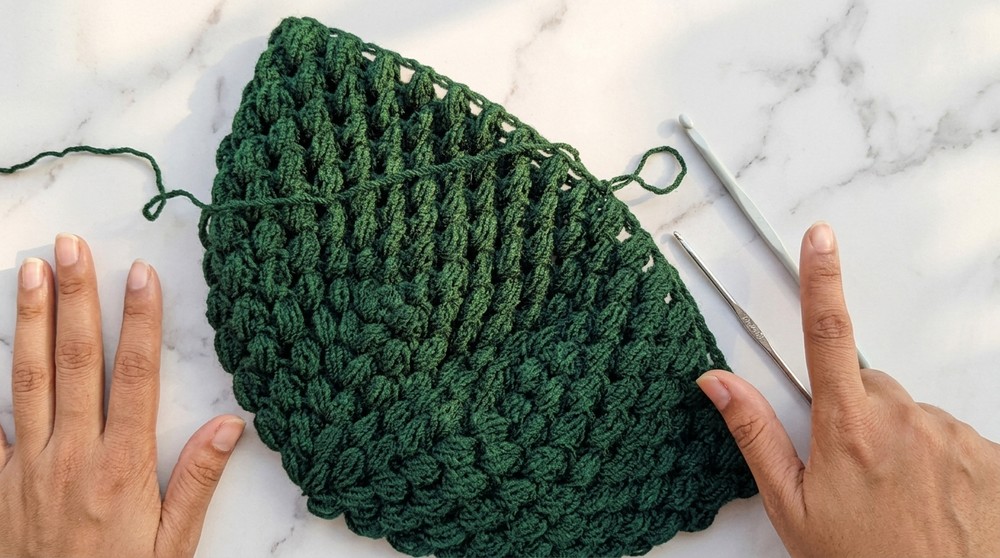
If you are looking for a fun and useful crochet project, this free crochet baseball cap pattern is a wonderful choice, especially for children around 10 to 12 years old. I love how simple and beautiful this cap turns out. The round shape at the start gives you a smooth top, and as you keep adding rounds, the cap slowly takes form with a lovely texture. The stitches are even and give a neat look to the finished piece. One of the most eye-catching features is the classic front bill that makes it look just like a real baseball cap.
Free Crochet Baseballcap Pattern For Summer Style
The cap feels soft but strong, and because you can easily change the number of rounds, it’s simple to make it bigger or smaller to fit anyone. You can also choose your favorite colors to make it unique, go for bright and fun shades, or keep it simple with classic ones. The process to create the shape of the cap and the strip at the back is easy to follow, and it always brings out great results.
Crocheters enjoy this pattern because it’s relaxing to make, doesn’t require hard stitches, and finishes up quite quickly. The finished cap is not just cute, it’s practical too. Children can wear it for play, for a walk, or even at a family picnic. The cap keeps their head covered while adding a touch of handmade style.
You can also use this pattern to make caps for gifts. If you want to make slight changes, just add or reduce a few rounds, and you have a perfectly sized cap. It’s a creative, cheerful project that adds both beauty and warmth to any outfit or day out.
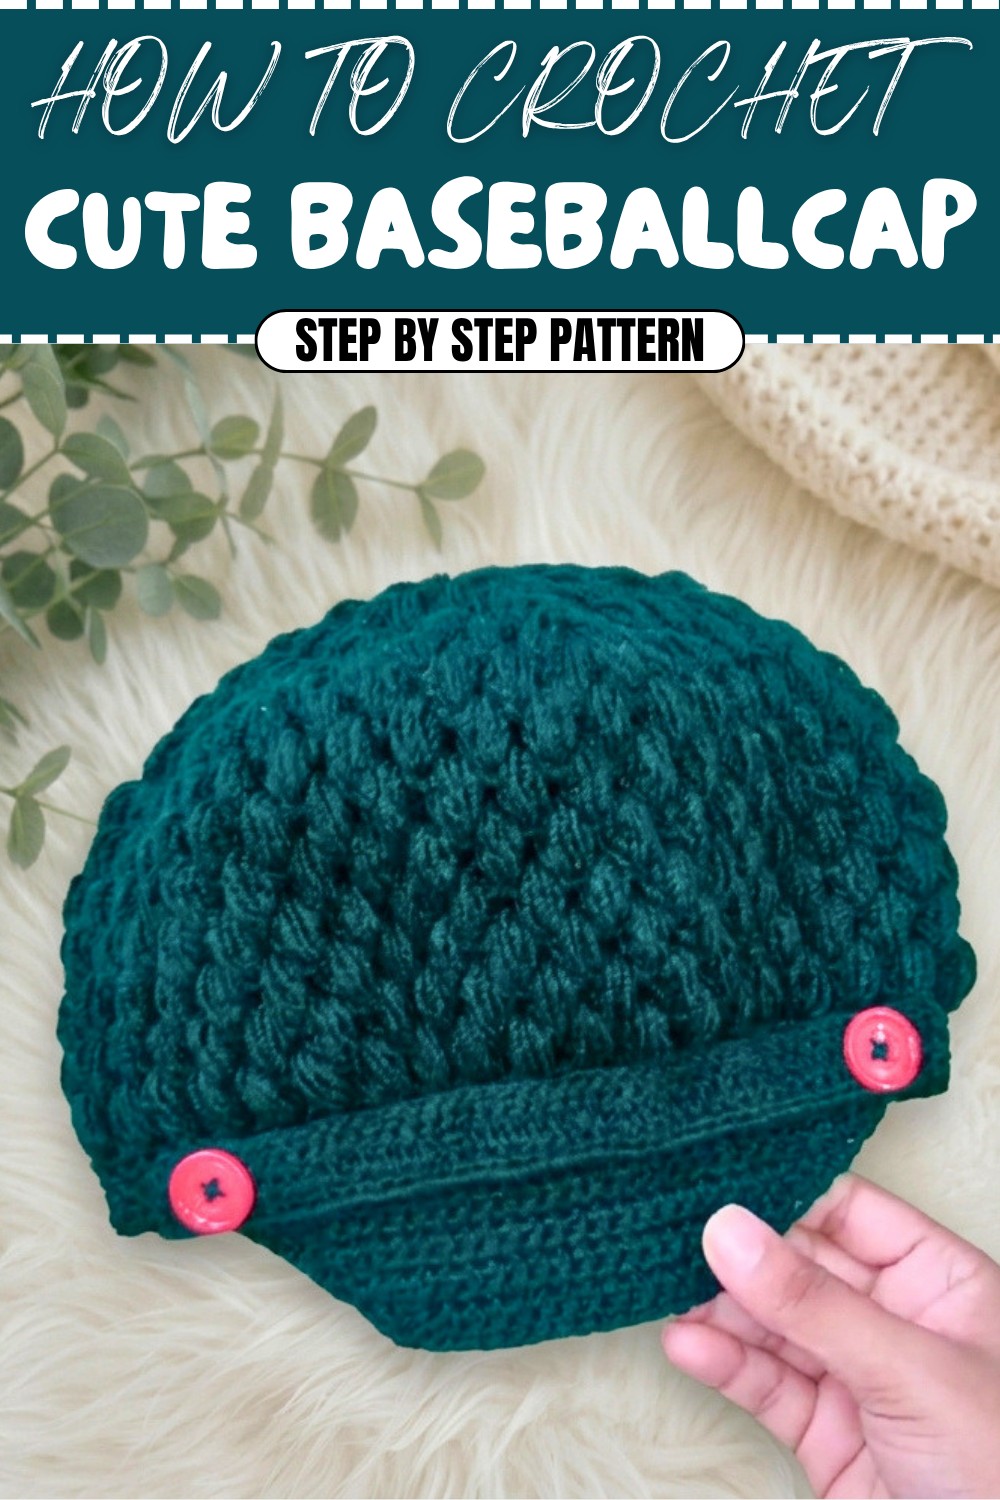
Classic Child’s Crochet Cap Pattern (Age 10–12)
Welcome to the step-by-step pattern for an attractive and practical child’s crochet cap. Specially designed for ages 10–12, this cap balances classic styling with user-friendly construction. The cap is worked seamlessly in the round, making use of basic stitches and clever shaping to create a comfortable, neat accessory.
Whether you are making this cap for your child, grandchild, or as a thoughtful gift, the easy-to-follow instructions ensure your crochet experience will be enjoyable and rewarding. At the end of each key section, helpful explanations guide beginners who may not be familiar with written patterns. Let’s create a cap that’s as delightful as it is functional!
Skill Level & Terminology
Skill Level: Confident Beginner
Terminology: US Crochet Terms
This cap is ideal for adventurous beginners, as well as experienced crocheters looking for a quick, relaxing project. The instructions use universally recognized US terms.
Materials & Tools
- Yarn: Medium (Worsted/Aran) weight, soft acrylic or cotton – 80–100g
- Hook: 4.5mm (size G/7) or size to achieve gauge
- Notions: Scissors, Yarn needle, Stitch markers (helpful for keeping round count)
- Optional: Tape measure (for checking size), Decorative buttons or patches
Gauge
Gauge ensures your cap fits as intended.
Gauge: 14 sc x 16 rows = 4" (10 cm) square, worked in rounds.
Abbreviations List
| Abbreviation | Meaning |
|---|---|
| ch | Chain |
| sc | Single Crochet |
| dc | Double Crochet |
| sl st | Slip Stitch |
| inc | Increase (2 sc in 1) |
| dec | Decrease (sc2tog) |
| st(s) | Stitch(es) |
| FO | Fasten Off |
Special Stitch Instructions
- Increase (inc): Work 2 single crochets in 1 stitch.
- Decrease (dec / sc2tog): Insert hook into first stitch, yarn over (YO), pull up a loop. Insert hook into next stitch, YO, pull up a loop (3 loops on hook), YO, pull through all loops.
- Slip Stitch (sl st): Insert hook, YO, pull through both loops.
Finished Size
- Circumference: ~20–22 inches (fits average 10–12 yr child)
- Length: ~7.5–8.5 inches, adjustable by adding/subtracting rounds
How to Start & Core Stitches
You'll begin with a basic chain and form the cap using single crochet (sc) throughout, increasing around the top for a circular shape, then working even rounds for body and brim. The cap's front band and top strip are formed using chains and rows of single crochet and double crochet.
The Pattern
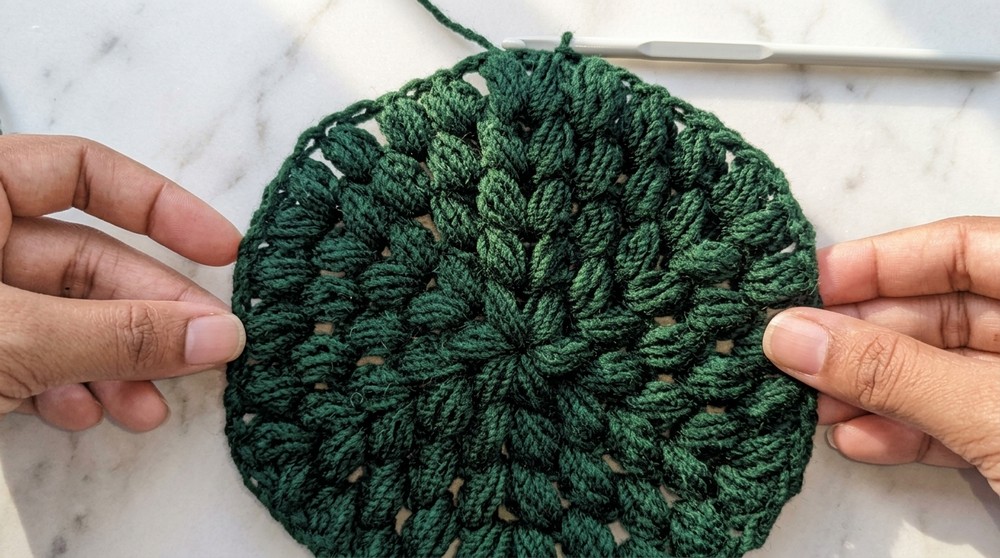
A. Top & Body of the Cap
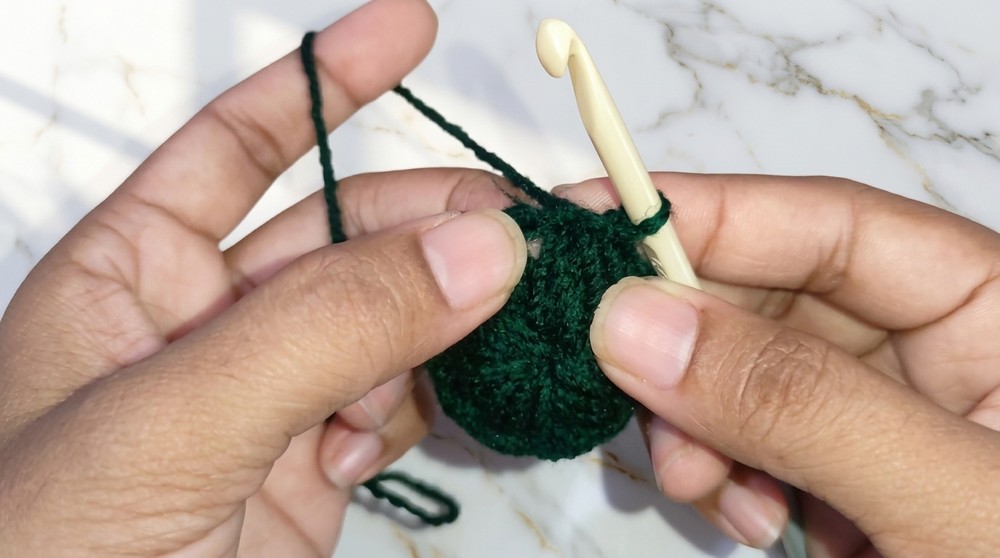
- Foundation Ring
Ch 6. Join with sl st in first ch to make a ring. - Round 1
Ch 1. Sc 12 into ring. Sl st in first sc to close round.
Explanation for beginners: Start with a chain loop, then fill that loop with 12 single crochets to form a flat circle.
- Round 2
Ch 1. In same space and in each stitch around, work sc. Mark start of round with stitch marker if desired. (12 sc)
Just continue making single crochet in every stitch for a firm base.
- Round 3–7
Work sc in each st around. Sl st in first sc at end of each round.
For a smooth dome, keep crocheting single crochets in each stitch, moving your stitch marker as needed.
B. Increasing
- Round 8
Sc in each st around. If you want a wider cap, you may add 1–2 more rounds here.
This section gives the cap its comfy shape. You can customize the width by adding extra rounds at this stage.
- Rounds 9–14
Work sc in each st around. Sl st at end of each round.
As the cap grows taller, simply make single crochets in the round. This is the main length of the cap and can be adjusted for fit.
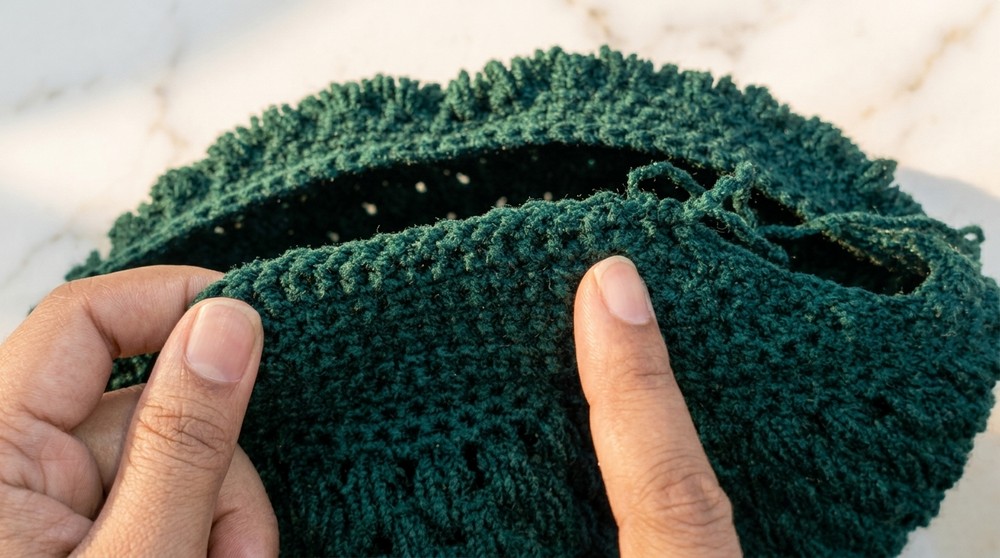
C. Front Band / Brim
- Row 1
Ch 1, turn. Sc in first 31 ch (work only in front section).
Sc in each st across the designated front brim area.
For beginners: Make a chain of 31 stitches, then work single crochets just on the front section to build the band.
- Row 2
Ch 1, turn. Dec in first 2 sc, sc in remaining sts.
Row by row, decrease one st at beginning and end to gently curve the brim.
- Rows 3–26
Repeat Row 2, decreasing 1 stitch at each end every row, until 26 rows are completed and only a few stitches remain.
The brim narrows as you go, giving a classic curve. If you are unsure, always decrease at start and end of row.
- Turn and sc evenly around the cap's brim for a neat finish.
D. Top Strip & Finishing Details
- Top Strip
Ch 46. Turn; dc in each ch across.
Ch 1, turn; dc in each st.
If you wish, add 1 more row for extra thickness.
For newcomers: Make a long chain, then work double crochet (dc) in every stitch for a sturdy strip.
- Measure length. It should be about 8.5 inches. Adjust by adding or subtracting chains/rows as needed.
- Attach strip to crown of cap using yarn needle and mattress stitch for a clean seam.
Explanatory Tips for Beginners After Each Section
For the top and body: Start with a loop, fill it with single crochet, and keep going in rounds, marking where the round starts if it’s helpful.
For the brim: Use chains to make the front band, then decrease stitches at the beginning and end of each row. This shapes the brim for a tidy look.
For the top strip: Make a long chain and crochet double crochet rows. Sew it along the top to finish off the cap.
Assembly & Finishing
- Weave in all yarn ends with a yarn needle.
- Lightly steam or press the cap if desired for shape.
- Secure any decorative additions (buttons, etc.) if used.
- Try on or measure for fit. Adjust sizing as needed by adding/removing rounds.
- Make sure the brim/front band sits well and attach securely.
Conclusion
Congratulations! You have completed a classic child’s crochet cap, tailored for ages 10–12. This cap can be customized easily by altering the length or width in the rounds before the brim. The instructions focused on single crochets, increases, decreases, and double crochet for the band—making use of elementary but versatile stitches.
How to Start: Begin with a simple chain ring, build up the body in rounds, add the front band with decreases, and complete with the top strip in double crochet.
Stitches Used Throughout: Single Crochet, Double Crochet, Increase, Decrease, Slip Stitch.
Pattern Focus: Seamless construction, simple shaping, clear band and strip details for a crisp finish.
This cap is not only adorable but also highly practical—perfect for chilly days, stylish looks, and joyful handmade gifting.