
How to Easy Crochet Penguin Amigurumi Pattern for All Skill Levels
Spark creativity effortlessly through a free crochet penguin amigurumi pattern that delivers both charm and easy-to-follow guidance.
Soft and squishy little characters made from yarn have a special way of bringing smiles and warmth into any space. Among these charming creations, a tiny penguin stands out with its sweet shape and gentle colors that invite you to cuddle or display it proudly. This pattern uses the magic ring technique, which allows crocheters to start with a neat, tight circle forming the perfect head and body base. Throughout the project, you’ll get comfortable working with single crochet stitches which build a tight, solid fabric perfect for stuffing and shaping.
One beautiful feature of this penguin pattern is the colorful belly created by changing yarn colors. This technique adds lovely texture and personality, making the penguin amigurumi truly come alive. You will also learn how to handle color changes, a fun skill that can be applied in many other crochet projects. The final touches include sewing on tiny wings, a beak, and attaching cute little feet, all combining to form a delightful and huggable toy.
Learn the Simplest Crochet Penguin Amigurumi Pattern for Beginners
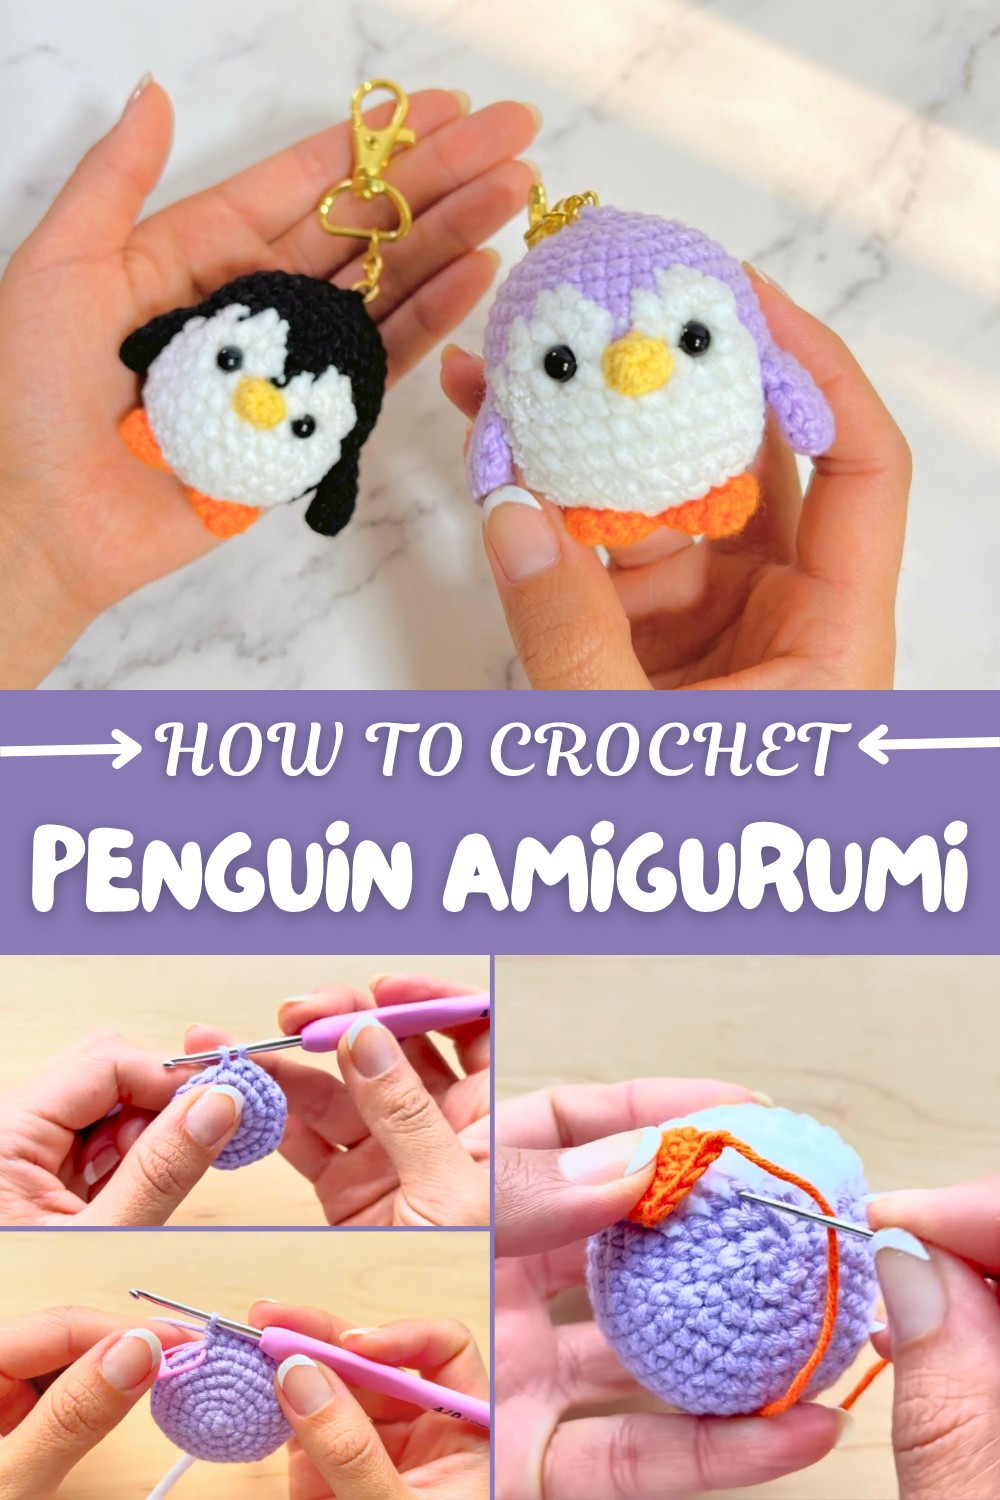
This charming pattern makes a wonderful handmade gift or decoration, especially during the winter or festive seasons. It is also ideal for beginners looking to practice stitch counting, increases, and decreases in a manageable project. With just a few materials like soft chenille yarn for the belly and acrylic yarn for the body, you can create this adorable penguin in your favorite colors.
More Ideas to Try With This Pattern
Once you’ve mastered the penguin, this pattern inspires lots of creative possibilities. You could customize it by adding scarves and hats, making a family of colorful penguins, or even crafting other animals by tweaking the shapes and colors. The stitch techniques also work nicely for making little amigurumi keychains, fridge magnets, or charming gifts that brighten someone’s day.
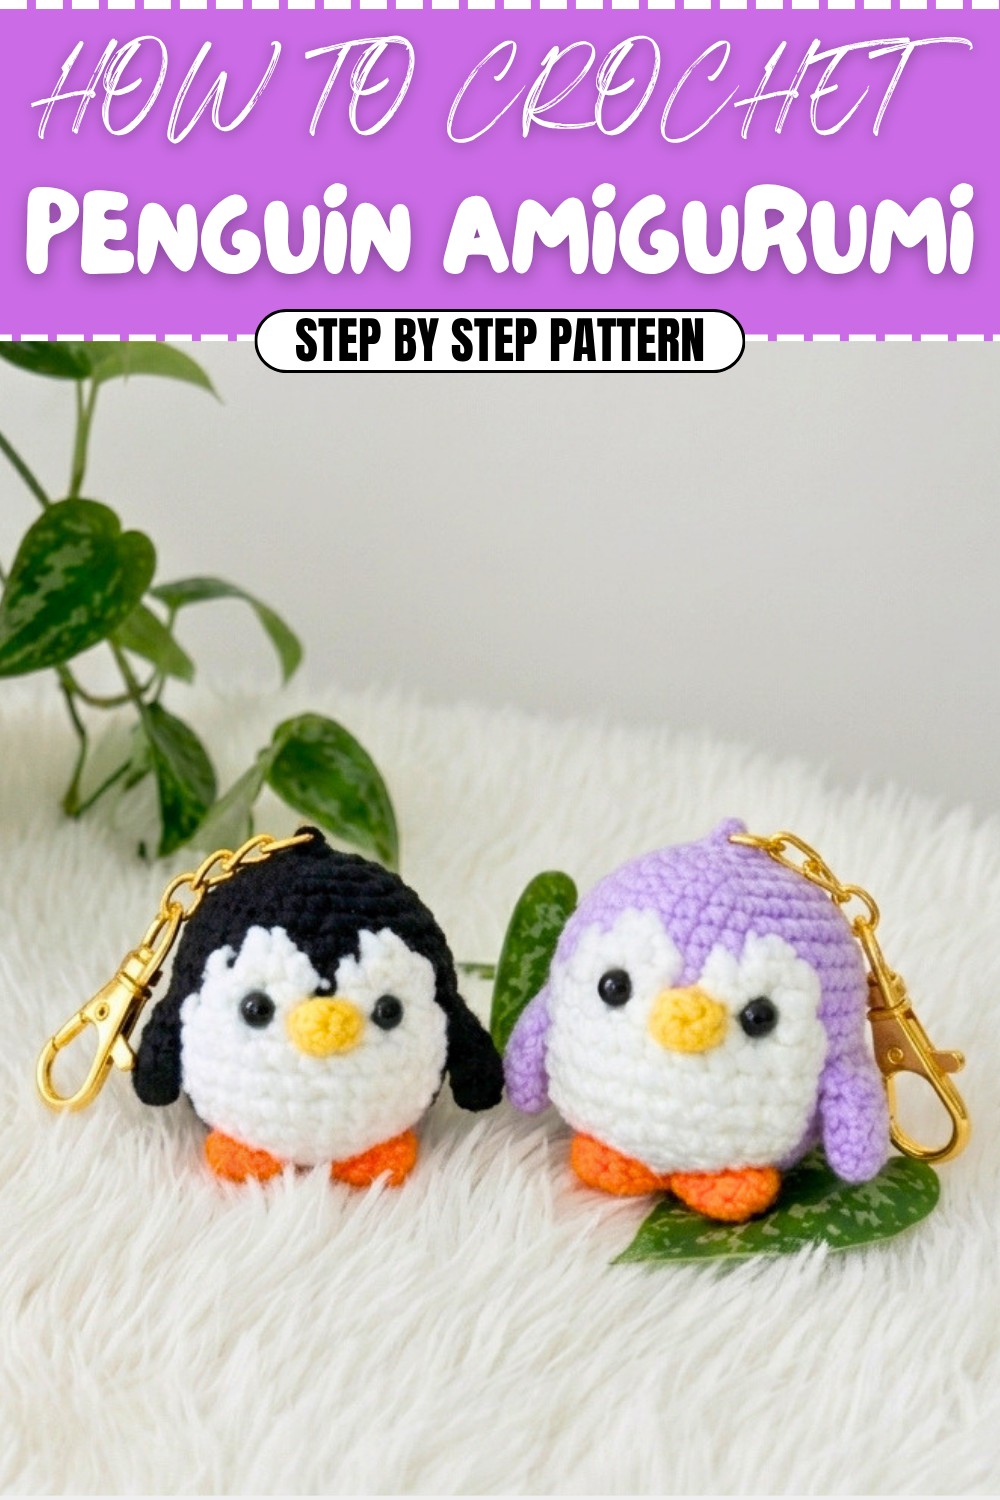
Crochet Pattern: Amigurumi Penguin Keychain
Welcome to this step-by-step crochet pattern to make adorable amigurumi penguin keychains. Experiment with different yarn colors to create a playful variety of penguins. This pattern focuses on creating a spherical body, detailed wings, cute legs, and an expressive face. The use of both solid and chenille yarn gives the penguin an eye-catching texture, especially for the belly. The stuffing and precise placement of parts bring this little penguin to life!
What You’ll Learn from This Pattern
- How to shape amigurumi with increases and decreases.
- Seamlessly change colors to create patterns within amigurumi.
- Proper stuffing and assembly techniques for balance and durability.
- Attaching functional components like keychains securely.
Skill Level & Terminology
- Skill Level: Beginner
- Terminology: US Crochet Terms
This project is beginner-friendly, focusing on simple stitches such as single crochet (sc), increases, decreases, and a magic ring. Even if you’re just starting out, the clear instructions and repetitive sequence make this a fun and achievable project!
Materials & Tools
- Yarn:
- Acrylic Yarn (approx. 2.5 mm thick):
- Lilac or purple (body)
- White (belly)
- Yellow or orange (beak and legs)
- Chenille Yarn: For belly texture
- Acrylic Yarn (approx. 2.5 mm thick):
- Stuffing: Synthetic silicone cotton or polyfill.
- Crochet Hook: 2.5 mm hook (suitable for yarn thickness).
- Other Materials:
- Safety eyes (6 mm).
- Tapestry needle.
- Scissors.
- Stitch marker (recommended).
Gauge
Gauge is not critical for amigurumi. The stitches should be tight enough to prevent any stuffing from poking through. Suggestion:
- 10 single crochets x 10 rows = 4 x 4 cm
Abbreviations List
| Abbreviation | Meaning |
|---|---|
| sc | Single Crochet |
| inc | Increase (2 sc in one stitch) |
| dec | Decrease (invisible or regular) |
| ch | Chain |
| MR | Magic Ring |
| st | Stitch |
Special Stitch Instructions
- Magic Ring (MR): Begin with a loop of yarn, crocheting stitches into the loop to create a tight and seamless starting circle.
- Invisible Decrease (dec): Insert the hook into the front loop of two consecutive stitches, yarn over, and pull through both loops. Yarn over again and pull through the two loops on the hook, reducing the stitch count without leaving gaps.
Finished Size
The completed penguin measures approximately 7 cm tall (about 2.75 inches) when using the specified materials and hook size.
What Stitches Are Used in This Pattern?
This pattern uses simple stitches like:
- Single Crochet (sc): The fundamental stitch for amigurumi.
- Increases (inc) and Decreases (dec): For shaping the penguin's round body and head.
- Magic Ring (MR): Used to start the body, wings, legs, and beak seamlessly.
The Pattern Itself
Step 1: The Penguin’s Body
- Using lilac/purple yarn:
- Start with a MR and crochet 6 sc into the ring. Pull tight to close. (6 sts)
- Round 2: Increase in each st around. (12 sts)
- Round 3: 1 sc, inc around. (18 sts)
- Round 4: 2 sc, inc around. (24 sts)
- Round 5: 3 sc, inc around. (30 sts)
- Round 6: 4 sc, inc around. (36 sts)
- Round 7: Using stitch marker, work 23 sc, switching to white yarn on the 23rd st, leaving a long tail for securing. Finish the round with 13 sc in white. (36 sts)
This step creates the transition from lilac to white, which forms the penguin’s belly.
- Rounds 8–12: Repeat the color sequence from Round 7:
- 23 sc in lilac, 13 sc in white. (36 sts)
This creates the belly area of the penguin, with alternating colors seamlessly blending.
- Round 13: Start decreasing with 4 sc, dec around. (30 sts)
- Round 14: 3 sc, dec around. (24 sts)
- Round 15: 2 sc, dec around. (18 sts) Stuff the body with polyfill firmly but evenly.
- Round 16: 1 sc, dec around. (12 sts)
- Round 17: Work dec around until the hole is closed. Weave in ends.
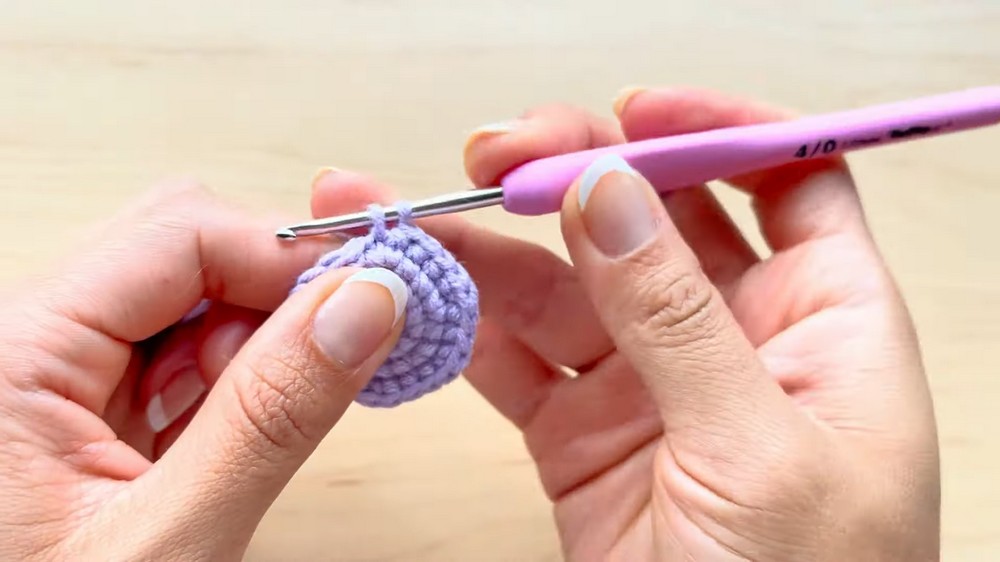
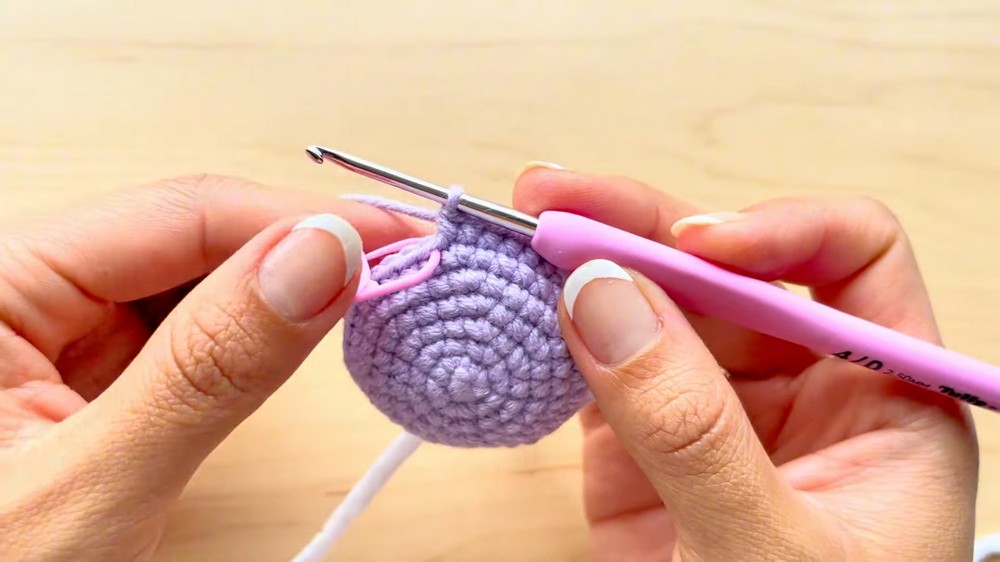
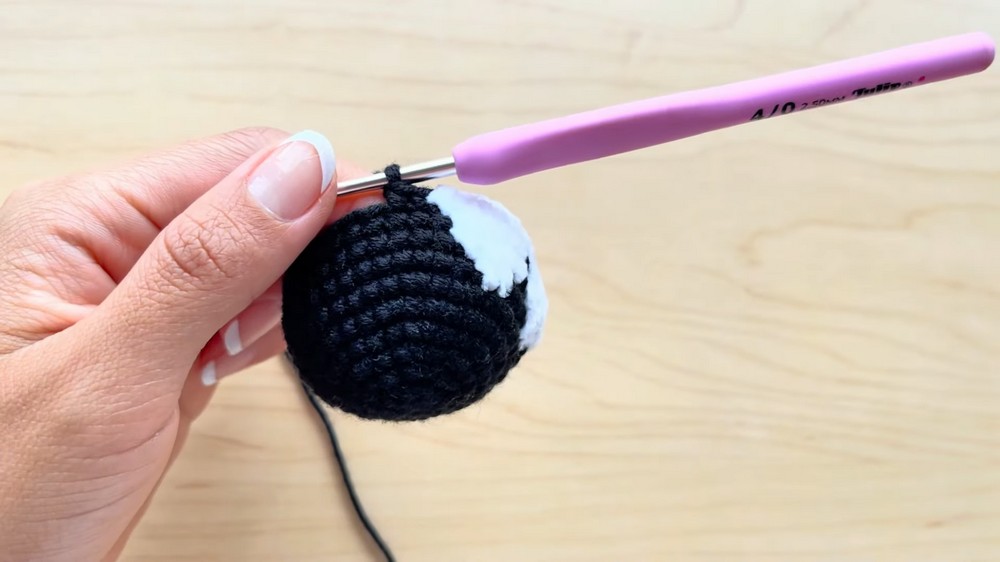
At this stage, the penguin’s rounded body and belly are complete. It’s ready for the attachment of the other parts.
Step 2: Wings (Make 2)
- Using black yarn:
- Start with a MR and crochet 6 sc into the ring. (6 sts)
- Round 2: 1 sc, inc around. (9 sts)
- Round 3: 2 sc, inc around. (12 sts)
- Round 4: Work even (12 sc).
- Fold the piece in half and crochet 4 sc across both sides to close the wing. Leave a long tail for sewing.
The wings are flat yet have volume, making them easy to attach and perfectly scaled for the body.
Step 3: Legs (Make 2)
- Using yellow/orange yarn:
- Start with a MR and crochet 6 sc into the ring. (6 sts)
- Round 2: 1 sc, inc around. (9 sts)
- Round 3: Work even (9 sc).
- Fold the piece in half and crochet 4 sc across to close the leg. Leave a long tail for sewing.
The legs are small and sturdy, giving the penguin a balanced base.
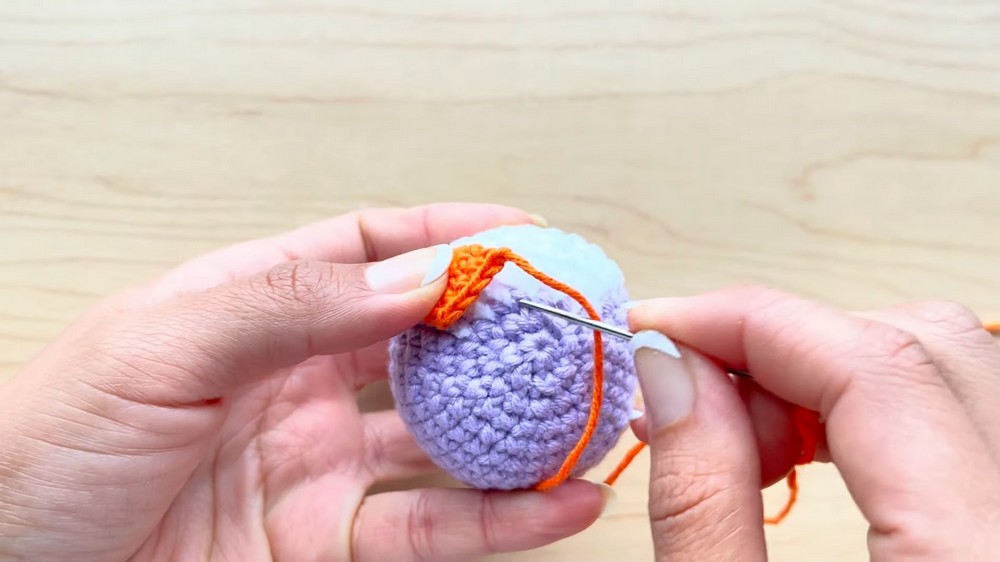
Step 4: The Beak
- Using yellow/orange yarn:
- Start with a MR and crochet 6 sc into the ring.
- Pull tight, leaving a long tail for sewing.
This tiny beak adds character and comes together in just minutes.
Step 5: Assembly & Finishing
- Attach the Beak: Sew the beak between the eyes (placed in Rounds 9 and 10, spaced evenly).
- Attach the Wings: Sew one wing to either side of the body, aligning with Round 10 for symmetry.
- Attach the Legs: Sew the legs to the bottom of the body, ensuring they’re evenly spaced for balance.
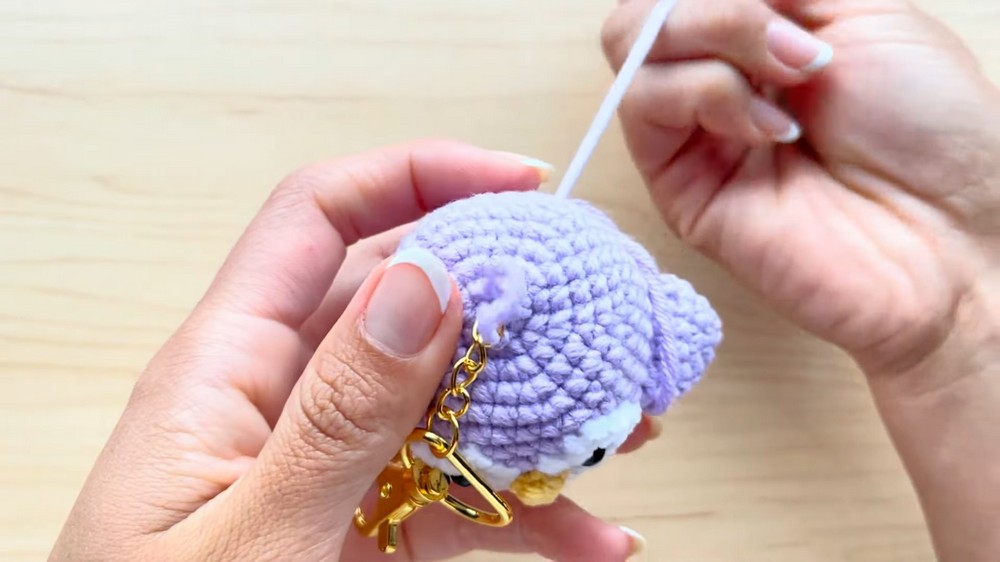
- Add the Keychain:
- Thread lilac yarn through the top of the magic ring on the penguin’s head.
- Attach the chain securely, ensuring it can hold the weight of the penguin.
Once assembled, the penguin will look adorable and well-proportioned.
Why I Love This Pattern
The penguin amigurumi is a delightful project that’s fun and quick to make. I love how customizable it is: you can experiment with colors, add accessories like scarves or hats, and even make it festive for different seasons. It’s also a perfect handmade gift that’s both practical and charming.