
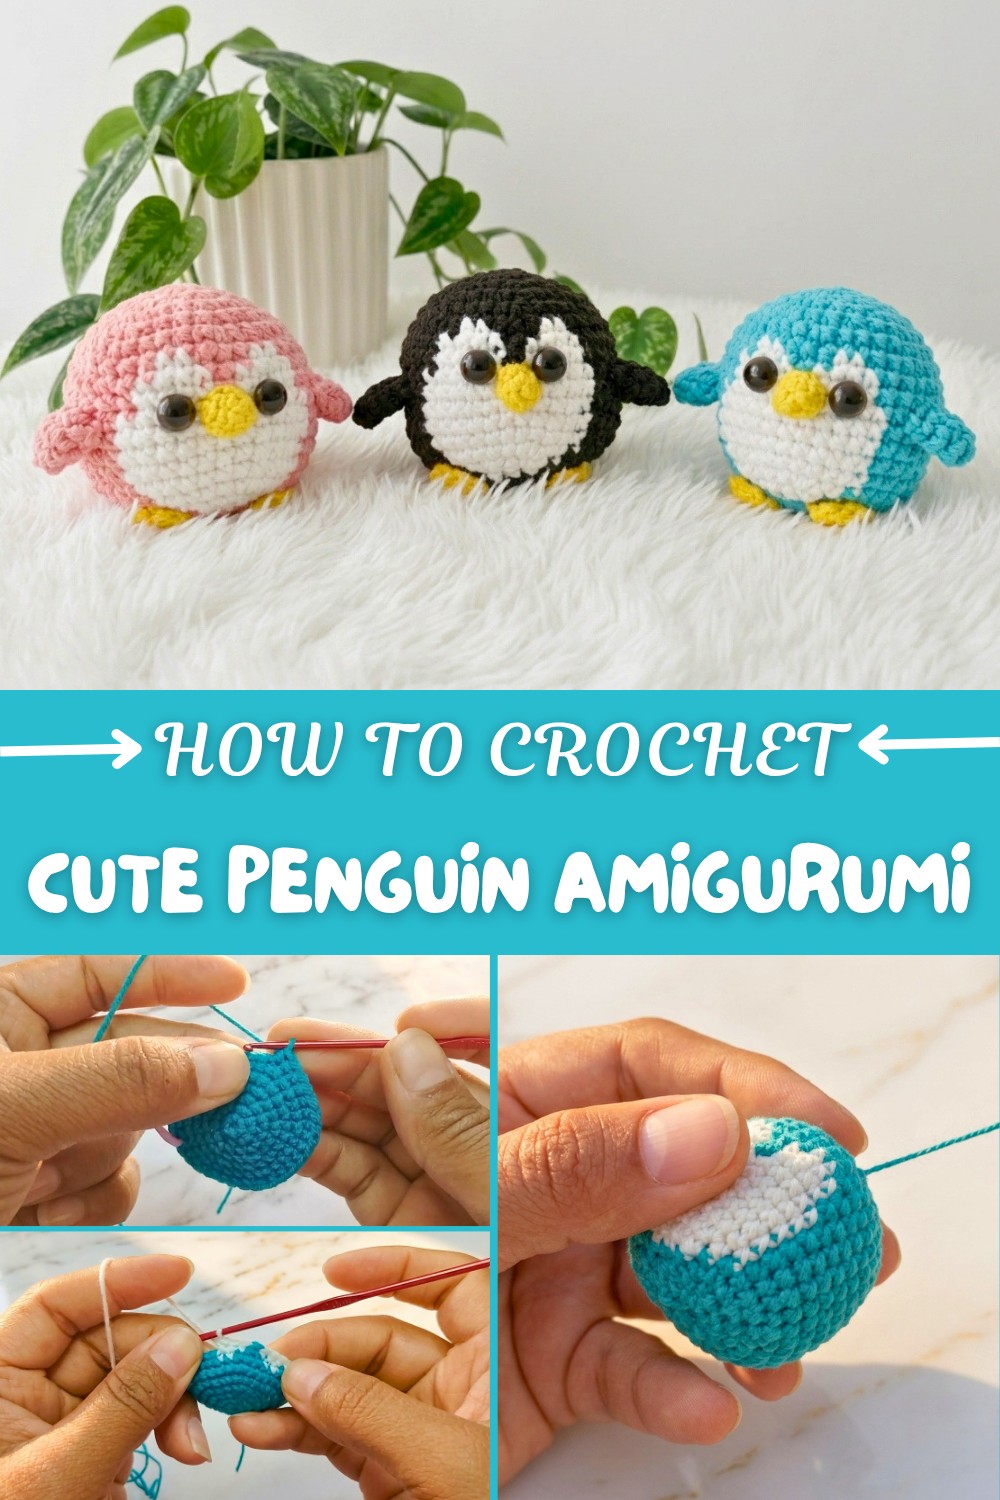
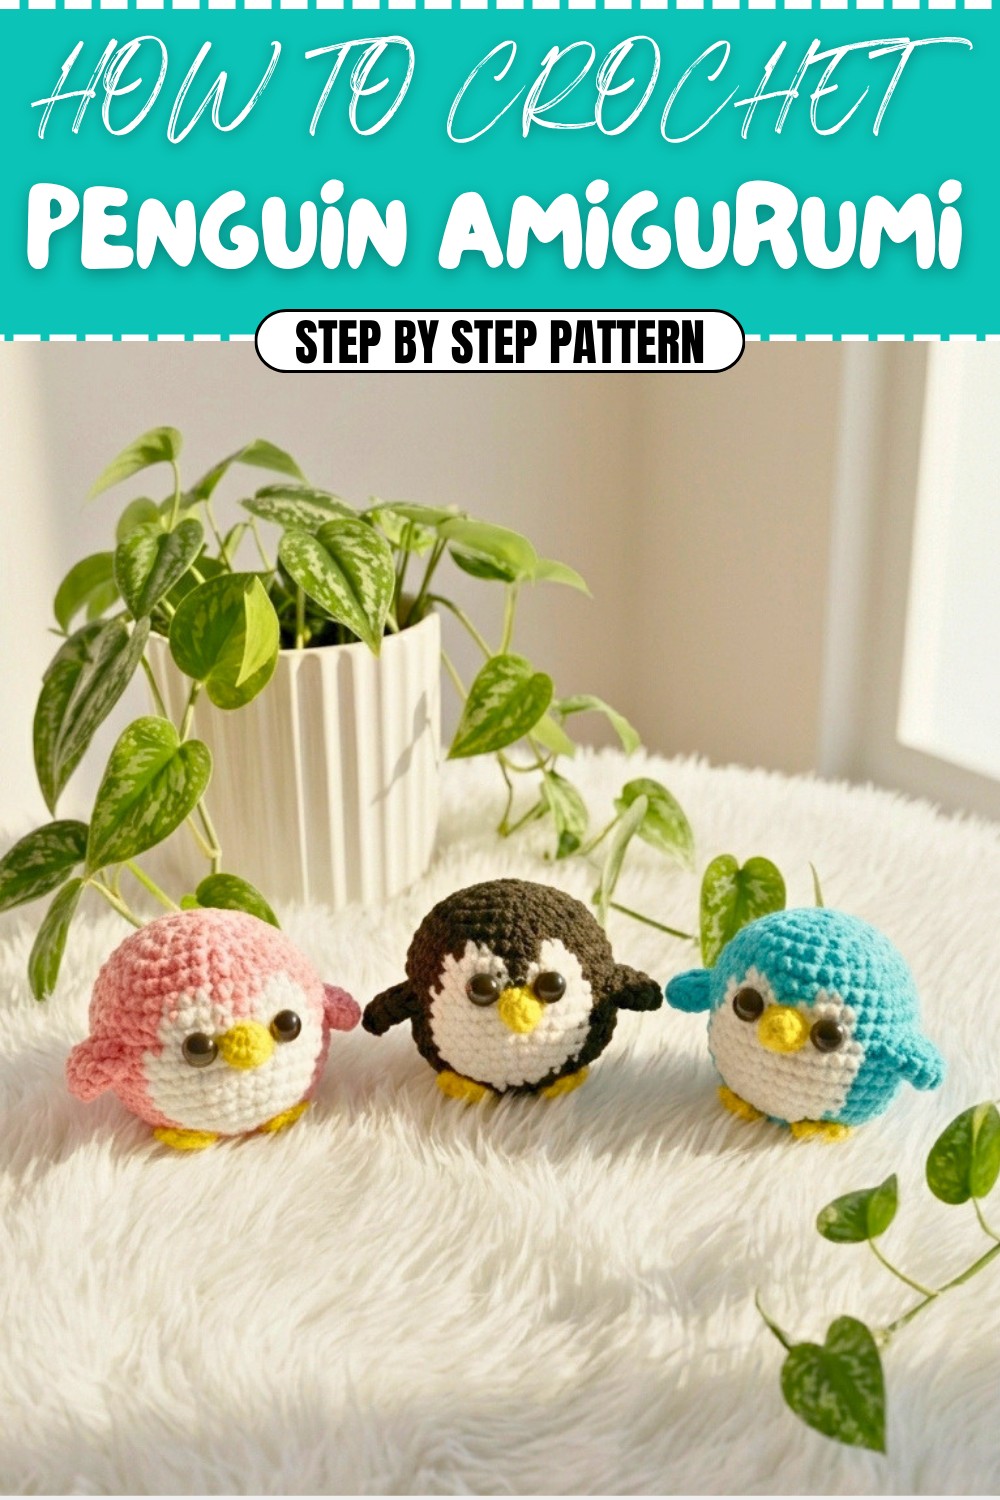
Cute Crochet Penguin Amigurumi – Easy Free Pattern
When you first pick up your crochet hook and yarn to create a penguin, you begin a journey of turning simple materials into an adorable, handcrafted friend. The Free Crochet Penguin Amigurumi Pattern is inviting for both new and seasoned crafters, offering a delightful way to learn the basics of amigurumi and make a sweet mini penguin with your own hands. Each round and stitch you make adds character, transforming your yarn into a lovable, huggable companion for any occasion.
Penguin Amigurumi – Free Crochet Pattern & Tips
This charming penguin features a round, chubby body, cute flippers, a cheerful beak, and twinkling bead eyes. The pattern uses beginner-friendly single crochet stitches and a few simple techniques for shaping and color changes, which are clearly guided in the helpful video. You can easily personalize your penguin or even turn this pattern into a tiny owl, chick, or other animal by tweaking ears and colors, making it a versatile addition to your crochet collection.
Color and Beautiful Features
- Classic blue body, crisp white belly, playful orange beak and feet, and black bead eyes add charm
- Try pastel or vibrant yarns to make a rainbow of unique penguins
- Accessorize with tiny scarves, hats, or sweaters for an extra special touch
- Single crochet stitches (sc), increases, and invisible decreases keep it easy and neat
Sizing Guide
- Finished penguin stands about 8-10 cm tall (perfect for holding in your palm)
- Make larger or smaller penguins by simply using thicker or thinner yarn and adjusting your hook size
With a few tweaks to colors or shapes, you can easily transform this basic pattern into owls, chicks, or bears, expanding your collection without starting from scratch.
If you notice loose color changes, adjust yarn tension and weave in ends securely. Keep stitches tight and consistent to avoid jagged edges at color joins. Use even, moderate stuffing to maintain a smooth shape. Always count your stitches with a marker to prevent losing your place.
Crochet Penguin Amigurumi Pattern
Materials
- 2.5 mm crochet hook
- 3-ply crochet yarn (blue for main body, white for face/belly, orange or yellow for beak and feet)
- Polyester stuffing (fiberfill)
- Stitch marker
- Yarn needle and sewing needle
- Scissors
- Optional: Black beads or safety eyes for eyes, craft glue
Skill Level
Intermediate (but confident beginners can also follow with care).
Key Abbreviations (US Terms)
- MR = Magic Ring
- ch = Chain
- sc = Single Crochet
- inc = Increase (2 sc in the same stitch)
- dec = Decrease (single crochet two stitches together)
- invdec = Invisible decrease (single crochet two stitches together through front loops only)
- slst = Slip Stitch
- st = Stitch
- rep = Repeat
Special Notes
- Work in spiral rounds; do not join at the end of rounds unless specified.
- Use a stitch marker to mark the first stitch of each round.
- Change colors as described, finishing the last pull-through of the previous stitch with the new color.
Body and Head
Start with blue yarn.
Round 1:
MR, ch 1, work 6 sc in the magic ring. (6)
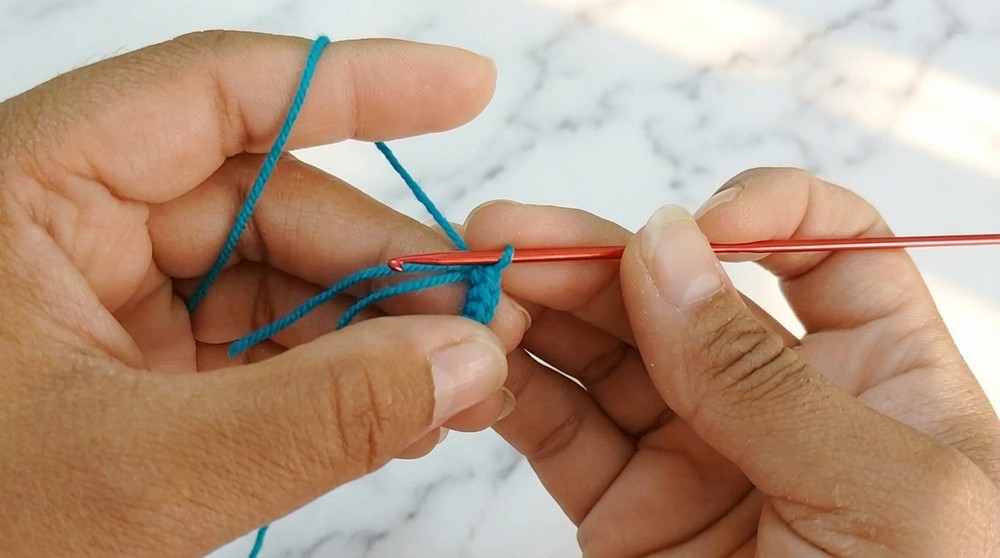
Explanation: This makes a small, tight circle—the base of your penguin body.
Round 2:
Work 2 sc in each stitch around. (12)
Explanation: You're increasing stitches, widening the base—your penguin begins to take shape.
Round 3:
(2 sc in first stitch, 1 sc in next stitch) - rep around. (18)
Explanation: Alternating increases and singles, your circle grows larger and stays flat.
Round 4:
(1 sc, 1 inc, 1 sc) - repeat around. (24)
Explanation: Continue expanding, your work starts to cup slightly to form a rounded belly.
Round 5:
(1 sc in each of 3 stitches, 1 inc in next stitch) - repeat around. (30)
Explanation: The increases are spread out more, helping to create a gentle curve.
Round 6:
(1 sc in next 2 stitches, 1 inc, 1 sc in next 2 stitches) - repeat around. (36)
Explanation: The circle is now cupped, forming the main part of the penguin's body.
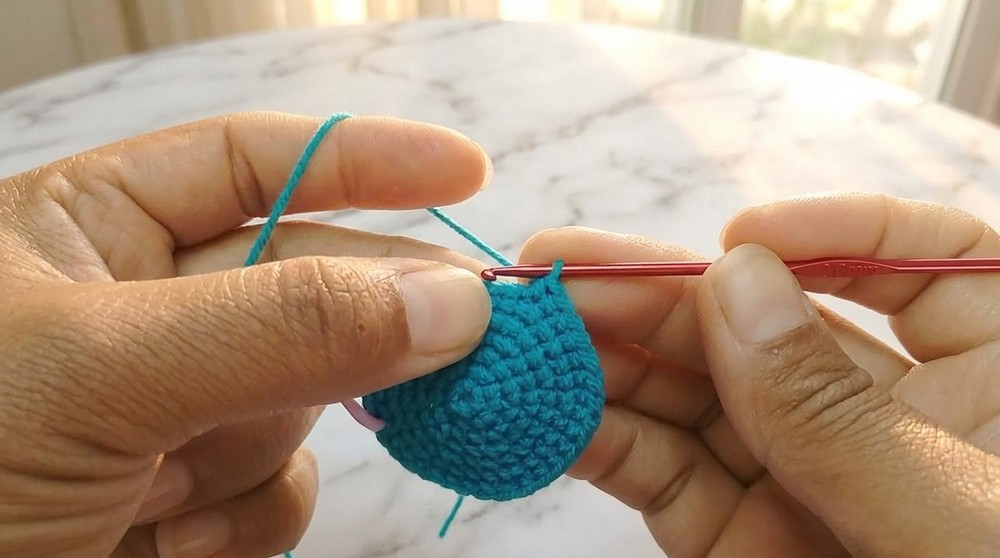
Rounds 7 to 14:
sc in each stitch around (36 each round). Work color changes for the face and belly as described:
- On Round 7, after 23 sc in blue, change to white for 2 sc, switch to blue for 3 sc, then white for 2 sc, finish with 6 blue sc.
- On Rounds 8-9, follow the same colorwork logic for face bands as described in the transcription.
- On Rounds 10-14, adjust the colorwork (21–22 sc in blue, 11 in white, etc.), following the instructions for face markings.
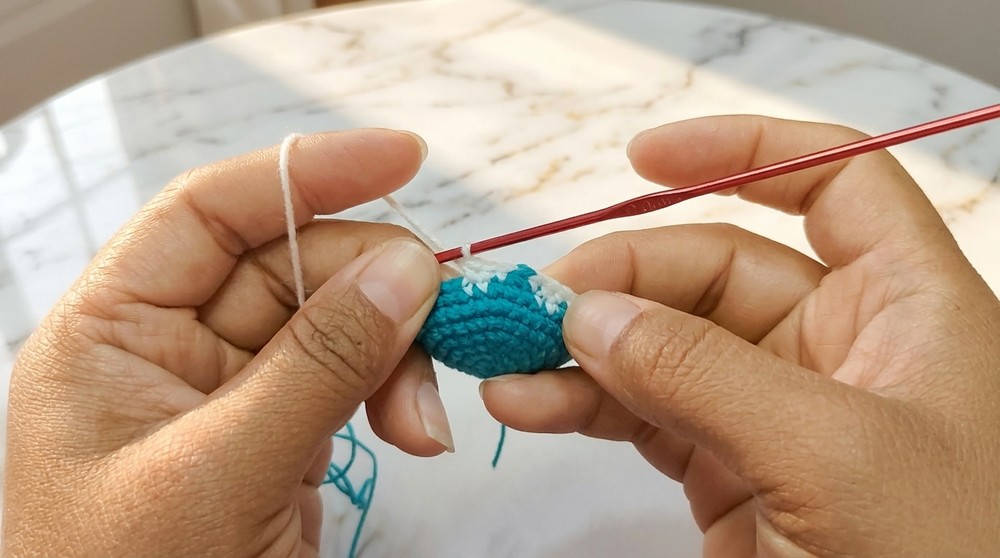
Explanation: This section establishes your penguin’s face and belly with neat color changes. Always change color by looping in the new yarn at the last step of the previous stitch. It’s the most visual part of your penguin!
Rounds 15 to 19: Head Shaping and Decrease
Begin decreasing to close the top of the head.
Round 15:
(4 sc, invdec) three times, 4 sc (blue), invdec (white), 4 sc (white), invdec (white), 1 sc (white), change to blue, 3 sc (blue), invdec (blue).
Round 16:
(3 sc, invdec) four times in blue, on next decrease switch to white: (3 sc, invdec) in white, switch back to blue and repeat. End with 24 stitches.
Round 17:
(1 sc, invdec, 1 sc) six times. (18)
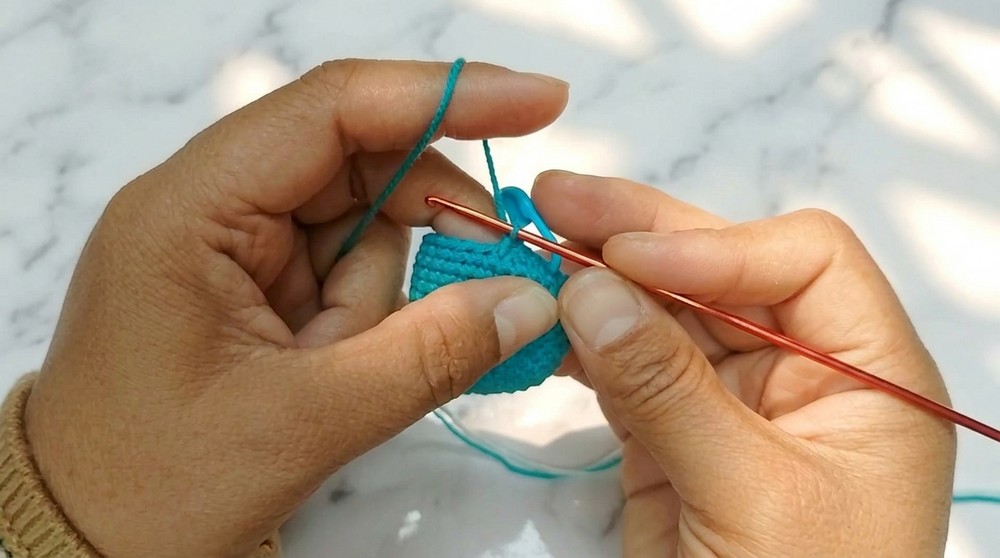
Explanation: The decrease rounds are closing up your penguin’s head—stuff firmly at the end of round 17 so your penguin holds its shape!
Round 18:
(1 sc, invdec) six times. (12)
Explanation: The work tapers quickly now; these decreases help sculpt the top of your penguin’s head.
Round 19:
Do 6 invdec to close. (6)
Finish off, cut yarn, use a yarn needle to sew the hole shut and hide the yarn inside.
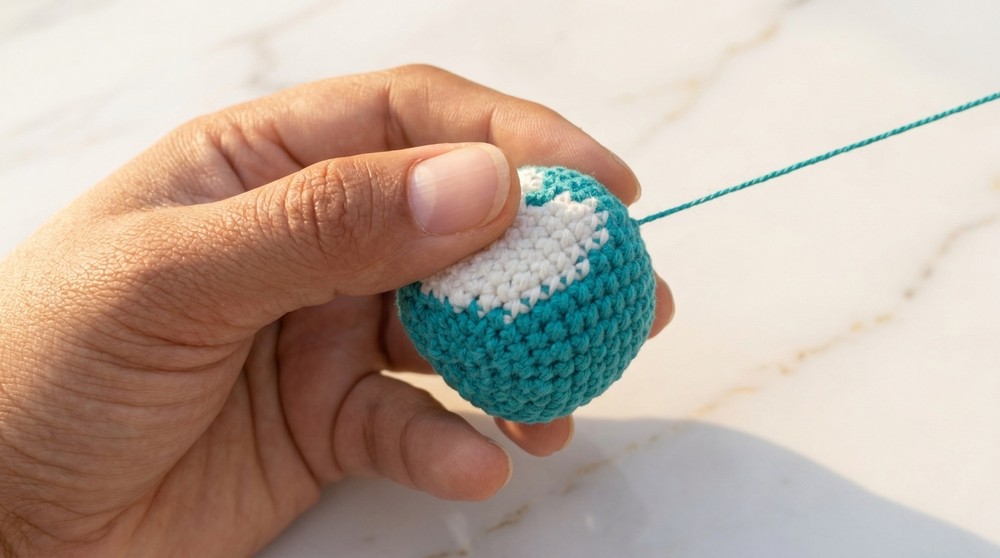
Explanation: The penguin’s body and head are finished. Use stuffing before closing for a plump, cute amigurumi.
Wings (Make 2)
With blue yarn:
Round 1:
MR, ch 1, 4 sc into ring.
Round 2:
2 sc in each stitch around. (8)
Round 3:
sc in each stitch around. (8)
Finish off, leaving a tail for sewing.
Explanation: These simple ovals form your penguin’s charming little wings. Make two and attach to each side of the body.
Toes/Feet (Make 2)
With orange or yellow yarn:
Round 1:
MR, ch 1, 6 sc in ring.
Slst to first stitch to finish. Cut yarn, leave a sewing tail.
Explanation: Flat circles for the penguin’s feet; make two and sew them to the bottom.
Beak
With orange or yellow yarn:
Round 1:
MR, ch 1, 5 sc in ring.
Slst to first stitch to finish. Cut yarn, leave a sewing tail.
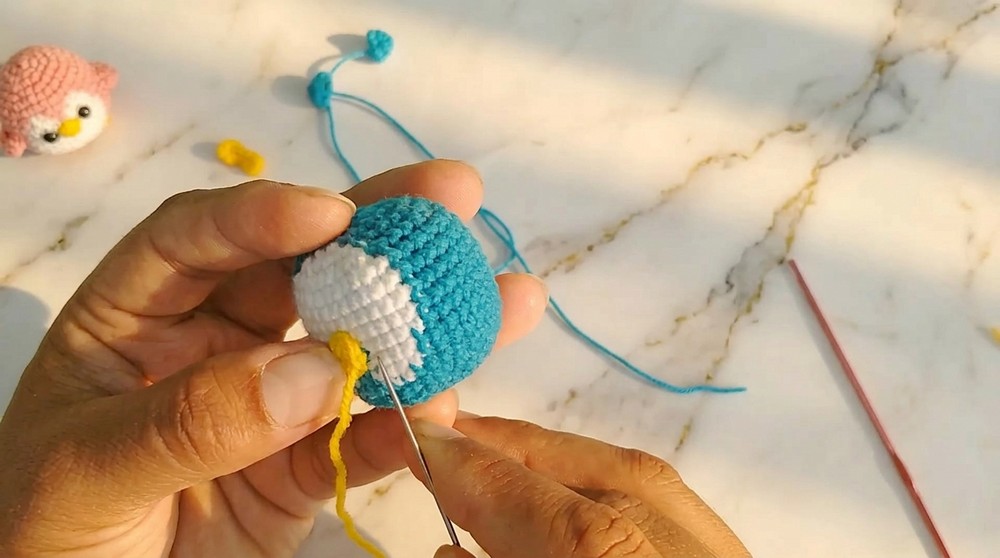
Explanation: The beak is a tiny oval/circle and is sewn right between the eyes. It’s a small but important detail for your penguin’s face.
Assembly
- Sew wings to each side of the body, starting at the second row below the beak.
- Sew the feet/toes to the flat base of the body.
- Attach the beak at the pointed tip of the head, centered between the face markings.
- Eyes: Glue or sew black beads just above the beak, or embroider eyes with black yarn.
- Finalize: Tuck in all yarn ends. Use glue if needed for securing eyes and beak.
Explanation: Assembling parts brings your penguin to life. Take time to evenly position pieces before sewing or gluing them in place. You’ll see your penguin’s personality shine as you attach the final touches!
Conclusion
Congratulations! You have completed your amigurumi penguin. Your project has taught you spirals, color changes, increases/decreases, invisible decreases, stuffing and assembling parts for amigurumi. This pattern can be customized with accessories, outfit, or color variations for even more creative fun.
Pattern Correction and Tips
- Always use a stitch marker to track the first stitch of each round.
- Stuff firmly for best shape before closing.
- For neat color changes, change colors on the last yarn-over of the stitch before the color switch.
- Double check counts in decrease rounds to avoid lopsided shaping.
- If gifting to children, embroider eyes for safety.
- Customize the size with hook or yarn changes, or add a scarf for extra cuteness.