
Free Crochet Granny Square Mesh Tank Top Pattern for Summer
Stand out in breathable style with a free crochet granny square mesh tank top pattern combining classic squares and modern mesh elegance.
There’s something magical about the way a hand-crocheted top can capture both beauty and creativity in a single piece of clothing. This tank top is a perfect example. It uses colorful granny squares, a timeless crochet design, to create a light, airy wear that’s perfect for summer days. Whether you’re heading to the beach, meeting friends, or just relaxing, this feels stylish and unique, with its combination of bold patterns and breathable mesh design. It’s not just a top, it’s a piece of art you can wear.
Free Crochet Granny Square Tank Top Tutorial: Easy Designs
Julie, the creator behind the YouTube channel Julsmara Crochet, is an expert at turning seemingly complicated designs into step-by-step projects that anyone can follow. Her calm and detailed instructions make even first-time crocheters feel confident and excited to try new patterns.
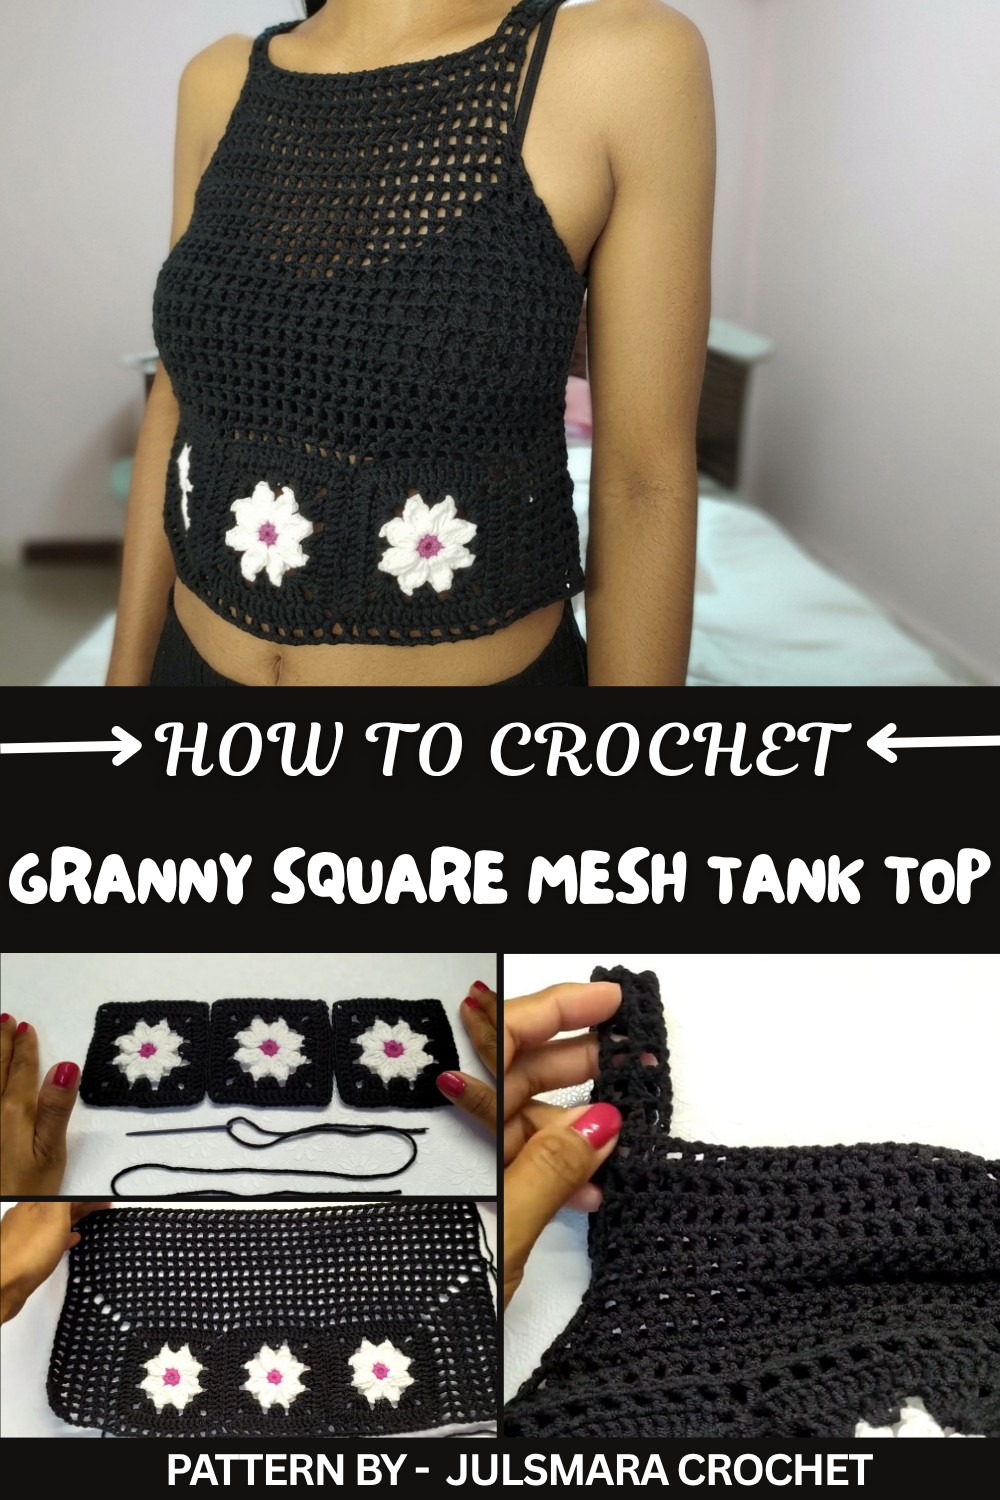
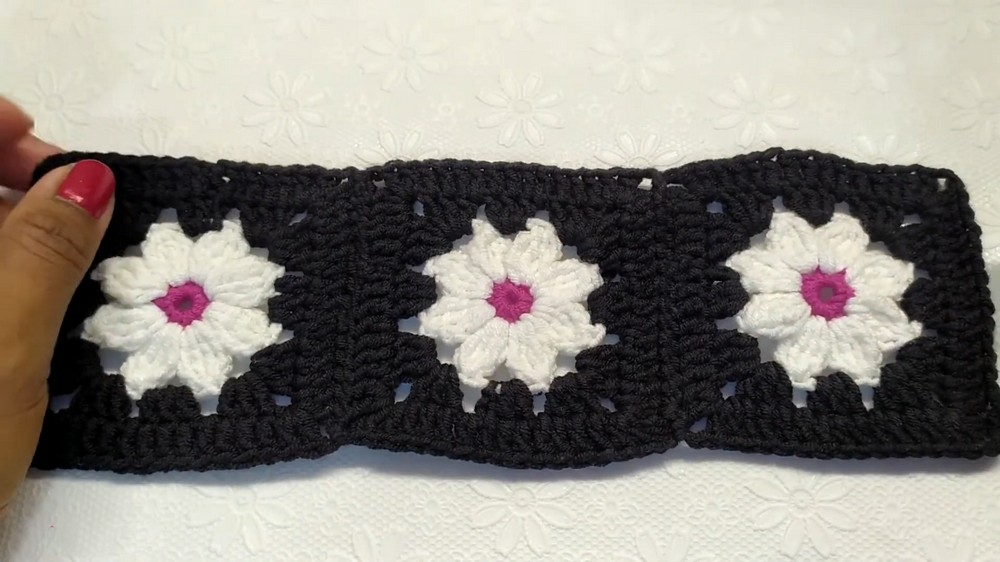
This tank top is built using six granny squares, three for the front and three for the back. Each square features a pink center, surrounded by white petals and a black border, giving it a bold yet elegant look. Once the granny squares are stitched together, the mesh detail begins. The airy design is created using rows of chain spaces and double crochet stitches, forming a light and breathable fabric that complements the colorful squares. The top is completed with soft, adjustable straps that ensure a perfect fit for anyone.
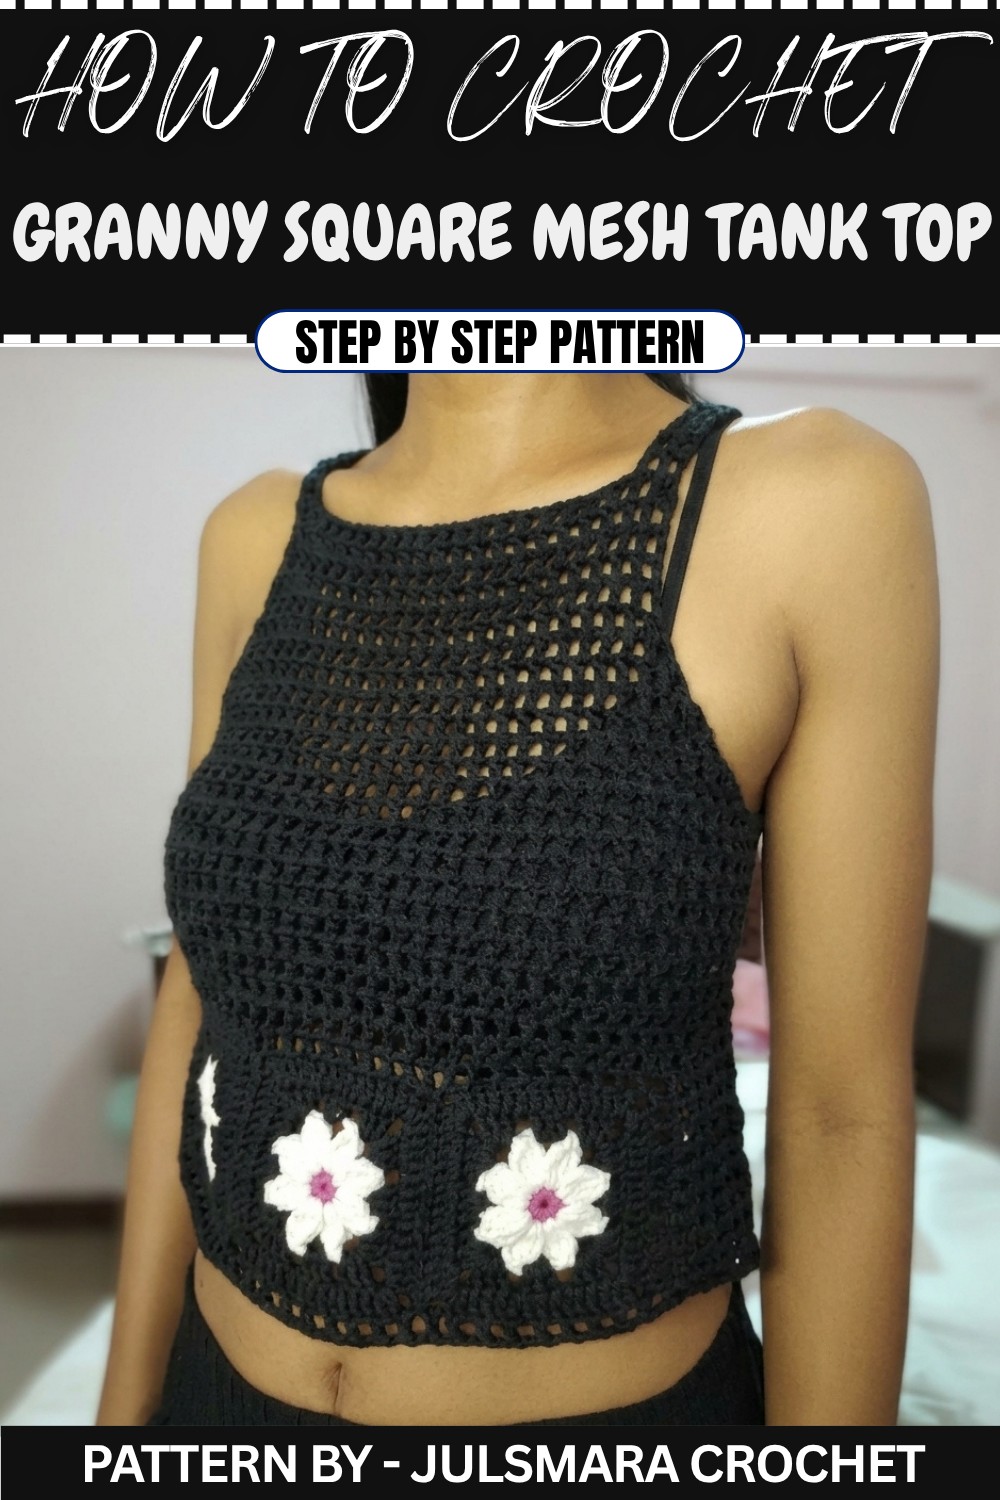
Granny Square Mesh Tank Top Pattern
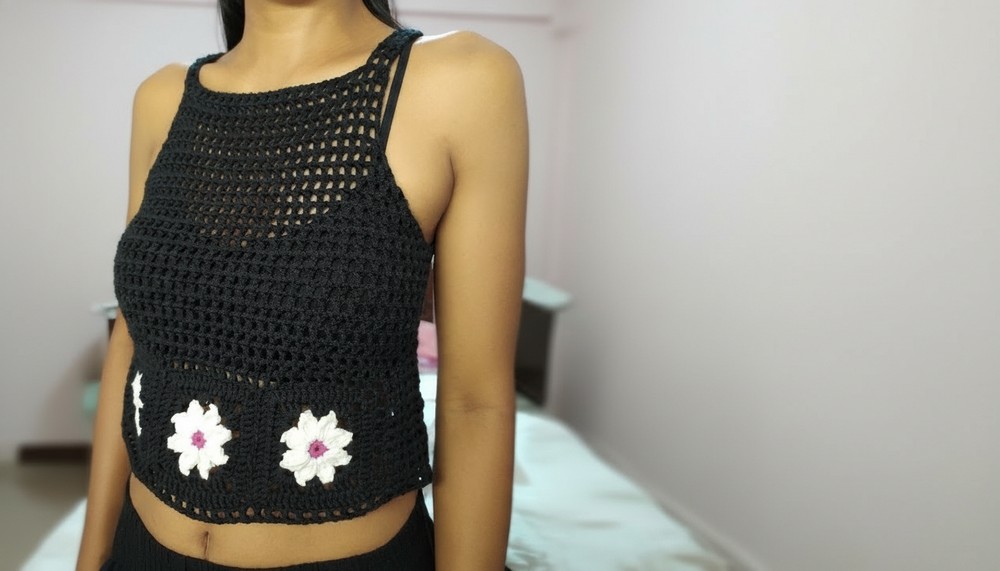
This granny square mesh tank top is lightweight, breathable, and perfect for warmer weather. The design incorporates classic granny squares and mesh panels, creating a modern variation of a timeless crochet style. This pattern is suitable for layering and can be easily customized for size and color preferences.
Skill Level
This pattern is suitable for Intermediate crocheters due to the assembly of granny squares, mesh construction, and stitch-reduction techniques. Basic crochet knowledge, such as granny square creation, double crochet, and stitch joining, is required.
Materials
To complete this tank top, the following materials are needed:
- Yarn:
- Alize Cotton Gold yarn in black
- Madame Cotton yarn in white (color 649)
- Hook: 3.5 mm crochet hook
- Tools:
- Yarn needle
- Stitch markers
- Cutter or scissors
Special Stitches
Half Double Crochet (HDC)
- Yarn over, insert the hook into the stitch, yarn over and pull through (3 loops on hook).
- Yarn over, pull through all 3 loops.
Double Crochet (DC)
- Yarn over, insert the hook into the stitch, yarn over and pull through (3 loops on hook).
- Yarn over, pull through the first 2 loops (2 loops remain).
- Yarn over, pull through the final 2 loops.
Chain-1 Mesh Pattern
- CH 1, skip one stitch, and work DC into the next stitch.
- Repeat across the row.
Stitch Abbreviations
- CH = Chain
- SC = Single Crochet
- DC = Double Crochet
- HDC = Half Double Crochet
- SL ST = Slip Stitch
Useful Tips
- Granny Squares: Ensure all granny squares are uniform in size by counting stitches on each side during creation.
- Blocking: Lightly block the granny squares before assembly to improve their shape and ensure smooth edges.
- Mesh Rows: Use a stitch marker to mark corners and track stitch counts, especially during reductions or row expansion.
The Crochet Pattern
1. Granny Square Preparation
Create Granny Squares
- You will need 6 granny squares total: 3 for the front panel and 3 for the back panel.
- Follow a standard granny square pattern, ensuring each square is the same size.
- Once the squares are complete, lightly block them for consistency.
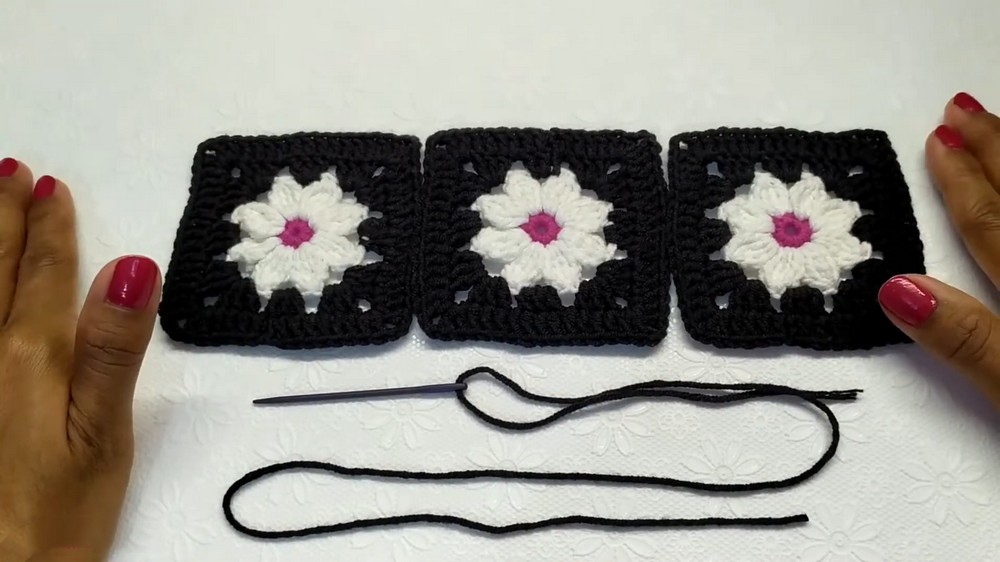
Assembly of Squares
- Place the squares together with their right sides facing up.
- Using a yarn needle, sew the squares together along their edges to form two panels.
- Front panel: Combine 3 squares side by side.
- Back panel: Repeat the same construction.
2. Mesh Construction
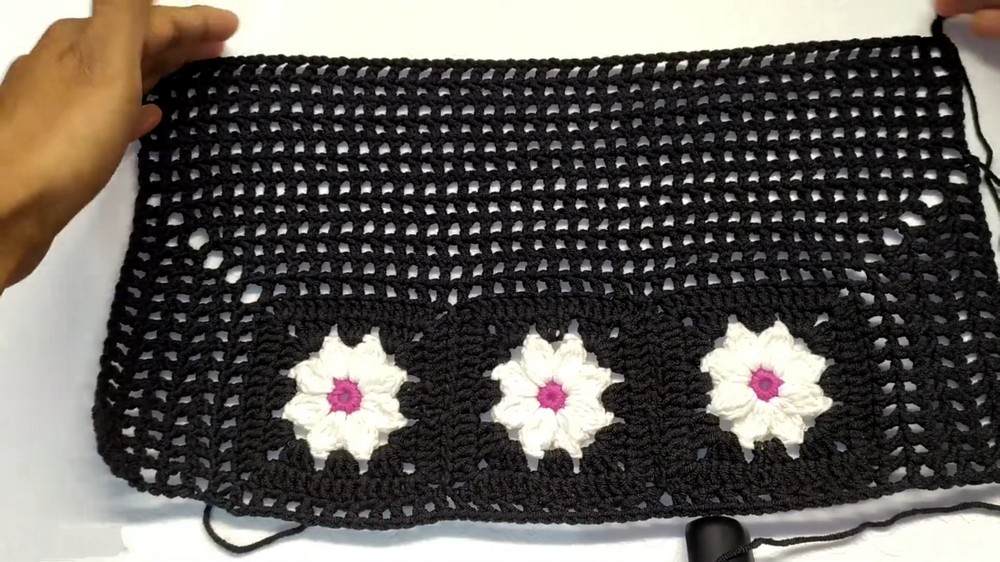
Establishing the Mesh
Round 1:
- Attach yarn to one corner of the square panels.
- CH 4, skip the first stitch, then work DC into the next stitch.
- Continue the pattern across the edge: CH 1, skip 1 stitch, DC into the next.
Corners and Sides
Rounds 2 to 6:
- At corners, work: CH 1, DC into the corner space, CH 4, DC into the same corner space.
- Build up the mesh pattern for 6 rows total along the top and side edges of the panels.
3. Expanding the Upper Panels
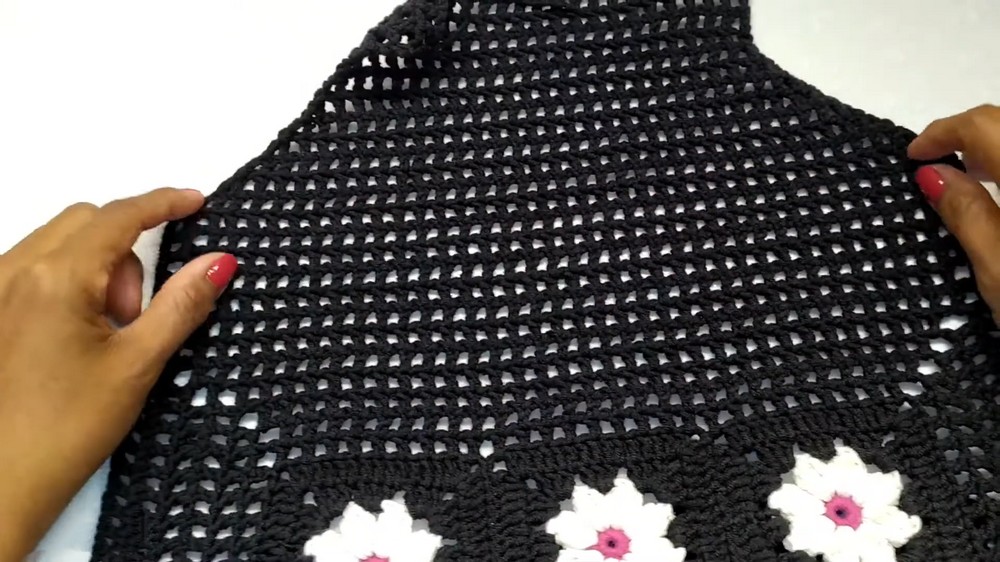
Round 7:
- After completing the initial 6 rows, add 6 more rows of mesh to the top section of both the front and back panels.
- Begin at the corner of the top edge and continue using the CH 1, skip 1, DC pattern to expand each panel.
- Ensure stitch counts align across both panels for symmetry.
4. Reducing Stitches
Round 13:
- Begin reducing stitches to shape the armholes.
- CH 2, turn, skip the next chain space, and work HDC into the top of the next stitch.
- Mark the edge stitches using stitch markers for consistency.
- To reduce at the end of the row:
- Yarn over, insert the hook into the next stitch, yarn over, pull through (3 loops).
- Yarn over, pull through 2 loops.
- Yarn over, insert the hook into the last stitch, yarn over, pull through (4 loops).
- Yarn over, pull through all loops on hook.
Rounds 14 to 19:
- Continue reducing stitches for 4 more rows to create gradual tapering (armhole shaping).
5. Completing the Body Panels
Rounds 20 to 23 (Straight Mesh Rows):
- After finishing reductions, stop decreasing stitches and work 4 rows of straight mesh.
- Use the CH 1, skip 1, DC pattern to maintain a uniform texture.
- You should have 22 chain spaces across after completing these rows.
6. Tank Top Assembly
Side Panel Assembly
- Use a yarn needle to sew the front and back panels together along the sides.
- Match the granny squares precisely to ensure neat edges and proper fit.
Creating Straps
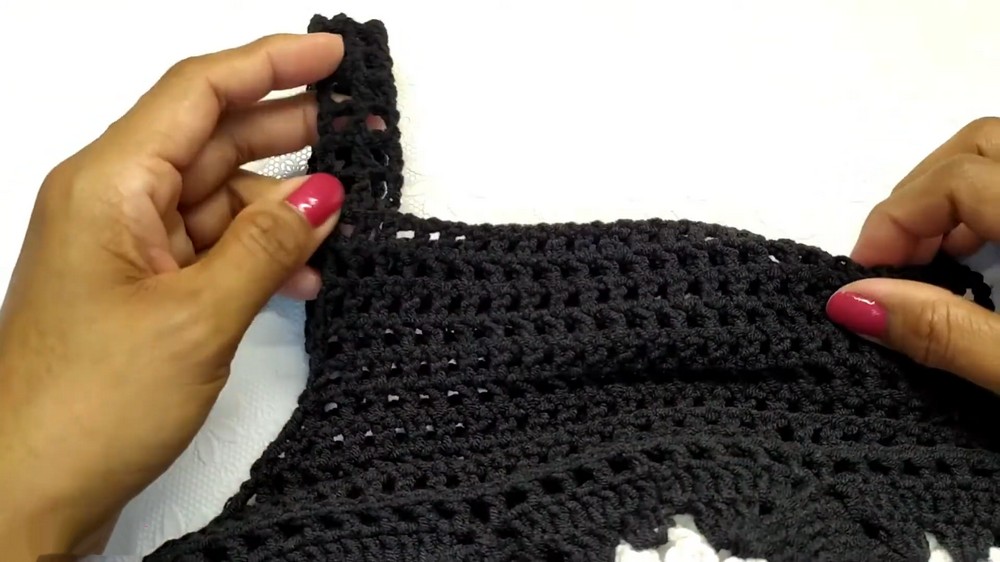
Foundation:
- Attach yarn at the top corner of the panel (where the straps will begin).
Rounds 1+:
- CH 4, skip one stitch, and work DC into the next stitch, continuing the chain-1 mesh pattern.
- Work 14 rows of mesh (or customize strap length based on preference).
- Once the desired length is reached, secure the strap to the opposite panel top edge using a SL ST.
Assembly and Sizing
The granny square mesh tank top consists of two main panels (front and back) sewn together at the sides with granny square alignment. The straps are added last and should be checked for symmetrical placement and consistent tension. Blocking the finished item lightly helps smooth out seams and enhances the final presentation.
Conclusion
This mesh tank top is a blend of traditional granny square motifs and modern openwork design, providing a breathable and fashionable piece for casual or summer wear. With customizable strap lengths, reductions, and additional rows, this pattern offers flexibility for sizing adjustments. Pair it with your favorite accessories for a stylish handmade look!