
Crochet Multi Puffed Sleeved Cardigan Pattern for Your Dream Outfit
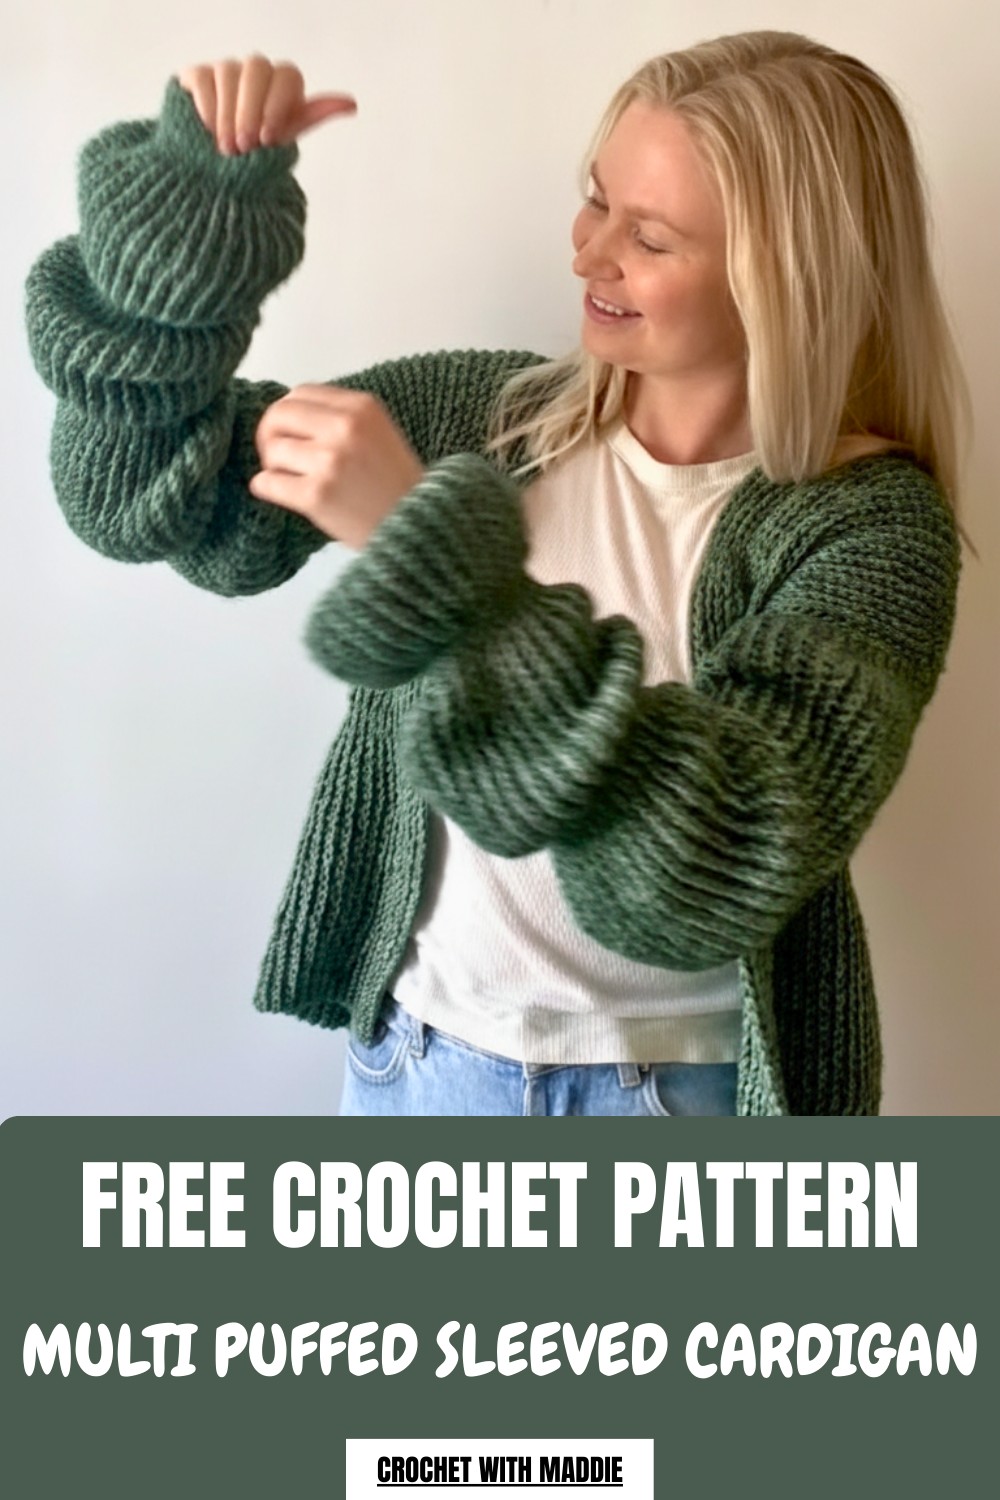
Soft bouncy bubbles stack neatly down your arms in this cozy crochet multi puffed sleeved cardigan that feels like wearing a warm cloud all day.
Pattern By Crochet with Maddie
It’s like stepping into your grandmother’s cozy closet and finding the most elegant, timeless piece of clothing you’ve ever seen, this multi puffed sleeved cardigan is all about combining comfort and charm. With its soft texture and unique puffy sleeves, it’s the kind of cardigan that can make you feel like you’re wrapped in a warm cloud while standing out in any crowd. Whether for chilly mornings, evenings by the fireplace, or just a stylish everyday look, this cardi combines function and flair effortlessly.
Wear This Free Crochet Multi Puffed Cardigan Pattern Everywhere
The construction is surprisingly simple yet so effective. It uses beginner friendly stitches like single crochet (SC) and slip stitches (SLST) while playing with different hook sizes. This little trick of alternating hooks creates the signature narrow and wide sections, giving the cardigan its chic, voluminous texture. The intricate yet easy back loop technique adds extra flexibility, making the fabric light and wonderfully textured. These skills are not just useful for garments but can easily translate to home decor or even accessories like purses or cushion covers.
What will you learn from this pattern?
By following this step by step guide, you’ll master working with different hooks to create textures and shapes. You’ll also learn how to create professional looking seams using single crochet stitches and adapt designs to fit your size. Another valuable skill you’ll pick up is how to manage stretchable areas like shoulders or cuffs, ensuring your garment is as wearable as it is stylish.
These methods allow for endless creative opportunities. You might try making delightful puffed sleeve dresses, cozy pullovers, or textured bags. Even loungewear or decorative items like table runners and blankets can benefit from the neat rows and back loop detailing you’ll perfect with this cardigan.
This project isn’t just a to do; it’s something to cherish, wear proudly, and customize to fit your wardrobe and personality.
Multi Puffed Sleeved Cardigan Crochet Pattern
Materials Needed
- Yarn: Cotton/wool/acrylic blend, approximately 11–12 skeins (buy an extra skein for backup).
- Hooks: 4 mm, 5 mm, and 7 mm crochet hooks.
- Tools: Needles for weaving in ends and for construction tasks.
- Extras: Stitch markers for alignment during assembly (optional).
Stitch Guide
- Single crochet (sc): Insert hook into the stitch, yarn over, pull through one loop, yarn over, pull through both loops.
- Slip stitch (sl st): Insert hook into stitch, yarn over, pull through both loops on the hook.
- All rows: Always work into the back loop only to create the linear texture.
Pattern Instructions
1. Back and Front Pieces
Foundation Chain:
- Using a 4 mm hook, create a slipknot and chain 12 stitches.
- Switch to a 7 mm hook, then chain 20.
- Switch to a 5 mm hook, then chain 6.
- Switch back to the 7 mm hook, then chain 20.
- Switch to the 5 mm hook, then chain 6.
- Finally, switch to the 7 mm hook, and chain 21.
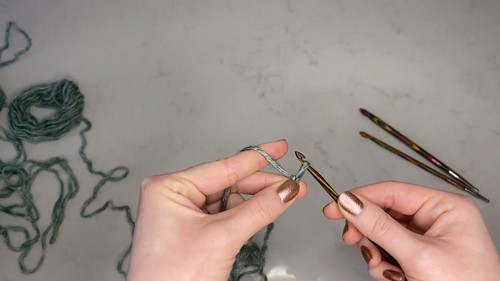
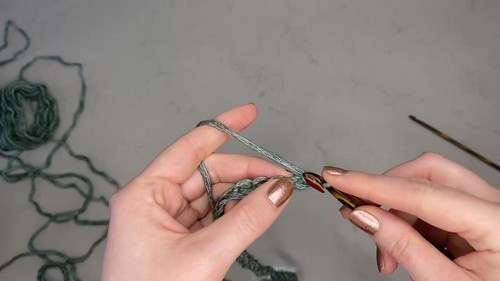
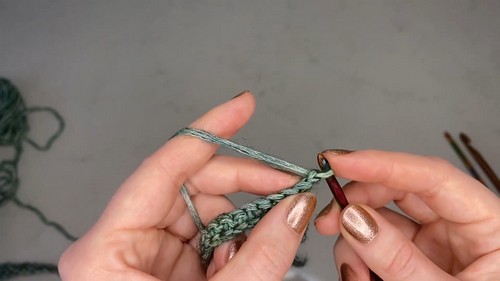
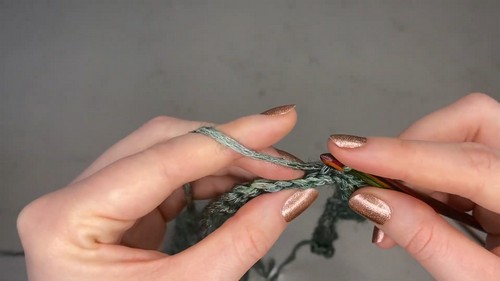
You will now have a foundation chain alternating between lengths and hook sizes.
Work Back Across the Chain:
- Start working back along the foundation:
- 7 mm hook: Single crochet (sc) into back loops only for the respective sections.
- 5 mm hook: Use slip stitches (sl st) into back loops only.
- 4 mm hook: Use single crochet (sc) in back loops only.
- First row: Work following the same sequence from the foundation chain (12 sc with the 4 mm hook, 20 sc with the 7 mm, 6 sl st with the 5 mm, and so on).
- Transition between rows: At the end of every row, chain 1, turn your work, and continue following the stitch and hook sequence from step 1.
Number of Rows:
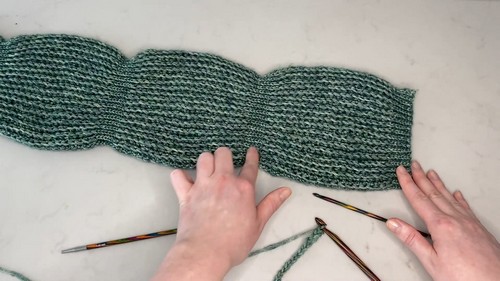
- Create 110 rows for the back piece.
- For the two front pieces, follow the exact same steps but work up 50 rows each (half the width of the back piece).
2. Arm Pieces
Foundation Chain:
- Using the 4 mm hook, create 12 chains to form the cuff.
- Switch to the 7 mm hook, then chain 20.
- Switch to the 5 mm hook, then chain 6.
- Switch back to the 7 mm hook, and chain 20.
- Continue the sequence by adding:
- A section of 5 mm hook: chain 6.
- A section of 7 mm hook: chain 20.
- Another section of 5 mm hook: chain 6.
- A final section of 7 mm hook: chain 20 and end with an extra 7 chains using the 5 mm hook.
Construction:
- Work back along the chain using the same principle:
- Use single crochet when you are working in sections with the 4 mm and 7 mm hooks.
- Use slip stitches when working in sections with the 5 mm hook.
- Always work into the back loops only for every row.
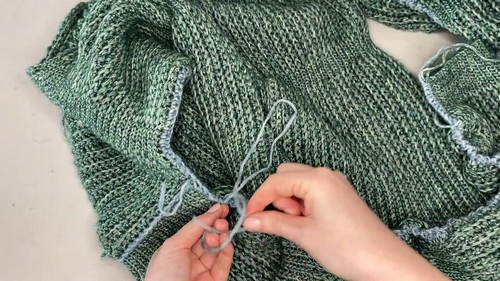
- Follow this sequence for the entire length of the sleeve: chain 1 at the end of each row, turn your work, and alternate hooks between rows.
Number of Rows:
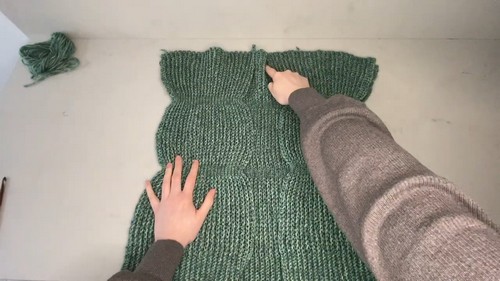
- Work rows back and forth until the sleeve measures approximately 69 cm long.
3. Assembly
Attaching Front Pieces to the Back Piece:
- Lay the back piece flat with threads (seams) facing downward.
- Position the front pieces with the threaded or seamed side facing upward (this ensures the seams are hidden inside the cardigan after assembly).
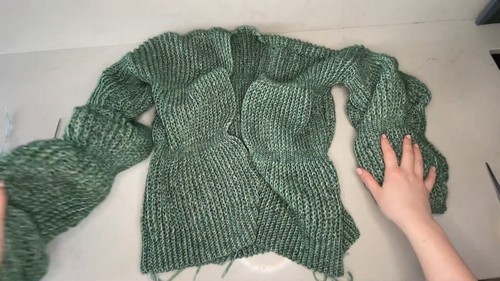
- Use a 5 mm hook and single crochet to join the seams for each front piece to the back piece. Match stitches and crochet along the edge to attach them evenly.
Attaching Arms:
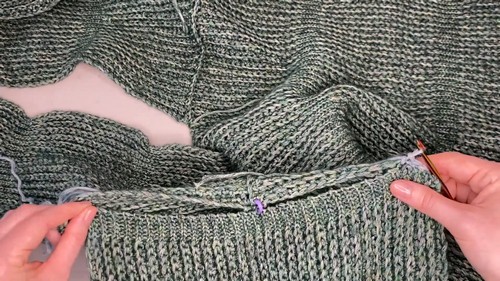
- Align the midpoint of the arm piece with the shoulder seam on the main body. Use a stitch marker or piece of yarn to hold the alignment in place.
- Use the 5 mm hook to crochet the arm onto the body. Work into every stitch on the main body and every other stitch on the arm piece. Repeat for the other sleeve.
Refining the Design
Creating Puffed Sleeves:
- Once the arms are attached, grab a length of yarn and thread it through a needle.
- Begin at the bottom of the sleeve by inserting the needle into the first stitch of the 7 mm section at the wrist.
- Sew in a zigzag pattern through every other stitch along the seam of the arm, alternating between the back and front of the sleeve.
- When you reach the corresponding joint, tighten the gathered fabric until the sleeve’s length is reduced by half its original size.
- Secure the gathered section with multiple knots for durability.
Finish the Shoulder Stretch:
- The shoulder joints may be overly stretchy after assembly. Cut a piece of yarn that matches the shoulder length.
- Thread the yarn through a needle and sew in a zigzag fashion along the shoulder seam.
- Gently pull the yarn to reduce the stretch by one third, ensuring a better fit around the shoulders.
- Secure the thread with a double or triple knot.
Finishing the Neckline and Openings:
- Use the 5 mm hook to crochet single crochets along the open edges of the cardigan (the front opening and neckline).
- This step ensures a polished and clean finish for your garment.
Final Adjustments
- Securing loose threads: Using a needle, weave the loose yarn ends into the fabric of the cardigan. This helps reinforce the structure and ensures durability while keeping the finish clean.
- Double check seams: Ensure all parts are securely attached to avoid gaps or loose stitches.
Finished Size and Fit
- Body Fit: Small to Medium (approximately 42 cm wide and 52 cm long).
- Sleeve Length (gathered): Approximately 69 cm.
- Overall Style: Relaxed fit with puffed sleeves and textured design.
Conclusion
Congratulations, You’ve completed your stylish multi puffed sleeved cardigan. Its unique texture and gathered puff sleeves make it both functional and trendy. Whether used for layering or as a statement piece, this cardigan is sure to turn heads.
You’ve mastered alternating hook sizes and stitch transitions to create a truly custom fit garment.