
Free Crochet Heart Crop Top Pattern for Fun Summer Getaways
Enjoy this free crochet heart crop top pattern with simple instructions that guide you through each row so you can make a cute and comfy top for summer outings.
A warm afternoon sparked the idea for something exciting. Bright, playful crochet projects often bring life to wardrobes, and this heart crop top adds charm and style to any outfit. A breathable and lightweight texture ensures comfort during sunny days, while a bold heart design makes it the centerpiece of casual, everyday fashion.
Soft, balanced colors paired with a clean construction bring out its elegance. The lace like straps and subtle fan shaped edging take the aesthetic to the next level, offering a touch of detail that matches special occasions or casual outings equally well. The top holds its shape effortlessly, combining cute features with practical wear—the result is simple yet full of personality.
Perfect Picnic Wear: Free Crochet Heart Crop Top Pattern
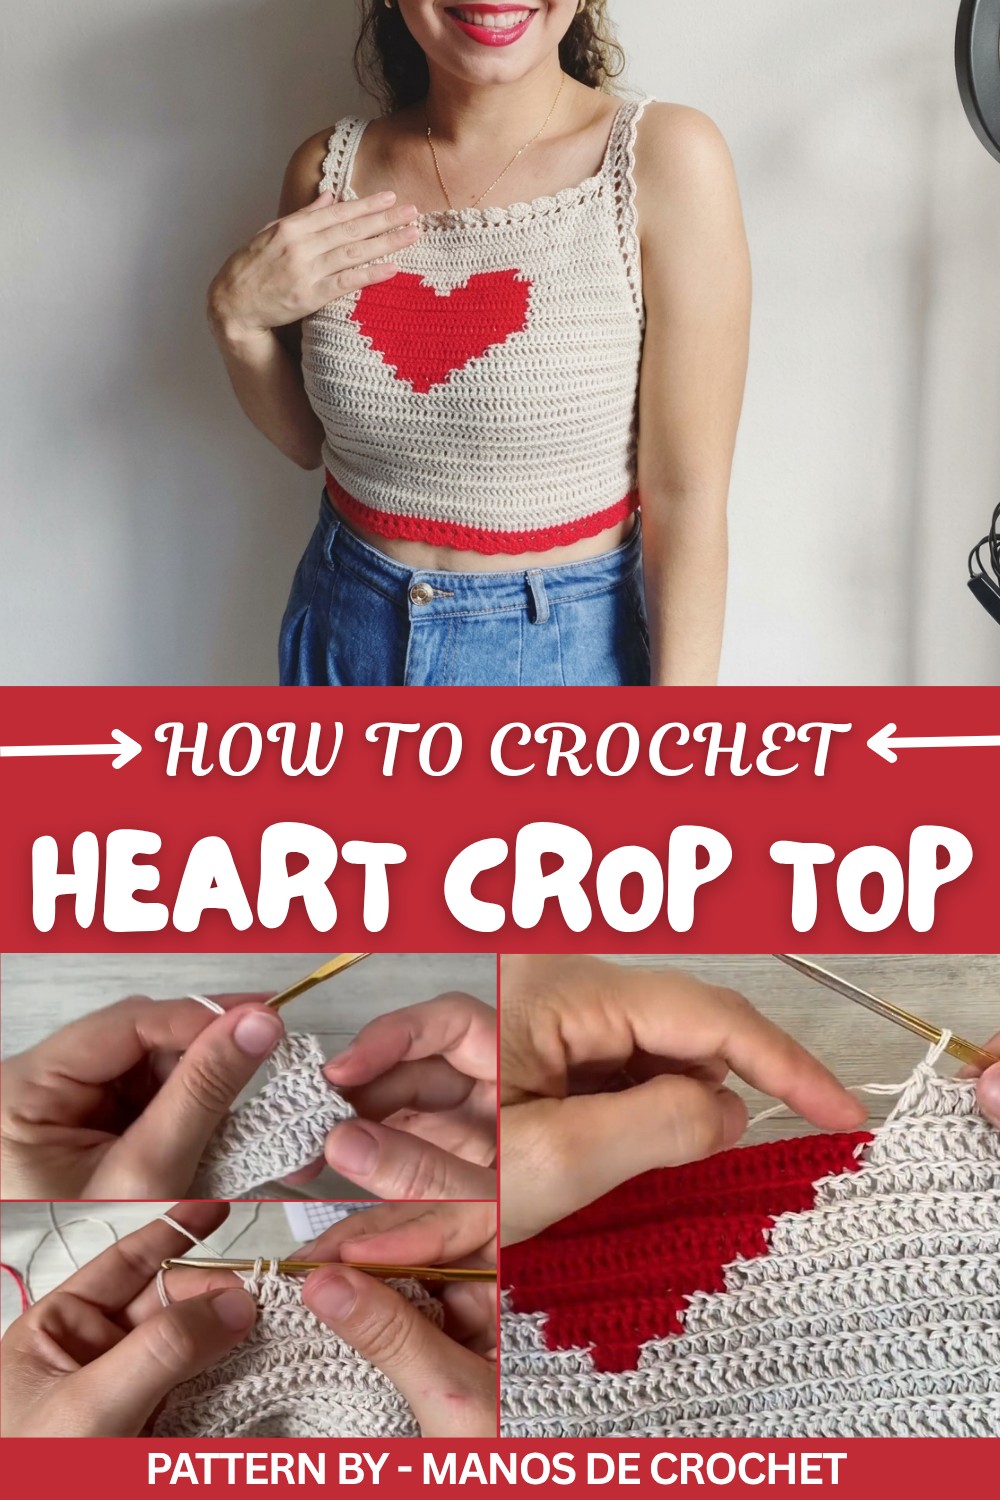
Stefhanie from Manos de Crochet shared an easy to follow tutorial that makes everything manageable, even for beginners. Her explanation of the heart motif involves a tapestry technique that may seem intricate at first glance, but her precise guidance makes each step feel approachable. Adjusting the size is a breeze as she clearly explains how to adapt the stitch count to individual measurements, adding versatility to this project.
With this project complete, creativity opens new doors. The techniques used here can inspire matching accessories, festive décor items, or even complementary styles inspired by the same cheerful theme. From enhancing personal wardrobes to gifting loved ones, this crochet crop top blends charm, quality, and utility effortlessly.
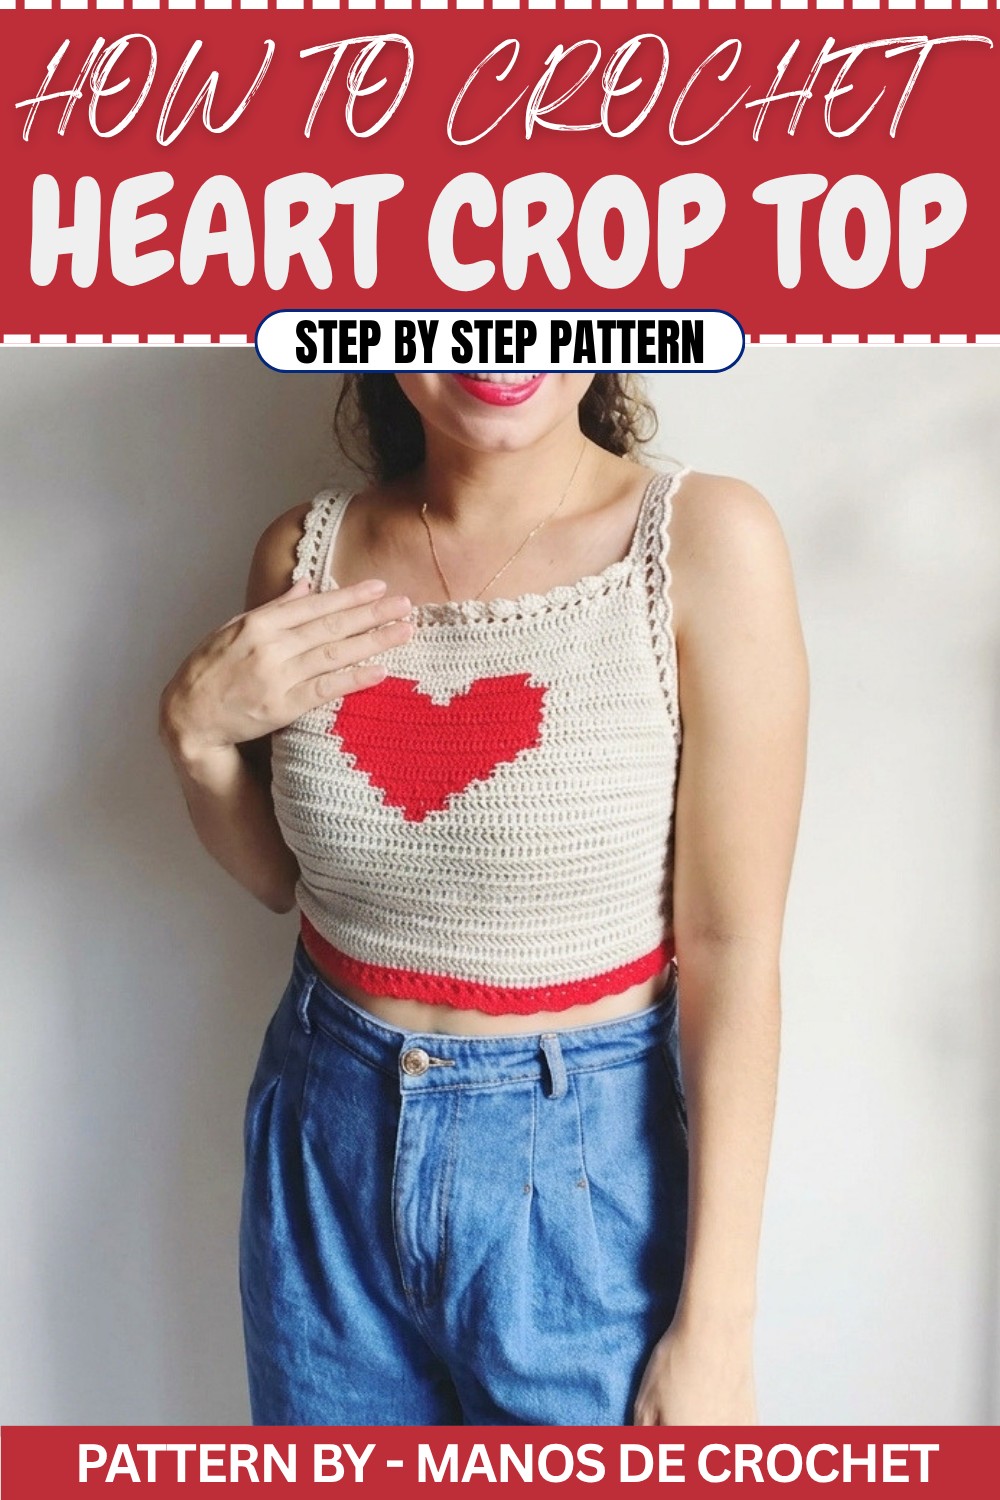
Crochet Tapestry Heart Top Pattern
This top features a charming heart design on the front, created using the tapestry crochet technique. With a romantic flair and delicate design, this project is perfect for those looking to make a stylish and handmade piece. Let’s dive into the steps together and bring this wonderful idea to life.
Quick Overview of Pattern
- Technique: Tapestry crochet
- Design: Heart pattern on front
- Key Features: Alternating rows for texture, decreases for shaping, and optional strap and neckline flare.
- Skill Level: Easy to Intermediate
Notes
- The heart design uses tapestry crochet, where two yarn strands are worked simultaneously to incorporate color changes.
- Base chains must be an odd number to ensure the heart pattern is centered.
- Rows alternate between working only the front chain and back chain of stitches, which creates texture.
- You can customize the heart size and placement depending on your chosen dimensions.
Skill Level
Intermediate – Basic crochet knowledge and color changing techniques are required.
Materials
- Yarn:
- Base color thread (thin acrylic or cotton thread, doubled for sturdiness).
- Red thread for the heart design.
- Crochet Hook: 4 mm crochet hook.
- Other Tools: Stitch markers, scissors, yarn needle for weaving in ends.
Measurements / Sizing
- The tutorial creates a size M top measuring approximately 70 cm in width.
- Measurements for other sizes are included to guide customization.
Gauge
- 4 rows x 6 double crochets = 2 inches (5 cm).
- Adjust your hook size if your gauge doesn’t match.
Stitch Abbreviations
- ch = Chain
- sc = Single Crochet
- dc = Double Crochet
- sl st = Slip Stitch
- yo = Yarn Over
Special Stitches
- Tapestry Double Crochet (tapestry dc):
While working a double crochet, change the yarn color just before completing the stitch to incorporate the secondary yarn strand. - Decreasing Double Crochet:
Combine two double crochets into one stitch:- Start the first dc but do not finish (leave loops on hook).
- Start the next dc and finish both stitches together.
The Crochet Pattern
Step 1: Foundation Row
- Create a slip knot and crochet 139 chains for the base. Ensure the number is odd for proper pattern placement.
- This measures approximately 70 cm for a size M top.
- If working a different size, adjust the length accordingly. (Refer to measurement chart for guidance.)
- Round 1: Begin by making 2 chains to start the row.
- Skip the first two chains and work dc into the third chain.
- Make one double crochet into each chain.
- At the end of Row 1, you should have 139 double crochets.
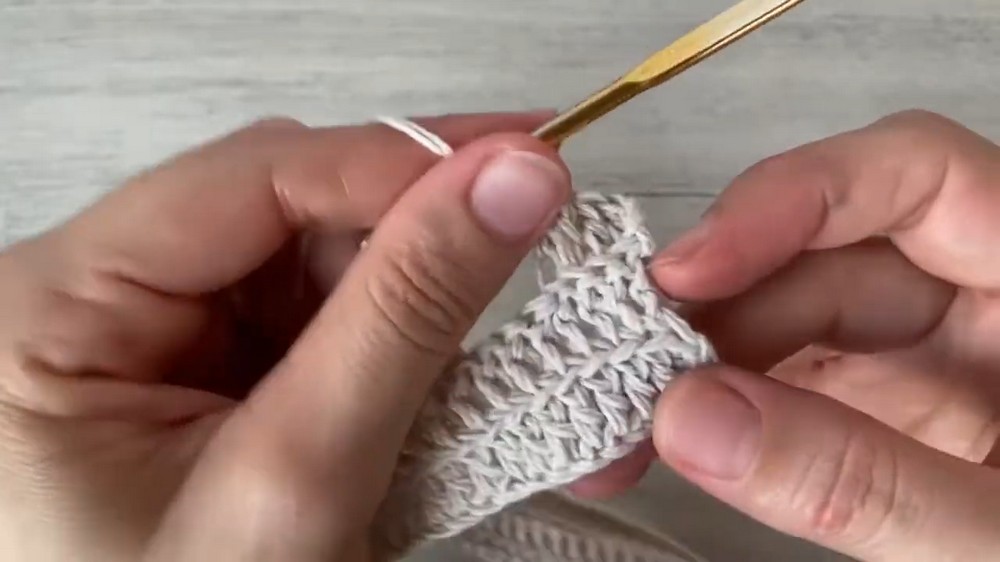
Step 2: Creating Texture
- Round 2:
- Start with 2 chains, turn your work.
- Work double crochets only into the front chain (it creates a ridged texture).
- Continue working dc in the front chain of each stitch across the row.
- Round 3:
- Start with 2 chains, turn work.
- Work double crochets in the back chain to alternate the direction of ridges.
- Continue working dc in the back chain across the row.
- Repeat Rounds 2 and 3 alternately until you have 12 rows total or your desired length for the body portion.
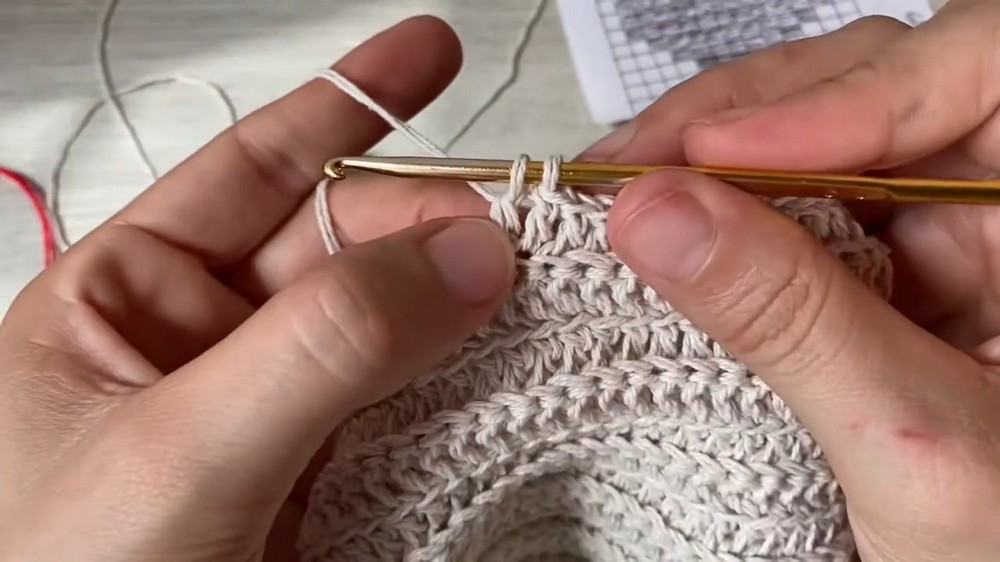
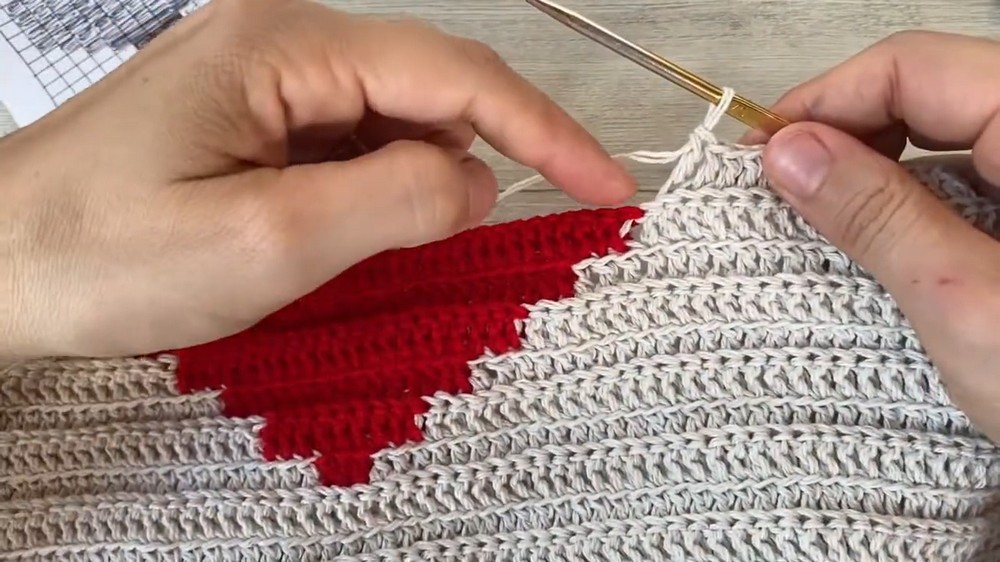
Step 3: Tapestry Heart Design
- Heart Pattern Setup:
- Reference the heart chart provided. Each square represents 3 double crochets of color.
- Begin stitching the bottom of the heart upward.
- Locating the start point:
- With 139 base stitches, subtract 3 stitches for the heart start point: 139 - 3 = 136 stitches.
- Divide 136 by 2 = 68 stitches for each side of the heart.
- Insert red color:
- On stitch 68, prepare a dc but leave it unfinished.
- Switch to the red yarn to finish the stitch and work 3 red double crochets.
- Create color transitions:
- Carry the unused yarn strand along the row by holding it behind the stitches.
- Alternate between red and base color as indicated by the chart.
- Build the heart:
- Follow the chart’s pattern to increase the number of red stitches in subsequent rows.
- Work 4 additional rounds, gradually expanding the heart’s width (adding 3 red stitches per row).
- Completing the heart:
- For the top rows of the heart, taper the red stitches again, leaving blank squares on the chart.
Step 4: Top Shaping – Decreases & Neckline
- Decreasing:
- At the start and end of each new row, decrease by combining two dc stitches into one (as explained above).
- Work decreases symmetrically over the next 4 rows to shape the bust area.
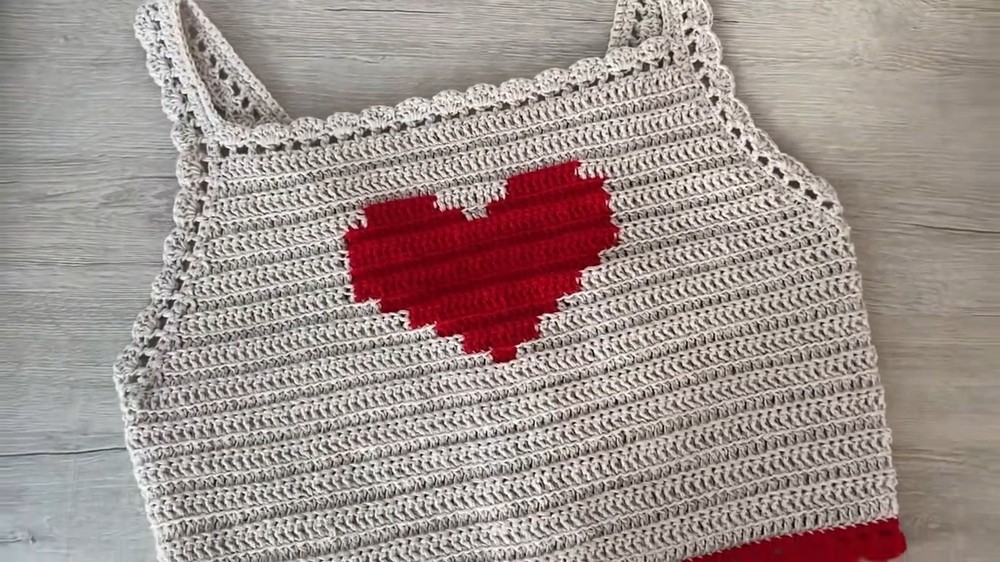
- Neckline Fans:
- With the base yarn, start a row of dc, skipping every other stitch with a chain space between.
- In the next row, create fans: Work 4 dc into each previous dc, with a sc between fans.
Step 5: Straps
- Make a Strap:
- Crochet 60 chains (approximately 30 cm for size M).
- Attach the strap to the top corner with a sl st.
- Add decoration to the strap by repeating the fan pattern used in the neckline.
- Repeat for Second Strap:
- Mirror the steps for the second strap on the opposite side.
Step 6: Bottom Border
- Create a simple edge by working a row of single crochets along the bottom.
- Add a decorative border:
- Crochet dc with chain spaces, then create fans (as with the neckline).
Assembly & Finished Size
- Tie closure: Add a 300 chain cord for the back closure. Thread the cord through gaps at the back for adjustment.
- Weave in all loose ends carefully using a yarn needle.
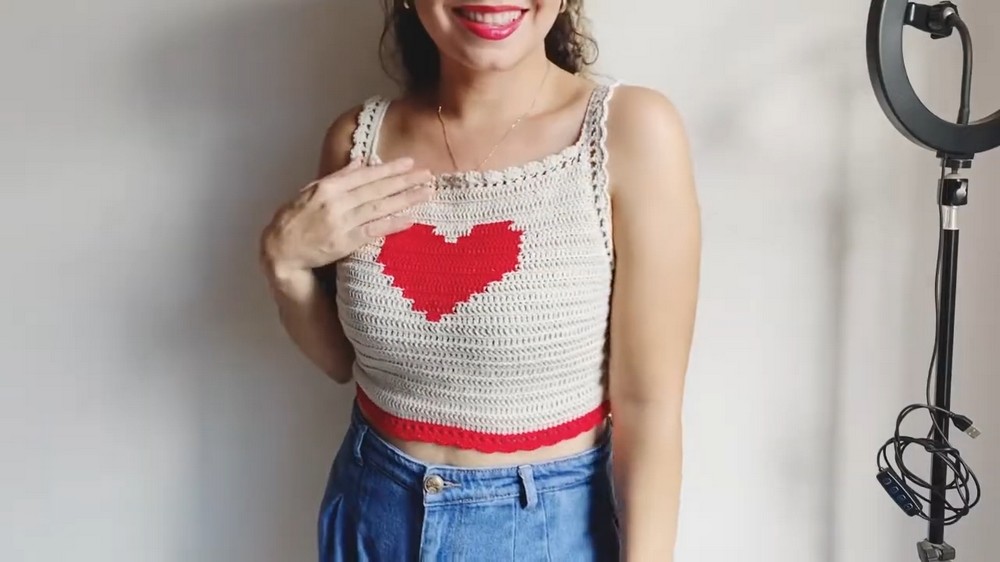
Finished size: 70 cm wide (size M) with adjustable straps and decorative borders.
Conclusion & Final Words
Congratulations! You’ve completed this beautiful tapestry heart top. Its elegant design and lovely texture make it perfect for any occasion.