
Free Crochet Granny Shoulder Bag Pattern That’s Stunning
Use this easy free crochet pattern to make your dream granny shoulder bag that’s trendy, fun, and quick to crochet.
The joy of crochet lies in turning something as simple as yarn into unique treasures. On Katia Creates, a YouTube channel loved by crochet beginners and experts alike, the art of transforming granny squares into accessories takes center stage. Her tutorials are more than instructions; they’re creative journeys that inspire viewers to make beautiful, functional pieces. Among them, the granny square shoulder bag stands out, a vibrant blend of tradition and practicality. Through Katia’s clear and friendly guidance, creating this timeless masterpiece feels approachable and exciting for anyone picking up their hook.
Make a Fabulous Granny Shoulder Bag Using Free Pattern
This crochet shoulder bag is not just a bag—it’s a cheerful celebration of color, texture, and classic design. Its most striking feature is the use of granny squares, intricately arranged to form a seamless and structured base. The bag’s bold and attractive shape is complemented by thoughtful details like a sturdy strap and an optional drawstring, which add layers of functionality and flair. Whether you’re heading to a picnic, a casual outing, or an eco friendly grocery run, this bag is versatile enough to suit any purpose while showcasing your creativity.
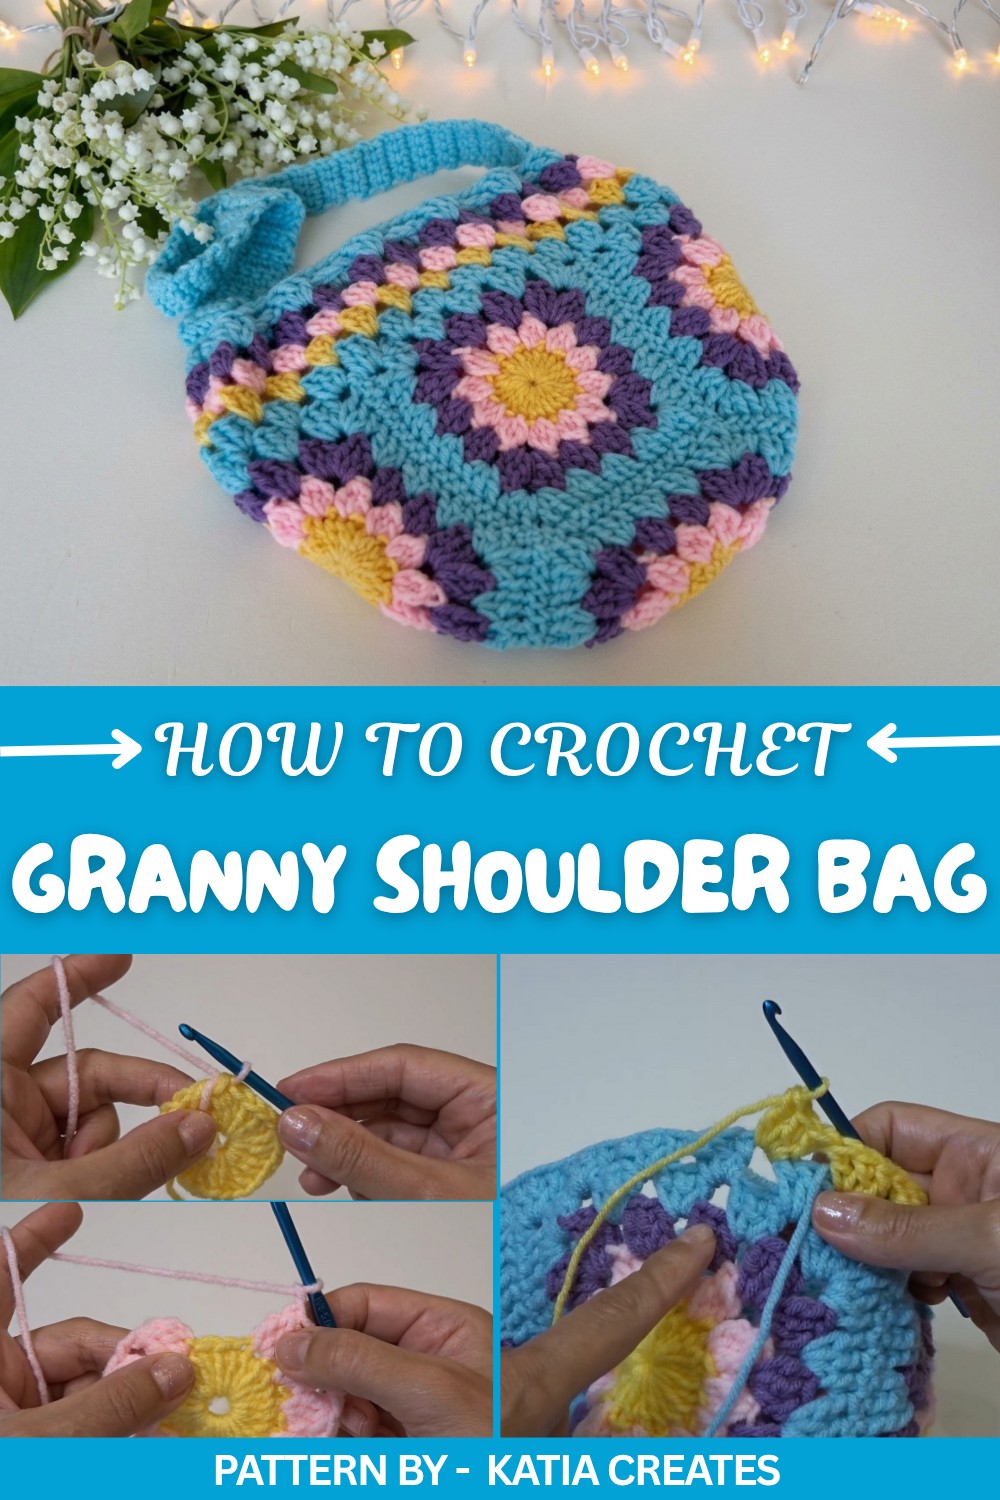
The process begins with crocheting individual granny squares, each offering a satisfying pop of color in every stitch. These squares are then joined with care to form the bag’s base, followed by adding height, straps, and optional finishing touches. You can make it bright and bold or subtle and chic, the design is yours to personalize. A handmade bag like this isn't just an accessory; it’s a statement, a story, and a reflection of your crochet charm.
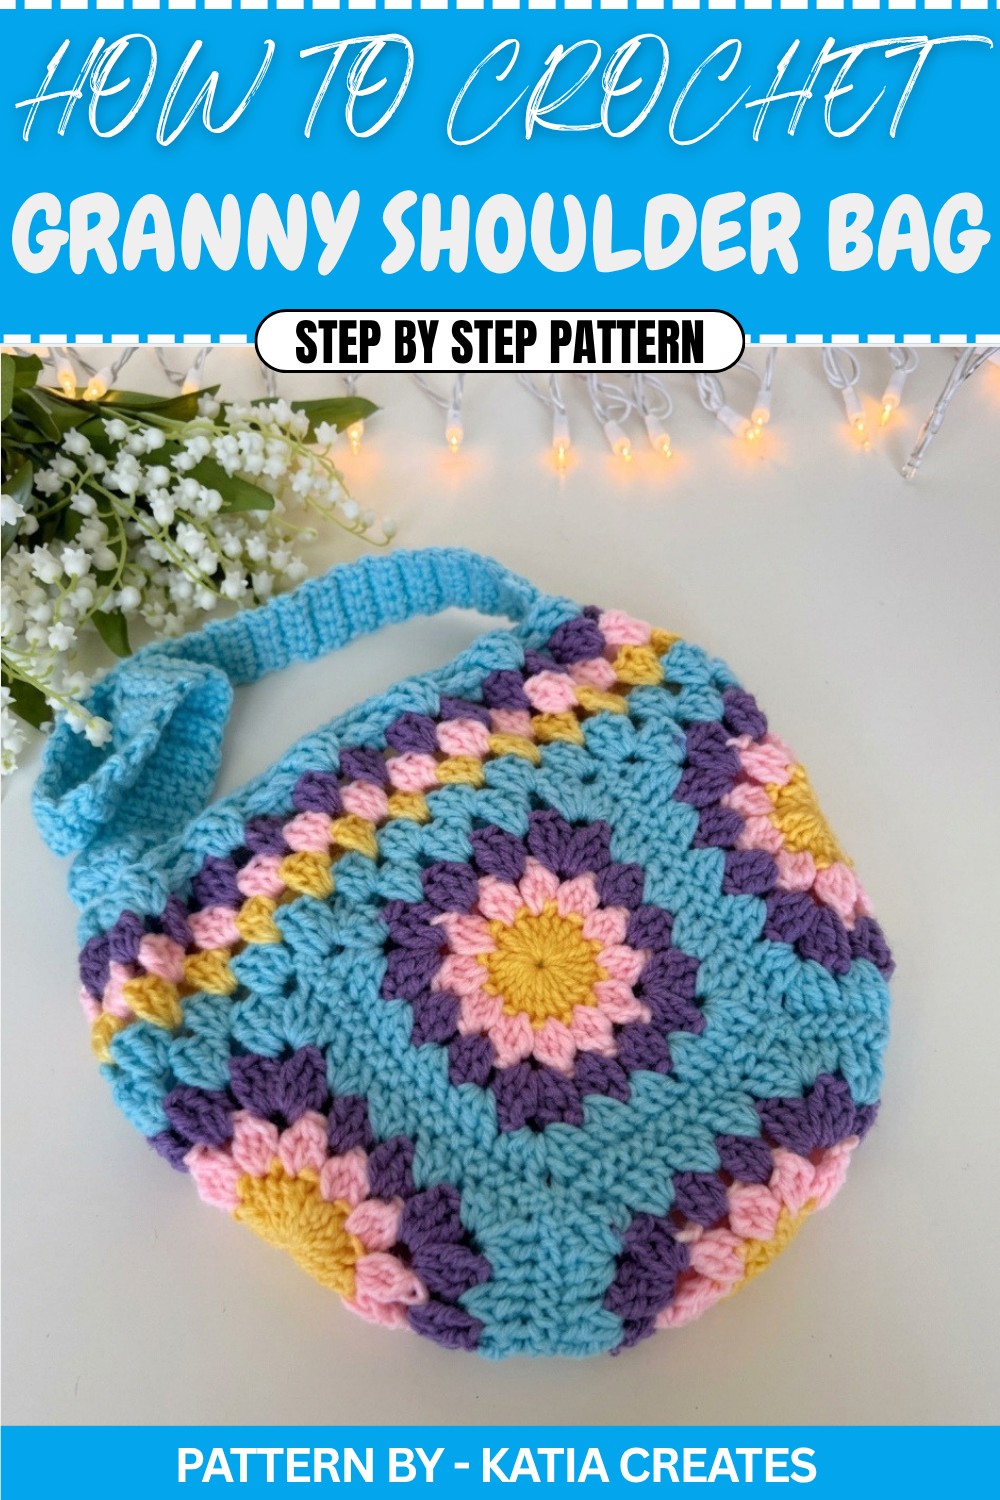
Crochet Granny Shoulder Bag
In this pattern, You’ll learn how to create the squares, sew them together, add height, and finish with a strap and optional drawstring for a versatile and stylish final look. This bag measures approximately 10 inches by 11 inches and is perfect for any occasion.
Quick Overview of the Pattern
- Type of Project: Crochet Sunburst Shoulder Bag
- Structure: Five sunburst squares joined to form a bag with added height, strap, and optional drawstring.
- Purpose: Stylish handmade accessory or practical carry all.
- Working Method: Squares are crocheted, sewn together, and expanded into a functional bag.
Notes
- This pattern uses a variety of colors to create vibrant sunburst squares, but feel free to customize based on your preferences.
- Using cotton yarn will give the bag a sturdier structure, while acrylic yarn will create a softer, flexible texture.
- If you struggle with the magic ring technique, you can start by creating a ring using a chain.
Skill Level
Beginner to Intermediate
Basic knowledge of the following stitches is required:
- Magic Ring
- Slip Stitch (sl st)
- Chain (ch)
- Double Crochet (dc)
- Single Crochet (sc)
Materials
- Yarn: Number 4 medium weight yarn (100% acrylic)
- Colors used: Yellow, baby pink, purple, and turquoise
- Hook: 5 mm crochet hook
- Additional Tools: Yarn needle, scissors, stitch markers (optional)
Measurements/Sizing
Finished bag dimensions: 10 inches by 11 inches
- The strap length is adjustable; the tutorial’s strap measures 21 inches (71 rows).
- Squares: Each square is 5.5 inches wide.
Gauge
Gauge is not critical for this pattern—adjust size by customizing the square dimensions or height rounds.
Stitch Abbreviations
- ch: Chain
- sl st: Slip Stitch
- dc: Double Crochet
- sc: Single Crochet
- yo: Yarn Over
Special Stitches
- Double Crochet Cluster: Involves working double crochets and leaving loops on the hook before finishing them all together. This creates the “cluster” effect.
The Crochet Pattern
Step 1: Create the Sunburst Squares
Round 1:
- Start with yellow yarn. Create a magic ring (or chain 5 and sl st into the first chain to form a ring).
- Chain 2 (does not count as a stitch).
- Work 24 dc into the magic ring.
- Tip: Tighten the ring slightly if it is difficult to hold while crocheting.
- Sl st into the first dc to close the round. Fasten off and pull the yarn tail to tighten the center.
Round 2:
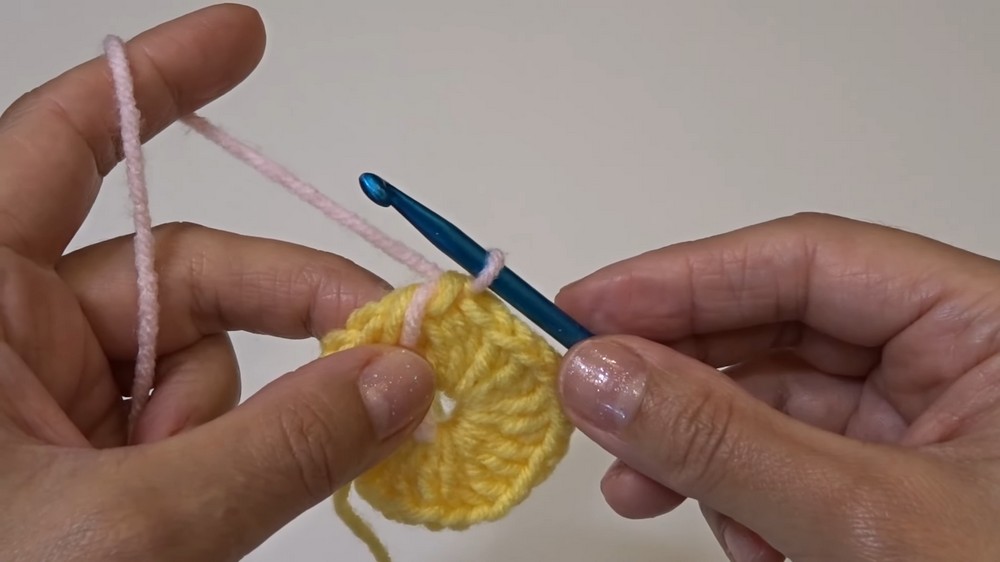
- Attach the pink yarn to the first dc (do not attach to the chain 2).
- Ch 2 (does not count as a stitch).
- Work a three dc cluster into the same stitch:
- Yo, insert hook into the stitch, yo, pull up a loop (3 loops on hook).
- Yo, pull through 2 loops.
- Repeat for a total of 3 unfinished dc.
- Yo and pull through all 3 loops on hook.
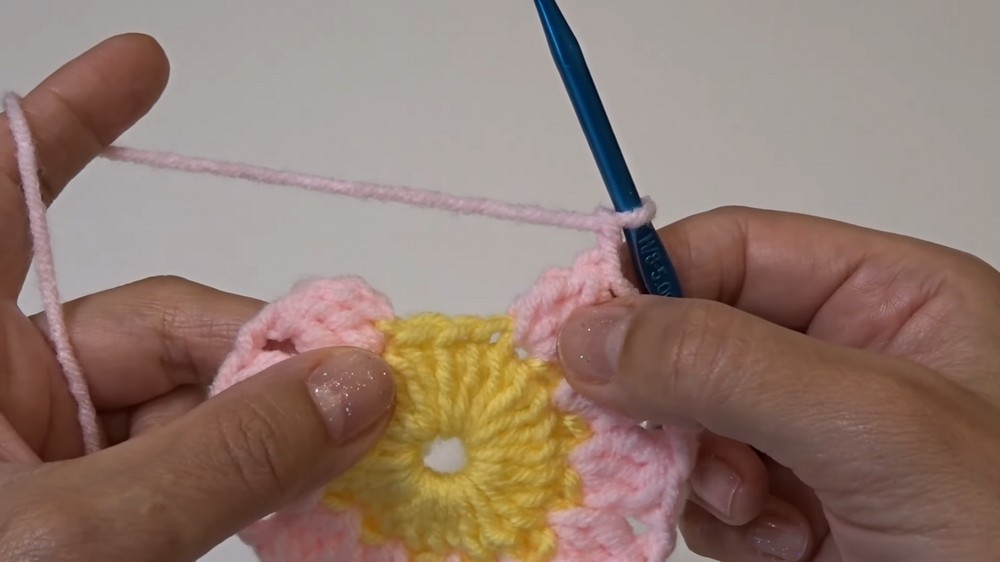
- Ch 2, skip the next stitch, and work another three dc cluster into the following stitch.
- Repeat steps 3 and 4 around to make 12 clusters, separated by ch 2 spaces.
- Sl st into the top of the first cluster to close the round.
Round 3:
- Change to purple yarn.
- Insert the hook into any ch 2 space, attach the new color, and ch 3 (counts as the first dc).
- Into the same space: Work 2 dc, ch 2, and 3 dc. This creates one corner.
- Into each remaining chain 2 space: Work 3 dc, and when reaching a corner, work 3 dc, ch 2, 3 dc.
- At the end of the round, sl st into the top of the starting ch 3 to close the round.
Round 4:
- Change color to turquoise.
- Slip stitch to the nearest corner’s ch 2 space. Ch 3 (counts as the first dc).
- Into the same space: Work 2 dc, ch 2, and 3 dc to complete the corner.
- Into each side space (between clusters): Work 3 dc.
- Repeat corner (3 dc, ch 2, 3 dc) in each ch 2 space. Continue around and sl st to the starting ch 3.
- Leave a long yarn tail for sewing this square.
Repeat:
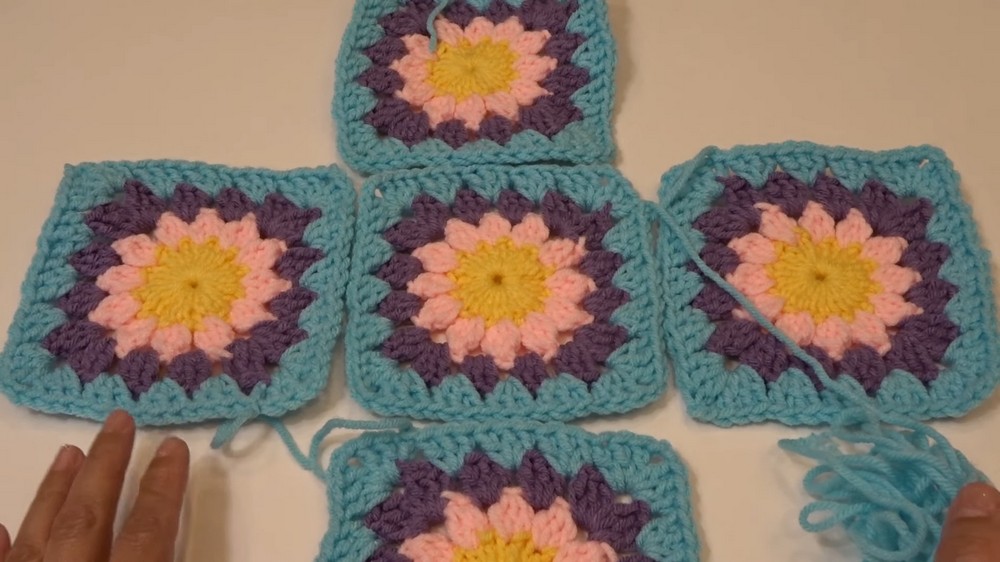
- Make a total of 5 squares. Drop ends for all squares except the center square, which requires an 80 inch tail for sewing.
Step 2: Assemble the Bag Base
Sew the Squares Together:
- Using the first square (with the long yarn tail) as the center square, position the other 4 squares around it.
- Lay the squares right sides together and align edges.
- With the yarn needle, start at the second ch in each corner. Whip stitch the edges together:
- Insert the needle under the back loops only (from the back of one square to the front of the adjacent square).
- Continue stitching along the edge.
- At corners, match the chains of adjacent squares and reinforce with additional whip stitches as necessary.
- Sew all four side squares to the center square.
Sew the Bag Sides:
- Fold squares so their right sides face inward.
- Align the edges and whip stitch the sides together.
- Reinforce corners by whip stitching through both chain spaces multiple times.
Step 3: Add Height
Height Construction:
- Turn the base right side out.
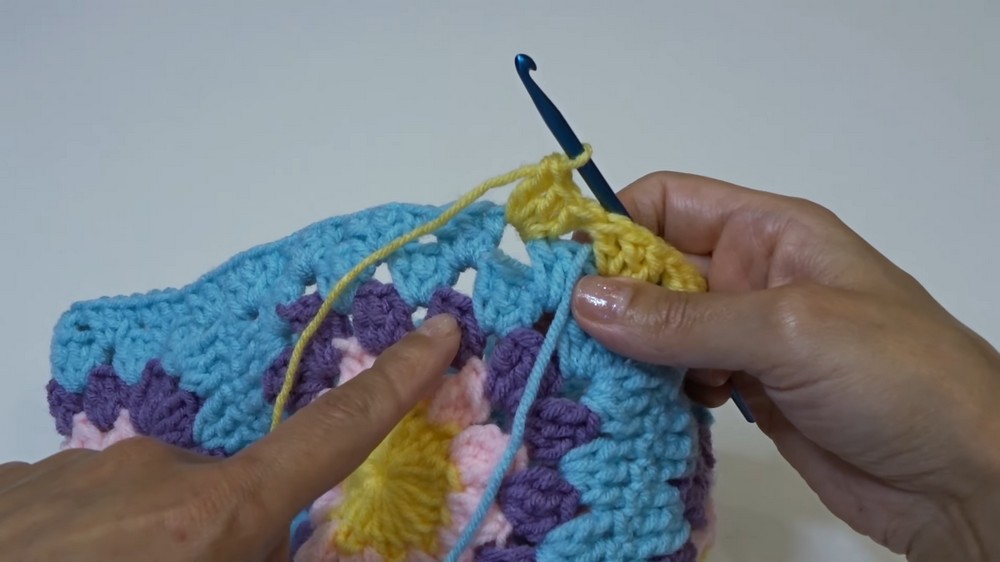
- Attach the yarn to any corner chain space. Ch 3 (acts as the first dc), then work 2 dc into the same space.
- Skip the next cluster and work 3 dc into the next chain space.
- Repeat 3 dc into each chain space around the bag, skipping clusters.
Repeat Rounds:
- Follow the same process for the height to add texture and size.
- Change colors after each round to achieve a colorful striped pattern.
- Work a total of 5 height rounds or as many as desired for your preferred bag depth.
- Slip stitch into the first ch 3 to finish each round.
Step 4: Create the Strap
Strap Construction:
- Use stitch markers to identify 12 sets of double crochet on both sides of the bag for strap placement.
- Begin at one marker and work 4 sc in the identified stitches.
- Turn your work and chain 1. Work 4 sc into the previous row.
- Continue repeating this row until the strap reaches your desired length.
- Example: For a shoulder strap, work 71 rows, measuring 21 inches.
Attach the Strap:
- Turn the bag inside out, ensuring the strap is not twisted.
- Whip stitch the end of the strap to the marked stitches on the opposite side of the bag.
- Pick up stitches from both the strap and bag and whip stitch securely.
Step 5: Add Drawstring (Optional)
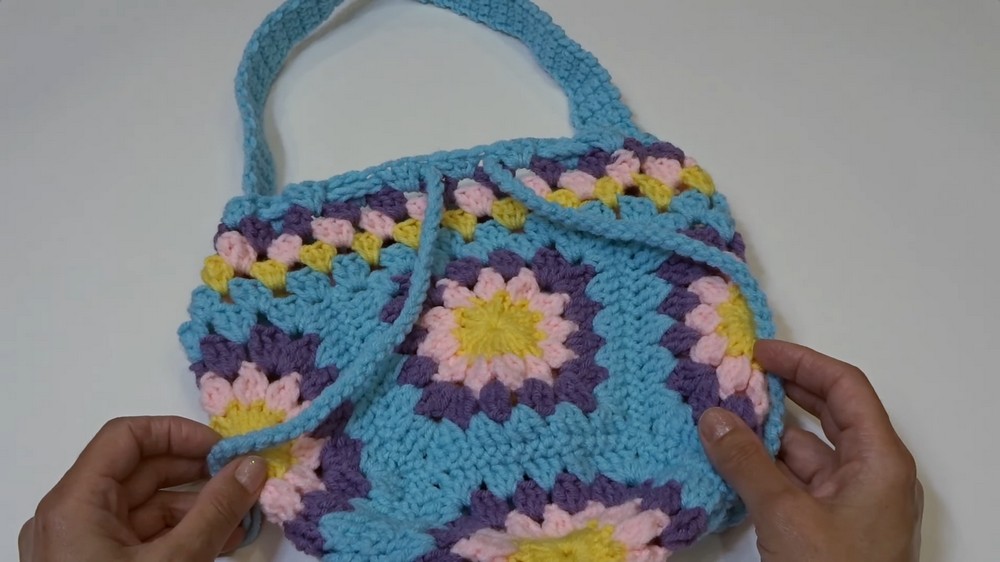
- Use 2 strands of yarn and chain 115 stitches (or desired length).
- Thread the chain through the last row of the bag:
- Start at any flower center and weave the chain in and out between 3 dc clusters.
- At the ends of the chain, add optional beads, pom poms, tassels, or charms.
Assembly & Finished Size
Once sewn and assembled, the bag will measure approximately 10 inches by 11 inches. The strap can be adjusted for different lengths. Optional drawstrings can provide a cinched look and additional functionality.
Conclusion and Ending Words
Congratulations! You’ve created a gorgeous sunburst shoulder bag complete with vibrant details, a practical strap, and optional drawstring closure. This unique accessory is sure to stand out while complementing any outfit.
Feel free to tweak the colors and sizing to suit your style. Add your own embellishments like beads or tassels for a personalized touch.