
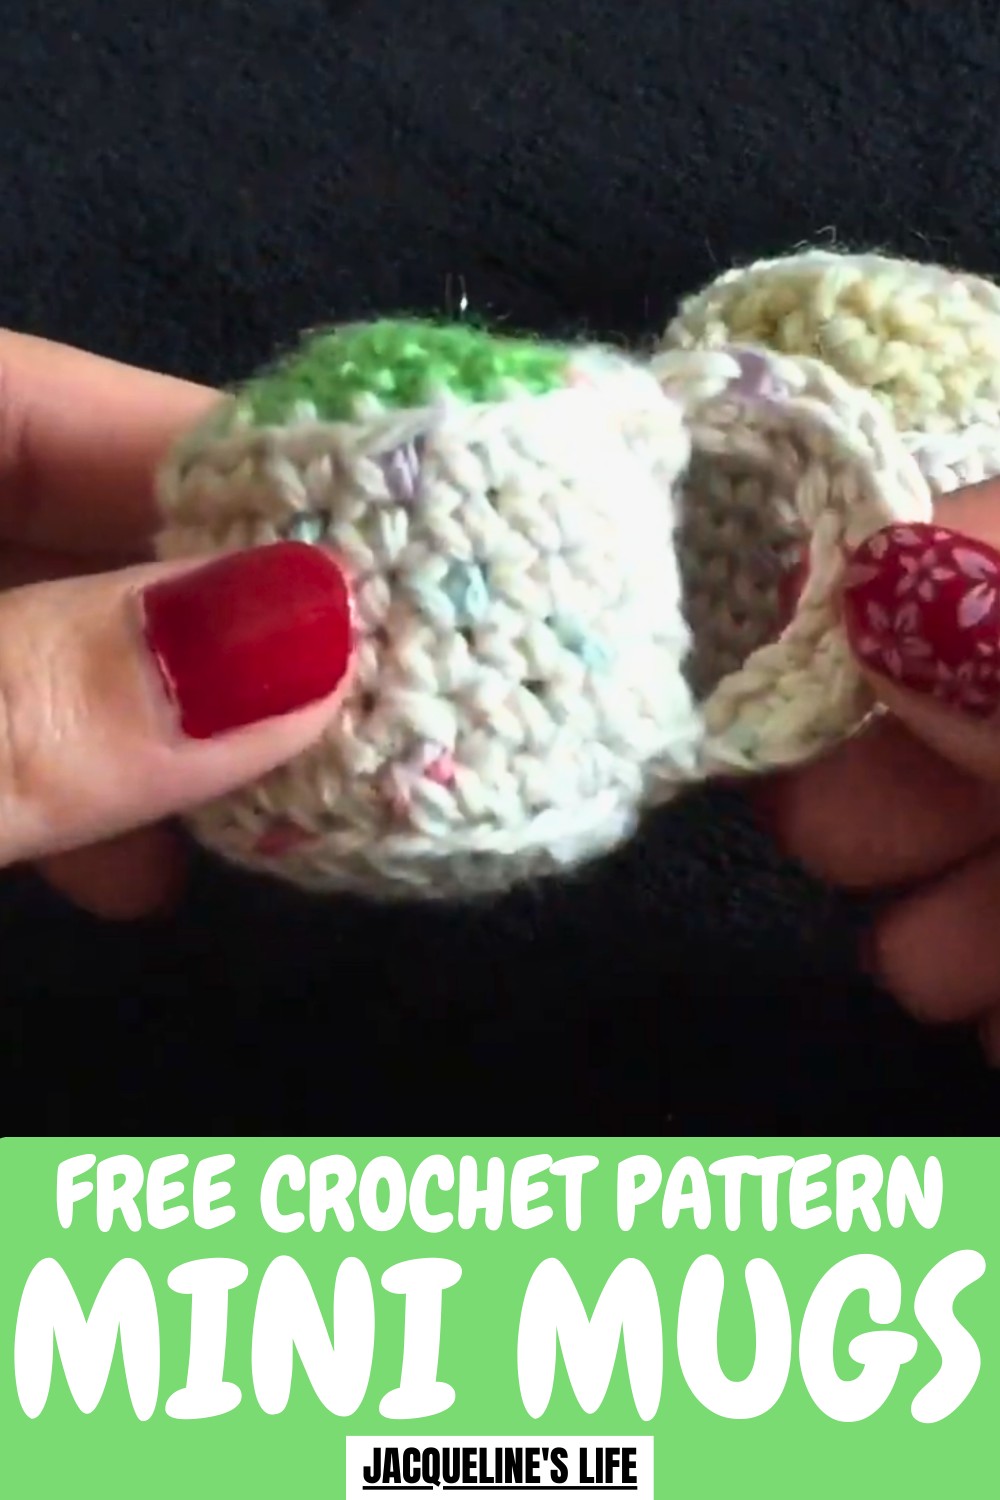
Sip up some cuteness with this Free Crochet Mini Mugs Amigurumi Pattern, adding playful charm to your décor, desk, or tiny handmade gifts.
Handmade miniature items bring charm and personality to any space. A Crochet Mini Mug Amigurumi Pattern lets you create a tiny, adorable mug that works perfectly as a decoration, gift, or collectible. This amigurumi piece gives freedom to choose color, texture, and design, making it unique and personal.
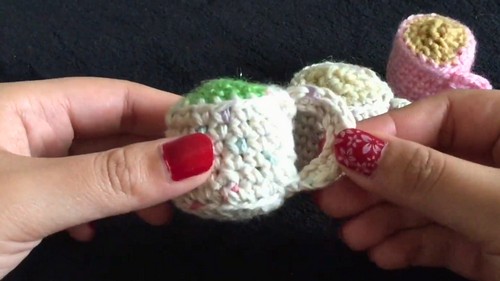
Eye-Catching Crochet Mini Mugs Amigurumi Pattern for Display
Working on it encourages patience, creativity, and focus while producing a durable, high-quality item that mass-produced options cannot match. Using a crochet mini mug pattern is a fun and rewarding way to combine art and play, resulting in a whimsical, one-of-a-kind piece that delights both maker and recipient.
How to Crochet a Mini Mug – Step-by-Step Guide
Materials Used
To create this mini mug, you will need:
- Yarn:
- Sugar and Cream Yarn: Used in this project; it gives the mug structure due to its slightly heavier weight.
- A secondary color yarn for the liquid inside the mug (e.g., green yarn for tea).
- Hook and Tools:
- 3.5mm Crochet Hook
- Scissors: For trimming excess yarn.
- Stitch Marker: To keep track of the last stitch in each round.
- Stuffing: Use polyfill or leftover yarn scraps as filler for the mug.
Uses of the Mini Mug
- Keychain: Add a keyring and carry a fun mini mug design with you.
- Home Decor: Use the mini mug as a cute decorative piece on desks, shelves, or tables.
- Personalized Gift: A creative handmade gift idea for coffee or tea lovers.
- Crochet Practice: A wonderful way to practice working in the round, increasing, decreasing, and color changes.
Special Features of the Mini Mug
- Compact Size: The mug is small and adorable, making it an ideal accessory or decor piece.
- Customizable Design: You can change the yarn colors, add embellishments, or adjust its size for personalization.
- Detailed Handle: The tutorial includes a sturdy handle that complements the mug’s design.
- Multi-Purpose: Beyond being decorative, the mug can hold small items like beads, pins, or coins.
Level of Difficulty
Beginner-Friendly
- Requires knowing basic crochet stitches like magic circle, single crochet (SC), increasing (INC), and decreasing (DEC).
- Additional skills like working in the back loops only and doing color changes are demonstrated but explained simply.
Tutor’s Suggestions
- Master the Magic Circle First: If you're new to the magic circle technique, the tutor suggests checking out their 5-minute tutorial for a slower and more detailed demonstration.
- Use a Stitch Marker: It’s essential to mark the last stitch of each round to stay on track with stitch counts.
- Customize the Size: If you prefer a larger mug, continue increasing past round 4. For a smaller mug, stop increasing earlier.
- Be Creative: Experiment with yarn colors and chain length for the handle to design your ideal mug.
- Use Invisible Decreases: To make the decreases appear cleaner, especially in smaller projects, practice invisible decrease techniques.
- Create a Tidy Color Change: While the tutor admits the color changes might not be perfect, they suggest doing what works best for you and securing the yarn tightly for a neater transition.
Step-by-Step Instructions
Step 1: Create the Base of the Mug with the Magic Circle
- Magic Circle:
- Wrap the yarn around your three fingers and pull through a loop. Tighten it and create the magic circle.
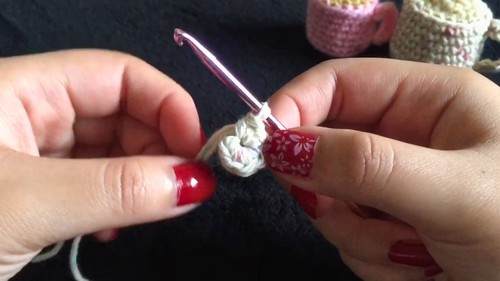
- Wrap the yarn around your three fingers and pull through a loop. Tighten it and create the magic circle.
- Round 1:
- Single crochet 6 SC inside the magic circle. Pull the tail to tighten the circle, then slip stitch into the first stitch to close the round.
- Round 2:
- Increase in each stitch (2 SC in each stitch) to total 12 stitches.
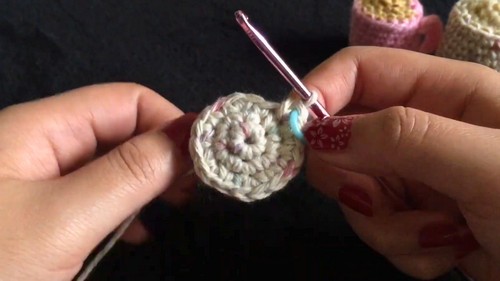
- Increase in each stitch (2 SC in each stitch) to total 12 stitches.
- Round 3:
- Single crochet in the first stitch, increase in the second stitch (1 SC, INC) and repeat until you have 18 stitches.
- Round 4:
- Single crochet in the next 2 stitches, then increase in the third stitch (2 SCs, INC) for a total of 24 stitches.
- Single crochet in the next 2 stitches, then increase in the third stitch (2 SCs, INC) for a total of 24 stitches.
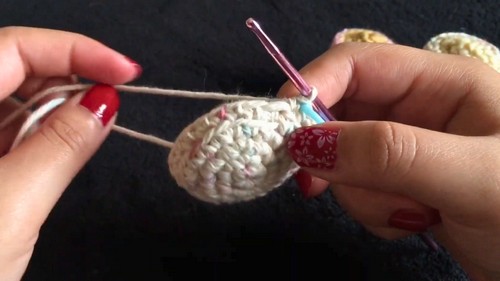
Step 2: Form the Mug’s Sides
- Round 5 (Back Loops Only):
- Crochet into the back loops only for the entire row, creating a sharp edge to form the base of the mug’s walls.
- You will still have 24 stitches at the end of this row.
- Round 6:
- Single crochet into the first two stitches, then perform an invisible decrease in the next two stitches (2 SC, INV DEC).
- Continue this pattern to form a slight taper at the top, resulting in 18 stitches.
- Single crochet into the first two stitches, then perform an invisible decrease in the next two stitches (2 SC, INV DEC).
- Rounds 7–10:
- Single crochet in each stitch to build height for the mug’s walls. Adjust height as desired by adding or reducing rounds.
Step 3: Stuff the Mug
- Add stuffing (polyfill or leftover yarn) into the mug to shape it before completing the top.
Step 4: Add the Mug’s Liquid (Color Change)
- Color Change:
- Remove the original yarn, insert the new color, and secure it tightly in the last stitch of Round 10.
- Crochet into the back loops only, creating the illusion of a separate layer for the liquid.
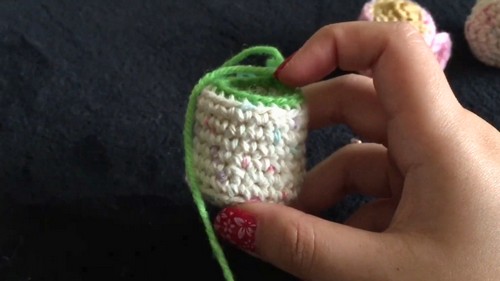
- Complete the row with 18 single crochets.
- Round 12:
- Perform a single crochet (SC) followed by a normal decrease (SC, DEC) until you have 12 stitches.
- Continue decreasing in the next round until the opening is small enough to close.
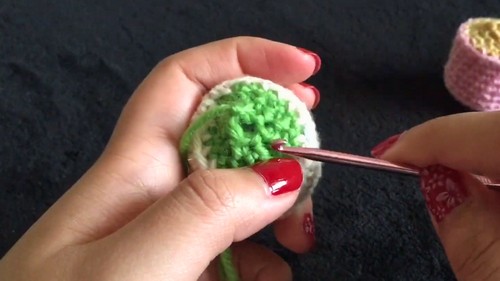
- Secure the yarn by pulling through the loop and stitching closed.
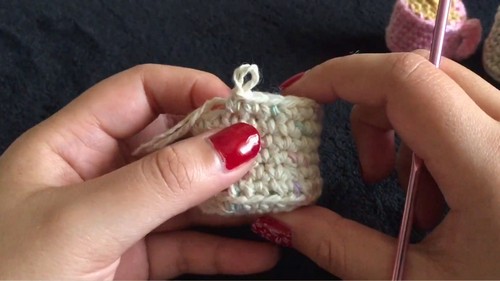
Step 5: Create and Attach the Handle
- Chain the Handle:
- With the main mug yarn, create a slip knot and chain 11 stitches.
- With the main mug yarn, create a slip knot and chain 11 stitches.
- Thicken the Handle:
- Single crochet back across the chain to make the handle sturdier.
- If you want a longer or shorter handle, adjust the chain length accordingly.
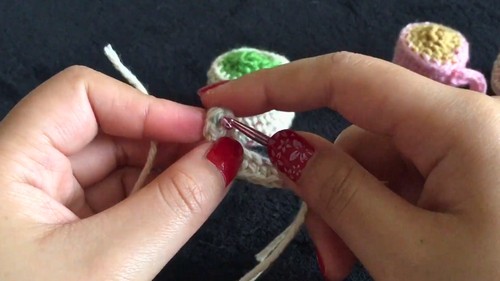
- Attach the Handle:
- Securely sew both ends of the handle to opposite sides of the mug, using extra yarn to reinforce the attachment.
- Securely sew both ends of the handle to opposite sides of the mug, using extra yarn to reinforce the attachment.
Conclusion
You’ve now created your very own mini crochet mug! This fun and versatile project can be personalized easily, whether you’re adding embellishments like beads or experimenting with different color combinations. The finished mug is a charming piece that’s perfect as a gift, accessory, or decor item.
Pro Tip
When working on the mug’s handle, firmly attach both ends to ensure durability. Reinforce the connection by sewing through the handle multiple times until it’s secure, as this part will likely be handled often.