
Achieve a stylish and comfortable with this Crochet Top Pattern, perfect for trendy outfits, breathable wear, and easy-to-follow instructions.
A delicate piece of wearable art begins to take shape with every stitch, transforming yarn into a stylish and versatile garment that elevates any wardrobe. Perfect for warm-weather outings, casual gatherings, or layered looks, this top combines comfort with elegance, making it a timeless addition to everyday fashion. The Crochet Top Pattern guides each step with clear instructions and thoughtful shaping, allowing makers to achieve a flattering fit while enjoying a relaxing, focused process.
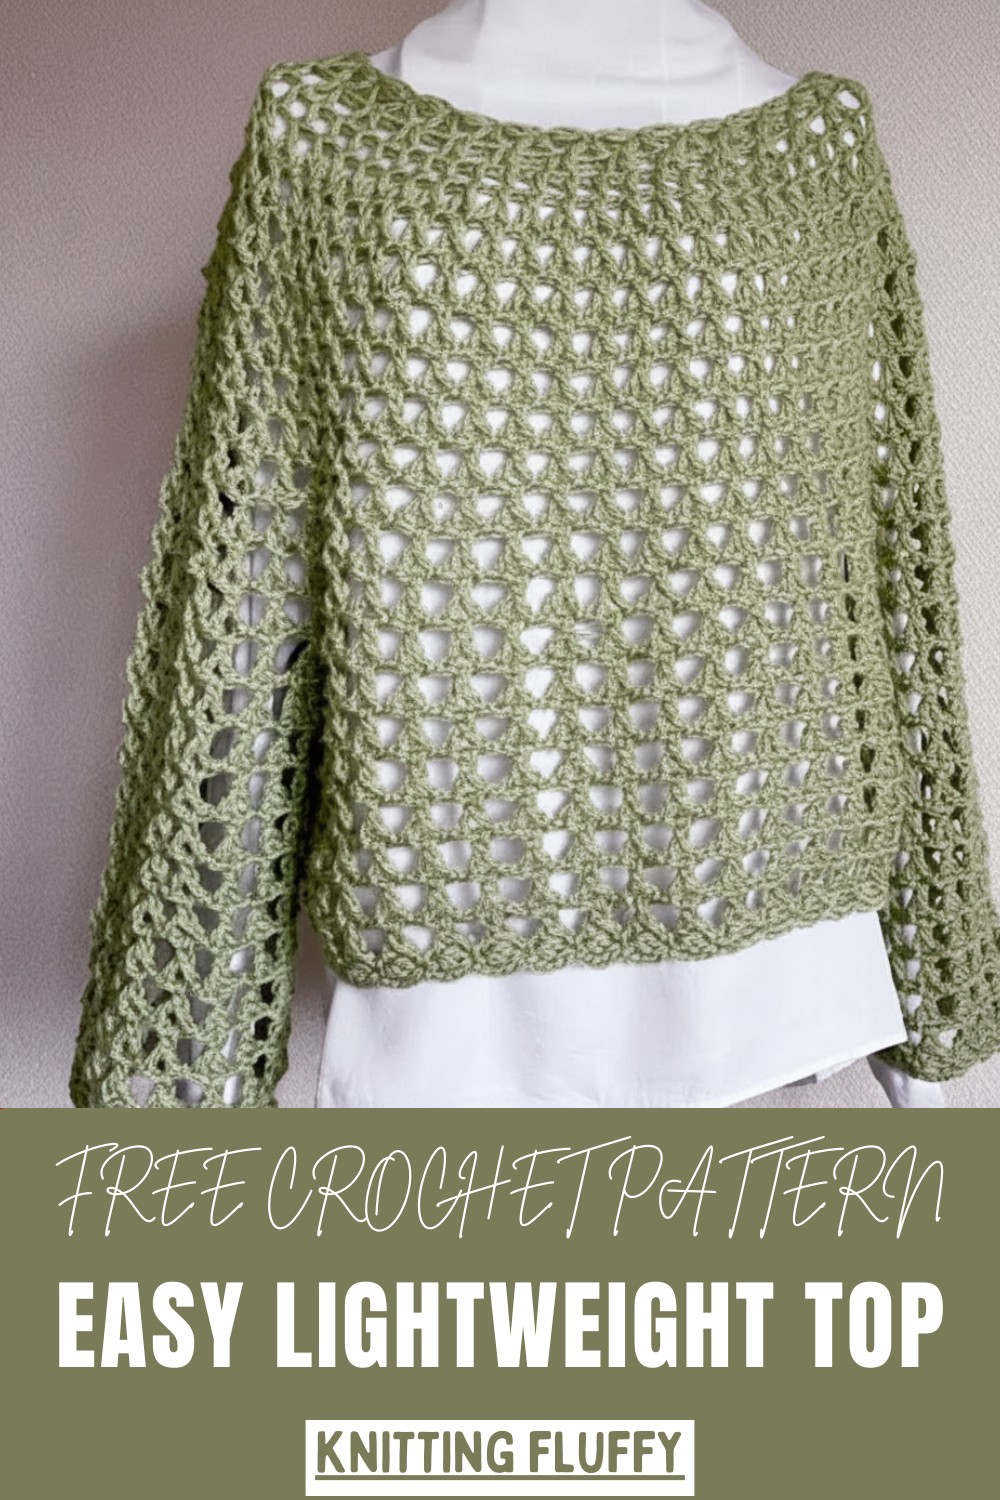
Chic Crochet Top Pattern Perfect for Summer Days
Its design highlights texture and pattern play, creating a lightweight, breathable fabric that drapes gracefully over the body while maintaining structure. The pattern encourages customization, whether through size adjustments, color choices, or subtle stitch variations, letting each piece reflect personal style and creativity. Working through the project provides a meditative rhythm, offering both satisfaction and a sense of accomplishment as the garment gradually comes to life.
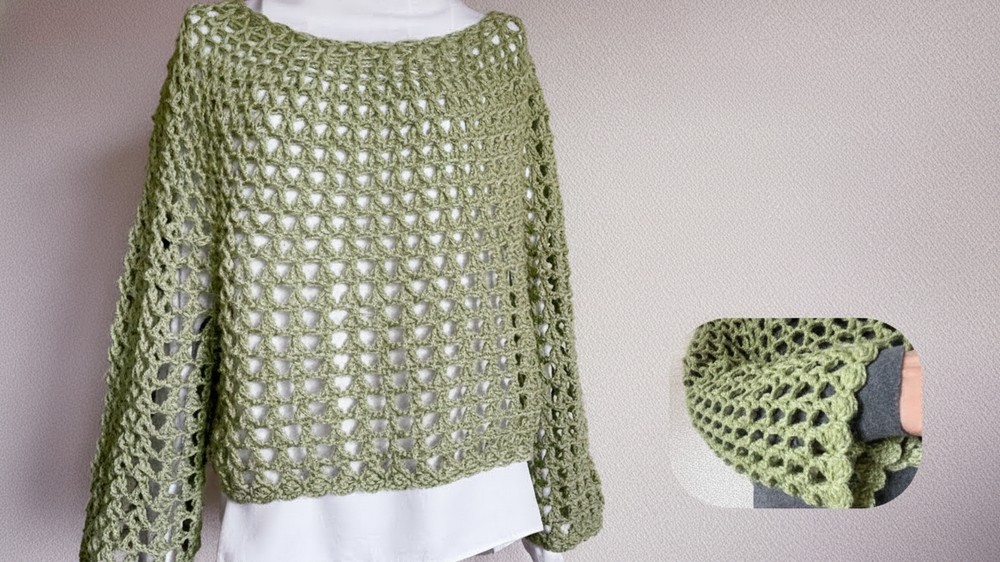
Once finished, the top pairs effortlessly with skirts, shorts, or layered under jackets, offering endless styling possibilities for different occasions. Its combination of practicality and aesthetic appeal ensures it is both functional and eye-catching. With its blend of elegance, comfort, and creative flexibility, this pattern delivers a chic and personalized garment that celebrates the artistry of crochet while enhancing any wardrobe with grace and charm.
Step-by-Step Project Details
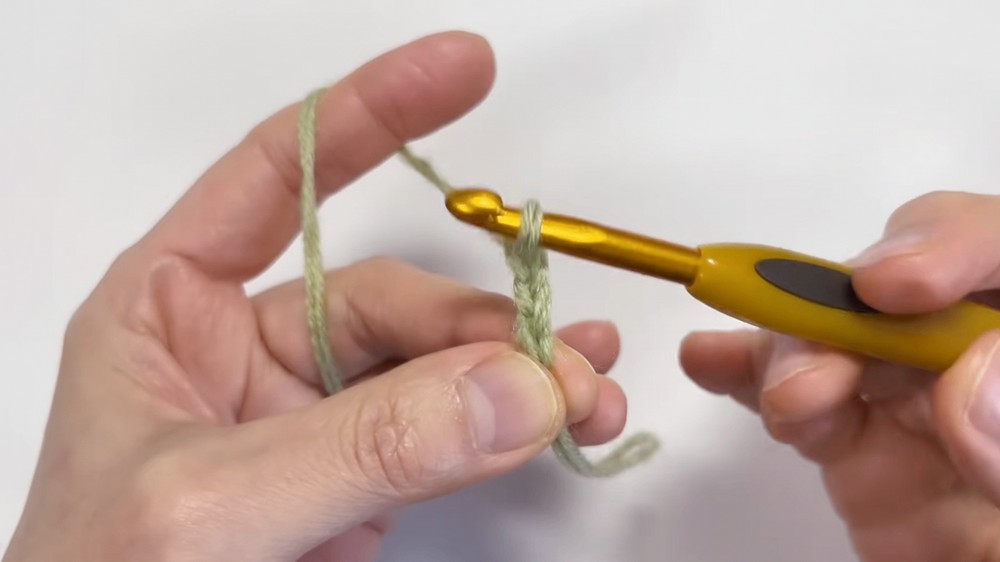
1. The Neckline Foundation
-
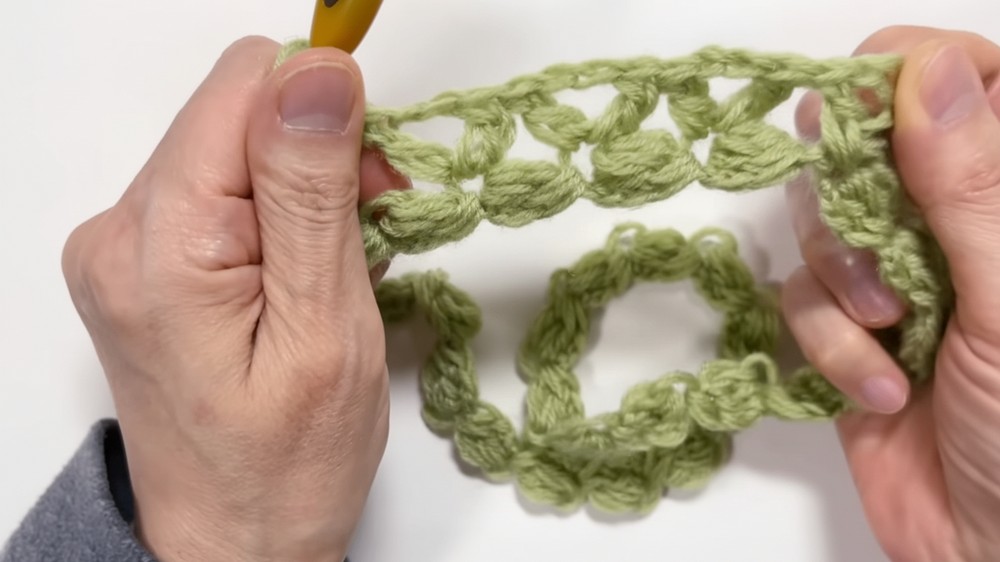
Starting the Rings: Use two strands of yarn held together with a 6.0mm hook. Chain 3, then work a 3-DC Cluster (Puff Stitch) into the first chain’s back bump.
-
Creating the Chain: Repeat the "Chain 3 + Cluster" process until the chain measures approximately 60cm (about 30 clusters total) to ensure it fits comfortably over the head.
-
Joining: Carefully align the clusters to avoid twisting and slip stitch into the first cluster to form a large ring.
2. Shaping the Yoke (Increases)
-
Row 2 (V-Stitch): Work a V-stitch (DC, CH 2, DC) into the top of each cluster from the foundation row.
-
Row 3 (Expanding): Work a V-stitch into each V-stitch of the previous row, but add CH 2 between each V-stitch to expand the yoke.
-
Row 4 (Grid Row): Create a mesh grid by working DC, CH 2 into the head of every DC from the previous row. You should have 60 DC stitches in total.
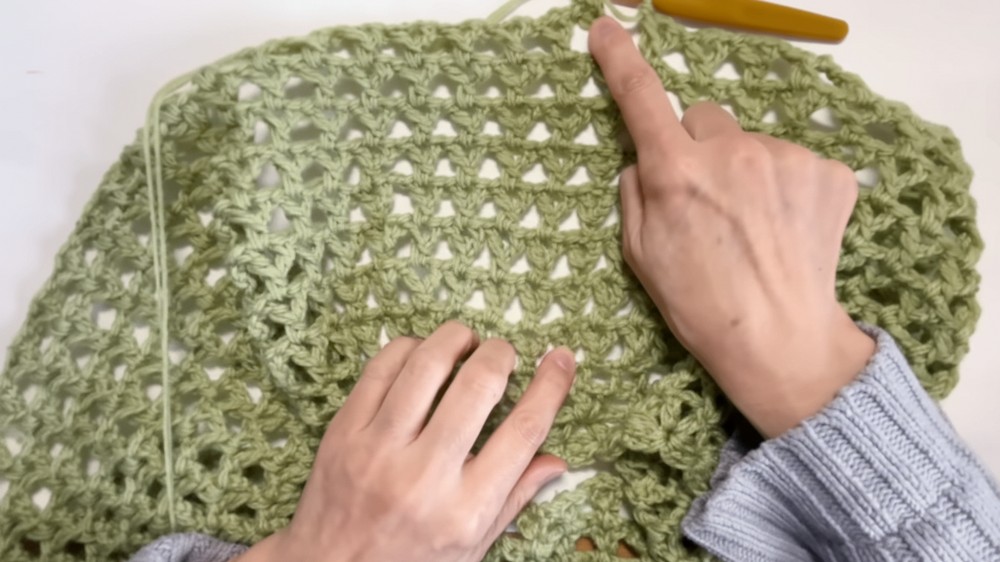
3. The "Y-Stitch" Pattern
-
Defining the Y-Stitch: Work a Treble Crochet (TR), then CH 2, and finally a DC into the base of that same TR. This creates a distinct "Y" shape.
-
The Body Rows: Continue this Y-stitch pattern for 8 rows (Rows 5–12).
-
Further Expansion: For Rows 13–15, add a CH 1 between each Y-stitch to provide a gentle flare for the bust and shoulders.
4. Dividing for Sleeves and Body
-
Marking the Arms: Set aside 13 pattern repeats for each sleeve using stitch markers.
-
Adding Underarm Ease: Chain 12 at the underarm to create extra room and comfort before continuing the body pattern.
-
Completing the Body: Work the Y-stitch pattern (with CH 1 spacing) for 7 rows down the torso.
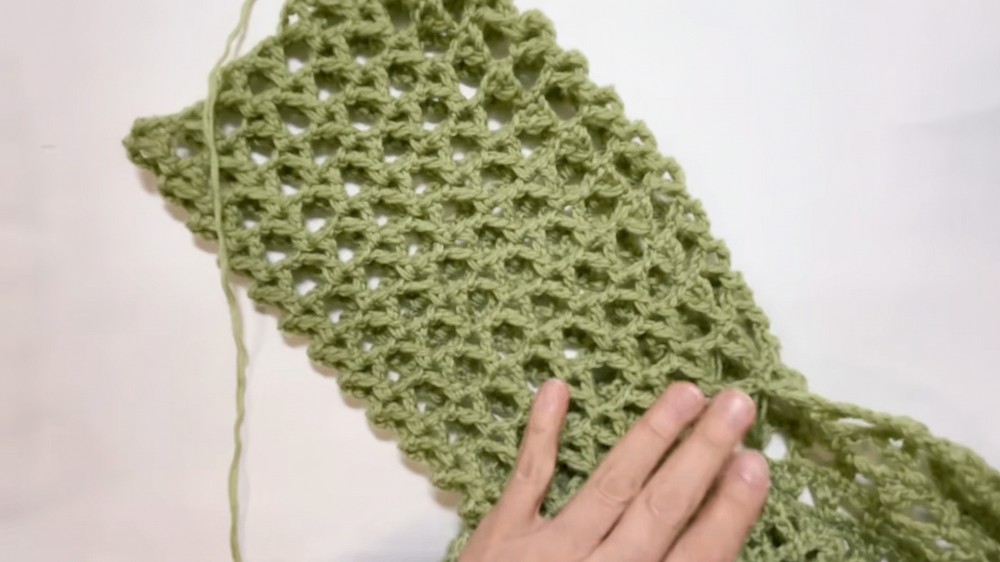
5. Sleeves and Finishing Touches
-
Sleeve Construction: Attach yarn at the underarm and work 12 rows of the Y-stitch pattern in the round.
-
The Shell Edging: Finish the sleeves and the bottom hem with a decorative picot-style edge: (SC, CH 3, 2-DC Cluster in the same stitch).
Project Specifications
-
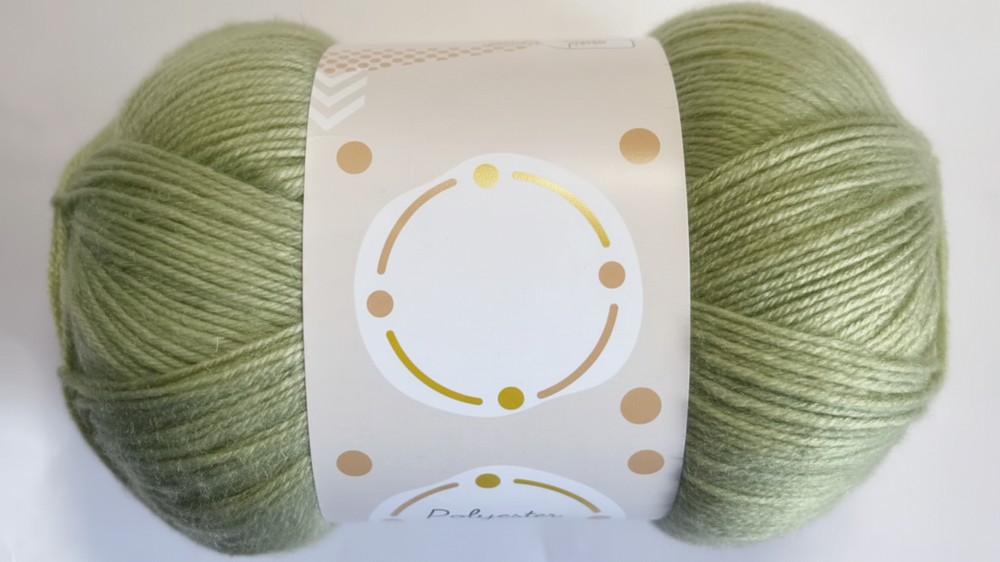
Materials:
-
Yarn: 2 skeins of Daiso Polyester Yarn (Lime color shown). Each skein is approx. 150g/600m.
-
Hook: 6.0mm (Japanese size 10/0).
-
Technique: Holding two strands of yarn together throughout for added structure and speed.
-
-
Special Features:
-
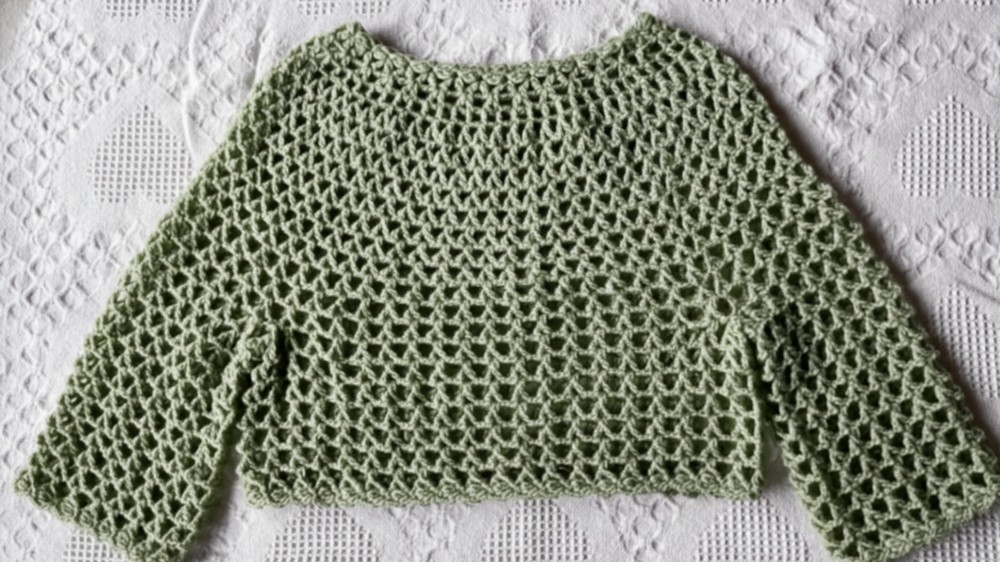
Top-Down & Seamless: No sewing or assembly required at the end.
-
Oversized Fit: The underarm chains create a relaxed, drop-shoulder silhouette.
-
-
Level of Difficulty: Easy to Intermediate. The stitch pattern is repetitive and easy to memorize, making it great for beginners looking to try their first garment.
-
Uses: Perfect as a swimsuit cover-up, a layering piece over a camisole, or a lightweight sweater for spring and autumn.
Tutor's Suggestions
-
Head Clearance: Ensure your initial chain of clusters is loose enough to pass over your head before joining. It is better to have it slightly larger than too small .
-
Seamless Transitions: When starting a new row, use a slip stitch to move your hook to the center of the first "Y" space. This keeps the seam invisible.
-
Customization: You can easily adjust the length of the body or sleeves simply by adding or subtracting rows of the Y-stitch pattern.
Conclusion
This crochet pullover is a masterclass in combining simple stitches to create a high-end, boutique-style look. By using the top-down method, you can try the garment on as you go to ensure a perfect fit. The finished piece is airy, draped beautifully, and incredibly lightweight, proving that you only need a few basic materials to create a versatile addition to your wardrobe.
Final Tip
When working the underarm chain of 12, make sure to work into the back bumps of the chains during the next row. This creates a clean, professional-looking edge that mirrors the rest of the garment and prevents the underarm from stretching out over time!