
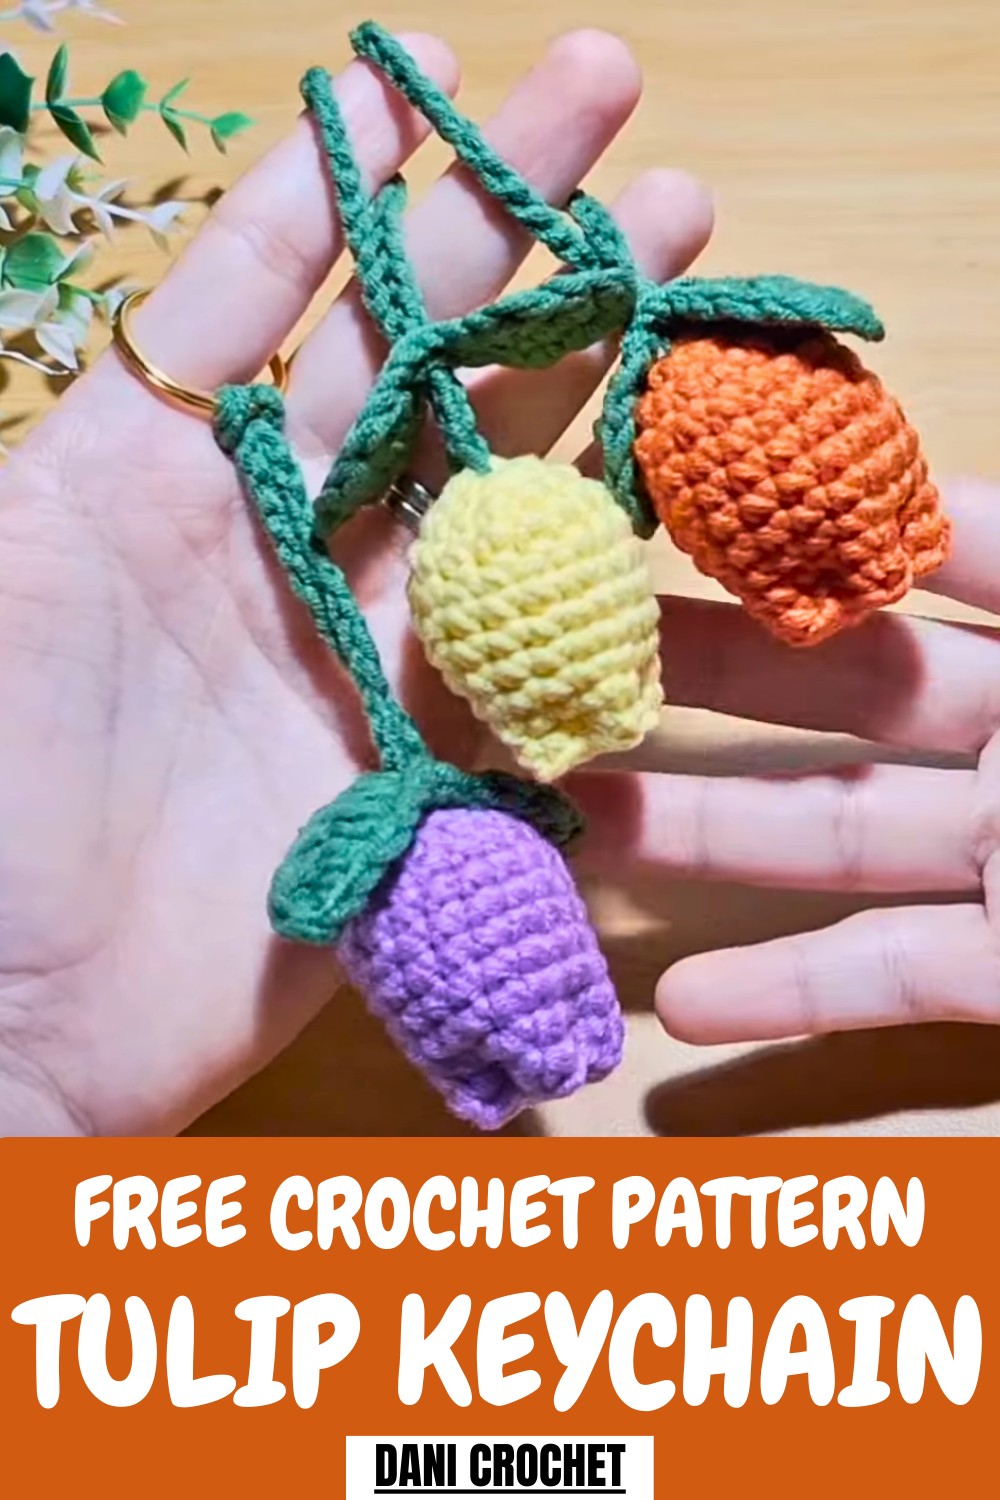
Fun Crochet Tulip Keychain Pattern To Carry Style
Brighten your accessories with this Free crochet Tulip Keychain Pattern, making cute, colorful keychains that bring charm, joy, and a playful handmade touch.
Infuse your accessories with a touch of floral elegance. A crochet tulip keychain pattern offers crocheters a delightful way to create a charming and functional piece. This petite project features the vibrant shape and color of tulip blooms while serving as a cheerful key organizer or bag accent. Its compact size makes it perfect for small gifts or party favors, bringing a personal touch that store-bought items can't replicate.
Lovely Crochet Tulip Keychain Pattern For Summer-Ready Gifts
Beyond its aesthetic appeal, this keychain is durable and lightweight, easily attached to keys or zippers. Celebrate nature's beauty and enhance your craft skills with this refreshing crochet project.
Tip
Maximize Leaf Stiffness: Before attaching the leaves, lightly press or steam them flat. If your yarn is a synthetic blend, use the technique of very briefly passing a lighter flame near the edges to melt the fibers slightly (without touching or burning) to stiffen the edges and help the leaf retain its pointed shape.
Uses
-
Sell the finished tulips at craft fairs, markets, or online stores.
-
Give them as small, thoughtful details or gifts in customer orders.
-
Attach them to keys, backpacks, or purses as a charming accessory.
-
Decorate a space or use them as party favors.
Materials
-
Yarn (Flower): Use Mil Cotton yarn (approximately 2 mm thick) in your chosen color (e.g., pink).
-
Yarn (Stem/Leaf): Use green yarn for the stem and leaves.
-
Crochet Hook: Use a 3 mm hook for the flower body.
-
Crochet Hook (Optional): Use a 2.5 mm hook for the leaves to create a tighter fabric.
-
Notions: Fiberfill stuffing, tapestry needle, scissors, and a keychain ring (optional).
Special Features
-
Quick and Minimalist Design: The simple construction uses a small amount of yarn and works up very quickly, making it highly efficient for mass production or urgent gifts.
-
Structured Tulip Tip: The finishing technique involves cinching the top opening and folding the fabric to create the signature, marked four-petal shape of a tulip head.
-
Integrated Hanging Loop: You attach a long chain directly to the base of the flower and secure it, creating a sturdy stem that functions as the hanging loop.
-
Detachable/Movable Leaves: The leaves are not sewn but are threaded onto the hanging loop, allowing them to slide up or down and be positioned for the best visual appeal.
Level of Difficulty
This project carries an Easy difficulty rating. You should be familiar with the Magic Ring, Single Crochet (SC), increases, and basic shaping techniques.
Tutor's Suggestions
-
Increase the Size: If you desire a larger tulip, work an extra increase round (e.g., (2 SC, inc) around) before starting the straight rounds.
-
Stuffing Compactness: When stuffing the tulip, press the fiberfill down firmly, but leave the top two rows unstuffed to allow enough room for the fabric to fold and be shaped correctly.
-
Leaf Hook Size: Use a slightly smaller crochet hook (2.5 mm) for the leaf. This will create a tighter fabric and a firmer leaf shape that holds its form better than the flower body.
-
Finishing Acrylic Yarn: For acrylic-blend yarn, briefly pass a lighter flame over the finished leaf edges to seal any fuzz and secure the yarn ends.
Step-by-Step Details
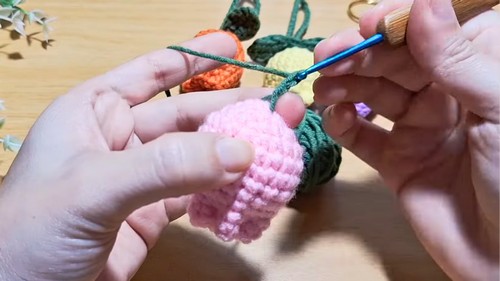
1. Crochet the Tulip Flower
Work in a continuous spiral in your main flower color (e.g., pink) using a 3 mm hook.
-
Start with a Magic Ring and work 6 Single Crochet (SC) stitches inside.
-
Work 6 increases (inc) around (R2) for a total of 12 SC.
-
Work the sequence of (1 SC, inc) six times (R3) for a total of 18 SC.
-
Work 8 straight rounds of 18 SC each (R4 to R11), creating the height of the tulip head.
-
Close the piece with a slip stitch, and cut the yarn, leaving a long tail for shaping.
-
Secure the starting yarn tail with a knot and push it inside the flower.
-
Stuff the flower body, ensuring the top two rows remain empty.
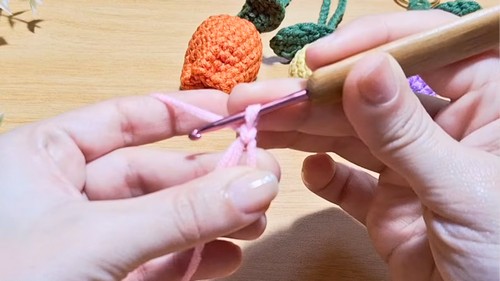


2. Shape the Tulip Tip
Use the long yarn tail and a tapestry needle or small hook.
-
Use the tail to cinch the top opening closed by pulling the thread through opposite points of the opening at least twice to mark the center.
-
Fold the top of the flower to create four distinct, petal-like creases.
-
Thread the tail and stitch through the folded points and the center to secure the folds in place, forming the classic tulip shape.
-
Knot the tail tightly on the inside of the flower and weave the end inside the stuffing to hide it.
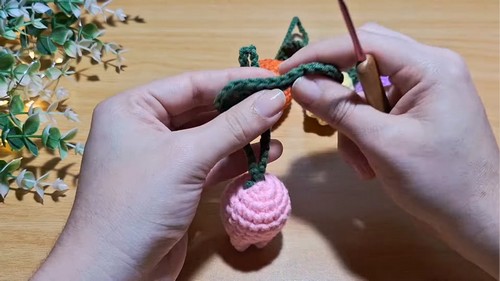
3. Create the Stem/Hanging Loop
Work in green yarn.
-
Insert the green yarn into the center of the first round (Magic Ring) of the tulip base.
-
Chain 34 (or your desired length for the loop).
-
Slip stitch into the opposite side of the first round (Magic Ring) to secure the chain and create the loop.
-
Knot the yarn tails to secure the attachment and push the ends inside the flower.
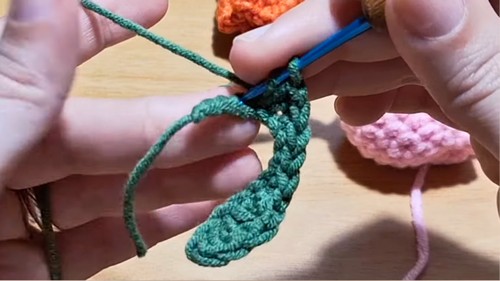
4. Crochet the Tulip Leaves
Make two leaves in green yarn, using a 2.5 mm hook if available.
-
Chain 14 stitches for the base of the two leaves.
-
First Half of First Leaf: Skip the first chain from the hook. In the next 5 chains, work: 1 SC, 1 Half Double Crochet (HDC), 1 Double Crochet (DC), 1 HDC, 1 SC.
-
Center: Work 3 Slip Stitches (SS) into the next 3 chains (these are the central stitches between the leaves).
-
First Half of Second Leaf: In the next 5 chains, work: 1 SC, 1 HDC, 1 DC, 1 HDC, 1 SC.
-
Turn: Chain 1 and turn your work.
-
Second Half of Second Leaf: Work back down the opposite side of the chain, mirroring the stitches: 1 SC, 1 HDC, 1 DC, 1 HDC, 1 SC.
-
Center: Work 3 SS into the next 3 center stitches.
-
Second Half of First Leaf: Work back down the remaining chain, mirroring the stitches: 1 SC, 1 HDC, 1 DC, 1 HDC, 1 SC.
-
Slip stitch to finish, chain 1, and cut the yarn. Hide the tails by weaving them into the back of the leaf.
5. Final Assembly
-
Thread the green hanging loop through the center-base of both finished leaves. You can adjust the leaves to sit close to the flower or lower down the stem.
-
Attach the keychain ring directly to the hanging loop by pulling the end of the tulip through the ring, securing it in a loop knot.

Conclusion
You successfully created an adorable and durable Tulip Keychain! This project is an excellent example of using simple stitches and smart shaping techniques to produce a recognizable and appealing miniature amigurumi perfect for market sales or gift-giving.