
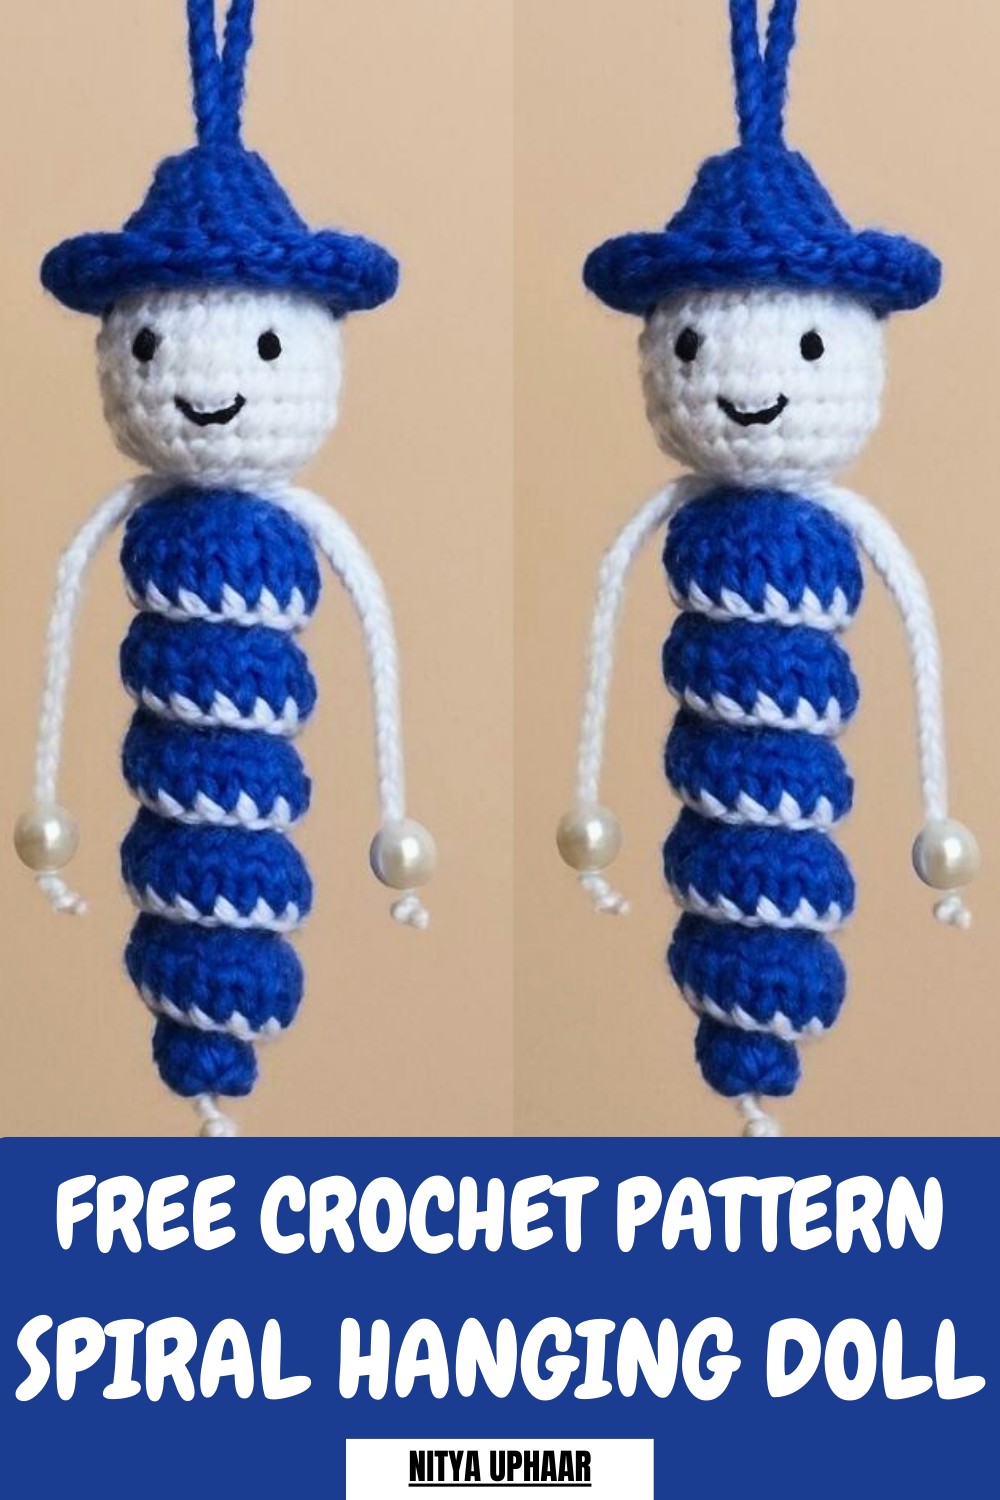
Delight in a whimsical design with this Crochet Spiral Hanging Doll Pattern, perfect for playful decor, gifts, and charming handmade accents.
A handmade treasure like this brings a touch of whimsical elegance and warmth to any environment, making it a delightful presence in your daily life. This petite wonder is incredibly versatile, serving as an adorable bag charm, a car mirror decoration, or even a festive ornament that brightens up your home during the holidays. Following a Crochet Spiral Hanging Doll pattern is a wonderful way to relax while producing something truly unique and eye-catching.
Twirling Crochet Spiral Hanging Doll Pattern for Playful Spaces
Tutor's Suggestions
-
Customization: Adjust the length of the body by changing the initial chain count.
-
Holiday Themes: Use red and green yarn for Christmas ornaments or pastels for nursery decor.
-
Secure the Spiral: The tutor demonstrates how to "set" the spiral shape by manually twisting it and stitching through the layers so it holds its form perfectly.
The brilliance of this design lies in its clever spiral structure and accessible approach for anyone picking up a hook.
Special Features
-
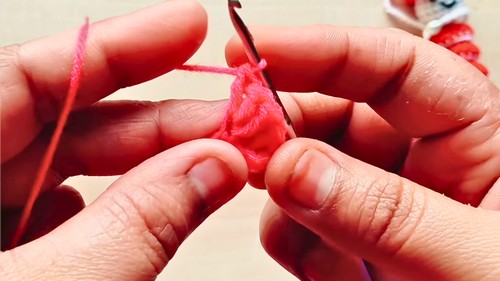
Natural Spiral: The 3-DC-per-stitch technique creates a beautiful, elastic spiral that bounces when hung.
-
Modular Construction: Each part (head, body, hat, arms) is made separately, allowing for easy color customization.
-
Reversible Border: Using the reverse single crochet on the hat gives it a professional, boutique-style look.
Level of Difficulty
-
Beginner-Friendly: The stitches are basic (SC, HDC, DC), and the assembly is straightforward. It is an ideal project for those new to amigurumi or crochet toys.
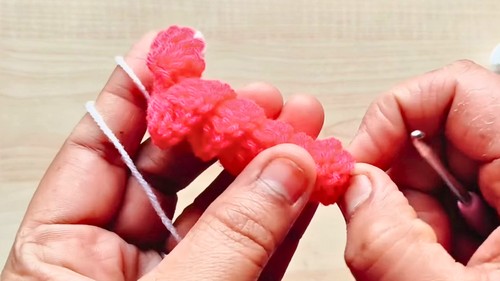
Its signature winding body is achieved by working three double crochets into each chain stitch, causing the yarn to naturally curl into a beautiful, spring-like shape.

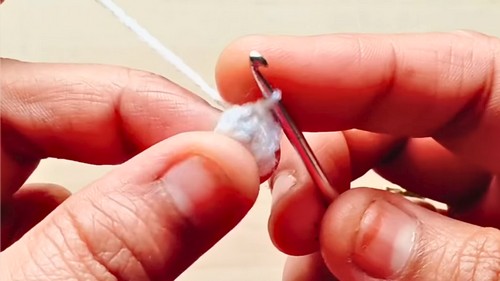
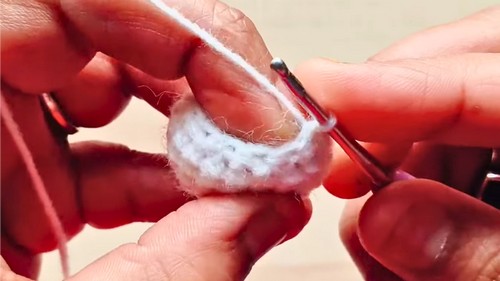
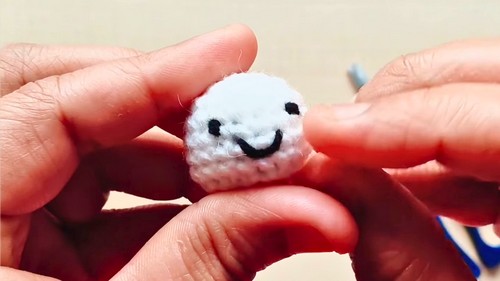
The pattern utilizes fundamental techniques like the magic ring, single crochet, and half-double crochet to form the doll's head and a stylish hat.
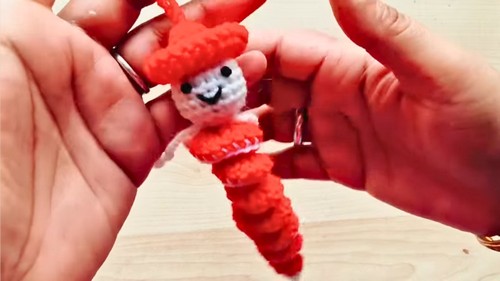
Enhanced with decorative pearl beads at the hand and base, and finished with a charming reverse single crochet border on the hat, this project is as enjoyable to complete as the final result is to display. By using a vibrant color and a few basic supplies, you can make a unique character that perfectly suits your style.
Materials Needed
-
Yarn: 4-ply acrylic yarn (e.g., Vardhman) in two colors: white (for the head and accents) and a primary color like dark pink (for the body and hat).
-
Crochet Hook: 2.5 mm (or a size 4 hook).
-
Stuffing: Cotton fiberfill for the head.
-
Safety Features/Details: Black yarn (for eyes and mouth) or safety eyes/black beads.
-
Decorations: Three 8 mm pearls (optional, for hands and body).
-
Tools: Scissors, a tapestry needle, and a measuring tape.
Uses
-
Home Decor: Hanging from door knobs or curtains.
-
Accessories: Bag charms or keychains.
-
Gifts: Small, thoughtful handmade presents for friends or children.
-
Holiday Ornaments: Unique additions to a Christmas tree.
Step-by-Step Details
In this tutorial, demonstrates how to create a charming crochet spiral hanging doll. This project results in a versatile decorative item suitable for home decor, bag charms, car hangings, or even Christmas ornaments. The tutor provides a comprehensive walkthrough, making it an excellent project for crocheters of all levels.
Conclusion
This spiral hanging doll is a delightful project that yields professional results with minimal effort. By combining simple crochet techniques with creative assembly, you can produce a variety of these dolls in different colors. They are durable, charming, and highly giftable.
Pro Tip
When attaching the pearls to the arms and body, tie your knots directly onto the chain stitches rather than just the yarn tail. This creates a bulkier knot that prevents the 8 mm pearl from slipping off over time.


