
Whip up some calorie-free cuteness with this Free Crochet Oreo Cookies Pattern that's perfect for sweet, playful, and fun decorations or gifts.
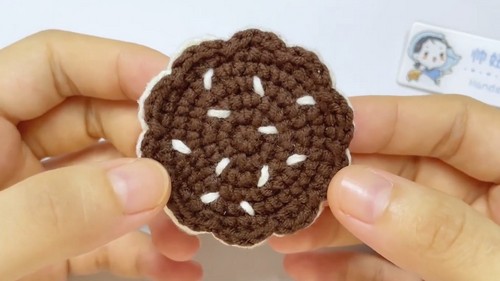
This adorable Oreo-inspired crochet cookie is the perfect combination of creativity and functionality! It can be used as a refrigerator magnet, a pendant, or even as a cute decoration for your crochet projects. Its beauty lies in the realistic design created using a textured crochet technique, making it look just like the real cookie we love. Beyond its charm, crocheting this cookie is an enjoyable and rewarding activity, especially for beginners looking for a fun way to refine their skills.
Sweet Crochet Oreo Cookies Pattern to Brighten Your Day
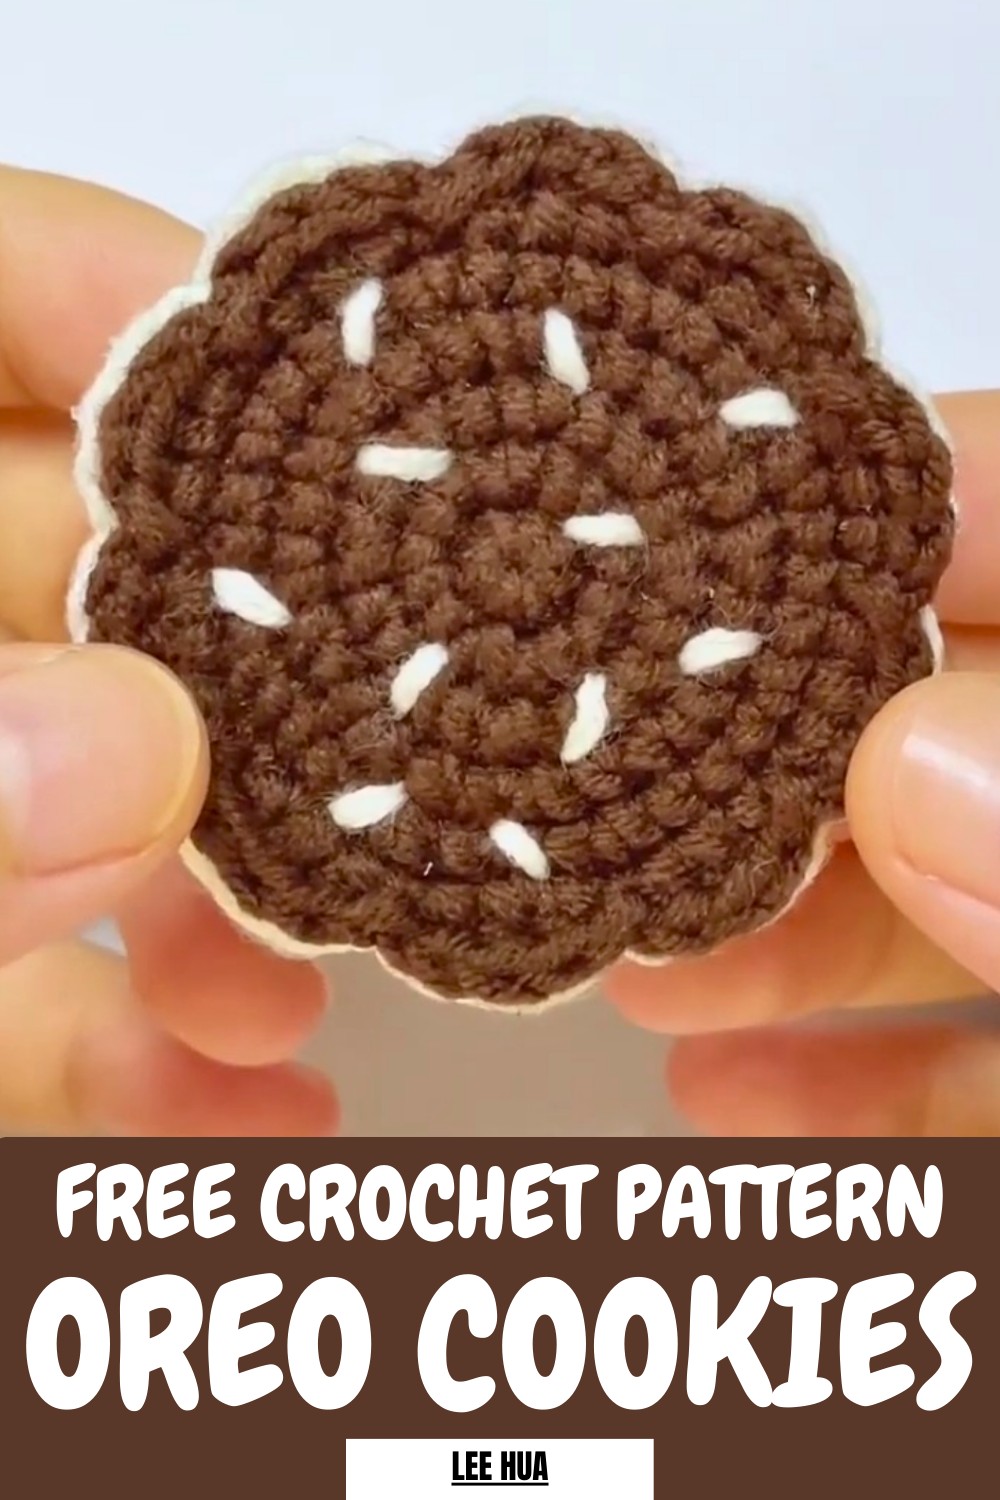
This pattern is beginner-friendly and uses simple stitches such as single crochet, slip stitch, and half double crochet. A special crossed single crochet stitch is introduced to give the cookie its unique raised texture, making it look delightfully detailed. It’s a manageable project, requiring only basic materials like brown and white yarn, a crochet hook, and optional extras like a magnet or glue for assembly.
The Crochet Oreo pattern is an excellent way to experiment with unique stitches, practice tension control, and create something playful and practical. Whether it’s a gift, personal keepsake, or home décor, this quick and fun project will satisfy anyone’s sweet tooth—no calories required.
Crochet Oreo Cookies Tutorial: A Step-by-Step Guide
Special Features of the Crochet Oreo Project
- The project is designed specifically with beginners in mind, featuring simple steps and clear instructions.
- Utilizes crossed single crochet stitches, giving the Oreo cookies their unique textured look.
- Versatile use: Can be made into pendants, magnets, or other personalized items.
- Satisfying, small-scale project that’s fun and quick to complete.
Level of Difficulty
- Beginner-Friendly: The stitches are explained and demonstrated simply, ensuring those new to crochet can follow along with ease.
- Slightly intermediate techniques like "crossed single crochet" are introduced, but they are broken down step by step.
Materials Needed
- Yarn: Brown yarn (for the cookie) and white yarn (for the cream).
- Crochet Hook: Appropriate for the yarn size.
- Magnet (if making a refrigerator sticker).
- Hot Melt Glue (used for sticking the pieces together).
- Tapestry Needle (for sewing and finishing).
- Scissors.
Step-by-Step Instructions
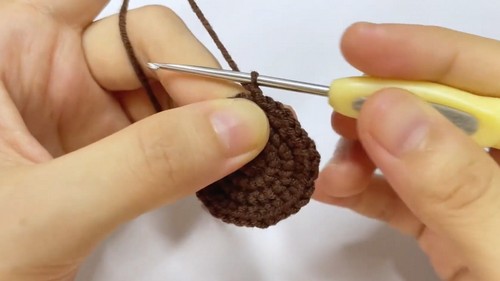
1. Create the First Slice (Brown)
- Start by hooking 8 single crochets in a loop.
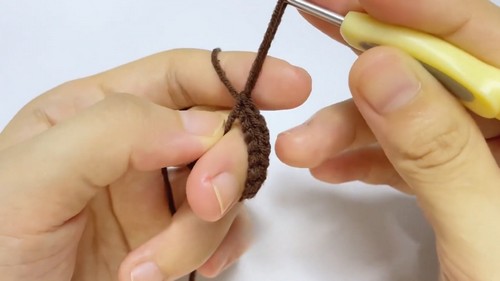
- Use a crossed single crochet for an intricate texture: Insert the hook, wrap the yarn on the right side of the crochet, and pull through loops as demonstrated.
- Repeat to complete 8 single crochet stitches.
- Repeat to complete 8 single crochet stitches.
- Stretch the loop and pull the thread tight to close the round. Connect it with a slip stitch.
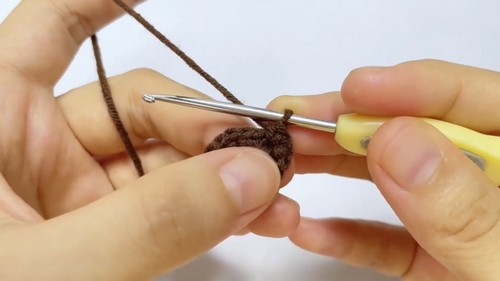
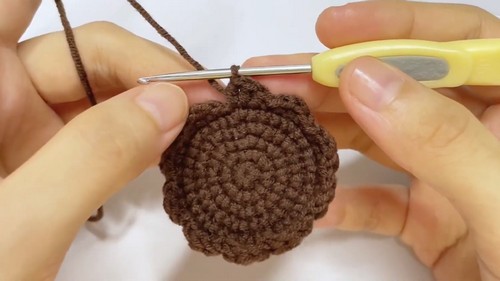
2. Crochet a Second Round (Increasing)
- Chain 1 and hook 2 single crochets in each stitch (8 sets of increases).
- Slip stitch to connect the round.
3. Continue to Increase (Rounds 3 and 4)
- Round 3: Hook 1 single crochet into one stitch, then an increase in the next (repeat 8 sets). Use a slip stitch to finish.
- Round 4: Hook 3 single crochets in consecutive stitches, then an increase in the next stitch (repeat 8 sets).
4. Add Decorative Details
- After completing the rounds, begin adding texture using half double crochets, double crochets, and slip stitches:
- For each set: Half double crochet in one stitch, double crochet in the next, then slip stitch. Repeat for 10 sets around the slice.
5. Complete the First Slice
- Once you finish, cut the yarn and pull it through the final loop.
- Seamlessly finish by using a tapestry needle to weave in the ends and hide the thread.
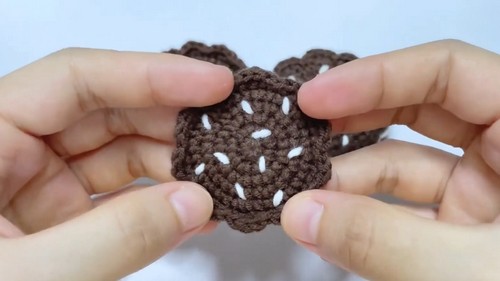
6. Make Two More Units (Brown and White)
- Follow the same steps to crochet:
- One additional brown slice (cookie).
- One white slice for the cream layer.
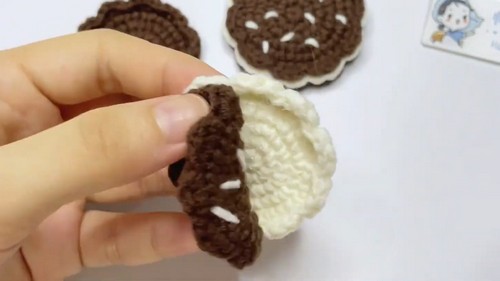
7. Assemble the Oreo Cookie
- Use white yarn to sew the slices together:
- Sandwich the white (cream) layer between the two brown slices.
- Sew only around the edges for a neat finish.
- If using for a refrigerator sticker, leave one side unsewn and insert a magnet in the middle.
8. Glue the Pieces Together
- Apply hot glue to hold the slices together for extra durability.
Tutor’s Suggestions
- Take your time to master the crossed single crochet, as it adds a special detail to the project.
- Adjust the tightness of your tension for a clean and sturdy look.
- Experiment with adding magnets, keychain hooks, or even embellishments to make your creation unique!
Uses of the Oreo Crochet Design
- Fridge Magnets: Add a playful touch to your kitchen.
- Keychains: Perfect as a cute accessory for bags or keys.
- Decor or Gifts: A creative and handmade token for family or friends.
Conclusion
Crocheting these Oreo-inspired cookies is a simple and rewarding DIY project, perfect for beginners and fun to customize. With a combination of brown and white yarn, you can create a realistic and charming result. Whether you make it for yourself or as a thoughtful gift, this crochet Oreo is sure to delight!
Tip
For a polished finish, ensure even tension in each round and take care when sewing or gluing the pieces together—this will keep the Oreo cohesive and professional-looking.


