
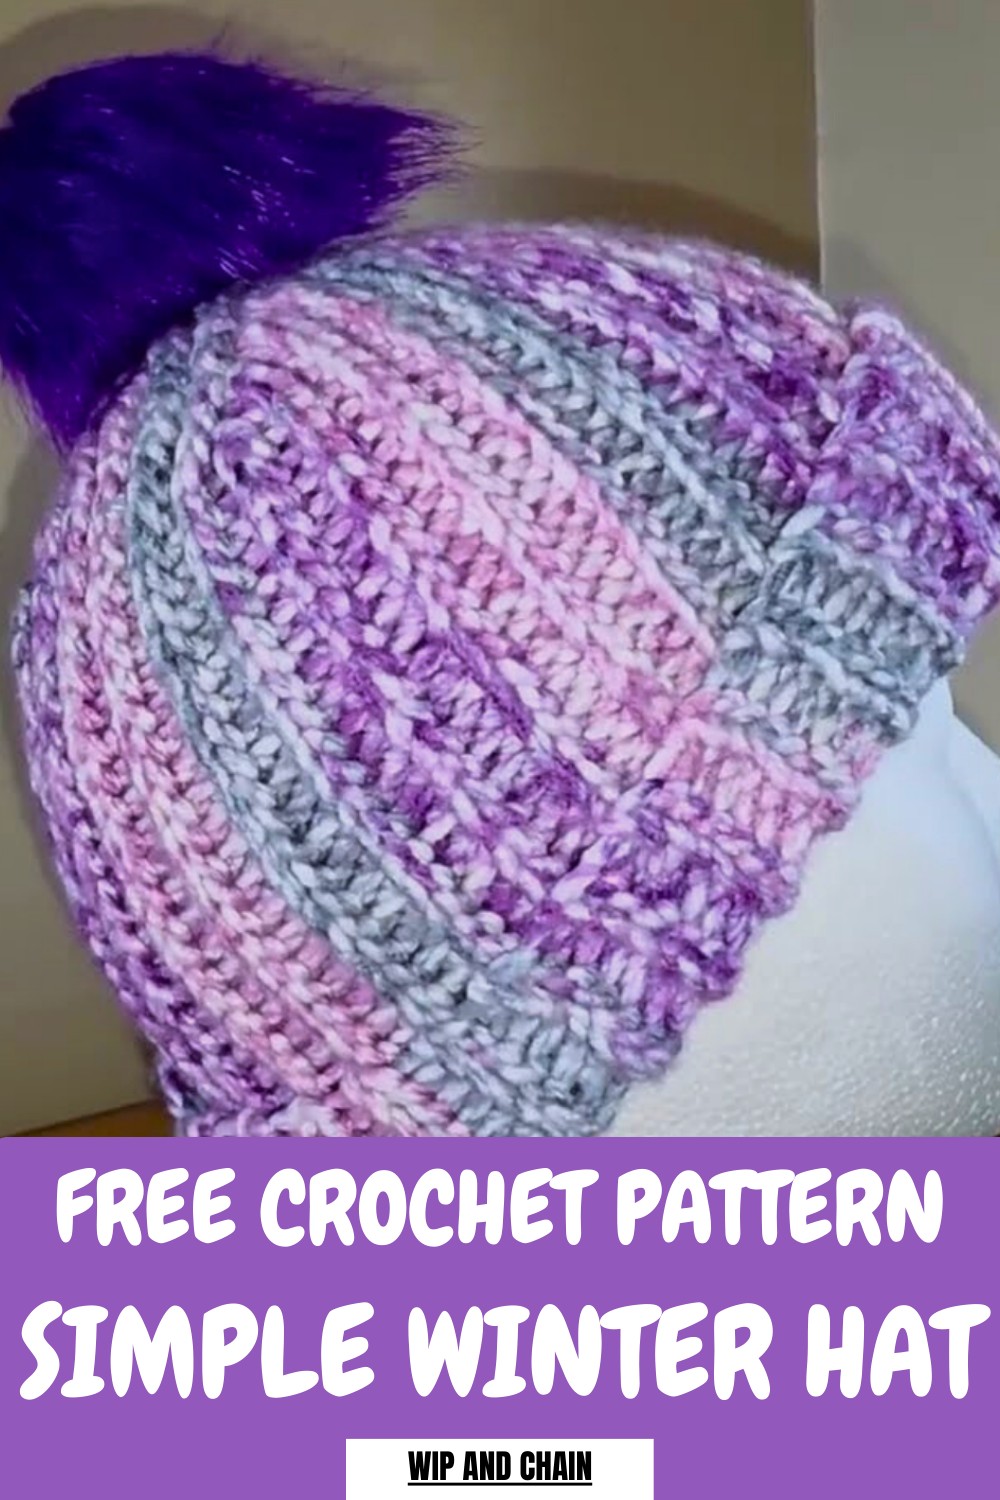
Protect yourself from the cold with this Crochet Winter Hat Pattern that featuring a soft design perfect for warmth and stylish winter wear.
Designing a bespoke accessory for the colder months allows you to blend high-end fashion with essential thermal protection. A Crochet Winter Hat Pattern acts as a sophisticated roadmap for producing a dense, wind-resistant fabric that effectively traps body heat while remaining incredibly soft. This specific design offers remarkable versatility, featuring intricate textures like raised cables or sleek ribbing that mirror the look of a luxury boutique find.
Cozy Crochet Winter Hat Pattern Perfect for Chilly Days
The primary benefit lies in the ability to generate a custom fit, ensuring your headwear remains snug and comfortable during the harshest conditions. Visually, the finished piece provides an air of timeless elegance, serving as a focal point for any seasonal ensemble.
By selecting a premium fiber and a rich tone, you produce a high-quality garment that far surpasses a mass-produced alternative. This pattern empowers you to curate a winter wardrobe defined by personalized style, exceptional warmth, and a professional finish that stands the test of time.
Step-by-Step Details
Here’s how you can make the beautiful winter hat:
Materials Needed
- Chunky/bulky yarn (Size #5 recommended, minimum 2 balls; example: Serenity Chunky in color “Majesty”).
- 7 mm crochet hook.
- Scissors.
- Stitch markers (optional).
- Pom-pom (optional).
Steps
-
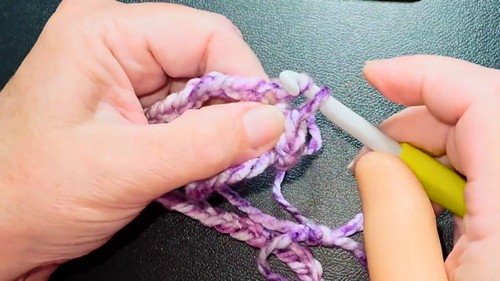
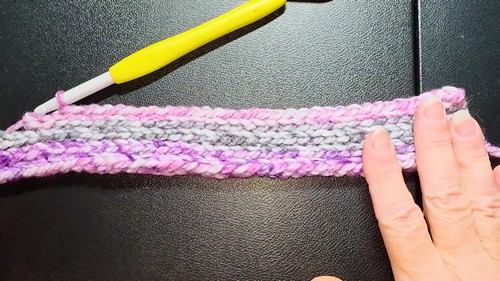
Prepare the Chain
- Begin by chaining 40 stitches using your chosen yarn. Tie off this chain and mark one end so you can recognize it as the fake chain later.
- Begin by chaining 40 stitches using your chosen yarn. Tie off this chain and mark one end so you can recognize it as the fake chain later.
-
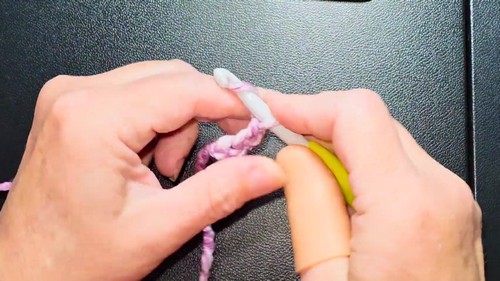
Start Slip Stitches
- Loop the yarn over your finger and insert into the first chain to pull the yarn up.
- Chain 1 and begin working slip stitches into each chain (back loops only). You will end up with 40 slip stitches.
-
Begin the First Panel’s Rows
- After finishing the first row, turn your work and chain 1. Start working 38 slip stitches, leaving 2 unworked stitches at the crown.
- Turn, chain 1, and work 38 slip stitches back down. Ensure all stitches are worked into the back loops only.
-
Continue Increasing and Decreasing Rows
Repeat the pattern as follows:
- Alternate between rows up and down, skipping 2 stitches at the top (crown) for each upward row.
- The number of slip stitches will reduce with each crown decrease: 40 > 38 > 36 > 34 > 32 > 30, etc.
- Once your stitch count reaches 30 slip stitches, return to 40 stitch rows and start a new pattern repeat.
-
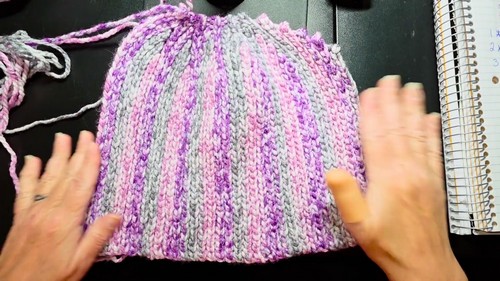
Create 5 Total Panels
- Follow the same process to create 5 panels in total. Each panel follows the pattern of increasing and decreasing rows.
- If needed, you can add a 6th or 7th panel for a looser-fitting hat.
-
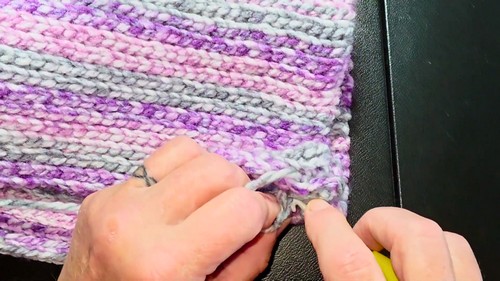
Join the Panels
- Once your panels are complete, line them up and begin to join the stitches. Fold the hat lengthwise so the edges align.
- Slip stitch through two loops from each edge to seam them together neatly.
-
Close the Crown
- Cinch the crown of the hat by working through the top edges of the panels and closing any gaps manually.
-
Add the Pom-Pom (Optional)
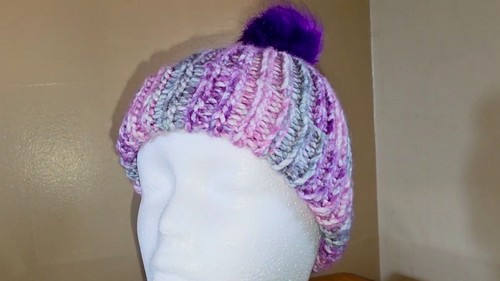
- Use a pom-pom from your stash or make one using leftover yarn. Attach it securely to the top of the hat for a fun addition.
Special Features
- Quick Completion: You can finish this project in one evening, making it a fast and satisfying crochet piece.
- Thick, Warm Design: The slip stitch and bulky yarn create a super-thick texture for added warmth.
- Customizable Fit: Add extra panels (e.g., 6th or 7th) for a larger size if the tight fit isn’t preferred.
- Versatility in Yarn Choice: This pattern works beautifully with solid colors, stripes, or patterned yarns.
Level of Difficulty
This project is rated easy to intermediate, suitable for beginners who understand basic slip stitch techniques. The repetitive nature of the pattern makes it simple to execute; however, you must pay attention to keeping your stitches loose and consistent.
Tutor’s Suggestions
- Keep Stitches Loose: Tight stitches will make the work difficult and risk splitting the yarn.
- Count Your Stitches: Make sure you’re skipping the correct number at the crown to ensure proper shaping of the panels.
- Adjust Size as Needed: If the hat feels too tight, add another panel to increase its circumference.
Uses and Materials
- Uses: Perfect for tackling extreme winter weather, the hat can also be customized with pom-poms or styled in various colors for fashion-forward looks.
- Materials: Chunky/bulky yarn (#5), 7 mm hook, and basic crochet tools.
Tip
When working with slip stitches, always focus on stitching into the back loops only and keeping your stitches loose. This will highlight the texture of the hat and make the process much smoother.
Conclusion
This super-thick winter hat serves as a quick and cozy accessory for cold days. Creator provides clear instructions, ensuring it can easily be made in an evening. Its customizable fit, stylish design, and warm texture make it a must-try project for crochet enthusiasts. Plus, adding a pom-pom turns it into a fun, playful hat that is sure to stand out in your winter wardrobe.


