
Show textured warmth with this Crochet Wheat Stitch Hat Pattern highlighting rich stitches snug fit and classic style for cool weather wear.
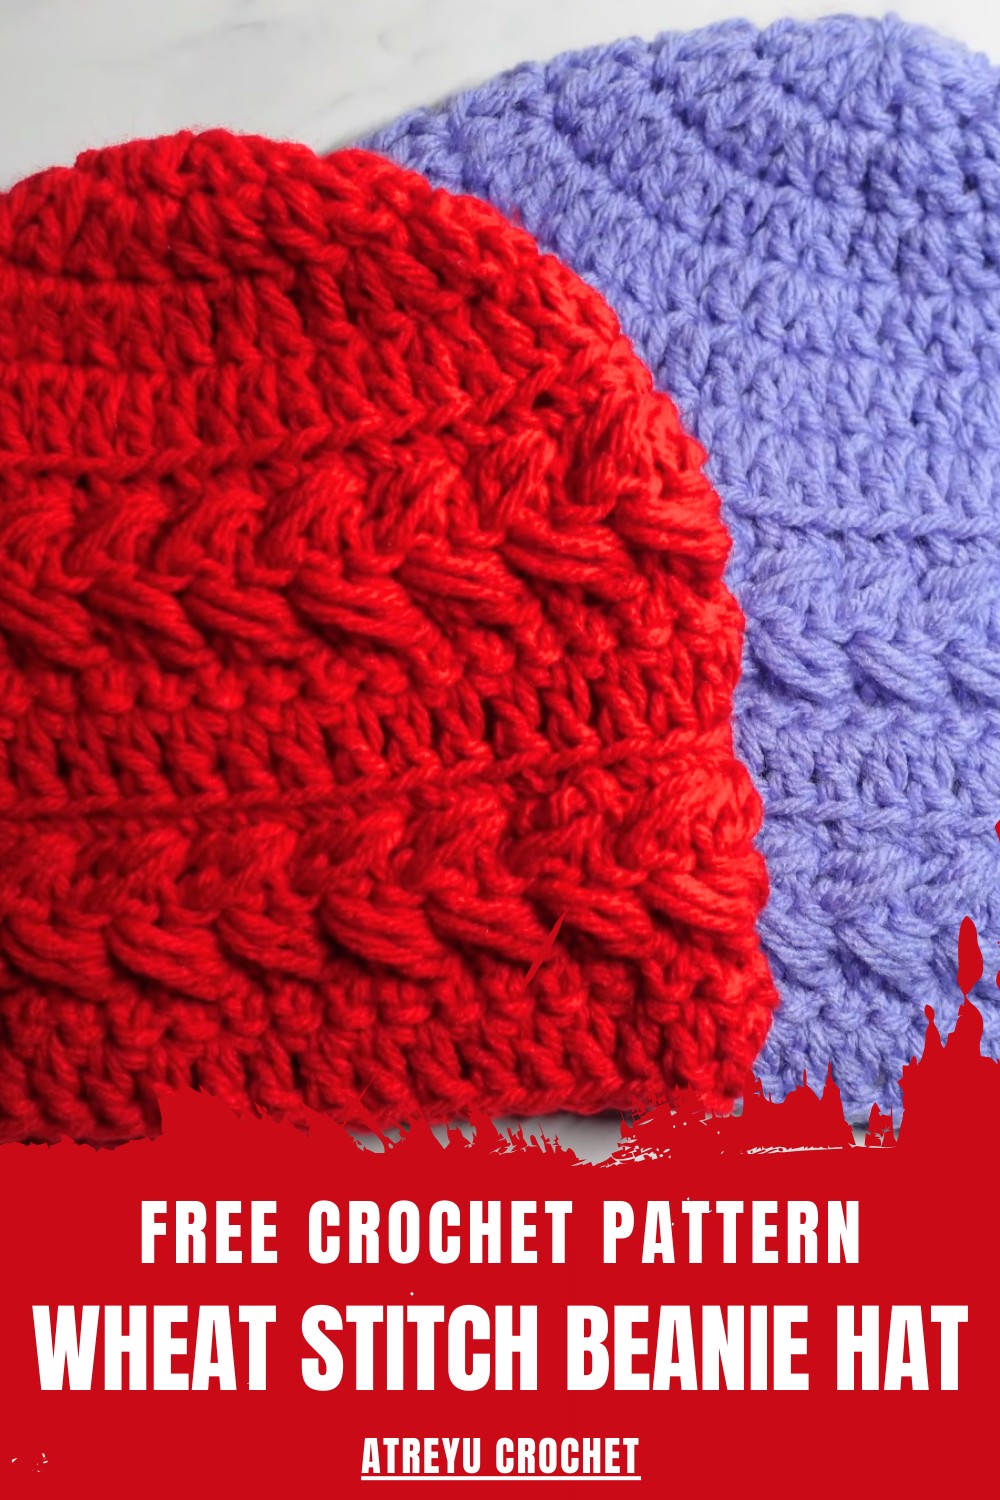
The fabric offers cozy warmth and a smooth finish that pairs easily with coats, sweaters, and layered outfits. Thoughtful color selection enhances its overall appeal, whether in soft neutral tones or richer seasonal shades.
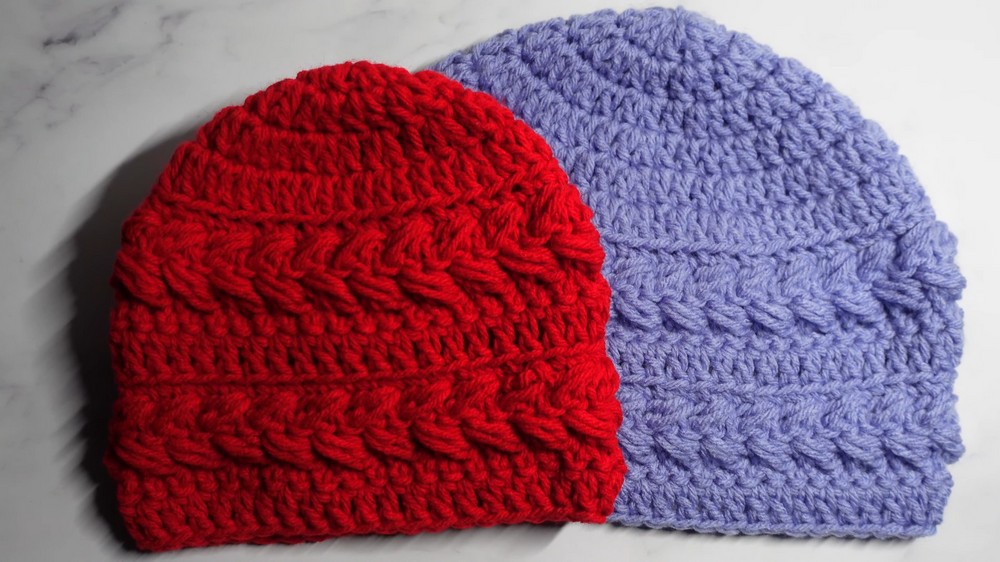
The completed hat reflects a harmonious blend of style and comfort, resulting in an accessory that feels refined and versatile. Overall, this design presents timeless charm, dependable warmth, and an eye-catching texture that complements modern wardrobes with effortless sophistication.
Step-by-Step Details
Materials Needed
- Yarn: Medium-weight (size 4) yarn.
- Hook: A 5.75 mm (size J) crochet hook.
- Tools:
- Scissors.
- Darning, weaving, or tapestry needle.
- A couple of stitch markers.
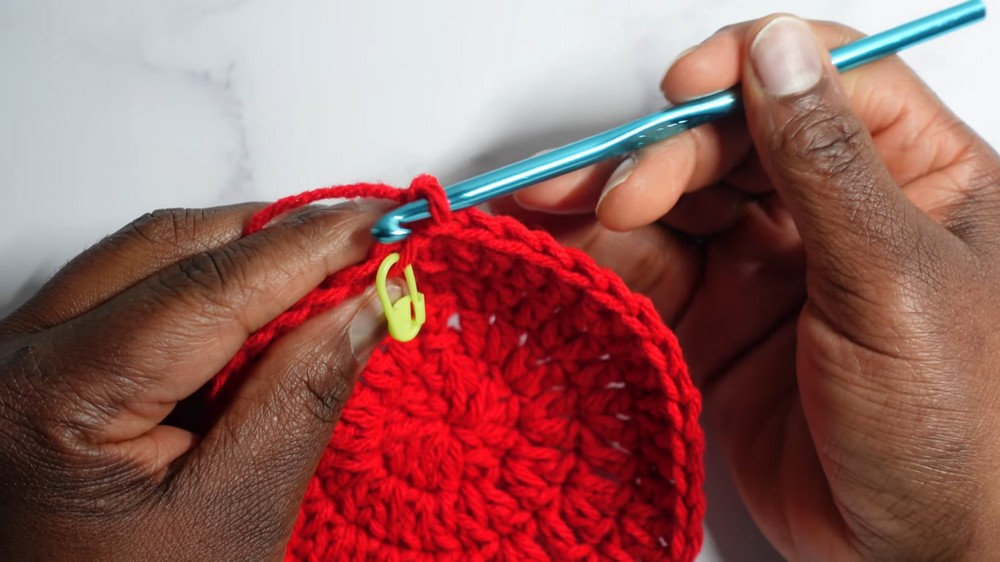
Step 1: Create the Foundation for the Hat
- Start with a slip knot:
- Wrap the yarn around your finger, twist, and pull through to create a loop. Insert the crochet hook into the loop, then pull to tighten.
- Chain 4: Yarn over and pull through the loop on the hook four times to create the chain.
- Form the base circle: Insert the hook into the first chain, yarn over, and pull through to form a round shape.
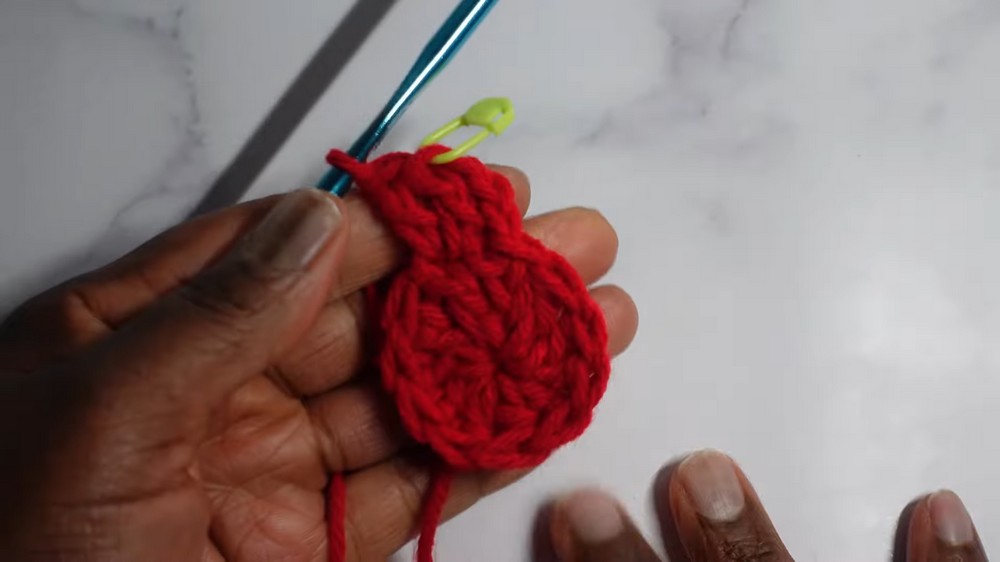
Step 2: Work the First Round
- Chain 3 (does not count as a stitch in this pattern).
- Make 10 double crochets (DC) into the center of the ring:
- Yarn over, insert the hook into the ring, yarn over and pull through, leaving three loops on the hook.
- Yarn over and pull through the first 2 loops, then yarn over and pull through the last 2.
- Place a stitch marker on the first double crochet to keep track of where the round starts.
- Slip stitch into the third chain of the initial chain 3 to close the round.
3: Increase Rounds
- Round 2:
- Chain 3 (does not count as a stitch).
- Place 2 double crochets in each stitch around (this doubles the stitch count from 10 to 20).
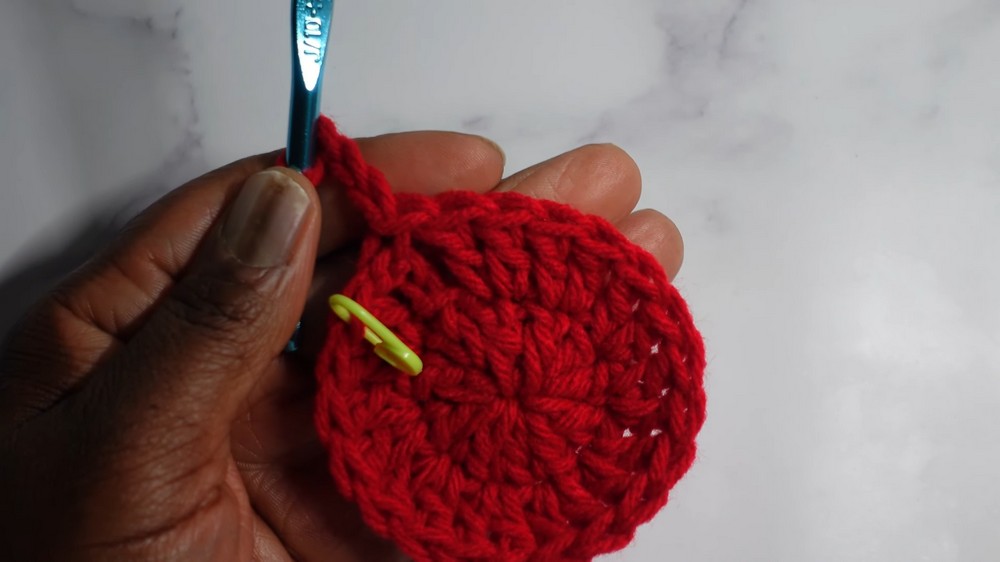
- Round 3:
- Use the 1, 2 pattern:
- Crochet 1 double crochet into the first stitch, then 2 double crochets into the next stitch. Repeat this pattern around the circle.
- Finish by slip stitching at the end of the round.
- Use the 1, 2 pattern:
- Continue Increasing Until Desired Size:
- Add 1 extra single crochet to the “1” pattern in each new round (e.g., Round 4 becomes 1, 1, 2, Round 5 becomes 1, 1, 1, 2, and so on).
- The size of the circle determines the diameter of your hat’s crown. Check and measure it against the head of the recipient. Once the desired diameter is achieved, stop increasing and proceed to the next step.
4: Work the Non-Increase Rounds
- In this step, crochet single crochets in the back loop only for the entire round to create texture.
- Slip stitch at the end of the round and chain 1.
- Turn your work to create the same texture as the accompanying wheat stitch scarf.
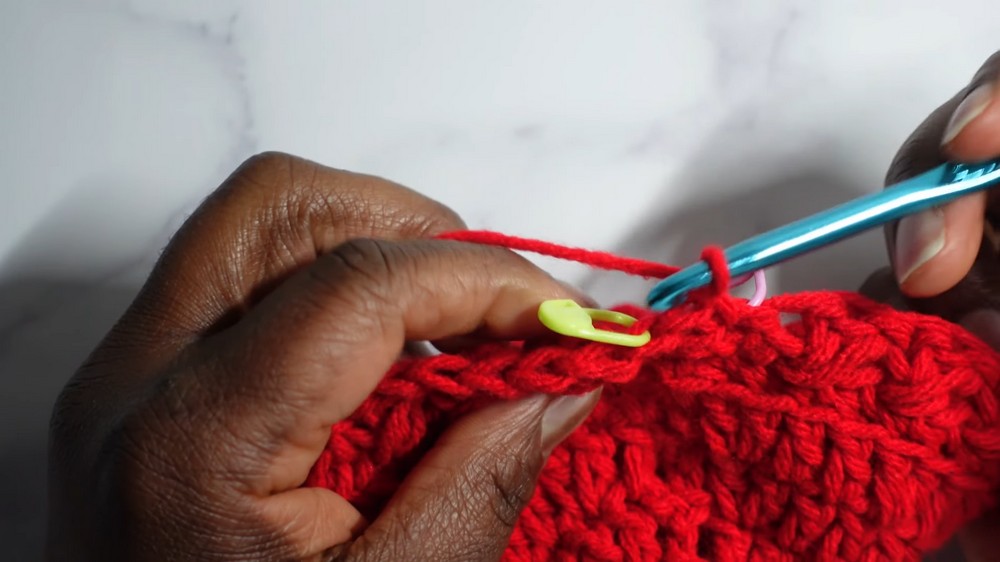
5: Begin the Wheat Stitch Pattern
- Wheat Stitch Round:
- Pattern: Skip the next stitch, put a single crochet in the following stitch, then go back to the skipped stitch and make a puff stitch.
- To create the puff stitch: Yarn over, insert the hook into the skipped stitch, and pull up loops until you have 5 loops on your hook. Yarn over, pull through the first 4 loops, and then yarn over and pull through the last 2 loops.
- Repeat this pattern (skip next stitch → single crochet → puff stitch in skipped stitch) around the row.
- End with a single crochet in the last marked stitch, slip stitch into the first stitch, and turn your work.
- Pattern: Skip the next stitch, put a single crochet in the following stitch, then go back to the skipped stitch and make a puff stitch.
- Next round:
- Align Puff and Single Crochets: Repeat the wheat stitch pattern, ensuring single crochets are placed into single crochets and puff stitches are placed into puff stitches.
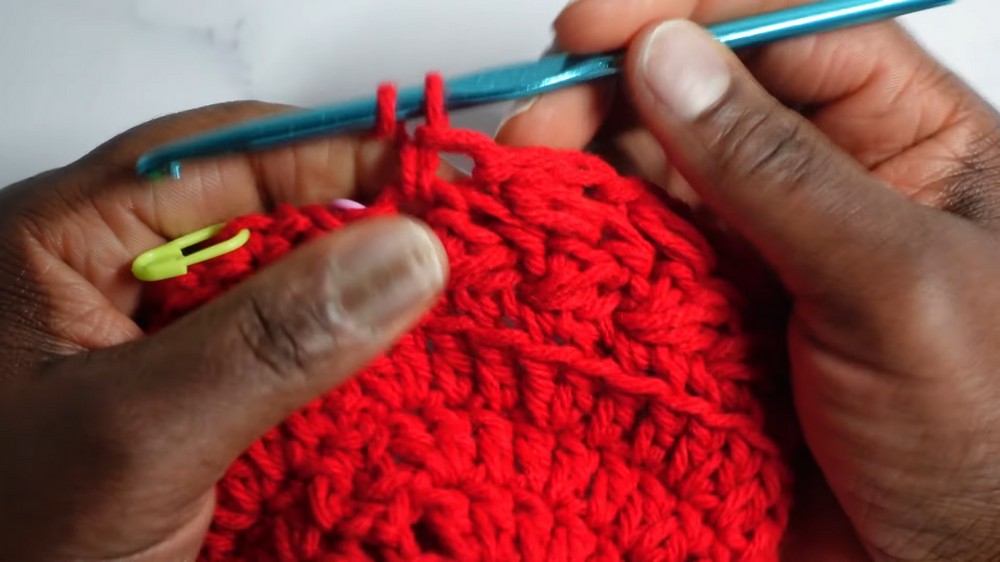
6: Alternate Rounds for Texture
- Alternate between wheat stitch rounds and single crochet back loop rounds to create the signature wheat texture.
- Keep working until the hat reaches the desired height.
7: Create the Final Edge
- For the final few rows, crochet double crochets or single crochets along the top edge to smoothen and reinforce the hat’s finish.
- Fasten off the yarn, weave in all loose ends with a tapestry needle, and trim any excess.
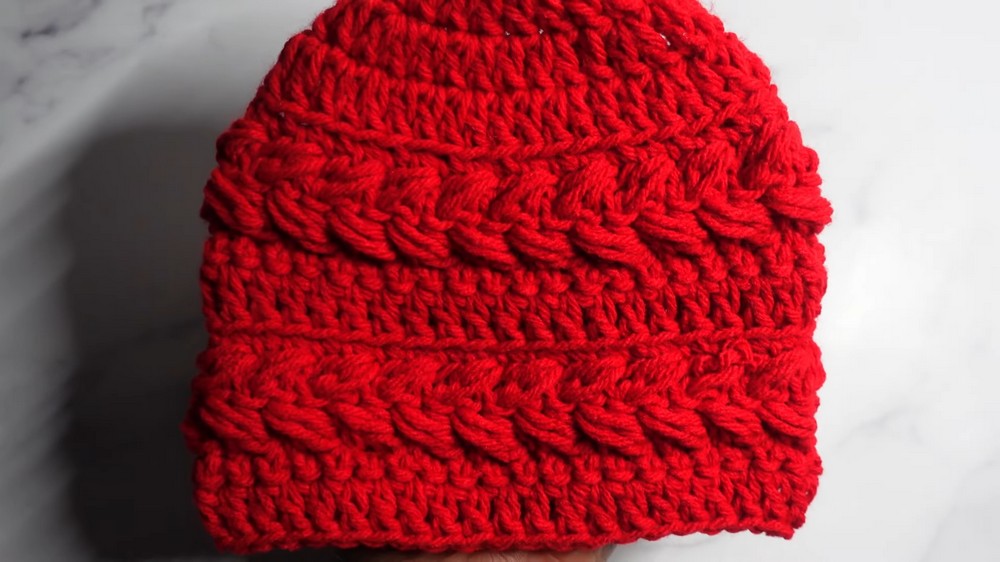
Special Features
- Wheat Stitch Texture: The alternating puff stitch design creates a unique texture resembling wheat stalks.
- Customizable Size: With guided instructions to measure the crown diameter, the hat can be adjusted to fit different head sizes.
- Elegant and Functional: The hat is designed as a matching accessory to the wheat stitch scarf, making it a stylish winter set.
- Back Loop Single Crochets: The added detail creates a subtle ridged texture to enhance the hat's visual appeal.
Level of Difficulty
This project is beginner to intermediate skill level. While the basic steps like double crochet and single crochet are beginner-friendly, the wheat stitch pattern (with skipped stitches and puff stitches) may challenge those new to crochet. However, the tutor’s clear instructions and slow demonstration make it easy to follow.
Tutor's Suggestions
- Practice the Wheat Stitch First: If you're nervous about the puff stitches, start by crocheting the wheat stitch scarf first to gain experience.
- Mark Your Stitches: Use stitch markers to keep track of beginnings and ends of rounds, skipped stitches, and puff stitches.
- Check Your Measurements Regularly: Make sure the hat’s diameter and height match the intended wearer’s measurements before proceeding.
- Turn Your Work: Turning your work in certain rounds is essential to match the texture of the accompanying scarf.
Uses
- Fashion Accessory: Add it to your wardrobe for a cozy yet elegant winter look.
- Gifting: This hat-and-scarf combo makes a thoughtful handmade gift.
- Set for Craft Markets: Add this to your collection if you sell handmade crocheted items.
Tip
Keep Track of Even Stitches: The wheat stitch pattern relies on an even number of stitches. Count your stitches at the end of each round to ensure you haven’t accidentally skipped one.
Conclusion
The wheat stitch hat pattern masterfully combines simplicity with elegance, making it a rewarding project for both beginners and experienced crocheters. With easy-to-follow steps, a textured design, and a beautiful finish, this hat is the perfect companion to the wheat stitch scarf. Customize the size and colors to tailor it to your style or gift it to someone special.


