
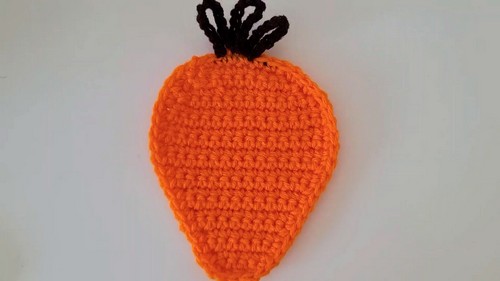
Turn your table into a playful space with the Free crochet Carrot Coaster Pattern, offering simple steps, fast stitching, and a charming handmade touch.
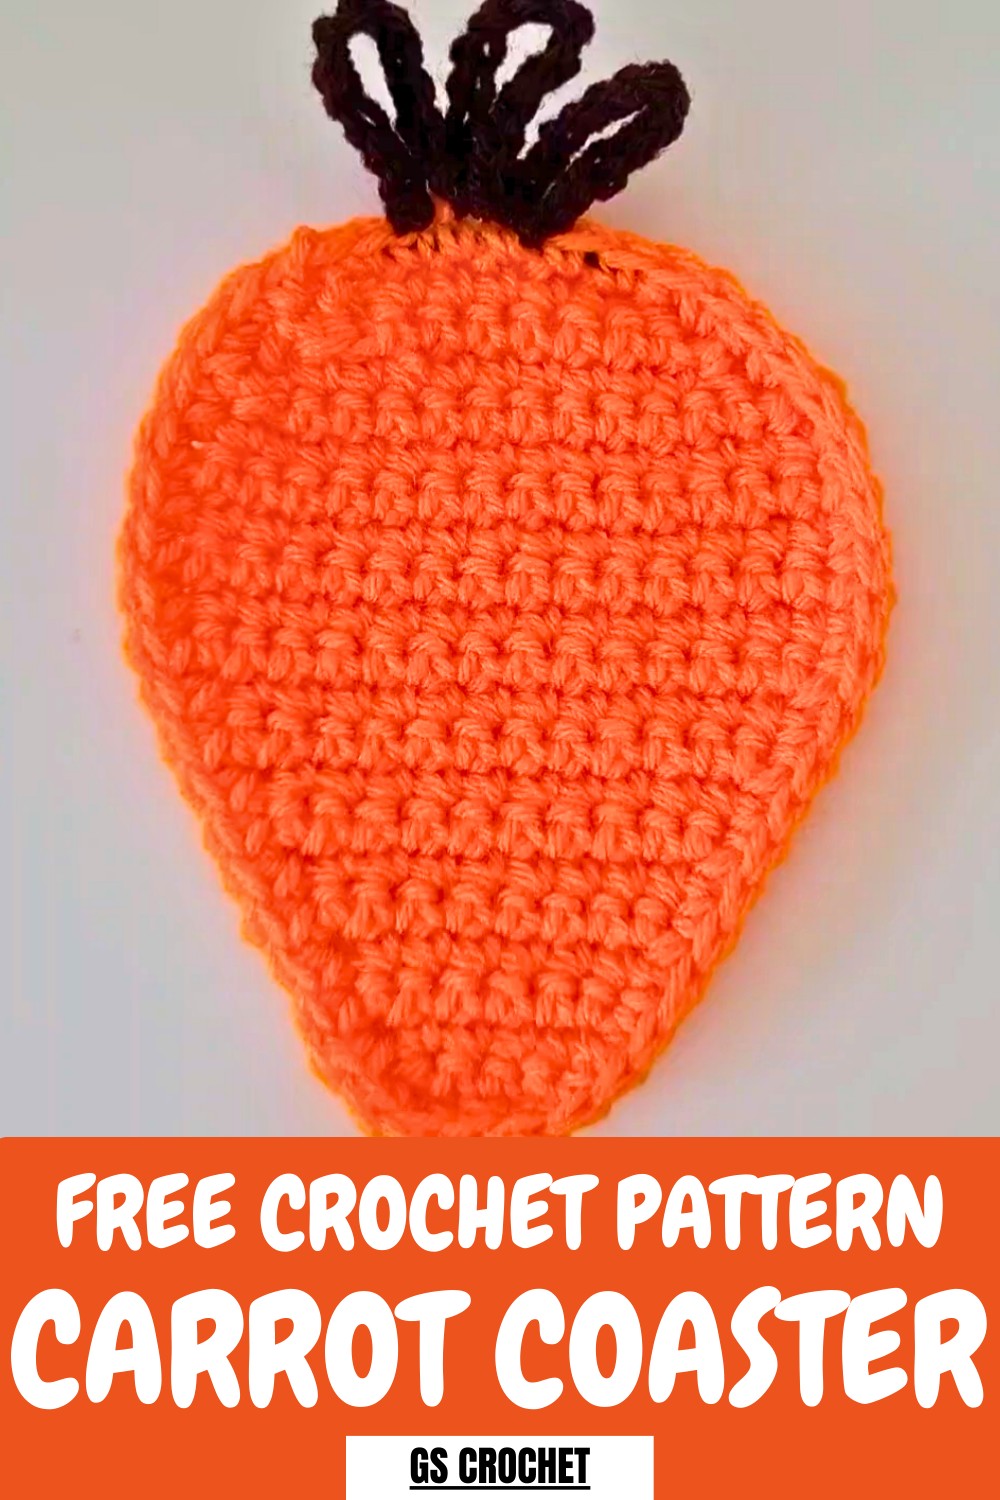
Ever thought a tiny carrot could brighten up your coffee table? This Crochet Carrot Coaster Pattern turns a simple everyday item into something playful and charming. Its tapered orange body and little green top give it a fresh, fun look that adds personality to any kitchen, desk, or coffee corner. More than just decoration, it keeps surfaces safe from heat and moisture, making it both practical and cute.
Adorable Crochet Carrot Coaster Pattern Handmade Charm
Light and easy to handle, it’s perfect for daily use or as a cheerful handmade gift. Working on it offers a relaxing, hands-on activity that sharpens focus and improves stitching skills. In the end, this little coaster brings together usefulness and visual appeal, transforming a simple table accessory into a small, lively piece that adds color, charm, and a touch of fun to everyday routines.
How to Crochet a Carrot Coaster: Step-by-Step Guide
Materials Needed
To complete this project, gather the following supplies:
- Yarn: Two colors – orange (for the carrot) and brown or green (for the stem).
- Crochet Hook: 5 mm (or whichever size works with your yarn).
- Scissors: For cutting the yarn.
- Darning Needle: Optional; helpful for weaving in ends.
- Your Hands!
Uses of the Carrot Coaster
- Protects surfaces from condensation and heat from mugs or glasses.
- Decorative addition to your dining table or kitchen.
- A wonderful handmade gift for holidays or events like Easter.
- A quick and enjoyable stash-busting project for leftover yarn.
Special Features
- Charming carrot shape made with simple single crochet stitches.
- Customizable size and colors to suit your preference.
- Includes a 3-piece stem for a realistic yet whimsical finish.
- A great project for learning and practicing increases, decreases, and making borders.
Level of Difficulty
- Beginner-friendly: The pattern primarily uses basic crochet techniques such as single crochet, increases, decreases, and slip stitches.
Step-by-Step Instructions
1. Creating the Carrot Base
- Make a slip knot and chain 4 to start.
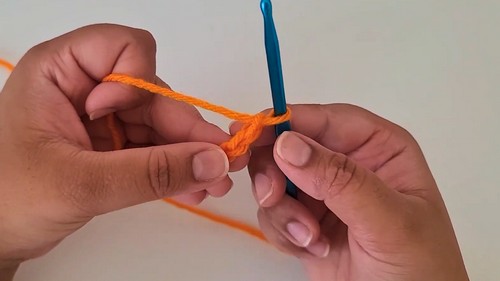
- Round 1: Skip the last chain, work the following:
- 2 single crochet (SC) in the second chain from the hook (increase).
- 1 SC in the next chain.
- 2 SC in the last chain (increase). You should now have 5 stitches.
- Chain 1, turn your work, and move to Round 2.
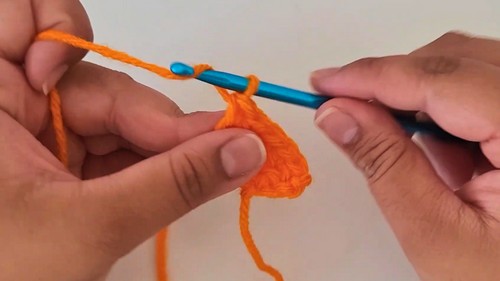
2. Building Up the Triangle Shape
- Round 2: Work 1 SC in each stitch across (no increases, total = 5 stitches).
- Round 3: Start with an increase, work 3 SC, and finish with an increase for 7 stitches.
- Continue alternating between increasing rows and flat (no increase) rows:
- Round 4: 7 SC.
- Round 5: Start with an increase, 5 SC, and finish with an increase (9 stitches).
- Round 6: 9 SC.
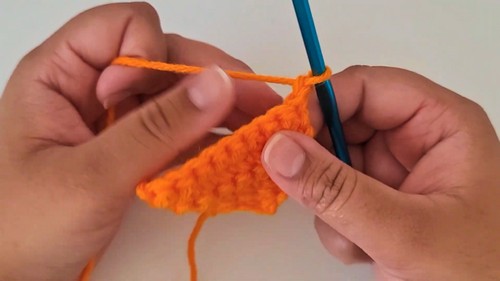
3. Shaping the Carrot Tip
- Progress onward with rounds (increasing every other row):
- Add 2 stitches per increase row until you reach 15 stitches in Round 11.
- For Rounds 12-15, work evenly with 15 SC.
4. Creating the Carrot's Tapering End
- Begin decreases from Round 16 onward:
- Round 16: Start with a decrease, work 11 SC, and decrease at the end (13 stitches).
- Round 17: Decrease, work 9 SC, and decrease (11 stitches).
- Round 18: Decrease, work 7 SC, and decrease (9 stitches).
- Round 19 (Final Decrease): Decrease, work 5 SC, and decrease (7 stitches).
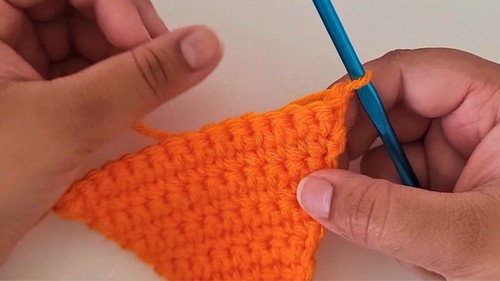
5. Adding a Border
- Work single crochet stitches evenly around the edges to give the carrot a polished, finished look.
- Use the base chains and outer loops along the border for an evenly spaced finish.
- Slip stitch into the first stitch of the border and fasten off by cutting the yarn and pulling through.
6. Making the Carrot Stem
- Attach the second yarn color (brown or green) onto the carrot’s top edge, starting slightly to the right of the center.
- For each stem piece:
- Chain 12.

- Slip stitch into the next stitch.
- Repeat this process to create 3 stem sections (one in each of the 3 centermost stitches).
- Chain 12.
- Fasten off and trim the yarn.
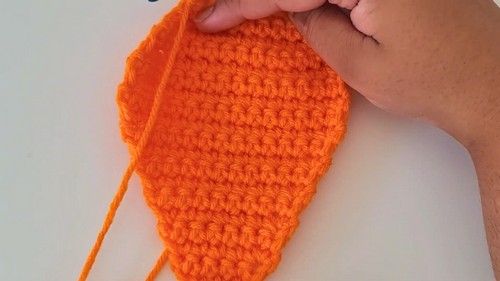
7. Weaving in Ends
- Use a darning needle (or crochet hook) to weave in the loose yarn ends on the back of the coaster. Ensure they are hidden in the back loops for a neat finish.
- Snip any excess yarn.
Tutor’s Suggestions
- Use stiff yarn for the best coaster texture.
- If your coaster edges curl, flatten it using a heavy book or a quick wash.
- Play with colors and hook sizes for a unique touch.
- Use the back side for weaving ends to keep the front tidy.
Conclusion
The carrot coaster is a delightful and easy crochet project for all skill levels. Its playful design and practical functionality make it a lovely addition to your handmade collection or a heartfelt gift for loved ones. With just a few basic stitches, you can create this fun, lightweight piece in no time. Plus, it’s a fantastic way to practice increases, decreases, and finishing techniques all in one project!
Bonus Tip
When working along the border, pull gently on the stitches to find the correct spaces, ensuring the edges remain neat and even. This will enhance the coaster’s overall appearance.


