
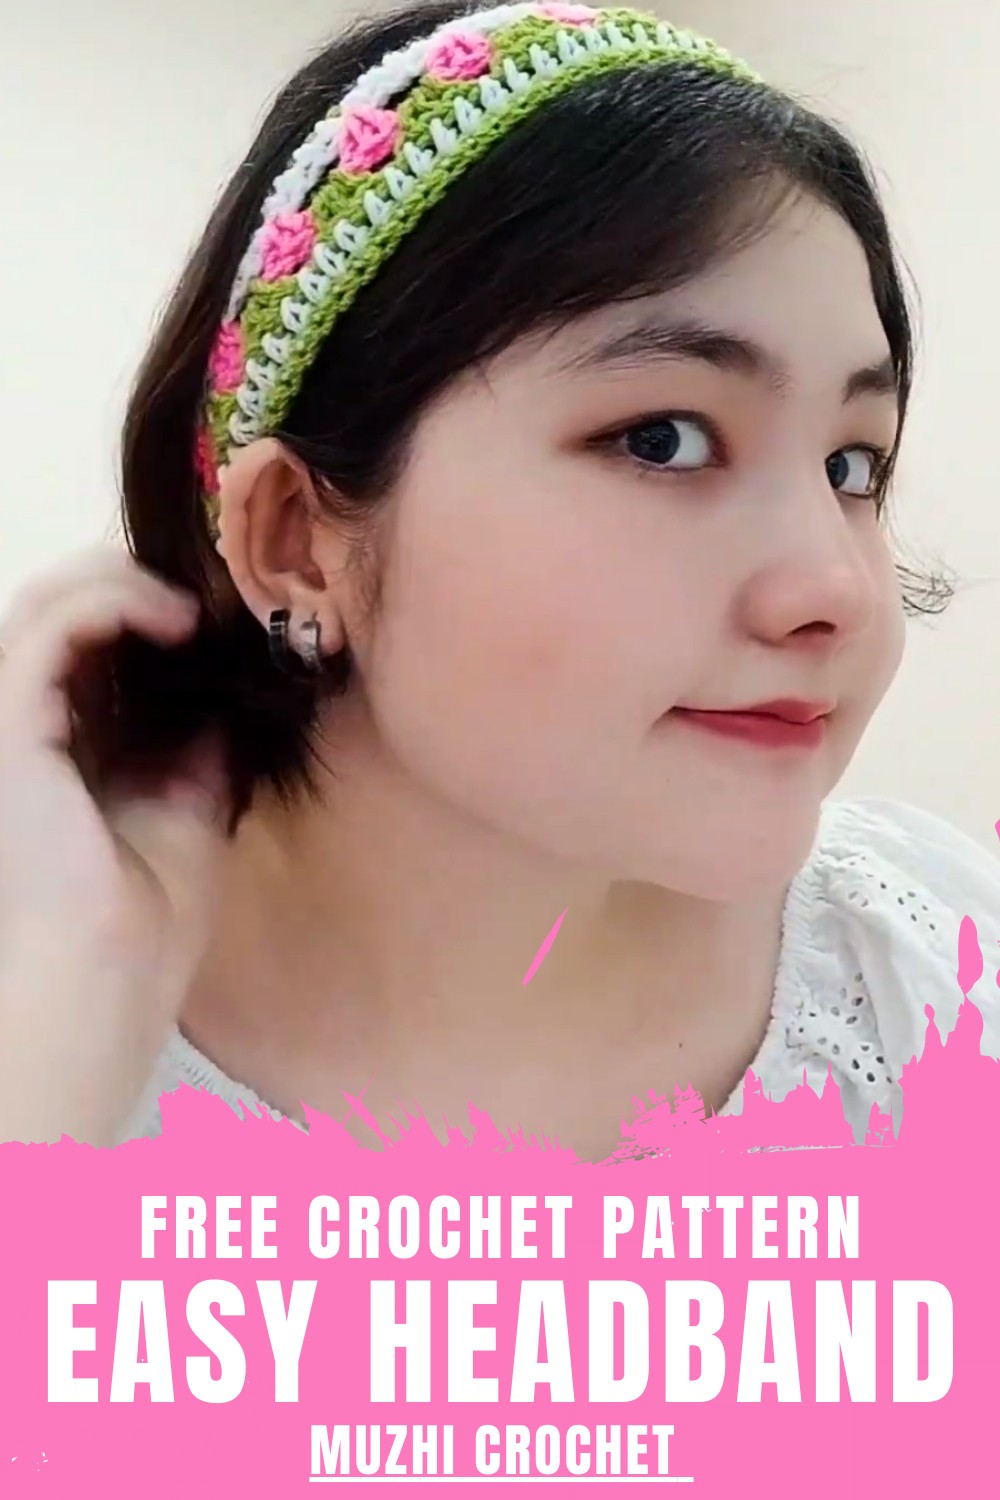
Refresh daily looks with this Crochet Headband Pattern, offering gentle stretch, soft texture, and secure comfort suitable for all seasons.
Everyday accessories gain a refined touch through a neatly designed headband that combines comfort with visual appeal. Worn to manage hair, add style to casual outfits, or provide light warmth around the ears, it serves multiple purposes throughout the year. This accessory fits seamlessly into daily routines, outdoor activities, and relaxed settings. Choosing a Crochet Headband Pattern allows for creative freedom in selecting stitch styles, adjusting width, and achieving the preferred fit.
Minimalist Crochet Headband Pattern With Timeless Appeal
The flexible texture offers a comfortable hold, making it suitable for extended wear. Its subtle detailing enhances the overall look without drawing excessive attention, allowing it to complement different hairstyles and clothing choices.
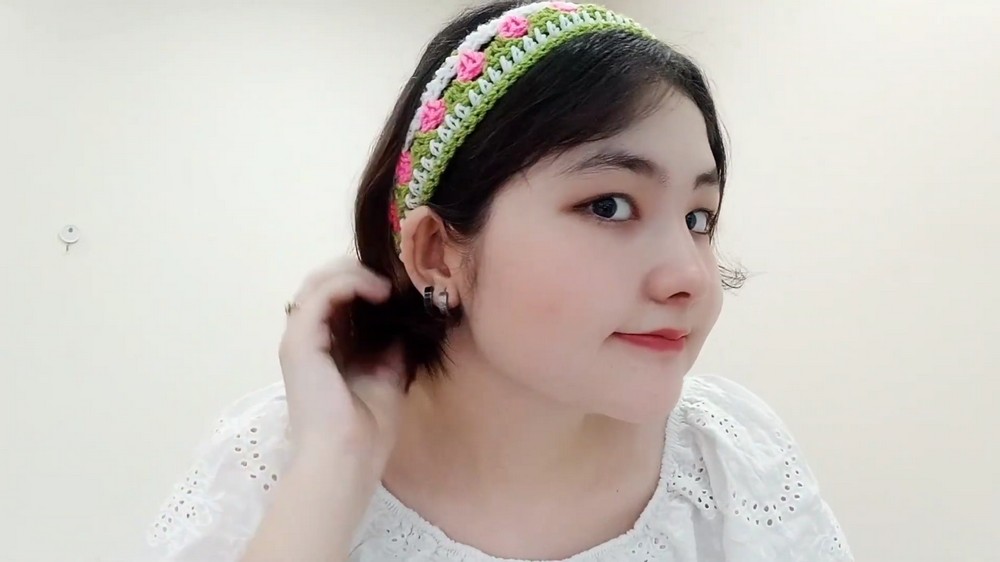
With the option to explore various color tones, the final result easily adapts to personal style. Overall, this design presents a simple yet elegant solution for everyday wear, delivering functionality and charm in a lightweight accessory that feels polished, practical, and timeless.
Step-by-Step Details
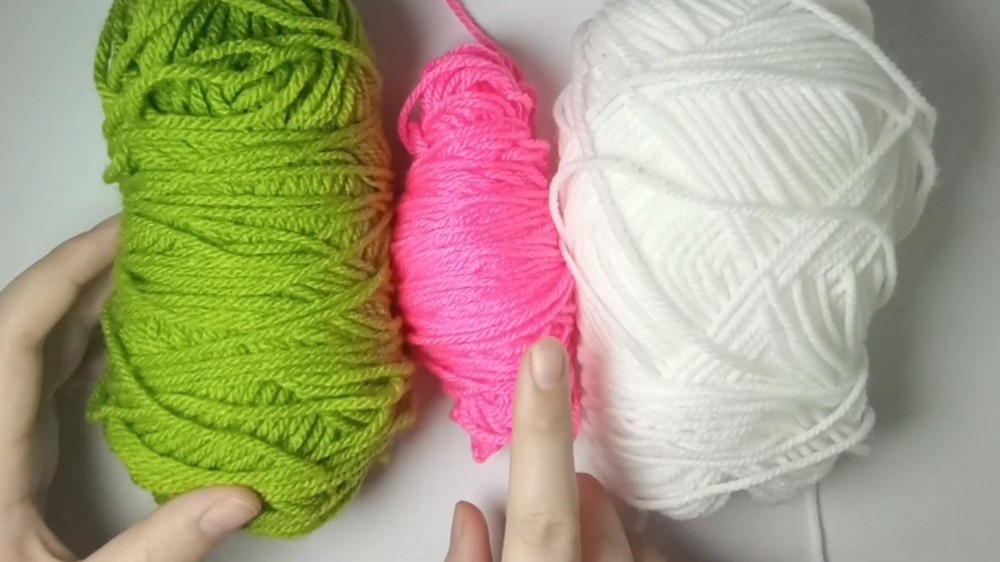
Step 1: Gather Materials
You’ll need the following materials:
- 5 g each of green, white, and pink yarn (eight-ply or double-knit yarn).
- A 4 mm crochet hook.
- A darning needle.
- Scissors (or a nail clipper as suggested in the video).
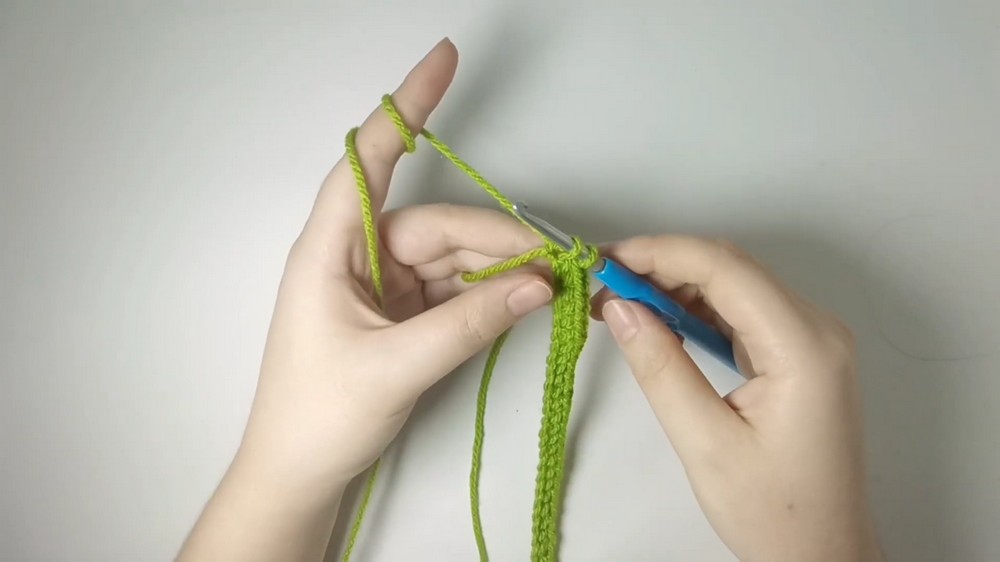
Step 2: Begin with the Base Row
- Use green yarn to make a slip knot.
- Chain 80 (or more if a larger headband is needed).
- Add one more chain, skip the first chain, and begin working single crochet stitches in the second chain.
- Insert the hook into the chain, pull up a loop, yarn over, and pull through both loops.
- Continue crocheting single stitches across the row until all 80 chains are completed.
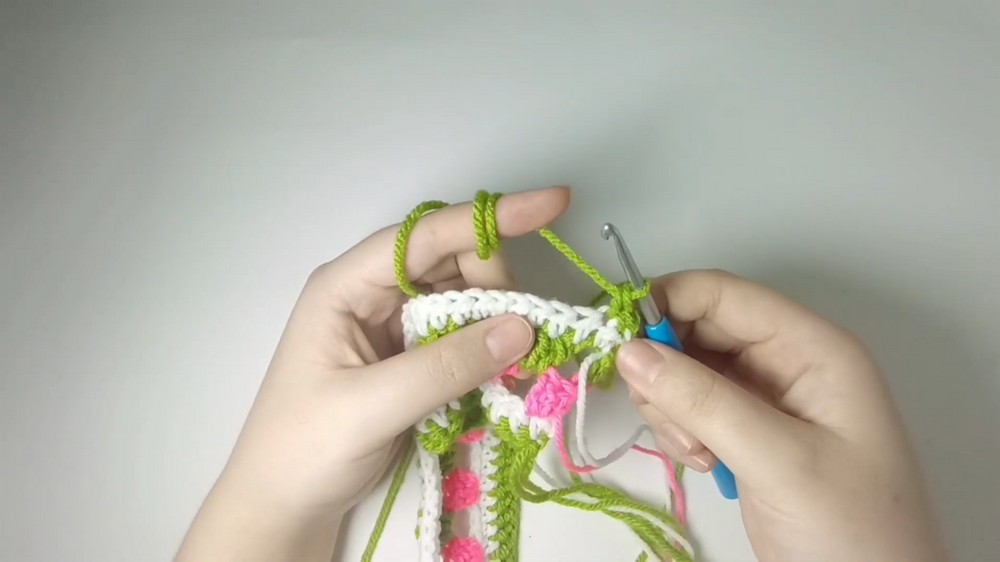
3: Add Color and Work Row 2
- Change yarn color to white at the last step of the final single crochet (switch the yarn before completing the last two loops).
- Chain 1 with the new color and turn the work.
- Work half double crochet stitches across the row:
- Yarn over, insert the hook in the stitch, pull up a loop to get three loops on the hook, yarn over, and pull through all three loops.
- Continue working half double crochet stitches until the end of the row.
4: Add a Decorative Pink Row
- Change yarn color to pink for row 3 (at the last half double crochet step).
- Chain 3 and turn the work.
- Skip the first three stitches. In the fourth stitch, work a cluster of three double crochet stitches:
- Yarn over, insert into the stitch, pull a loop, yarn over, pull through two loops, yarn over again, and pull through another two loops. Repeat two more double crochet stitches in the same stitch.

- Yarn over, insert into the stitch, pull a loop, yarn over, pull through two loops, yarn over again, and pull through another two loops. Repeat two more double crochet stitches in the same stitch.
- Chain 1, skip three stitches, and work three double crochets in the next stitch. Repeat this pattern (chain 1, skip 3, 3 double crochets) until the end of the row.
5: Alternate Rows with Color Changes
- Switch back to green using the same ball of yarn from the first row.
- Work similar double crochet clusters in each chain space from the previous row (chain 1 and skip three double crochets as before). Complete row 4 this way.
- Change yarn color back to white: repeat row 2 by working half double crochet stitches in all spaces and stitches, including chain spaces.
- For row 6 (final row), return to green yarn and work single crochet stitches across all rows.
6: Sew the Edges Together
- Use green yarn to sew the starting and ending edges of the headband.
- Switch to white yarn for the white portion, pink for the pink row, and so on. Use a darning needle to sew the edges of each color section together for a seamless finish.
- Once finished, weave in all remaining tails into their respective color sections and trim the excess yarn.
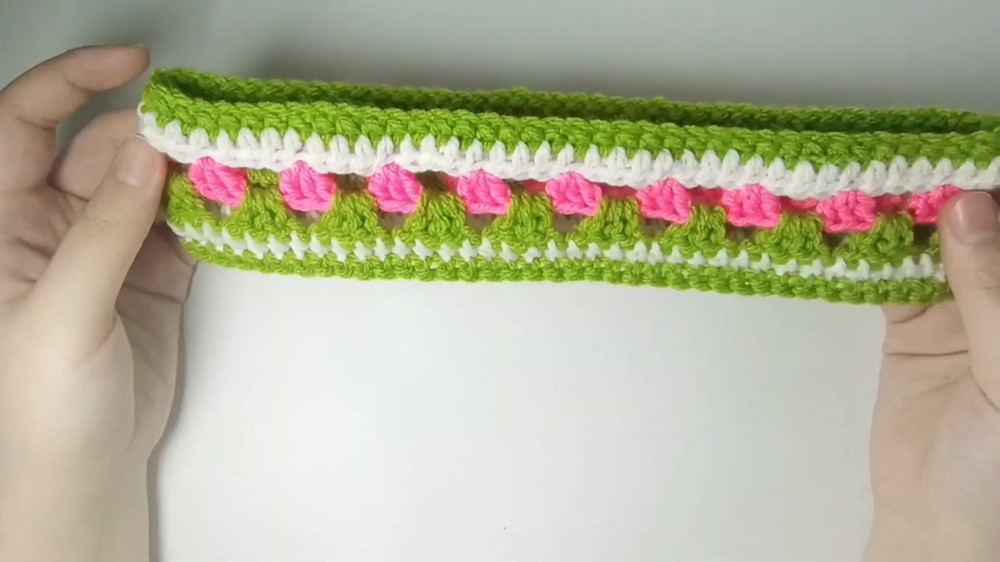
Special Features
- Vibrant multi-color design: The headband alternates between green, white, and pink, creating a unique and spring-inspired appearance.
- Decorative double crochet clusters: The third and fourth rows add texture and visual flair to the pattern.
- Beginner-friendly techniques: The project primarily uses single crochet, half double crochet, and double crochet stitches, making it approachable for new crocheters.
- Versatility: The tutorial allows viewers to adjust the size by adding more chains to fit various head sizes.
Level of Difficulty
The level of difficulty is beginner-friendly. While changing colors and making double crochet clusters may require attention, the tutorial breaks down each technique in detail. The foundational stitches—single crochet and half double crochet—are simple to learn and execute, making this project accessible even for those new to crochet.
Tutor's Suggestions
- Customizable size: To create a larger or smaller headband, adjust the initial chain count based on your head's circumference.
- Consistent tension: Maintain steady tension throughout to avoid uneven stitches or loopy rows.
- Color-changing tip: The tutor demonstrates an effortless way to switch yarn colors during crochet without leaving bumps or knots.
- Efficient finishing: Use tails from each row to sew sections together, ensuring smooth edges with no need for additional yarn.
Uses:
-
- Stylish accessory for spring outfits.
- Great as a handmade gift.
- Functional headpiece for practical use (keeping hair in place).
Conclusion
This pattern teaches viewers how to create a beautiful crochet spring headband with easy-to-follow steps, basic techniques, and vibrant yarn colors. Perfect for beginners, it allows crocheters to hone their skills and produce a stylish handmade accessory that is both decorative and practical. By following this guide, you’ll master color changes, foundational stitches, and sewing techniques—all in one project.
Tip
To neatly change yarn colors, always switch during the final step of the last stitch in the row. Pull through with the new yarn before completing the stitch to create a seamless transition.


