
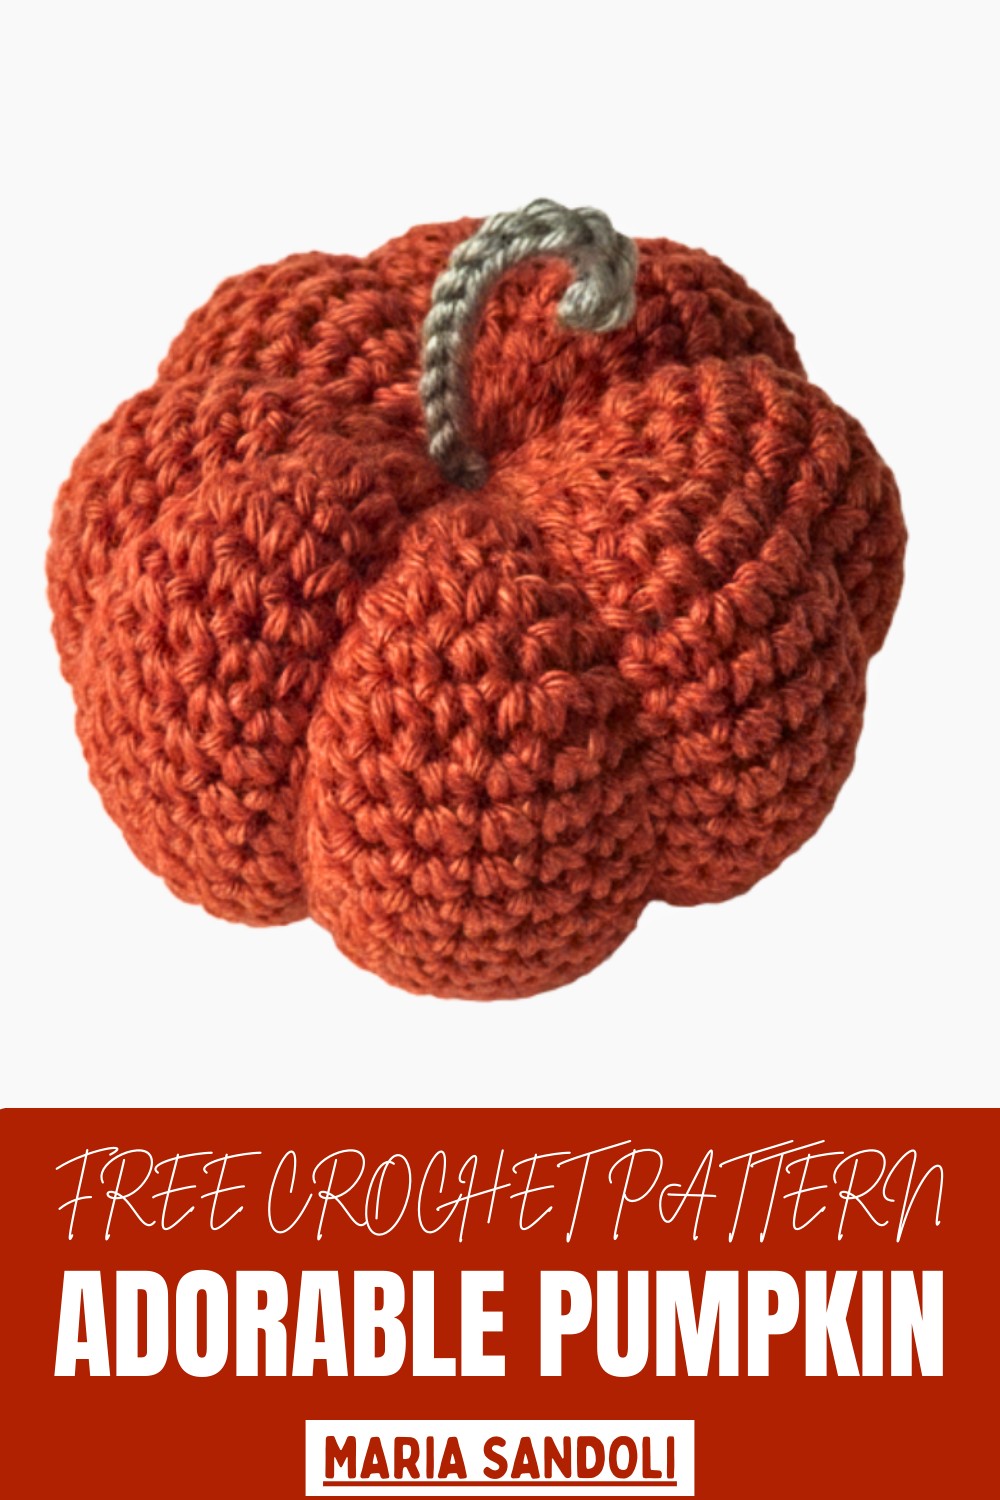
Bring festive charm with this free crochet pumpkin pattern that's perfect for creating cute, easy, and seasonal decorations for any space.
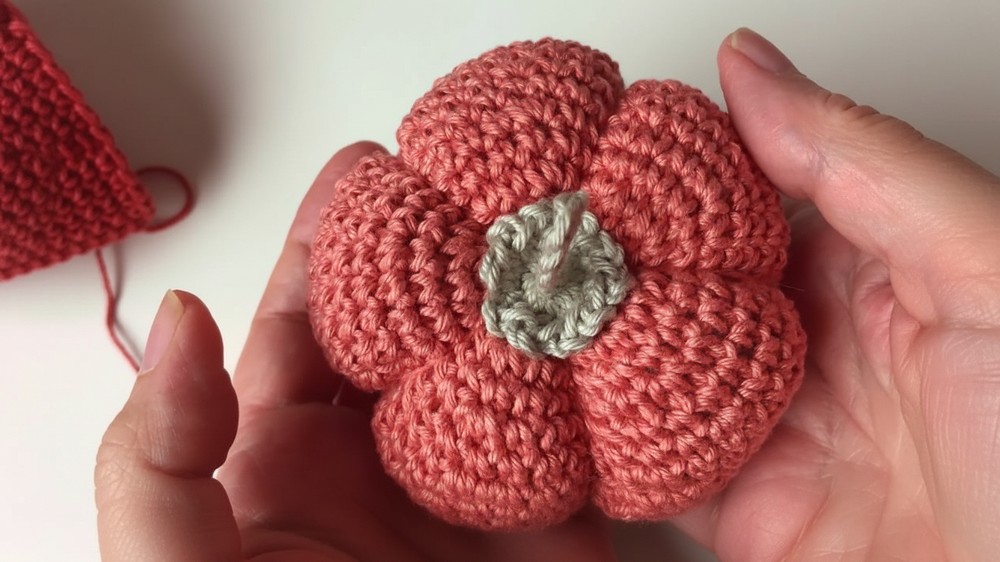
Celebrate the essence of autumn with a charming handmade creation that brings warmth and whimsy to any space. This Crochet Pumpkin Pattern transforms soft yarn into a plump, textured pumpkin, perfect as a seasonal centerpiece, mantel décor, or a heartfelt handmade gift. Its natural curves and vibrant autumnal hues capture the spirit of fall, making it a delightful addition to cozy home displays or festive arrangements.
Special Features, Uses, and Materials
-
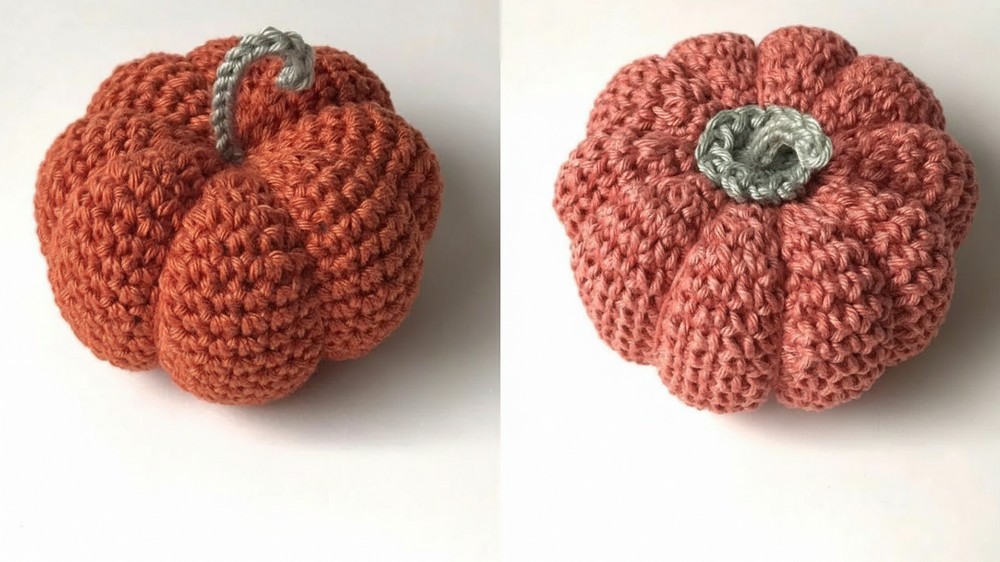
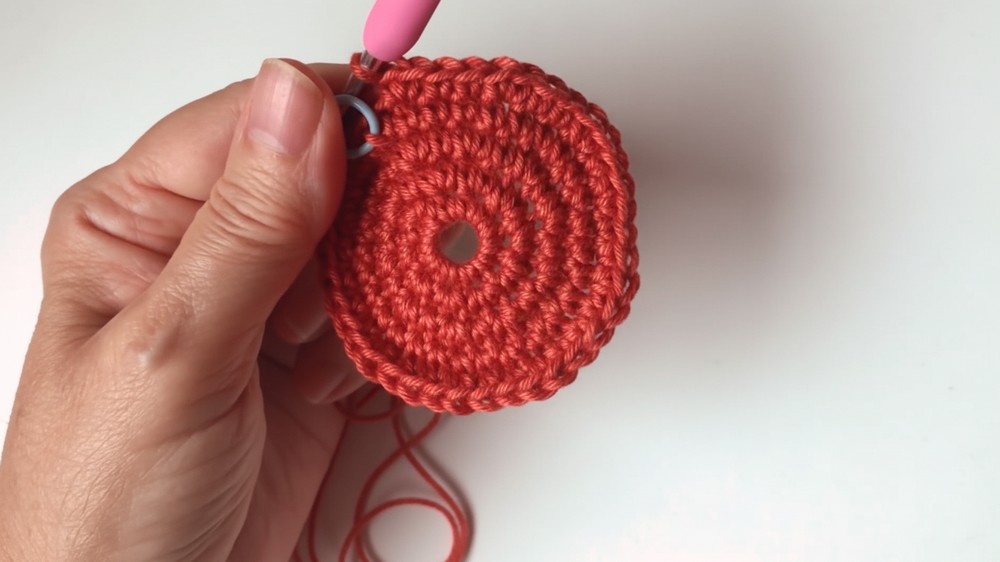
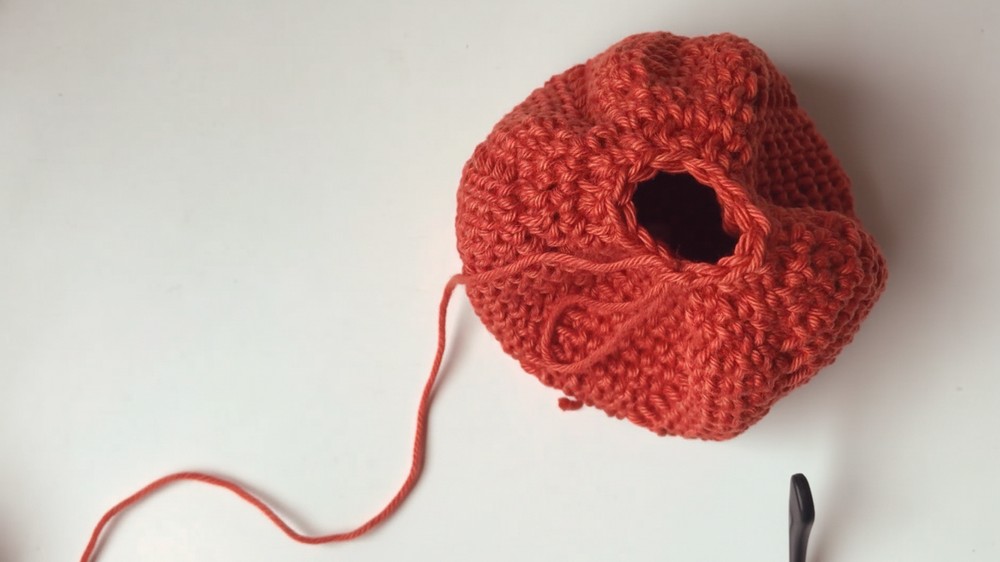
Special Features: The pattern utilizes the Back Loop Only (BLO) technique on a specific round to create visible marks on the exterior, which act as guidelines for inserting the sculpting yarn later. The defining feature is the post-crochet sculpting, where you use a large needle to pull the top and bottom of the pumpkin together, forming the classic vertical grooves.
-
Uses: This project serves as a festive Halloween decoration (Abóbora de Halloween) or a general decorative squash item.
-
Materials:
-
Yarn: Amigurumi yarn (Color 4095 - Orange) for the pumpkin body, and Amigurumi yarn (Color 5745 - Green) for the stem.
-
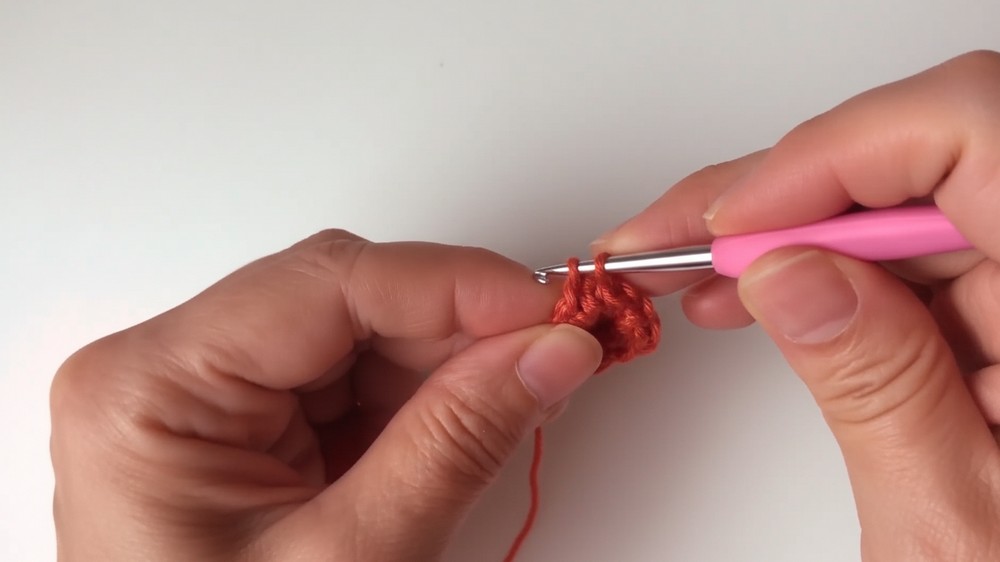
Hook: 3 mm crochet hook.
-
Notions: Scissors, tapestry needle (size 16) for sewing, stuffing material (poly-fill), a large doll needle (long needle for sculpting), and fabric glue.
-
-
Difficulty Level: Intermediate. You must manage increasing and decreasing rounds precisely and execute the specialized technique of sculpting the shape with a large needle.
Fun Crochet Pumpkin Pattern for Festive Corners
Beyond its visual charm, this project offers creative satisfaction and practical benefits. It hones fine motor skills, sparks imaginative color combinations, and provides a relaxing, mindful crafting experience. The completed pumpkin radiates seasonal cheer while showcasing the joy of handmade artistry. From the first stitch to the final accent, this Crochet Pumpkin Pattern brings warmth, elegance, and a touch of festive magic into your home.
Tutor's Suggestions
-
Mark Your Segments: On Round 8 and subsequent body rounds, consciously work a stitch into the Back Loop Only (BLO) every five stitches. This BLO technique creates a visible horizontal bar, which makes finding the insertion points for the sculpting needle much easier.
-
Do Not Overstuff: Fill the pumpkin with stuffing, but avoid overstuffing. The pumpkin must remain slightly soft and pliable to allow the sculpting yarn to compress the fiber and create deep, well-defined grooves.
-
Secure the Stem: Use a strong fabric glue to firmly secure the stem piece and the stem tendril into the top center of the pumpkin.
Conclusion
You successfully completed the Amigurumi Halloween Pumpkin, featuring sharp segments created by the innovative use of the back loop only technique and post-crochet sculpting.
Final Tip
When you insert the sculpting needle to form the grooves, always pull the yarn firmly after exiting the top. This force compresses the stuffing and yarn, ensuring the segments are clearly defined and hold their shape.


