
Haunt your space with the Free crochet Mini Ghost Amigurumi Pattern, creating a cute and spooky little ghost perfect for Halloween decor or fun gifts.
With its soft, rounded body, gentle folds, and sweet, tiny face, it looks more playful than scary, bringing a touch of whimsy wherever it appears. Small and lightweight, it can float on a shelf, sit on a desk, or become part of a festive Halloween display. Crocheting it is as fun as displaying it—stitching each curve and detail helps improve focus, hand coordination, and patience, while producing a neat, polished result.
Cute Crochet Mini Ghost Amigurumi Pattern Which Inspires Fun
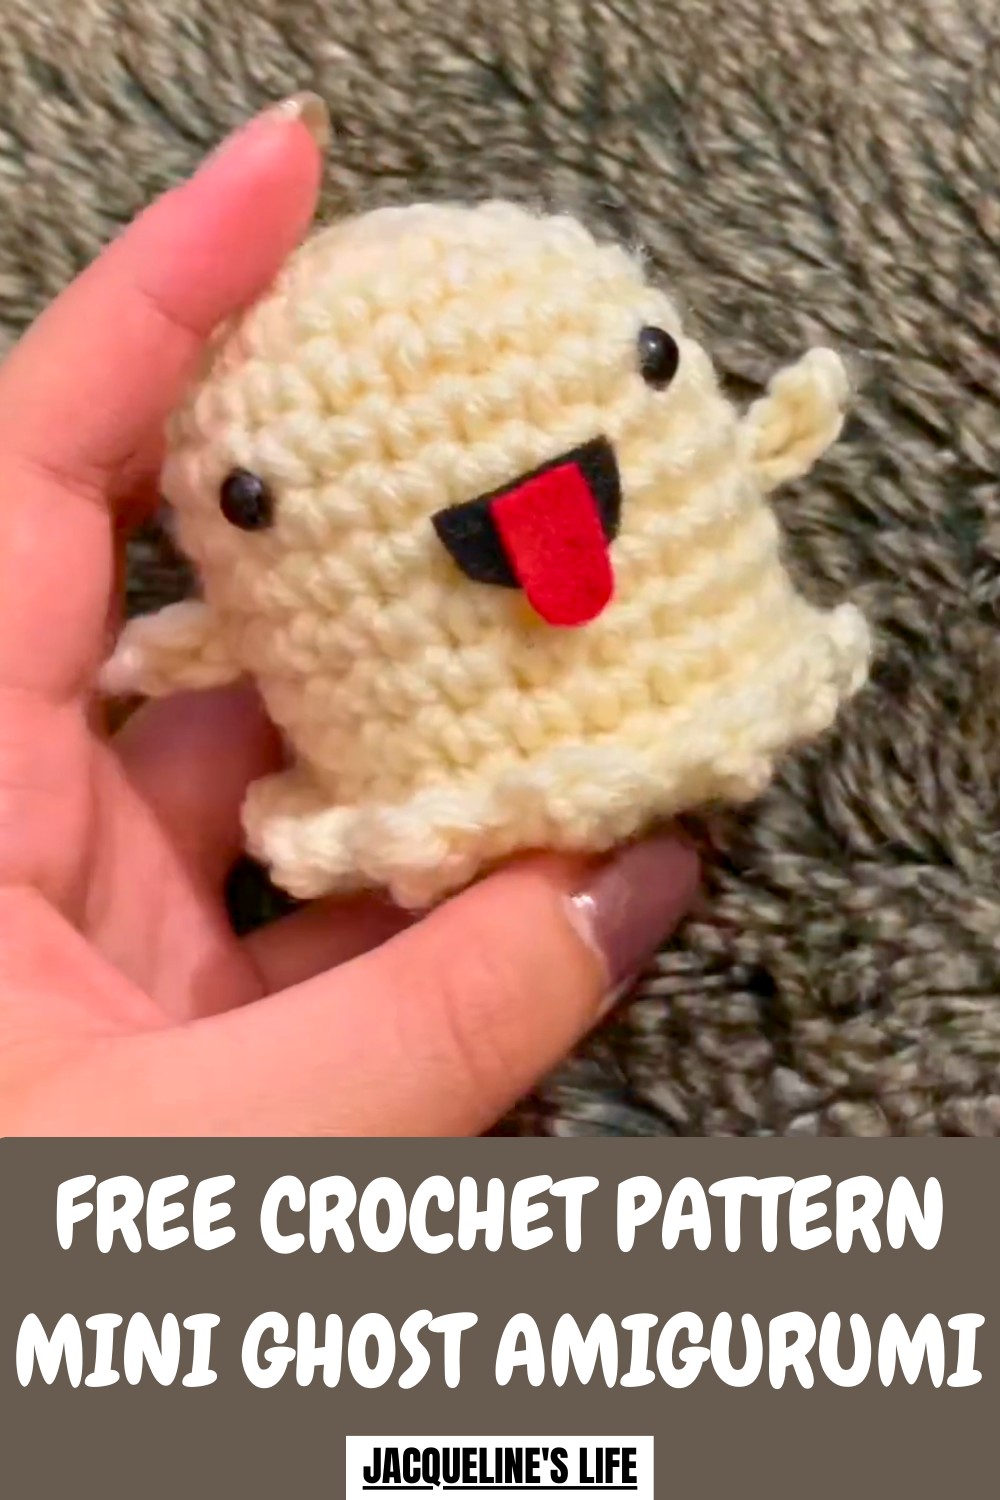
The soft yarn and careful finishing keep it huggable and durable, and subtle touches like its expression or flowing “body” give it personality. This mini ghost isn’t just decoration; it can become a keychain, bag charm, or special handmade gift. Its charm, versatility, and playful look make it a tiny companion that brightens any space.
How to Crochet Mini Ghosts: Step-by-Step Guide
Materials Needed
To create your mini ghosts, you will need the following materials:
- Yarn: A weight-4 yarn is recommended. The tutor experimented with Red Heart Super Saver, Big Twist yarn, and Caron’s One Pound yarn, preferring the latter for its quality and softness.
- Crochet Hook: Use a 5mm crochet hook.
- Fiberfill or Stuffing: For filling the ghost.
- 7-8mm Safety Eyes: For the face.
- Felt (Black and Red): For the mouth and tongue details.
- Hot Glue Gun: To attach felt pieces securely.
- Scissors: For cutting yarn and felt.
- Yarn Needle: For sewing pieces together.
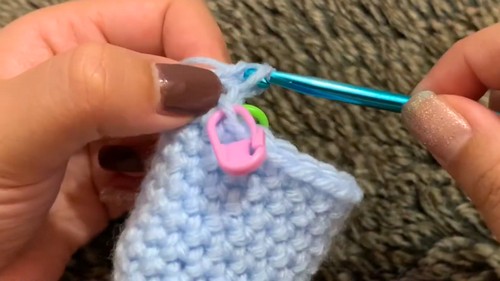
- Two Stitch Markers: To track the rounds in your crochet work.
Uses
The mini ghosts are versatile and can be used in many creative ways:
- Halloween Décor: Hang or place the ghosts around your home to add a spooky yet cute touch.
- Gifts: Perfect as handmade keychain accessories or themed toys.
- Personal Collectibles: Create an “army” of different colored ghosts, as demonstrated by the tutor.
- Stress Relief: They can act as squishy decorative stress-relief toys.
Special Features
- Customizability: The ghosts can be made in various colors using different yarns. They can also have simple or detailed features like arms or faces.
- Beginner-Friendly: The techniques, like single crochet and increases, are easy to learn.
- Two Base Options: The tutor shows how to start with either a magic circle or a chain-2 method for flexibility.
- Felt Details: Add personality by gluing on felt pieces, such as a tongue or a unique mouth shape.
- Compact Size: The mini ghosts are small, making them quick to make and easy to use for decoration.
Level of Difficulty
Beginner-Friendly
The project is accessible to beginners, involving simple stitches such as single crochet, increases, and decreases. The steps are repetitive, but attention to detail is necessary, especially when sewing the pieces together or adding decorative features.
Tutor’s Suggestions
Here are some key suggestions shared by the tutor:
- Yarn Recommendations: The tutor prefers Caron’s One Pound yarn for its smooth texture and ease of use while warning that Red Heart yarn often sheds particles and is harder to work with.
- Different Color Options: Stick to white or pastel yarns, as brighter or darker colors may alter the ghost’s appearance and look less appealing.
- Choose Your Starting Method: If a magic circle feels too advanced, the chain-2 method offers a simpler alternative with slightly different results.
- Face Placement: Pay attention to the flat sides of the ghost when attaching safety eyes to ensure a symmetric and balanced look.
- Size Variations: Add extra rows if you want taller ghosts, but be cautious about stuffing – overfilling can distort the shape.
Step-by-Step Instructions
1. Create the Base of the Ghost
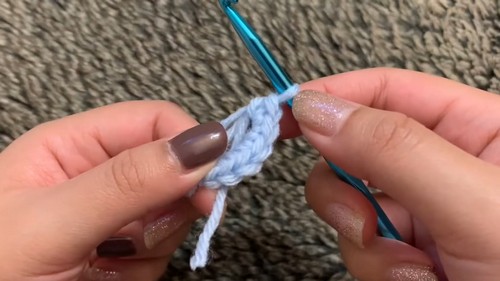
Option 1: Magic Circle Method
- Wrap the yarn around your fingers to form an "X."
- Insert your hook under the first loop of the circle and pull the working yarn through.
- Tighten the loop with a yarn over and pull through.
- Work 6 single crochets into the circle, then pull the tail to close the loop.
Option 2: Chain-2 Method
- Start with a slip knot and chain 2.
- Work 6 single crochets into the first chain and count your stitches to ensure accuracy.
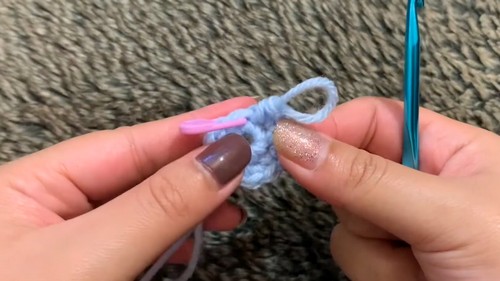
2. Build the Body
- For Round 2, single crochet twice into each stitch (12 stitches total).
- For Round 3, alternate 1 single crochet and 1 increase (18 stitches total).
- Continue increasing as instructed until you achieve the desired width (up to 22 stitches in later rounds).
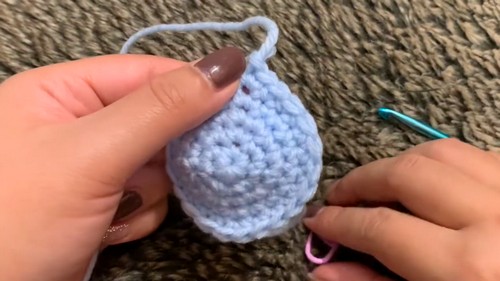
- Crochet evenly (no increases) for Rounds 6-12 to build the body. Add more rows if you want a taller ghost.
3. Create the Scalloped Bottom
- Work with front-loop-only stitches to crochet scalloped edges:
- Chain 1.
- Double crochet into the front loop of the first stitch.
- Slip stitch into the same stitch.
- Slip stitch into the next front loop, and repeat the scalloped pattern.
- Work with the back-loop-only stitches for the decreases to shape the ghost's bottom as you close it.

4. Add the Safety Eyes
- Select a smooth side of the ghost as the front.
- Insert 7-8mm safety eyes, spacing them equally before securing the backs.
- Adjust placement carefully if needed.

5. Close the Ghost
- Begin decreasing in stitches until the open section narrows.
- Stuff the ghost with fiberfill or leftover yarn.
- Once you're down to 12 stitches, finish decreasing and leave a tail of yarn to sew the final stitches closed.
- Use your hook to weave the tail in and secure it tightly.
6. Make and Attach the Arms
- Create a slip knot with your yarn and chain 3.
- Slip stitch into the second chain and single crochet into the first (forming a tiny arm).
- Make two arms, then sew or knot them onto the sides of the ghost using a yarn needle.
7. Add the Mouth
- Cut the black felt into a long, wide "U" shape for the ghost's mouth.
- Cut the red felt into a smaller "U" for the tongue.
- Attach the tongue to the mouth with hot glue, then glue the entire piece onto the ghost.

Conclusion
This mini crochet ghost project is a simple, fun, and creative way to decorate for Halloween or make unique gifts. The tutorial guides you through every step, with options for personalizing the ghost to fit your taste. Whether you opt for the magic circle or the chain-2 method, you're sure to create a cute, spooky little addition to your home!
Pro Tip
When working with colored yarns, avoid using overly textured or fuzzy yarns. Smooth yarns like Caron’s One Pound create an even and polished look, making the details of your crochet ghost stand out!


