
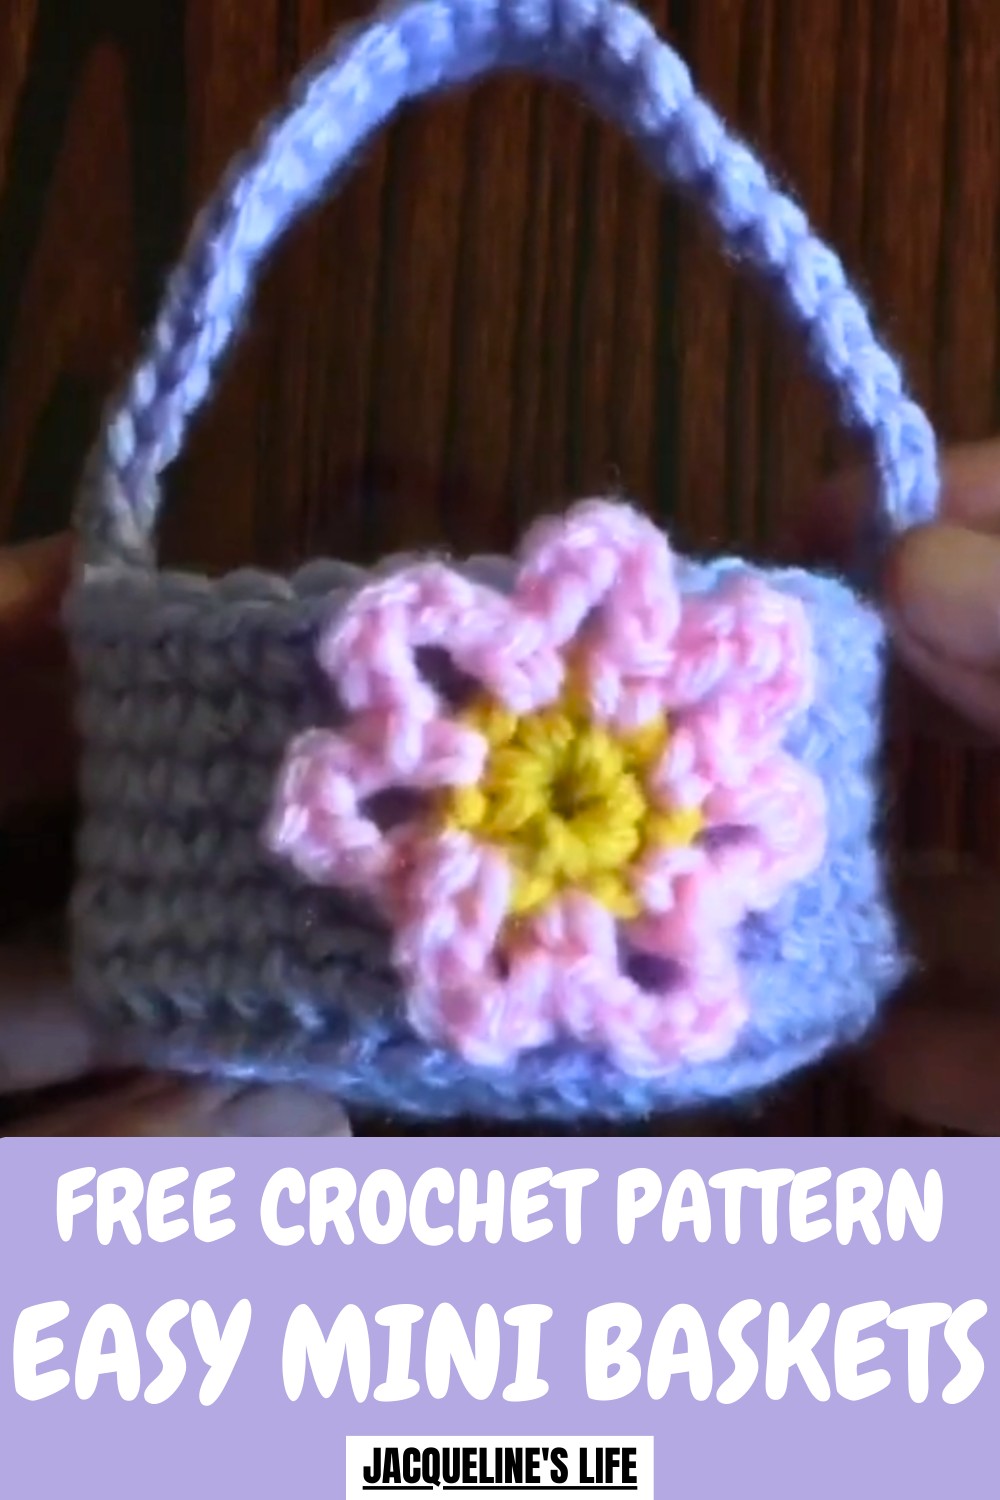
Tote tiny treasures with this Free Crochet Mini Basket Pattern, perfect for organizing small items or adding charm to your shelves and décor.
Organizing small items becomes both practical and stylish with a personalized touch. The Crochet Mini Basket Pattern allows you to create a compact basket that can hold keys, jewelry, office supplies, or tiny keepsakes. This project gives full control over size, color, and texture, making each basket unique and perfectly suited to your needs.
Cute Crochet Mini Basket Pattern to Hold All Your Little Finds
Working on it promotes focus, creativity, and a satisfying sense of accomplishment while producing a sturdy, reusable item that store-bought alternatives rarely match. A mini basket can be a functional addition to your home, a charming gift, or a decorative accent for shelves and desks.
Following this pattern combines utility with artistic expression, transforming simple yarn into a practical, beautiful item. Every stitch adds structure and personality, resulting in a versatile creation that brightens spaces, keeps things organized, and brings both enjoyment and pride to the maker.
How to Crochet a Mini Basket – Step-by-Step Guide
Materials Needed
- Yarn:
- The tutorial uses one-pound yarn (medium-weight yarn) for durability and structure.
- Crochet Hook:
- 5.5 mm crochet hook for easier handling and tight stitches.
- Additional Tools:
- Stitch marker (to track rounds).
- Scissors (for cutting yarn).
Uses of the Mini Basket
- Storage: Perfect for keeping small items like jewelry, knick-knacks, or crochet miniatures (like the octopus shown in the video).
- Decor: Great as a handmade piece to display on shelves, desks, or tables.
- Gifts: Make the basket as thoughtful presents for friends and family.
- Practice Project: Excellent for honing basic crochet skills, like single crochet, increases, and invisible decreases.
Special Features
- Beginner-Friendly Design: The basket uses only basic techniques: magic circle, single crochet, increases, and decreases.
- Customizable: The height and handle size can easily be modified to suit your needs or preferences.
- Back Loop Technique: The design creates texture and structure by crocheting into back loops only for specific rows.
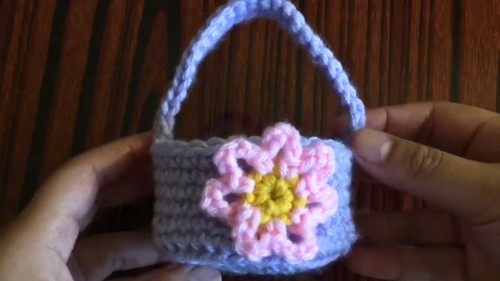
- Optional Decor: Add embellishments like flowers to further personalize and beautify the basket.
Level of Difficulty
Beginner-Friendly
- The project is easy to follow if you already know the magic circle and single crochet stitches.
- It introduces invisible decreases and working in the back loops only, which may require explanation for those unfamiliar with these techniques.
Tutor’s Suggestions
- Learn the Magic Circle First: If you don’t know how to create a magic circle, check out the separate tutorial mentioned at the beginning of the video to master the technique beforehand.
- Use a Stitch Marker: Insert the stitch marker into the slip stitch of every round to avoid confusion and mistakes while counting stitches.
- Count Stitches Carefully: Pay attention to stitch counts during rounds, especially for increases and decreases, to maintain the basket’s shape.
- Customize Height and Handle: You can adjust the number of single crochet rounds for the basket’s body or the number of chains for the handle based on your needs.
- Securely Attach the Handle: Align and attach the handle evenly on both sides for a balanced design. Use thicker single crochet stitches to reinforce the handle for added durability.
Step-by-Step Instructions
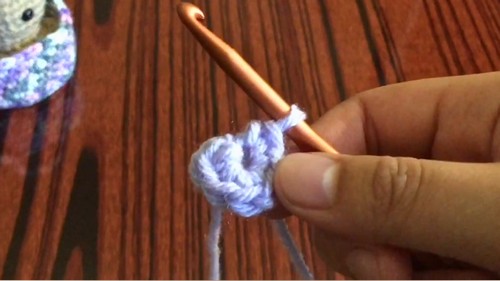
Step 1: Create the Base
- Make a Magic Circle:
- Create a magic circle with your yarn (refer to the separate tutorial if needed).
- Work 8 single crochets (SC) into the circle.
- Close the circle with a slip stitch into the first SC.
- Begin Round 2 (Increase):
- Work 2 single crochets into each stitch, doubling the stitch count to 16 stitches.
- Place your stitch marker in the last stitch of the round for accurate tracking.
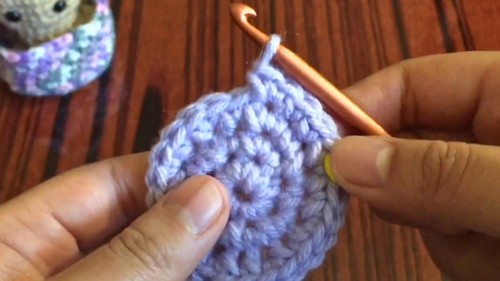
- Round 3:
- Crochet 1 single crochet in the first stitch and 2 single crochets in the next stitch (increase).
- Repeat the sequence (SC, increase) until you have 24 stitches.
- Round 4:
- Crochet 1 single crochet into the first two stitches and increase in the third stitch.
- Repeat (SC, SC, increase) until you have 32 stitches.
- Crochet 1 single crochet into the first two stitches and increase in the third stitch.
- Round 5:
- Crochet 1 single crochet into the first three stitches and increase in the fourth stitch throughout the round.
- End with 40 stitches.
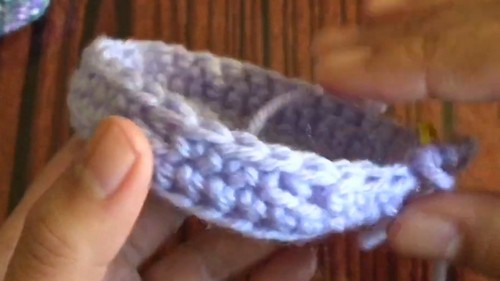
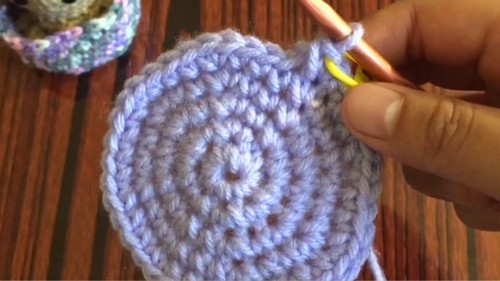
Step 2: Form the Basket Walls
- Round 6 (Back Loop Single Crochets):
- Work 1 single crochet into every stitch, but only insert your hook into the back loops only of each stitch.
- This technique gives the bottom edge of the basket a defined texture.
- Round 7 (Decreases):
- Start by crocheting single crochets into the first three stitches.
- Perform an invisible decrease into the front loops only of the next two stitches.
- Repeat the sequence (SC, SC, SC, decrease) to reduce the stitch count to 32 stitches.
- Round 8–11 (Basket Height):
- Crochet 1 single crochet into every stitch without any increases or decreases.
- These rounds allow the basket to take a cylindrical shape. You can add more rounds if you want a taller basket.
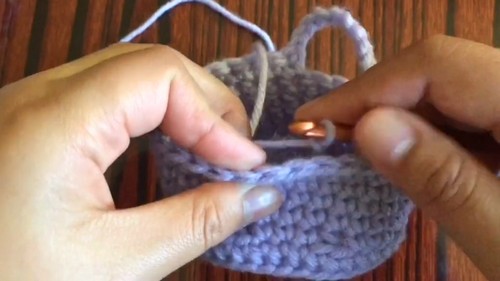
Step 3: Add the Handle
- Chain the Handle:
- Create a chain of 27 stitches, or adjust this count based on your desired handle length.
- Attach the Chain:
- Align the chain to the opposite side of the basket’s top edge.
- Single crochet into the chosen stitch to attach the chain securely.
- Thicken the Handle:
- Single crochet into each chain stitch across the handle to give it more structure and durability.
- Once you reach the starting point, single crochet again into the stitch on the basket and secure the yarn by pulling it through the loop.
- Single crochet into each chain stitch across the handle to give it more structure and durability.
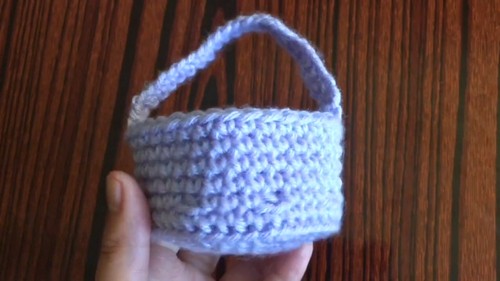
Step 4: Finish the Basket
- Cut & Secure the Yarn:
- Cut the yarn, pull it through the final loop, and tighten it securely. You can make extra knots for reinforcement.
- Trim Excess Yarn:
- Cut off any remaining loose ends.
- Cut off any remaining loose ends.
Conclusion
Congratulations! You’ve completed your mini crochet basket. This functional and charming creation showcases your crochet skills while offering practical use as a storage or decorative item. You can even further personalize your basket by adding flowers, bows, or other embellishments. Whether given as a gift or kept for personal use, this project is an excellent way to showcase handmade creativity.
Pro Tip
When crocheting the base, keep your stitches tight but consistent to ensure the basket has a sturdy, flat foundation. Loose stitches may cause sagging, so adjust your tension if necessary!


