
Add charm to your decor with a Free Crochet Mini Hanging Plant Pattern, perfect for gifting or crocheting stylish accents effortlessly.
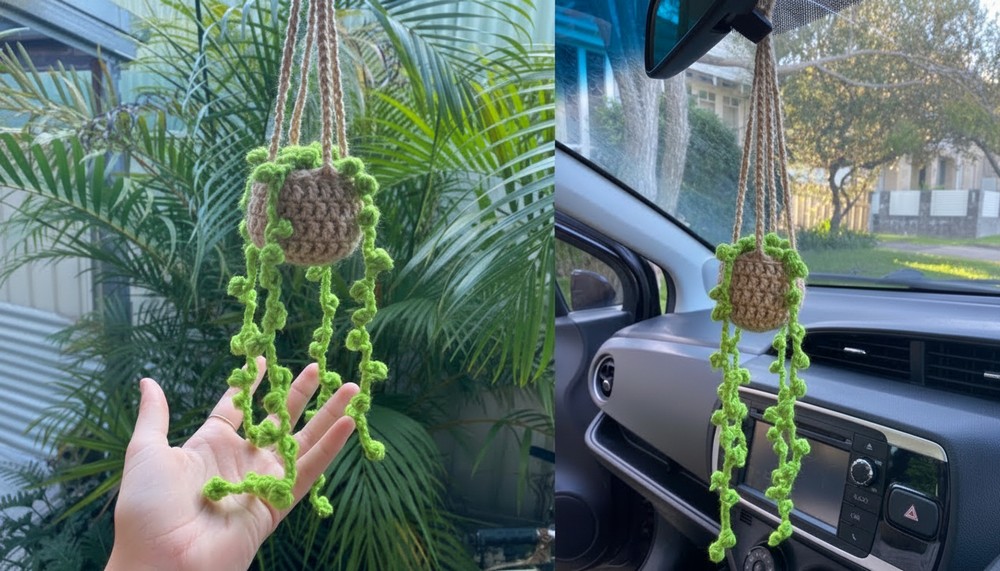
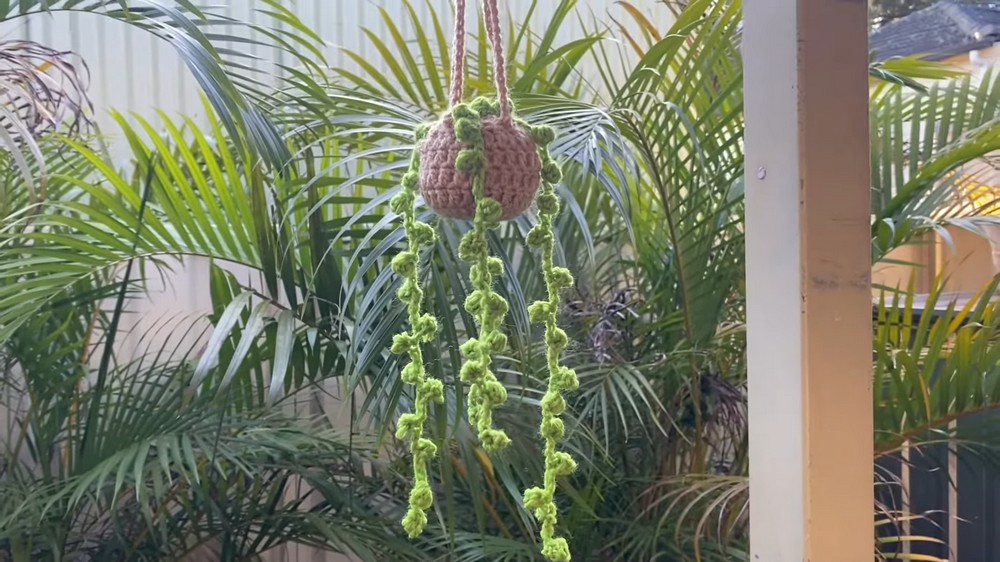
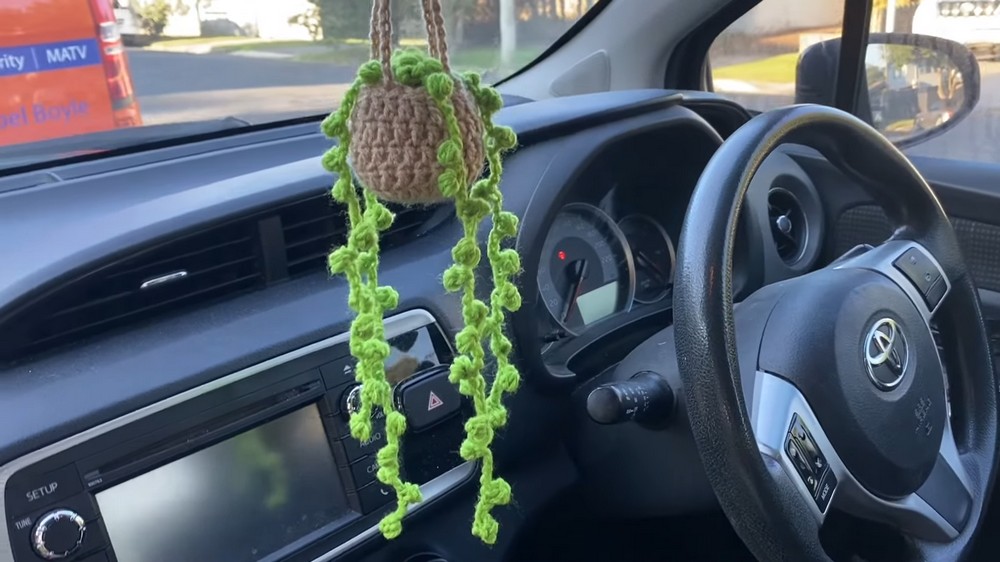
A tiny crochet project brings a unique charm to your space, and a mini hanging plant pattern is ideal for adding modern decoration. This simple creation offers style and functionality, bringing a touch of nature-inspired detail without the fuss of caring for live plants. Whether displayed as cute home decor, attached to a car mirror, or given as a handmade gift, it creates an effortless way to brighten up any corner.
Crochet Mini Hanging Plant Pattern to Enhance Indoor Aesthetics

This pattern uses minimal materials and basic techniques, allowing beginners and seasoned crocheters to enjoy the process. Puff stitches and magic circles provide the foundation, letting you experiment with shades and textures to personalize your project. The small size ensures portability, making it easy to work on during quiet moments or while traveling.
A single mini plant hanger offers quiet creativity and meaningful accomplishment, while the finished creation adds a playful vibe to your space. Beyond its practical benefits, crocheting such a pattern is a relaxing activity, sparking joy through artistry and mindfulness. Lightweight and customizable, it serves as ready decor or a thoughtful handmade gift with a personal touch.
Materials Used
The materials needed for this mini crochet plant hanger are:
- Acrylic Yarn: Two colors – one for the pot and one for the vines.
- Crochet Hook: 4 mm hook (used for both yarn colors).
- Yarn Needles: For weaving in ends and assembling components.
- Scissors: To cut yarn as needed.
- Stuffing Material: A small amount to fill the pot.
Crocheting Process
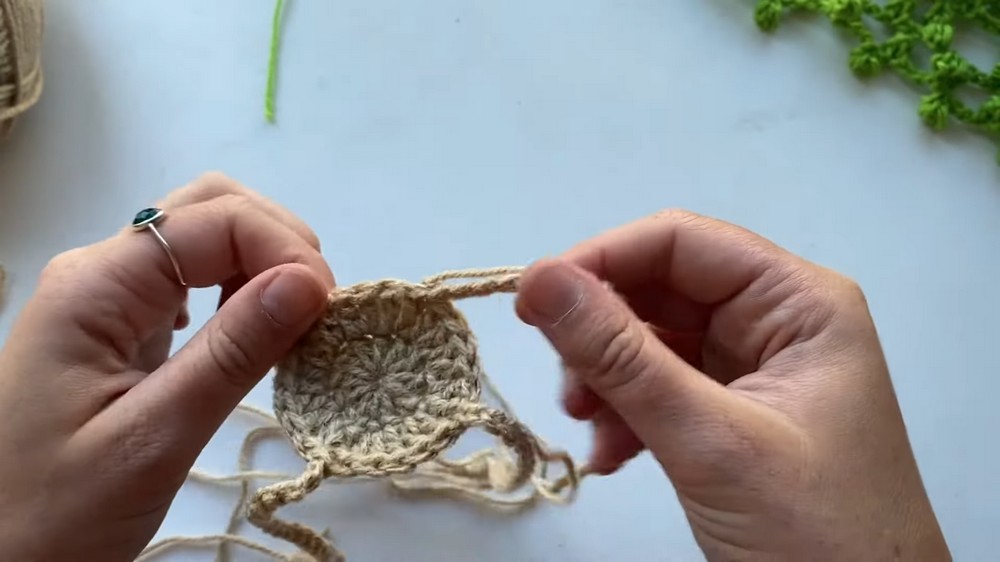
1. Making the Pot Base
- Start with a magic circle for the pot base:
- Wrap the yarn over three fingers, secure with a chain loop, and begin crocheting.
- First Round: Chain 2 (counts as 1 double crochet) and make 11 double crochets into the circle (12 stitches total). Tighten the circle and finish with a slip stitch.
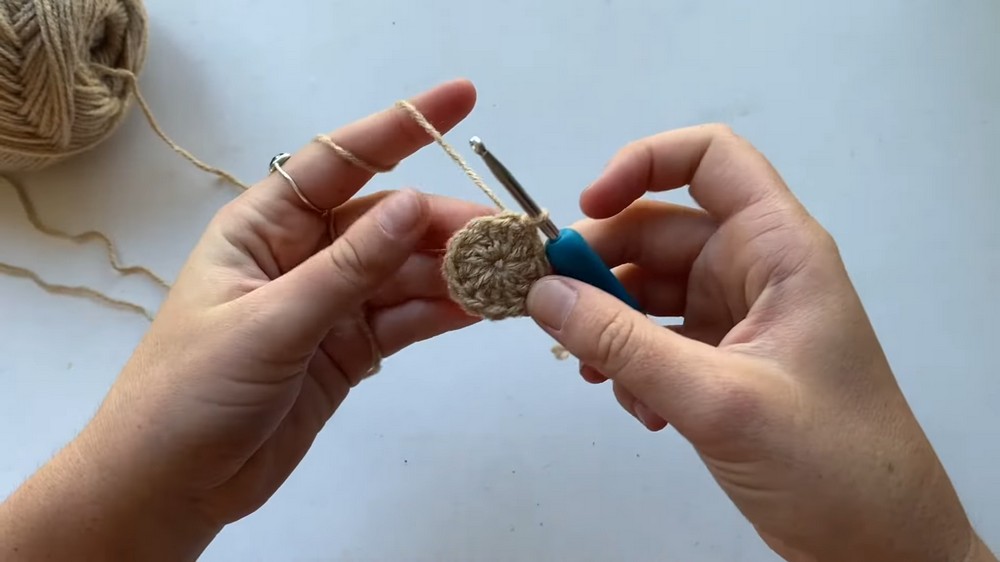
- Second Round: Chain 3, double crochet twice into each stitch (24 stitches in total). Slip stitch to end.
- Body of the Pot: Chain 3, double crochet once into each stitch in four rounds. This forms the curved body. After the final round, turn the pot inside out so the good sides face out.
2. Creating the Vines
- Start with a slip knot and create puff stitches for the vines.
- Puff Stitch Process:
- Chain 3, yarn over, and insert the hook into the second chain. Pull through loops until you have five loops on your hook, then pull through all loops and slip stitch to secure.
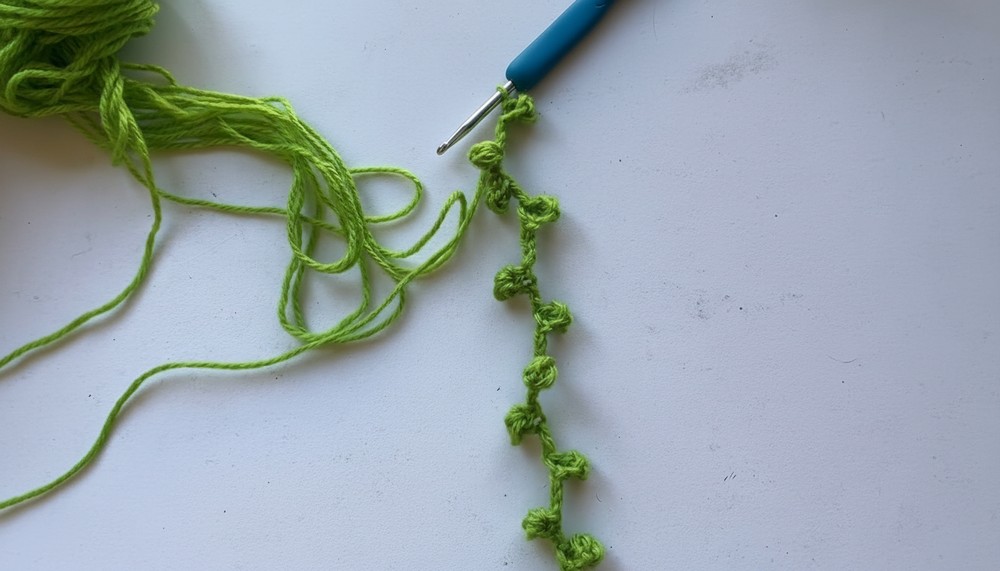
- Chain 3, yarn over, and insert the hook into the second chain. Pull through loops until you have five loops on your hook, then pull through all loops and slip stitch to secure.
- Chain random lengths (4–7 chains) to give the vines a natural look before starting the next puff stitch. Repeat this for each vine.
- Make four vines in total: two measuring 8 inches, and two measuring 10 inches.
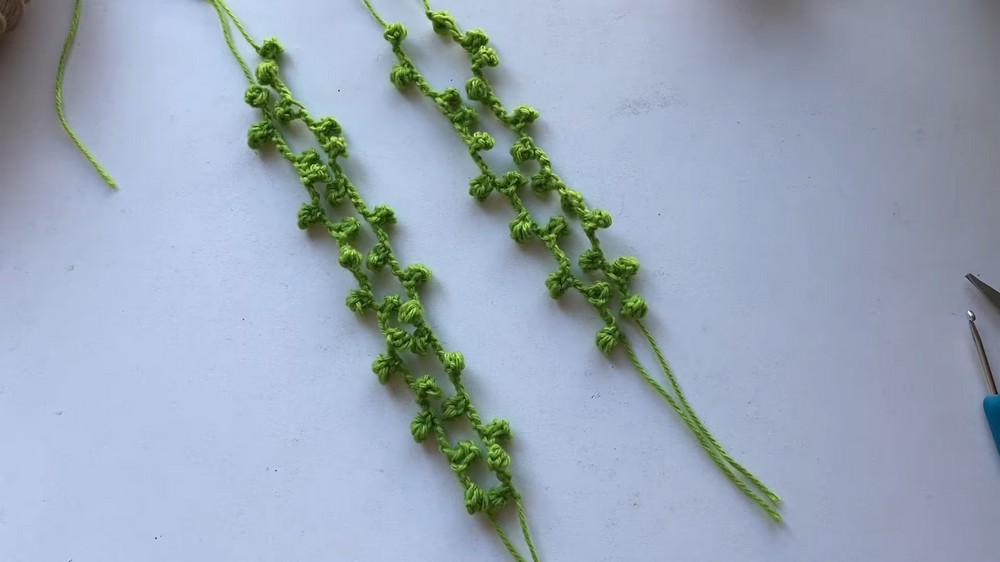
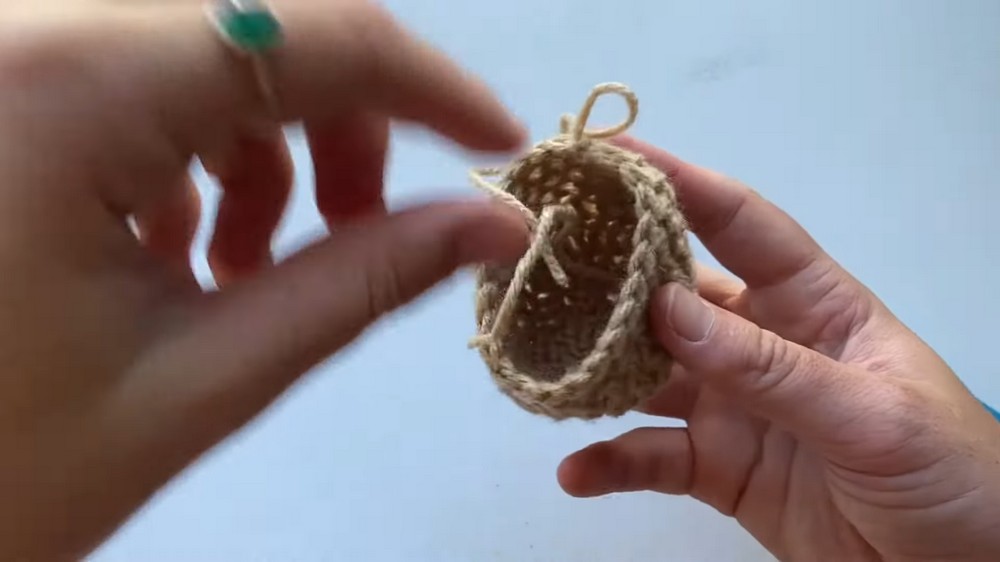
3. Assembling the Vines into the Pot
- Gather all vine ends and ensure the lengths are even.
- Insert your crochet hook into the pot's bottom (center of the magic circle) and pull the vine ends through.
- Secure the ends with two tight knots and trim off excess yarn, leaving a small tail inside the pot.
4. Adding the Hanging Straps
- Create straps for hanging using the same yarn used for the pot:
- Chain 30 for each strap and make four straps evenly spaced around the pot, attaching them at six-stitch intervals.
- Chain 30 for each strap and make four straps evenly spaced around the pot, attaching them at six-stitch intervals.
- Once complete, knot all strap ends together neatly to form a hanging loop.
5. Final Pot Assembly
- Stuff the pot with filling material, ensuring it's fully packed but not overflowing.
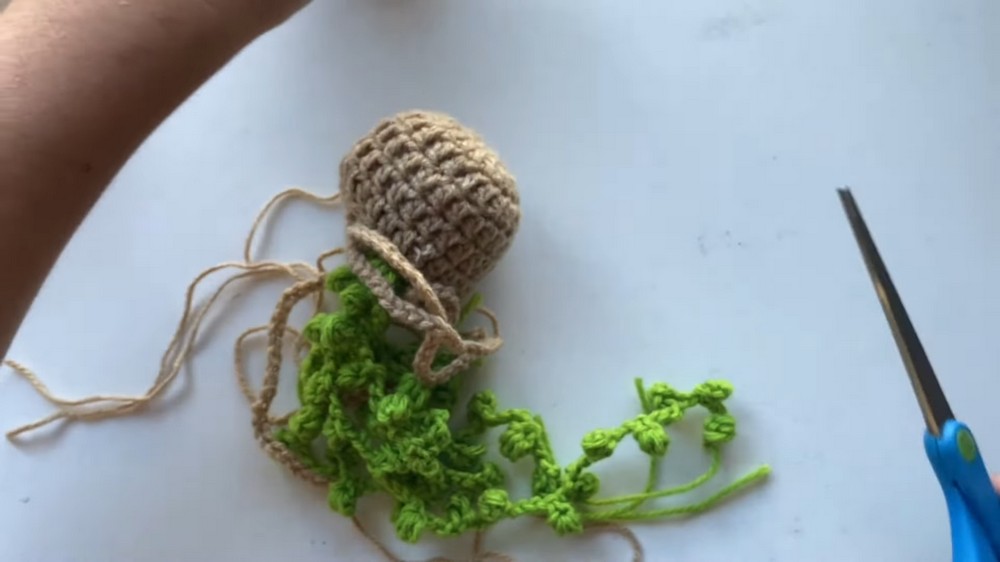
- Use a 15-inch piece of yarn to secure the pot's top to its base via inner stitches. Sew around completely using a yarn needle.
Special Features
- Realistic Look: The combination of puff stitch vines and a well-shaped pot gives the project an authentic, decorative feel.
- Customizable Design: You can create vines of irregular lengths to mimic nature or experiment with colorful yarns.
- Uses and Versatility: It's perfect for decorative home accents, car mirror pendants, or quirky gift ideas.
Difficulty Level and Tutor Suggestions
This project requires beginner to intermediate crochet skills. While it involves simple stitches, techniques like the magic circle, double crochets, and puff stitches may take some practice. The tutor suggests:
- Experimenting with vine lengths to make them look more natural.
- Reusing simple steps like the magic circle and puff stitch for endless customization options.
Tip for Success
To achieve a polished look, take your time with the slip stitches and knots, ensuring everything is tightly secured to avoid unraveling. Also, play around with vine chain patterns (alternating lengths like 5, 6, 4, etc.) to give your creation an organic appeal.
Conclusion
The mini crochet plant hanger is a fun and rewarding project that blends creativity with functionality. Whether hung on a hook or used as a cute accessory, it’s sure to delight and add charm wherever it’s placed. With just a few materials and a little charm, you can crochet this handmade decor, a part of your space.


