
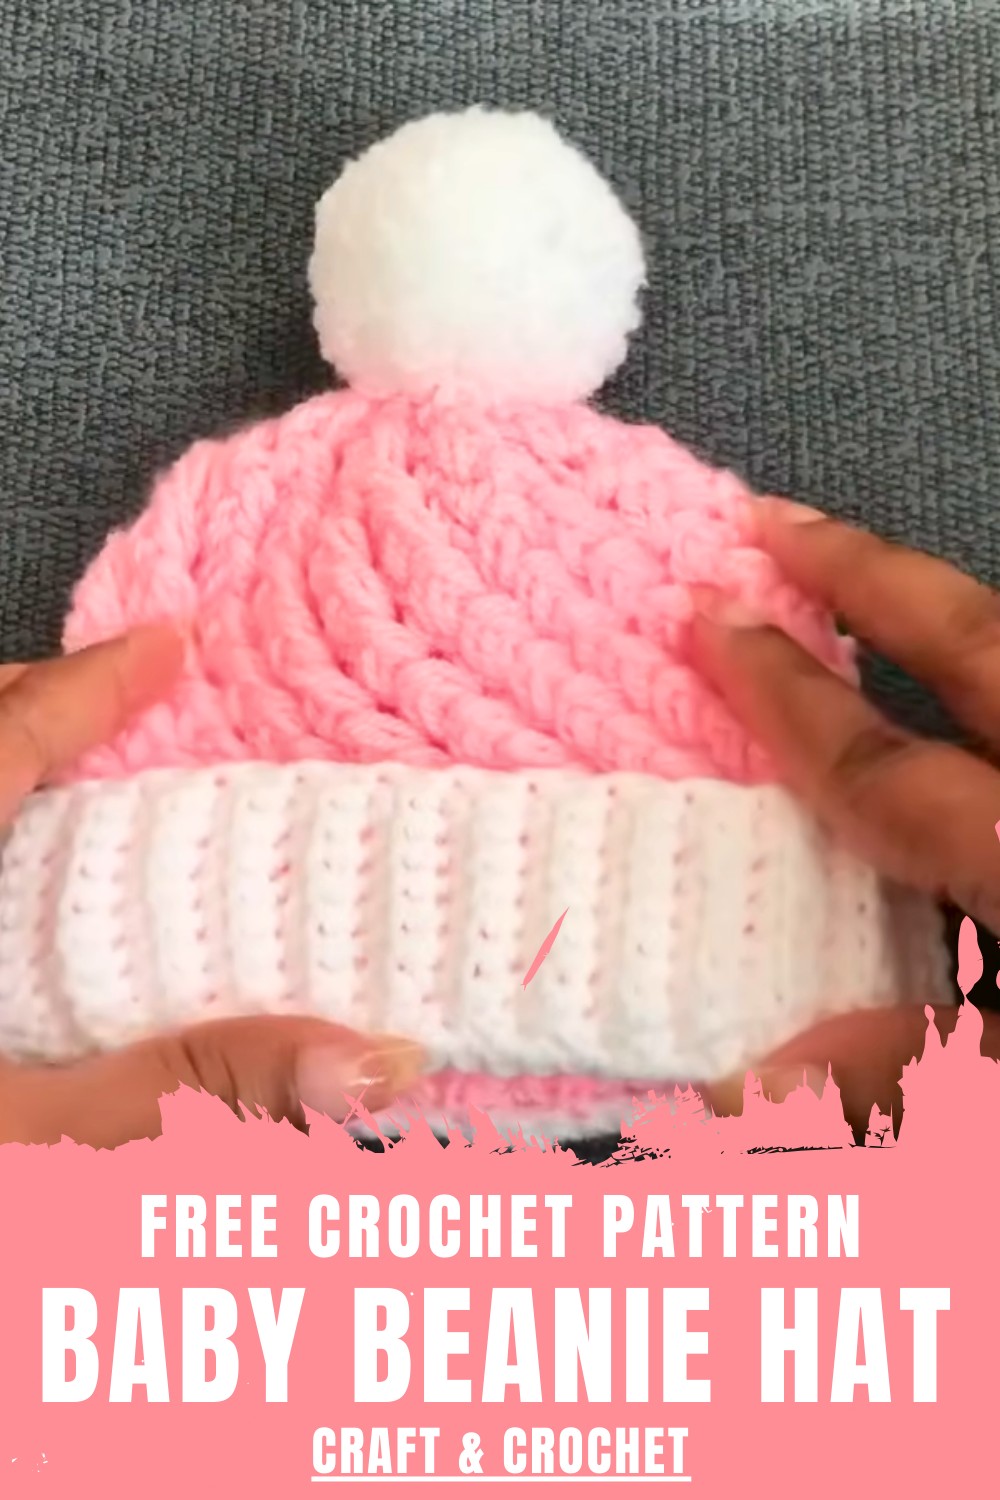
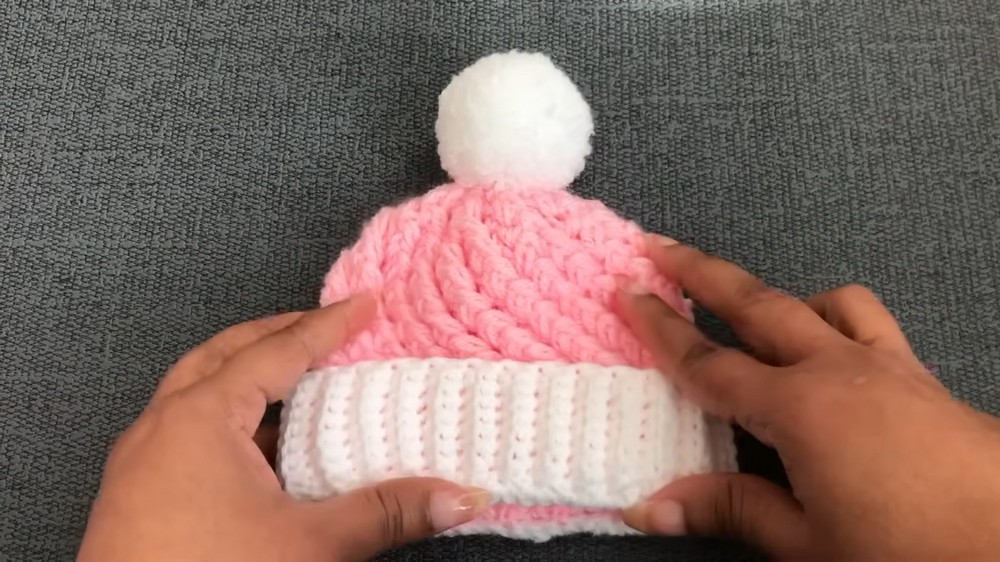
Wrap little heads gently with this Crochet Baby Beanie Hat Pattern for soft, cozy fits that keep infants warm and comfy every day at home.
Clear instructions guide beginners confidently while still offering a satisfying project for experienced crocheters. Lightweight construction ensures breathability, while the finished beanie holds its shape through regular use and washing.
Beyond appearance, this project supports skill building, consistency, and creative expression in a small, rewarding format. Practical, adorable, and timeless, the finished hat adds warmth, care, and personal meaning to baby wardrobes while celebrating the beauty of handmade crochet for families who value comfort and tradition.
Step-by-Step Guide How to Crochet a Baby Hat
1. Materials Needed
- Yarn: Double-knit (DK) knitting yarn
- Main color: 30-50g depending on size
- Second color: ~10g
- Crochet Hook: 4mm recommended
- Scissors
- Yarn Needle
- Pom-pom (optional): Made with ribbon yarn
2. Prepare the Ribbed Band
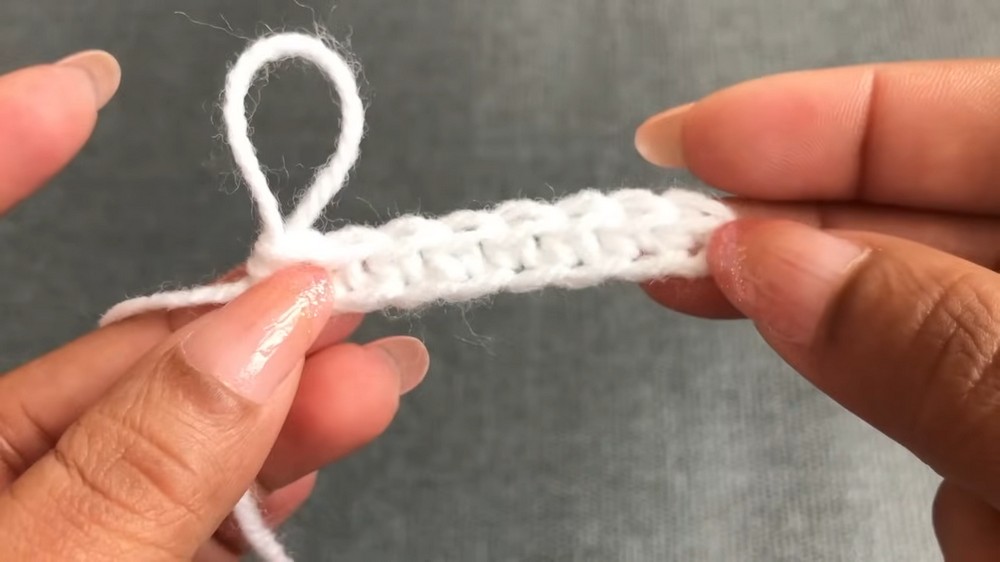
- Start with a Slipknot: Leave a 15cm tail to join the band edges later.
- Chain 9 stitches: Use your hook to chain 9 (approximately 9 stitches are used across all sizes).
- Row 1 (foundation row):
- Turn your work to the back side of the chain.
- Skip the first chain and crochet single crochets (SC) across into the back loops. This row will have 9 single crochets.
- Row 2:
- Chain 1 and turn your work to the opposite side.
- Crochet into the back loops only for all 9 SCs. This is what creates the ribbed effect.
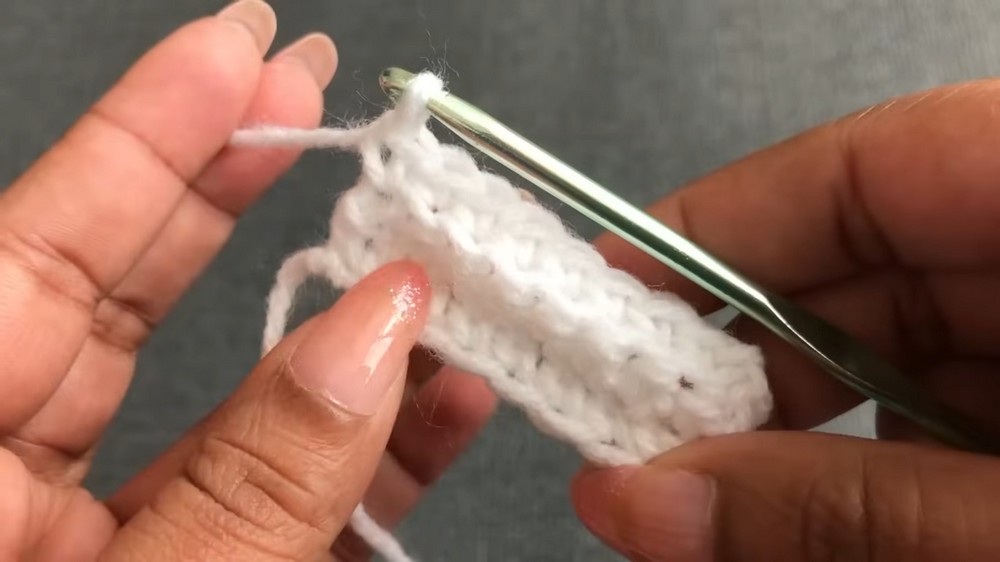
- Rows 3 to X:
- Continue this ribbed pattern (chain 1, SC into back loops only) until you achieve the desired size:
- 24 rows for newborns
- 27 rows for sizes 0-3 months
- 30 rows for sizes 3-6 months
- 33 rows for sizes 6-12 months
- Continue this ribbed pattern (chain 1, SC into back loops only) until you achieve the desired size:
3. Join the Band
- Fold the ribbed band in half.
- Use the tail you left earlier to sew together the first and last rows of the ribbed band.
- Align the stitches and, using back loops of one side and both loops of the other, join them with a slip stitch.
4. Create the Body of the Hat
- Foundation Round: Add one single crochet (SC) into each row of the ribbed band. Add 2 single crochets per ribbed section for proper spacing.
- Newborn: 48 SCs
- 0-3 months: 54 SCs
- 3-6 months: 60 SCs
- 6-12 months: 66 SCs
- Newborn: 48 SCs
- Main Stitch Pattern (Rounds 2-12):
- Change to your main yarn color if desired.
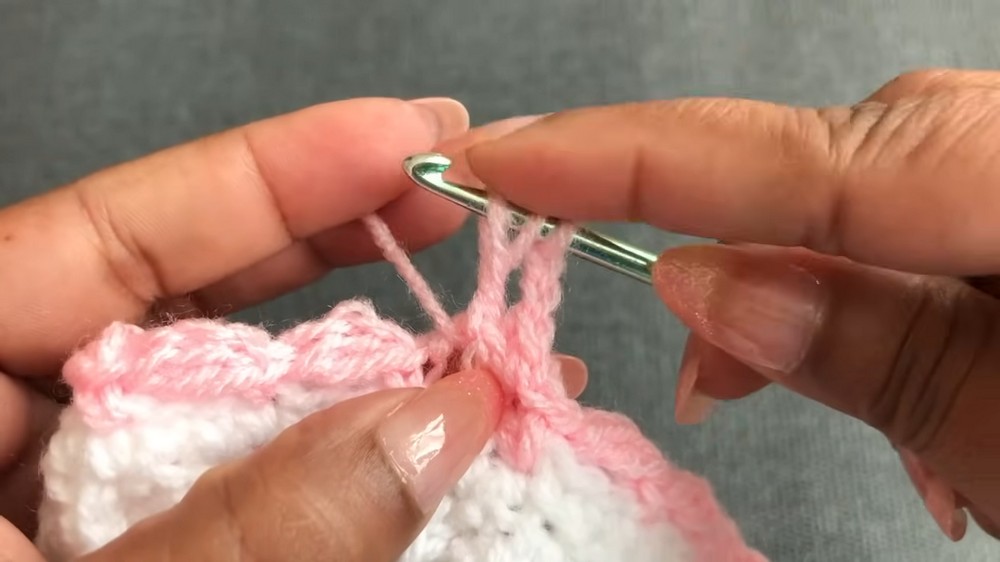
- Round 1: Chain 2. Insert a single crochet (SC) into the third stitch. Skip 2 stitches and create a puff stitch into the next stitch (this puff stitch is worked around the SC). In between puff stitches, chain 2.
- Successive Rounds: Alternate between the puff stitch and chain 2, working puff stitches around previous puff stitches to create a 3D effect.
- Number of Rounds:
- Newborn: 11 rounds
- 0-3 months: 12 rounds
- 3-6 months: 13 rounds
- 6-12 months: 14 rounds
5. Shape the Top of the Hat
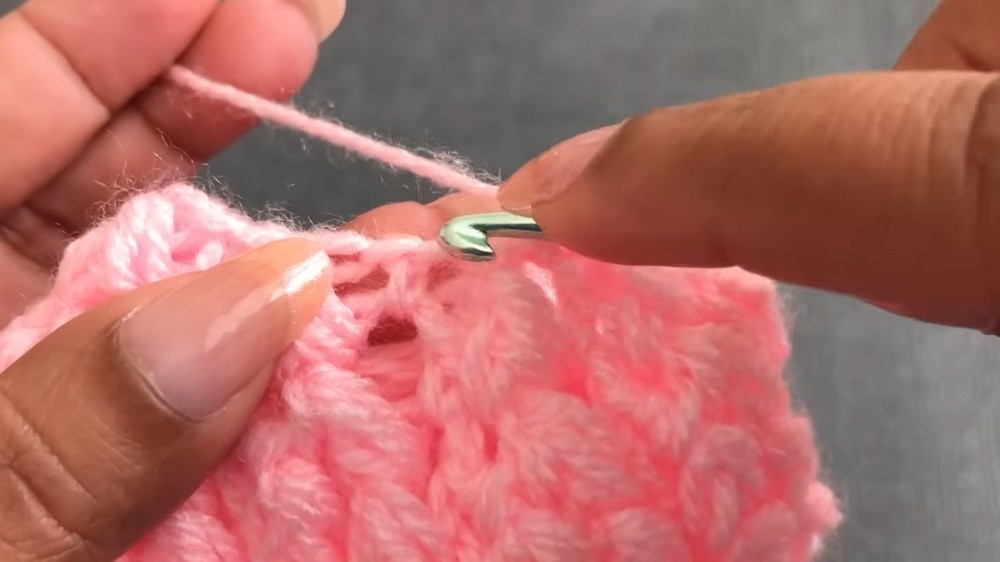
- For the last 3 rounds, reduce stitches to close the top of the hat neatly. Here’s how to decrease:
- Combine puff stitches in pairs by working fewer loops into the hook. For example, gather loops from two puff stitches into a single puff stitch. Continue this pattern to create fewer puff stitches every round.
- Decreasing Puff Stitches:
- Newborn: Reduce from 11 to 8 stitch lines.
- 0-3 months: Reduce from 12 to 9 lines.
- 3-6 months: Reduce from 13 to 10 lines.
- 6-12 months: Reduce from 14 to 11 stitch lines.
- Once you have about 8-11 puff stitches left (depending on size), use single crochets to close the gap.
- Seal the Top: Use a yarn needle to weave through the remaining loops and pull them tight to fully close the gap.
6. Add a Pom-pom (Optional)
- Use a matching or complementary color, ideally the same as the band color, which creates a cohesive look.
- Attach the pom-pom securely to the center of the hat.
- To finish, pull all loose yarn tails inside the hat and weave them securely. Snip any excess for a neat look.
Special Features
- Four Sizes: The tutorial shows how to create hats for newborns, 0-3 months, 3-6 months, and 6-12 months.
- 3D Puff Stitch Design: The puff stitches provide a fun, textured design while ensuring the hat remains soft and comfortable for babies.
- Beginner-Friendly: The pattern uses basic stitches (single crochet, puff stitch) and clear repetitions, making it perfect for beginners and crocheters of all levels.
- Quick and Easy: The hat can be completed in 20-30 minutes, depending on your experience and speed.
Level of Difficulty
The tutorial is beginner-friendly, but some intermediate elements, such as the puff stitch and decreasing for the crown, may require extra focus. Beginners will find this project easy to follow due to the clear explanations.
Tutor's Suggestions
- Count your stitches: Ensure consistent numbers for rows and rounds to maintain proper sizing, especially when creating the band and reducing stitches for the top.
- If you’re a beginner, try using one yarn color to simplify the process.
- Keep tension consistent: This is particularly important in the first few rounds of the puff stitch to avoid unevenness.
- Follow the measurements for each size:
- Newborn: ~11 rounds and 14 inches circumference
- 0-3 months: ~12 rounds and 15 inches circumference
- 3-6 months: ~13 rounds and 16 inches circumference
- 6-12 months: ~14 rounds and 17 inches circumference
Uses and Materials
Uses:
- Perfect for baby gifts, baby showers, or making something cozy and soft for your little one.
- Works as a winter hat to keep newborns and small babies warm.
Materials Needed:
- Yarn: Soft double-knit yarn in two colors (main and secondary) is ideal.
- Hook Size: Use a 4mm hook to suit the yarn.
- Accessories: Include a pom-pom to add flair!
Pro Tip
When switching colors, tie and weave yarn ends securely to keep the transitions neat. The 3D puff stitch looks better when these ends are hidden properly, giving the hat a polished, professional finish.
Conclusion
This baby hat crochet tutorial is an excellent project for beginners and experienced crocheters alike. With simple stitches and a short completion time, you’ll create a practical, soft, and comfortable hat that babies will love. The 3D puff design adds a unique, eye-catching texture, while the four size options ensure versatility. Follow this guide, and you’ll quickly master this quick and satisfying project perfect for gifting or personal use!
Let me know if you'd like further clarification!


