
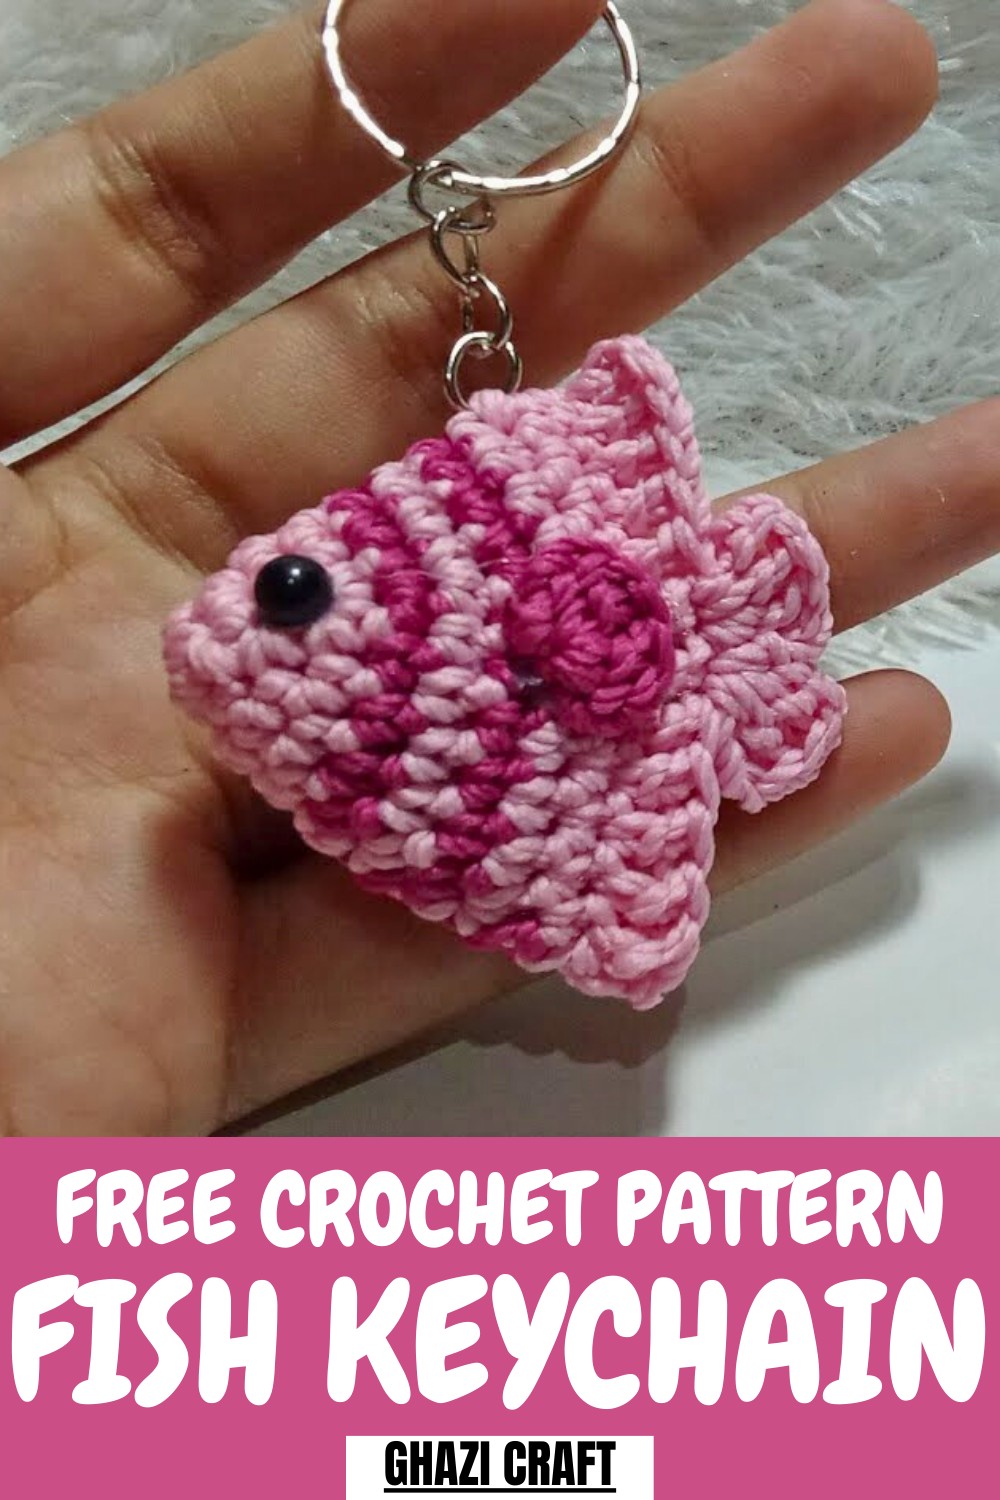
Cute and colorful, this free crochet Fish Keychain Pattern turns ordinary keys and bags into fun, charming accessories with a playful touch.
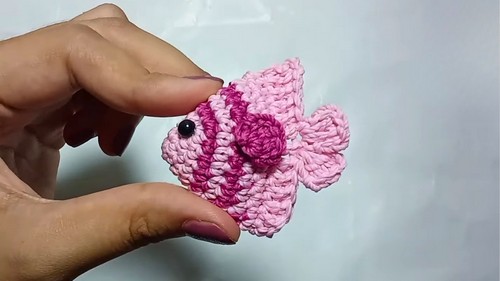
The "Fish Keychain" crochet pattern is a charming and playful design, perfect for creating vibrant accessories or thoughtful handmade gifts. This pattern features a whimsical fish style, complete with a rounded body, tail, fins, and added details like eyes, giving it a fun, cartoon-like appearance.
Trendy Fish Keychain Crochet for Your Bag or Keys
Swim into Creativity
This "Fish Keychain" crochet pattern is an easy and enjoyable project, ideal for beginners or experienced crocheters who want a quick, fun accessory. With a playful rounded body, colorful stripes, and cartoonish fins and tail, it's a cheerful piece that can be completely customized with different yarn colors.
Materials You'll Need
- Yarn: Lightweight or medium acrylic or cotton yarn in assorted colors (choose your favorites for a custom design).
- Hook: Crochet hook suited to your yarn (check the yarn label for size recommendations).
- Accessories: Stuffing, safety eyes for detailing, and a keychain ring to attach your fish.
- Additional Tools: Tapestry needle and scissors for finishing.
Crochet a Charming Fish Keychain: Step-by-Step Guide
The steps incorporate colorful yarn changes, making it ideal for experimenting with bright shades or soft pastels to match various themes or seasons. The recommended yarn is lightweight, such as cotton or acrylic, which works well for small, durable keychains.
Suited for Beginners
The video tutorial makes this project accessible to beginners while also offering opportunities for intermediate crocheters to play with colors and sizing. Even with minimal crochet experience, you’ll be able to follow the clear instructions step-by-step.
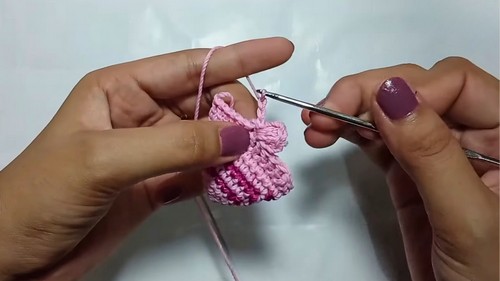
Step 1: Head & Body Construction
- Magic Ring Formation: Start with a magic ring and chain 1.
- Row 1: Crochet 6 single crochets (SC) into the magic ring.

- Row 2: Make a pattern of 1 SC, increase (2 SC in one stitch); repeat this 3 times for 9 stitches.
- Row 3: Work 2 SC, increase for a total of 12 stitches.
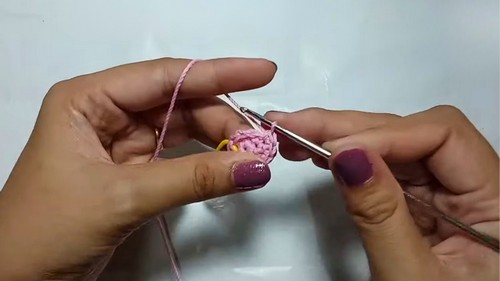
- Row 4: Follow the pattern 3 SC, increase for a total of 15 stitches.
- Change Yarn Color (Optional): Add variety by switching to a new color.
- Row 5: Work 4 SC, increase to total 18 stitches.
- Row 6: Work 5 SC, increase for a total of 21 stitches, and change color if desired.
- Row 7: Work 6 SC, increase for 24 stitches and change color again.
- Rows 8-9: Crochet 1 SC in every stitch. (Maintain the stitch count at 24.)
Tutor Suggestions to Nail the Project
- Master the Magic Ring Technique: This forms the perfect base for the body and ensures a clean, tight starting point.
- Stuff as You Go: Add stuffing while shaping the head and body for an even and firm finish.
- Experiment with Colors: Play with contrasting or gradient yarn combinations to make the keychain pop.
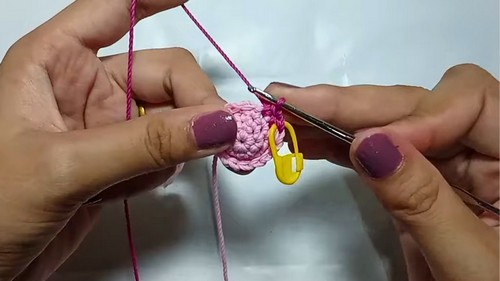
Step 2: Add Stuffing & Tail
- Stuff the Body: Fill the body firmly with stuffing before closing.
- Create the Tail:
- Count 6 stitches at the end of the body for shaping the tail.
- Use the following pattern twice for each tail flap: Chain 3, work 2 double crochets (DC), then chain 3 and slip stitch.
- Secure with 1 chain and cut the yarn.
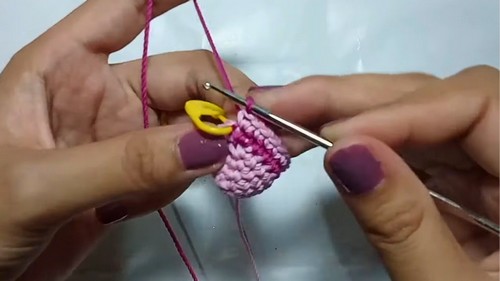
Step 3: Crochet the Fins
- Make the Fin Base: Start with a magic ring.
- Form the Fins:
- Chain 3, make 2 DC, chain 3, and slip stitch to the ring.
- Repeat the pattern to form the second fin.
- Secure with 1 chain and cut the yarn.
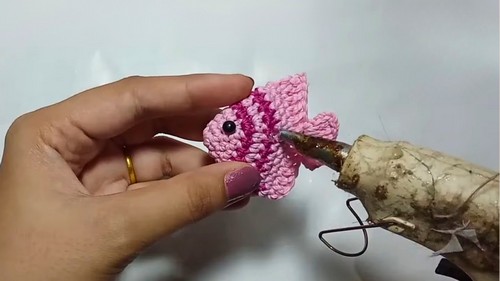
Step 4: Add the Details
- Attach the Fins: Sew the fins between rows 7 and 8.
- Add the Eyes: Place safety eyes between rows 3 and 4 for a cute expression.
- Attach the Keychain Ring: Secure the ring firmly to the top of the fish, completing your keychain.
Special Features of the Crochet Fish Keychain
- Customizable Color Stripes: Add personality to your fish by experimenting with different yarn colors on each row.
- Compact Size: Perfect for small gifts, party favors, or even keychains for kids’ school bags.
- Beginner-Friendly Stitches: Uses simple crochet techniques like single crochet, magic ring, and double crochet.
Why It’s Useful
The finished fish keychain is not only adorable but highly versatile. Use it as a fun summer accessory, a party favor, or a delightful handmade gift. With its compact size, it’s perfectly portable and practical to carry along wherever you go.
Your Handmade Charm
Congratulations! You’ve just completed an adorable fish keychain. This project is satisfying, quick, and leaves you with a vibrant, playful piece that’s both decorative and practical. Have fun customizing it with different colors to match the seasons or themes.
Make Multiple Fish for a Statement Keychain
Want to take it up a notch? Crochet several fish in different colors and attach them to a single keyring for a vibrant, multi-fish statement piece!


