
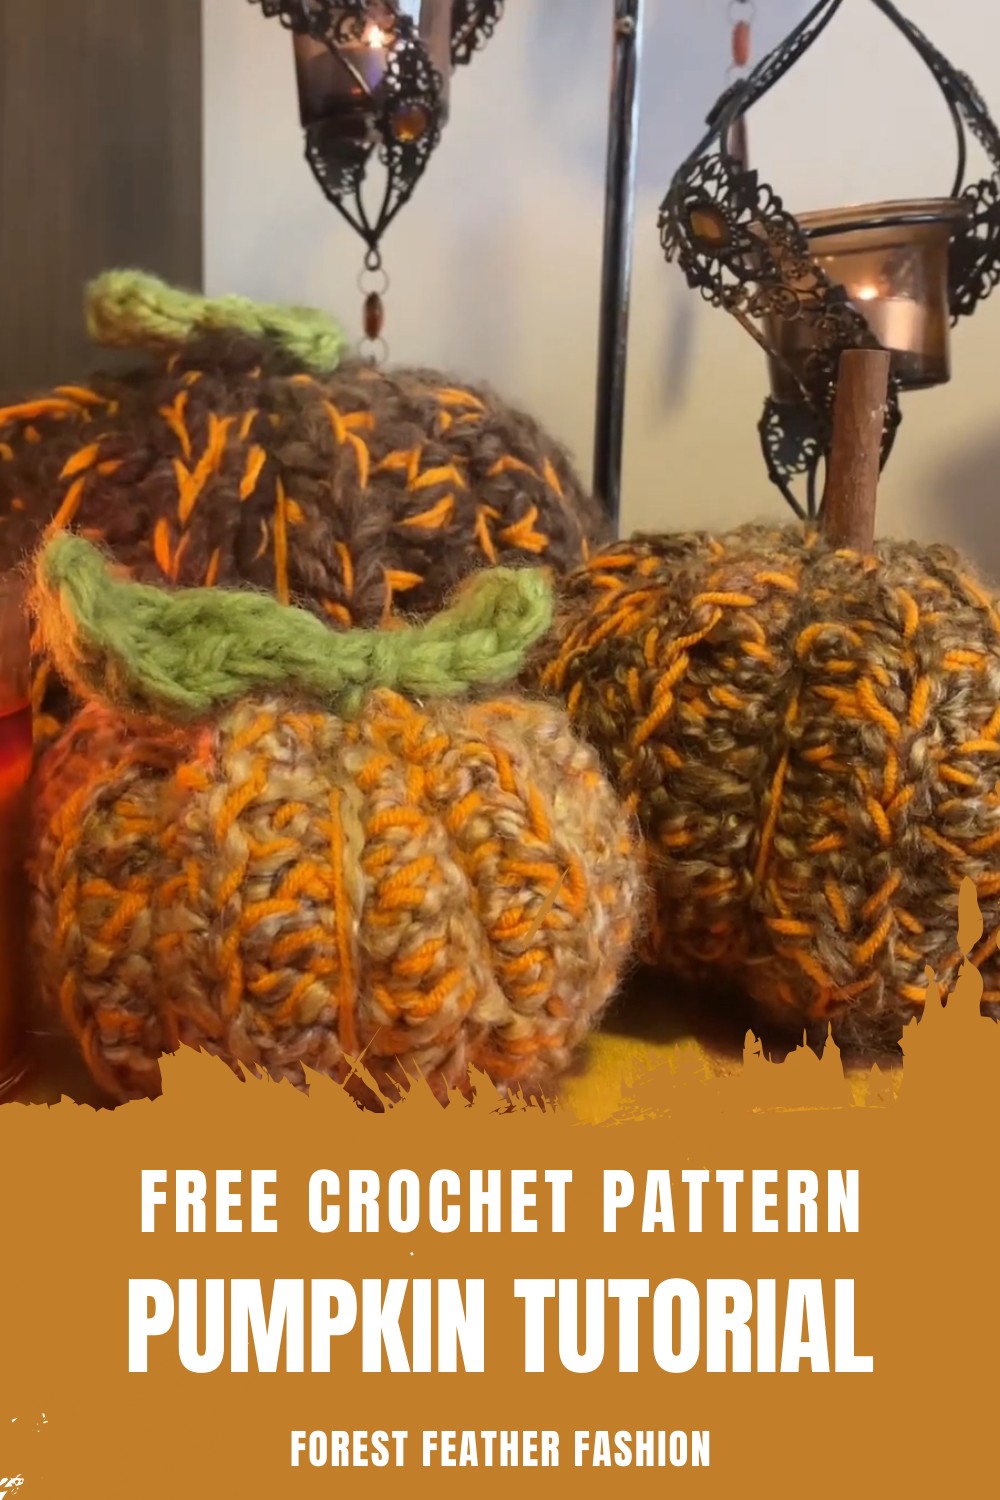
Add a cozy fall touch to your home decor with this Free Crochet Pumpkin Pattern, perfect for beginners and seasonal crochet lovers alike.
Autumn is the perfect time to add cozy and handmade touches to your home, and nothing says fall quite like a delightful crochet pattern project. This charming pumpkin pattern is incredibly versatile, easy to make, and ideal for enhancing your space with seasonal warmth. Whether you’re sprucing up your coffee table, designing a centerpiece for your dining area, or adding festive elements to your front porch, a crochet pattern project brings a personalized and creative autumn vibe into any corner.
How to Crochet a Perfect Pumpkin Pattern for Autumn Charm
Beyond its decorative use, the pattern offers an opportunity to refine your crocheting skills while enjoying the process of producing something functional and beautiful. With customizable colors, textures, and sizes, the project can complement virtually any aesthetic—whether rustic, classic, or modern. It’s a great way to connect creativity with practicality.
An added benefit is the ability to crochet the pattern using affordable materials like leftover yarn and fabric scraps, ensuring it remains budget-friendly and eco-conscious. Whether you’re gifting a handmade pattern to loved ones or keeping it as cherished seasonal decor, the project offers the joy of crocheting and the satisfaction of decorating your home.
Materials Needed
- Homespun yarn (Autumn-themed colors).
- Orange milk cotton yarn for added texture.
- Cinnamon stick (or any alternative for the stem).
- Crochet hook (select a size based on your yarn).
- Yarn needle for final stitching.
- Stuffing (or fabric scraps as a substitute).
Step-by-Step Instructions
Step 1: Begin with a Slip Knot
- Combine the two strands of yarn.
- Create a slip knot using your crochet hook.
2: Chain to Determine Pumpkin Height
- Crochet a chain based on the desired height of your pumpkin.
(For a medium-sized pumpkin, chain 1.1 as Candice demonstrates.) - Adjust this length for larger or smaller pumpkins.
3: Half Double Crochet for Ribbing Texture
- Turn your chain over and work half double crochet (HDC) into the back loops of the chain.
- Insert hook into the back loop, pull up a loop (3 loops on the hook), yarn over, and pull through all three loops.
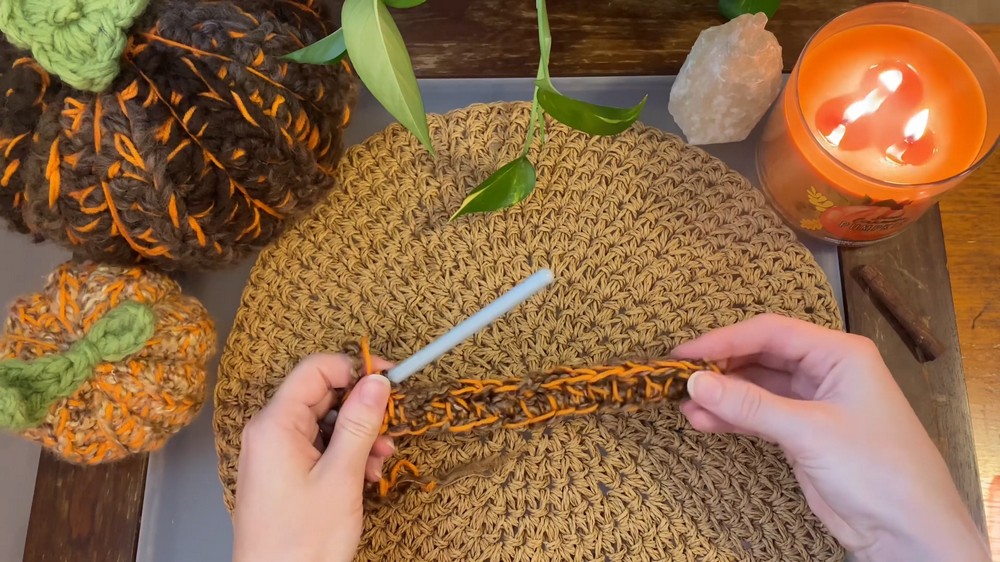
- Repeat HDC across the chain to complete the first row.
- Chain one and turn your work for the next row.
4: Continue HDC in Back Loops
- Keep working HDC into the back loops for all stitches of each row to build ribbing.
- Crochet rows until the length of the piece is three times the height of the pumpkin.
(You can fold your work to check the length as Candice suggests.)
5: Join Edges
- Decide which side of the piece will face outward.
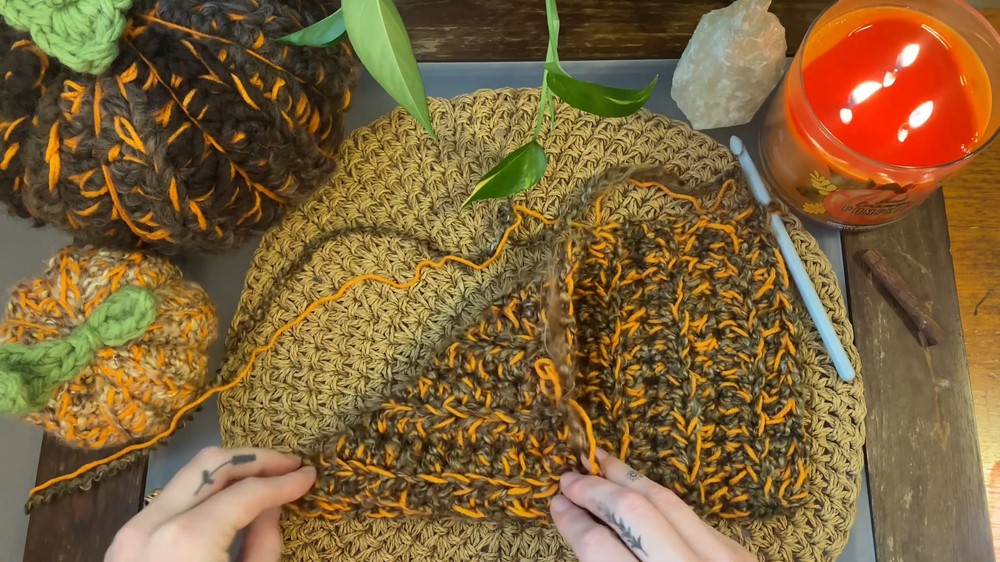
- Fold your work in half and use slip stitches through both edges to join. Ensure this seam blends into the ribbing effect.
6: Close the Bottom
- Leave a long yarn tail after slip stitching and thread it onto a yarn needle.
- Weave the needle through every second stitch on one edge, pull tight, and secure the bottom.
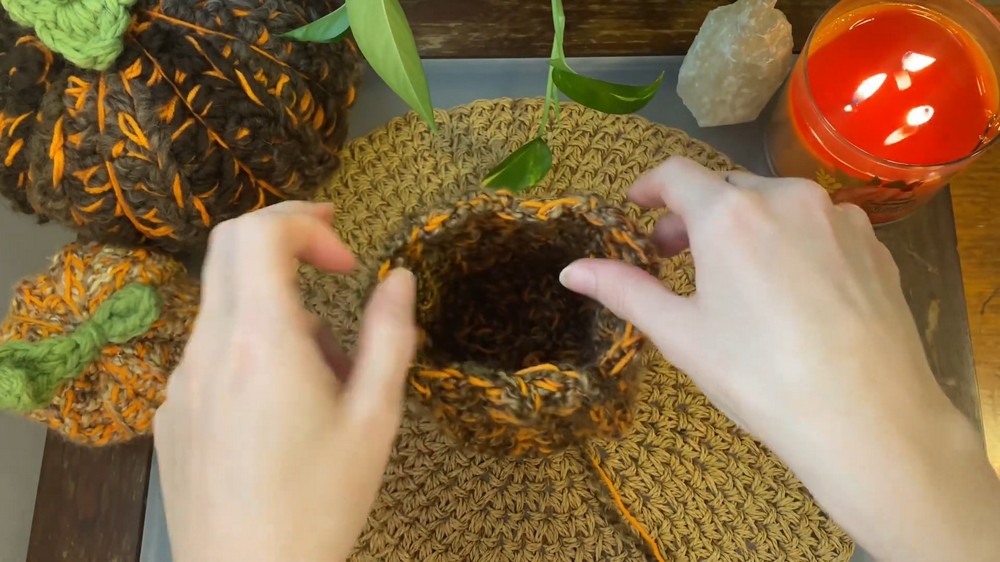
7: Add Stuffing
- Turn the piece right-side-out and add stuffing for volume.
(Fabric scraps can be a great alternative for filling.)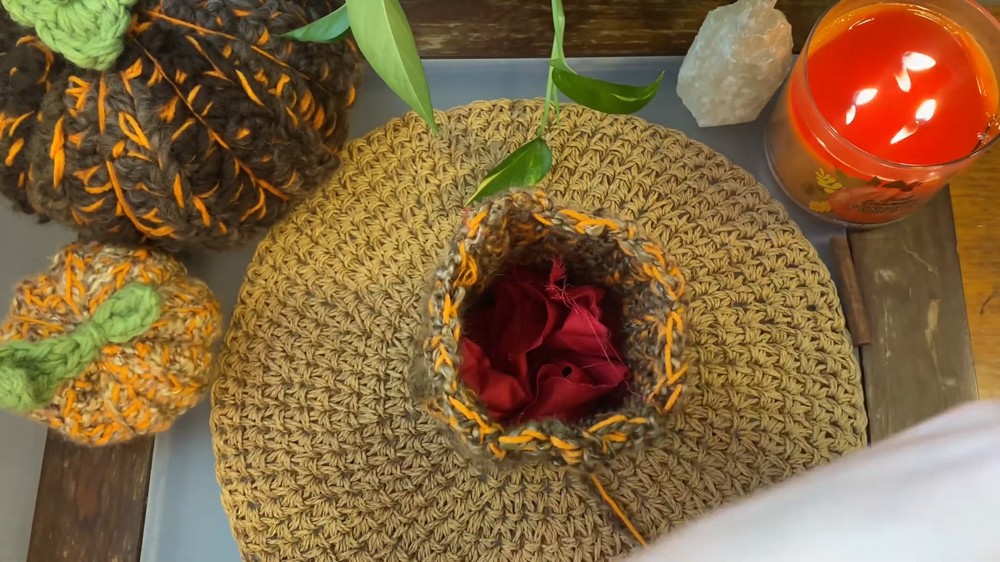
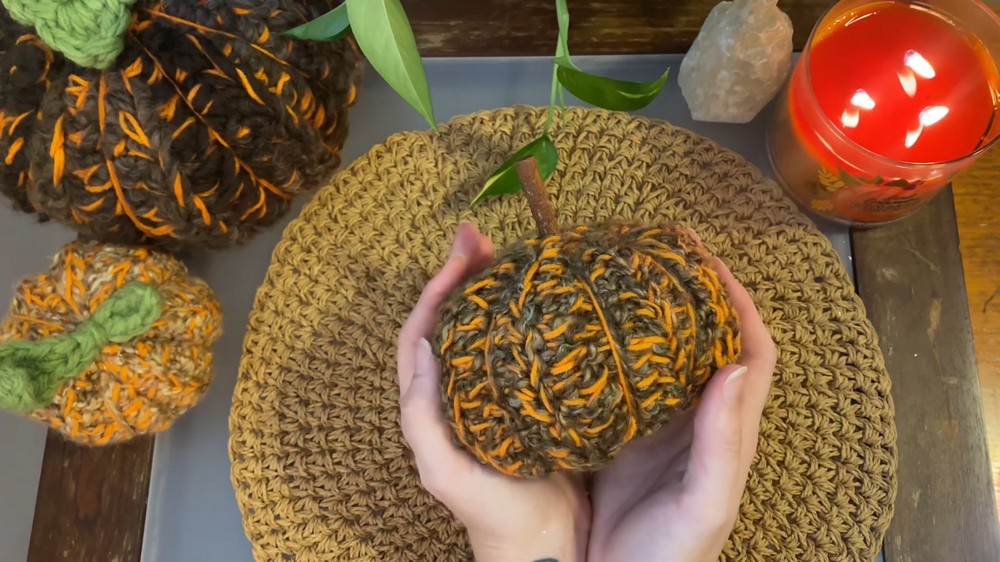
8: Close the Top and Insert Stem
- Weave your yarn needle through stitches at the top, but leave it slightly loose.
- Insert the cinnamon stick as the pumpkin stem. Secure it by stitching around the base of the stick.

Step 9: Shape Your Pumpkin
- Run the yarn tail down through ribbing hollows to create the iconic pumpkin shape.
- Pull tight to secure and repeat this step for all hollows.
Special Features
- Ribbing Texture: Mimics the natural lines of a real pumpkin.
- Adjustable Sizes: Customize the height and width of your pumpkin effortlessly.
- Eco-friendly: Use scraps or leftover materials for stuffing and decoration.
Level of Difficulty
This pattern is beginner-friendly and includes straightforward techniques such as slip knots, chains, and half-double crochet stitches. It emphasises simplicity and personalization, making it accessible for crocheters of all skill levels.
Tutor’s Suggestions
- The tutor recommends combining different yarn types for added texture and depth.
- It encourages using scraps if stuffing isn’t available, ensuring the project remains cost-effective.
- It highlights the importance of securely weaving and stitching to create a polished end product.
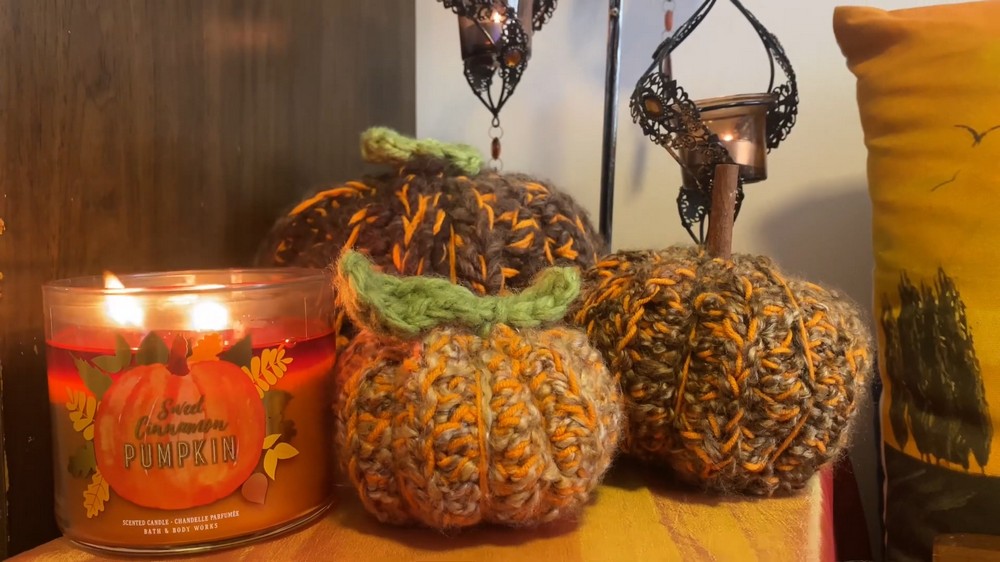
Uses
- Home Decor: Place these pumpkins on tables, shelves, or mantels for a rustic autumn aesthetic.
- Party Decorations: Ideal for fall-themed events or Halloween gatherings.
- Gifts: Handmade pumpkins make thoughtful seasonal presents.
Tip
To ensure durability and maintain shape, press firmly while stuffing and secure stitches thoroughly at each stage of gathering the top and bottom edges.
Conclusion
This rustic crochet pumpkin pattern is a delightful way to add autumn vibes to your space. With step-by-step guidance, stunning ribbing effects, and reusable materials, this project is rewarding and fun. Whether used for home decor or gift-giving, this pumpkin will bring charm to your fall celebrations.


