
Upgrade your summer wardrobe with this Crochet Top Pattern, featuring a light, airy design that keeps you comfortable and effortlessly chic.
A delicate balance of texture and style makes this top an effortless favorite for any wardrobe. This Crochet Top Pattern keeps the wearer cool and comfortable, while subtle patterns bring a touch of sophistication to everyday looks. Ideal for casual meetups, office wear, or weekend outings, it pairs beautifully with skirts, jeans, or tailored trousers, offering versatility that suits many occasions.
Lovely Crochet Top Pattern That Everyone Will Adore
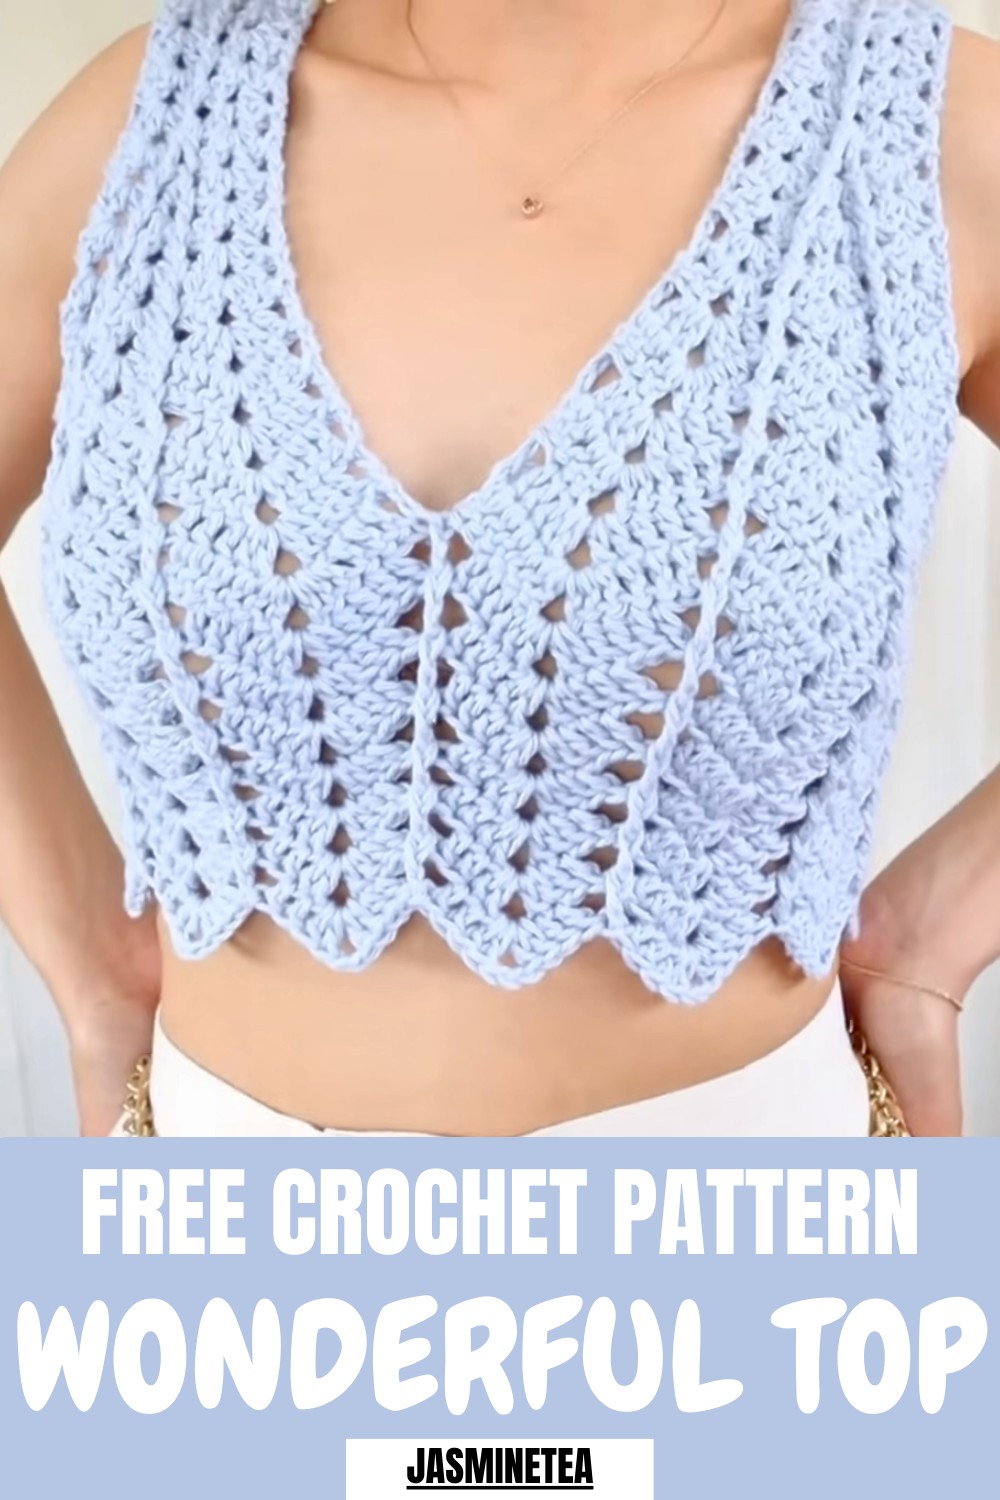
The design gently enhances the natural silhouette, providing a flattering fit without feeling restrictive. Lightweight construction ensures ease of movement, while the intricate stitch details add charm and elegance. Color choices, stitch variations, or small accents allow each piece to carry a personal touch, making it uniquely yours.
Beyond aesthetics, the top offers practical comfort and breathability, combining functionality with style. With timeless appeal and modern design elements, this pattern transforms simple outfits into polished, chic ensembles that feel fresh, stylish, and effortlessly refined.
Step-by-Step Details
Step 1: Materials
For this tutorial, you will need:
- Yarn: 100% cotton yarn, weight 4 (medium).
- Hook Size: 4.5 mm crochet hook.
- Additional Tools: Stitch markers, scissors, and a smaller hook for weaving in ends.
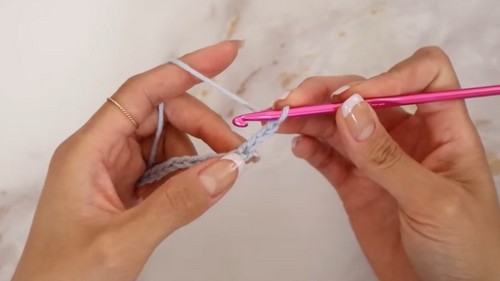
Step 2: Start the Foundation Chain
- Chain 12: No matter the size you’re creating, always begin with a chain of 12 stitches.
- Mark the 12th Chain: Use a stitch marker to keep track of your last chain.
- Chain 3: After marking, chain three more stitches. These count as your first double crochet.
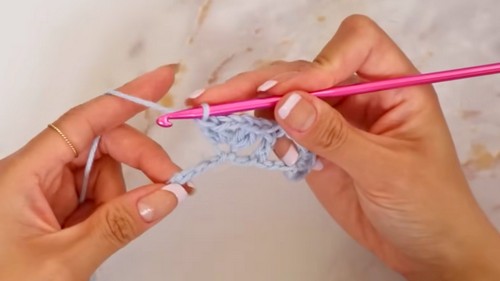
Step 3: Work the First Row
- In the third chain from the start, create a double V-stitch:
- Make two double crochets, chain 2, and add two more double crochets in the same chain.
- Skip 3 Chains: Then, in the fourth chain, repeat the double V-stitch pattern.
- At the end of the row, skip three chains and place one double crochet in the last chain to make the edges neat.
4: Begin the Second Row
- Chain 3: Chain up three stitches, and then flip your work.
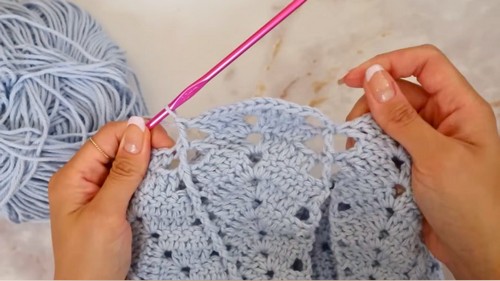
- In the chain space of the first double V-stitch, create another double V-stitch.
- Add Front Post Double Crochet in the Middle: Wrap around the middle post from the previous row and work a front post double crochet to give texture and 3D detail.
- Continue alternating double V-stitches (in chain spaces) and front post double crochets until the end of the row. Finish with a double crochet in the third chain from the bottom of the row.

5: Alternate Rows to Maintain Texture
- In odd rows, incorporate back post double crochets instead of front post double crochets to keep embossed stitches on one side.
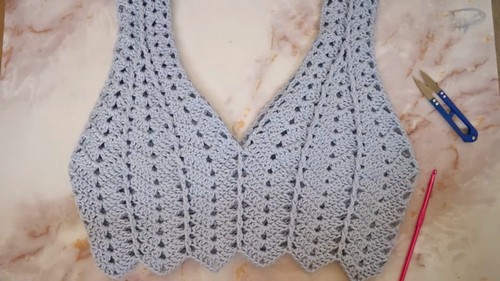
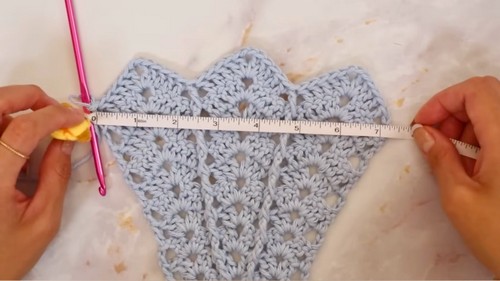
- Simply repeat row 2 and alternate between front and back posts where necessary until you reach 6 rows. This will create a segment that runs from your shoulder to your collarbone (approximately 3.5 inches for a size small).
6: Begin Increasing Rows
Starting on the 7th row, increase the width of the top to fit your bust:
- Work Double Post Stitches:
- When you reach each post stitch, make two front/back post double crochets around the post (one after the other), ensuring that the posts flare outward by chaining 2 between these stitches.
- In all chain spaces, create single V-stitches (1 double crochet, chain 2, 1 double crochet).
- Work regular double V-stitches and alternate post stitches to finish the row.
7: Incrementally Increase Width
As the top progresses:
- Work two increase rows for every level of width adjustment:
- For example, after finishing the 7th and the 8th rows at "increase level 2," start placing one additional double crochet before and after every V-stitch in the 7th row and repeating this pattern in the 8th.
- Progress by adding one more stitch to the increase (e.g., three stitches before and after the V-stitch for rows 9 and 10).
- Continue this increasing pattern until the body width reaches one-quarter of your bust measurement. For example:
- If your bust size is 32 inches, crochet until the top width measures 8 inches (32 ÷ 4 = 8).
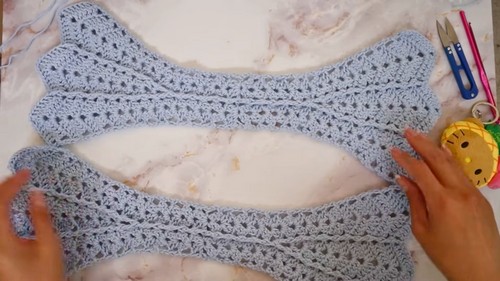
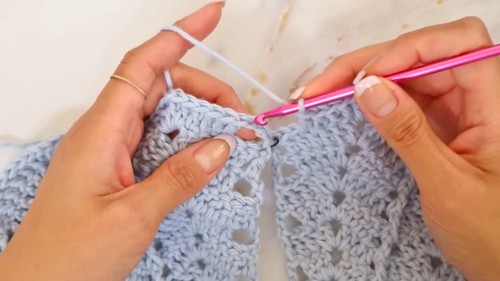
8: Create Armhole and Seamless Connection
- Take both fabric pieces (the front panel and back panel), ensuring one has the yarn still attached.
- Connect Pieces:
- Slip stitch the chain from one piece to the chain at the edge of the other piece, forming one continuous piece. This is where the armholes will start to form.
- Join both pieces at the chain spaces, working in a circular manner. Do not flip the work anymore since all subsequent rows will be crocheted in the round.
9: Decrease for Rib Cage Fit
- To achieve a tapered effect:
- Start your decrease rows after completing the bust. For example, if the last increase row was "Four Increase," begin the decreasing process with a "Three Decrease."
- For a decreasing row, work fewer double crochets before and after V-stitches. For example:
- Row 1 (Decrease 3): Place three double crochets before and after each V-stitch.
- Row 2 (Repeat Decrease 3): Copy the row exactly without adding anything new to taper the edges further.
10: Continue Decreasing to Final Width
Repeat decrease and repeat rows in an alternating pattern until the top fits comfortably around your rib cage. For example:
- Decrease 3 – Repeat 3, Decrease 2 – Repeat 2.
- For a snug fit, stop decreasing approximately one or two inches after the bust tapering ends. Repeat your last decrease row until the desired length is reached.
Special Features
- Embossed Texture: Features alternating front and back post stitches to create a 3D ribbed effect.
- Custom Fit: The tutorial provides straightforward instructions to customize width and length based on individual shoulder-to-collarbone and bust measurements.
- Seamless Armhole Design: Clever armhole construction makes the top easy to wear and fit naturally.
- Beginner-Friendly Repeat Patterns: No complex counting is required once the texture pattern is understood.
Level of Difficulty
This project is beginner to intermediate level. The repeat row pattern is relatively simple, but mastering post stitches (front and back) and maintaining tension for shape consistency may require moderate crochet experience.
Tutor’s Suggestions
- Write Down Your Adjustments: Keep track of your increase and repeat rows for each side of the top. This ensures the front and back panels are identical in size and shape.
- Measure Often: Take measurements at key points, such as the quarter-bust width and desired length, to ensure the top fits your body perfectly.
- Customize V-Stitch Rows: You can easily increase or decrease the rows for a more fitted or looser crop top.
- Pay Attention to Post Stitches: Always alternate front and back post stitches to create a clean and symmetrical embossed texture.
Uses and Materials
Uses:
This crop top works as:
- A casual summer staple, perfect for pairing with skirts, shorts, or jeans.
- A layering piece over tanks or bralettes for cooler weather.
- A handmade gift for friends and family with custom sizing.
Materials:
- 100% Cotton Yarn (Weight 4): Ideal for breathability and body-fitted designs.
- 4.5mm Crochet Hook: For smooth, even stitches that maintain the fabric’s elasticity.
- Tools: Stitch markers and scissors for detailing and finishing; a smaller hook for weaving in ends.
Tip
When crocheting post stitches, keep your tension loose and consistent. This will allow for smoother transitions and prevent stiff, uneven texture along the ribbed sections.
Conclusion
This ribbed crop top is a stylish and straightforward crochet project, perfect for beginners looking to enhance their skills with post stitches and shaping techniques. The ability to customize the size, along with seamless armhole construction and tapered rib cage fitting, makes it versatile for all body types. Follow the clear increase and repeat patterns to achieve a flattering design that is both functional and trendy.


