
Adorn your gift boxes with this crochet rose pattern, which yields realistic floral accents highly effective for romantic embellishments.
Capturing the delicate spiraling beauty of a garden favorite a crochet rose pattern provides a meticulous guide for a floral accent that never fades. This design results in a lush and multi-layered bloom featuring soft scalloped edges and a deep central core that mimics the natural complexity of a real flower. The finished piece serves as a versatile embellishment for a wide array of items ranging from sophisticated bridal bouquets and hair accessories to elegant brooches that pin onto a lapel or a sun hat.
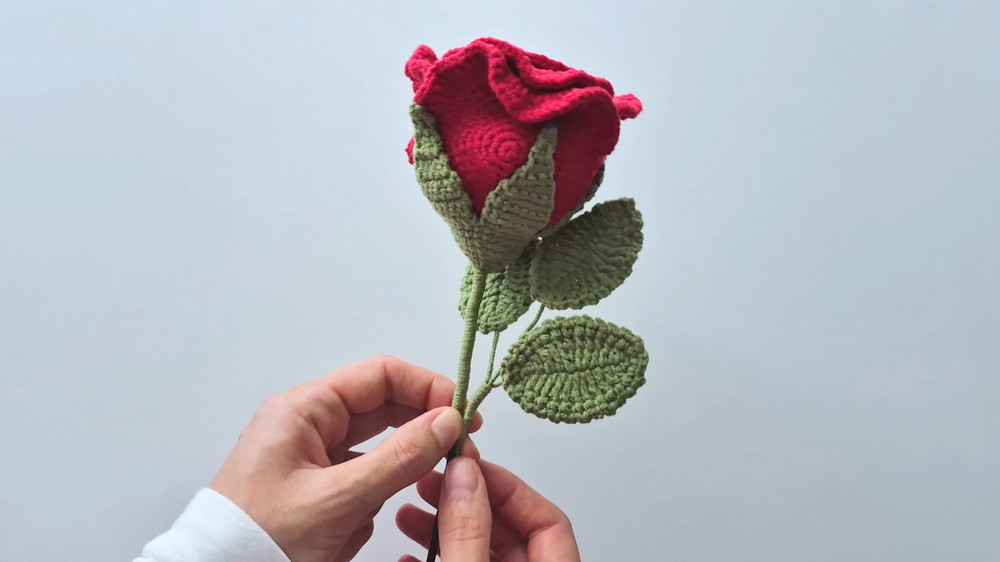
Graceful Crochet Rose Pattern for an elegant bouquet
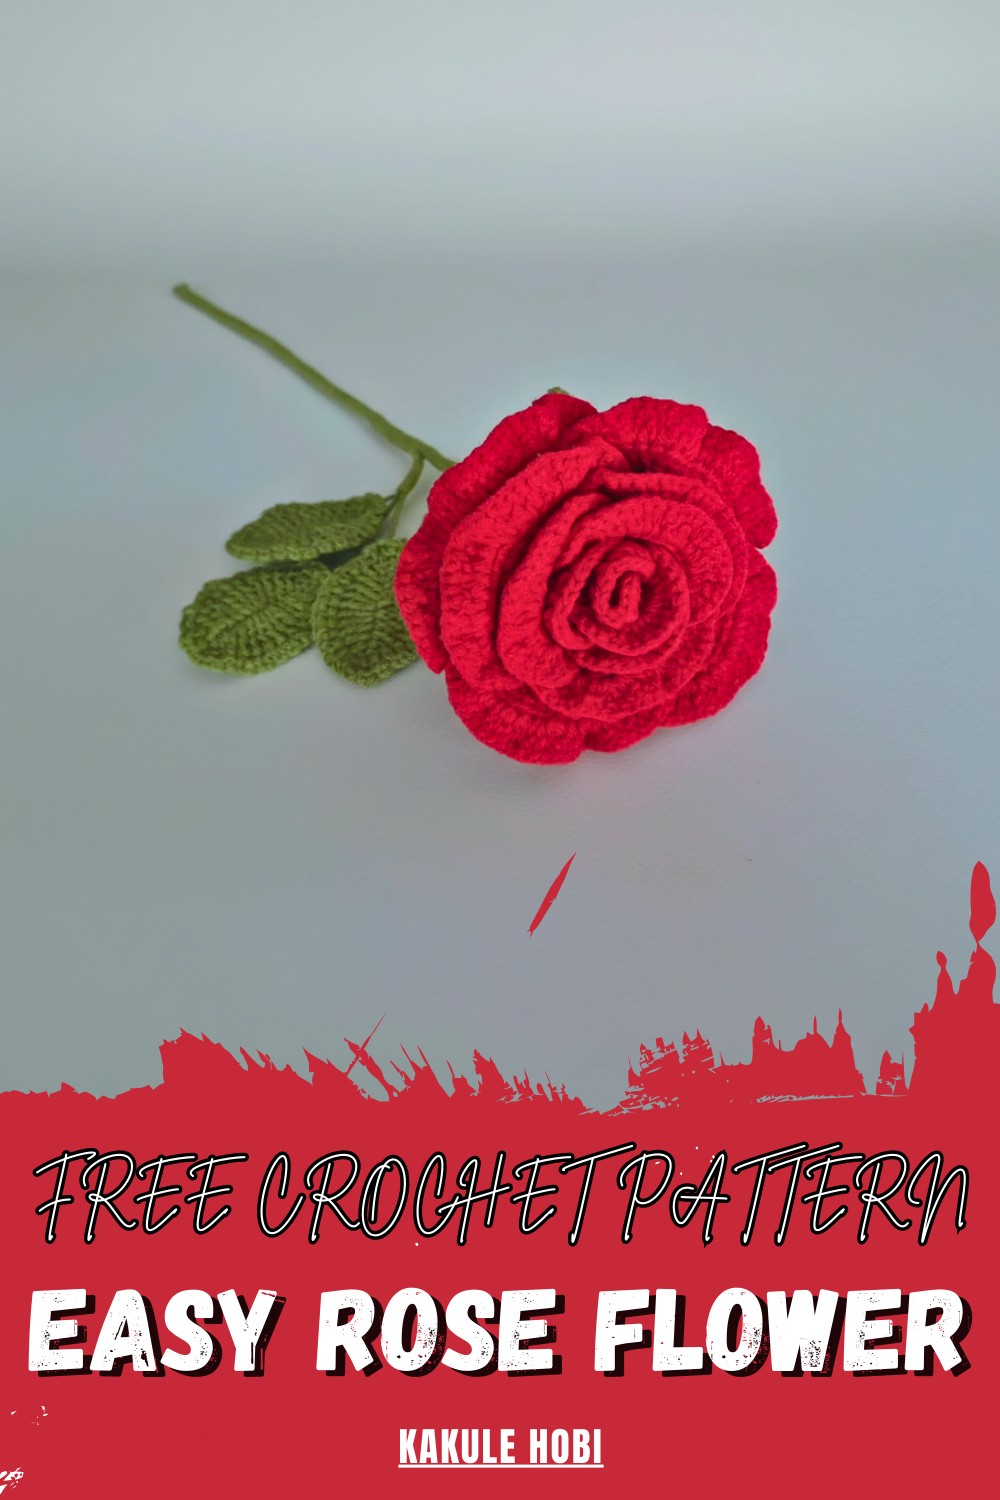
The overall look is one of refined luxury especially when worked in fine silk or mercerized cotton which adds a subtle sheen to the petals. Beyond its decorative charm the item offers a lightweight and durable alternative to fresh flowers making it a permanent keepsake for special events.
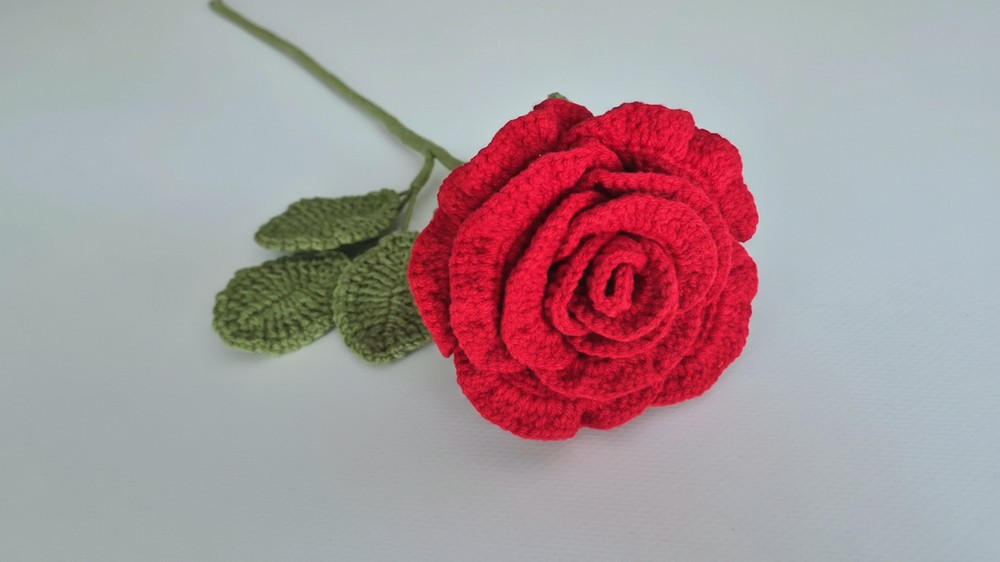
Its presence adds a romantic and bespoke touch to home decor or garments providing a pop of color and texture that feels both classic and vibrant. This floral element represents an enduring symbol of beauty and provides a polished finish to any project.
Step-by-Step Details
Step 1: Materials Needed
The presenter begins by showcasing the materials needed for the project:
- Cotton Yarn (colors for the flower, leaves, and stem – e.g., red and green).
- Wire:
- 0.3–0.4 mm floral wire for leaves.
- Thicker wire for the stem.
- 2 mm crochet hook.
- Fiberfill (small amount).
- Cold silicone glue (or hot glue).
- Scissors and a tapestry needle.
Step 2: Making the Flower Base
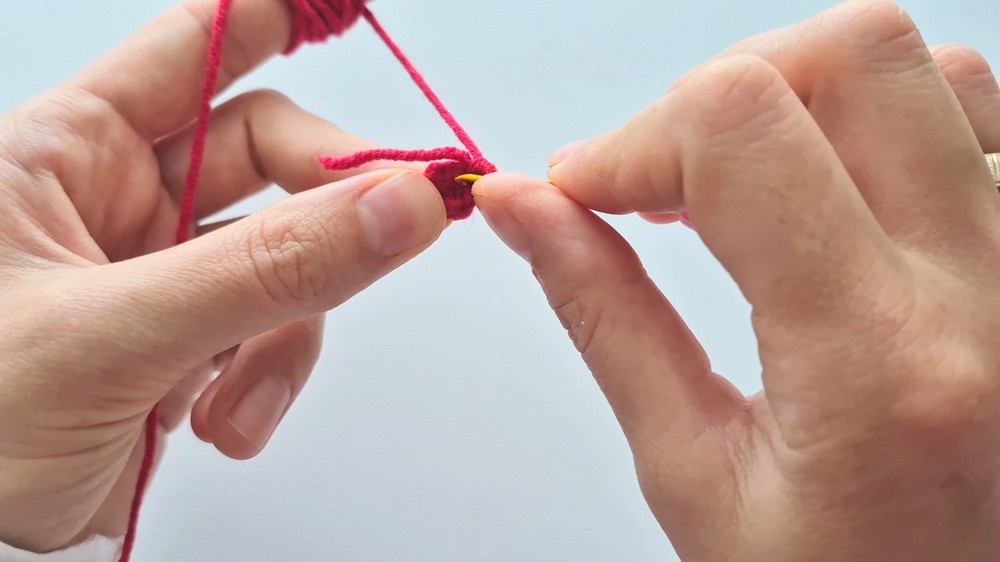
- Create the Magic Ring:
- Use green yarn to form a magic ring.
- Make 6 half double crochet (HDC) stitches inside the magic ring (wrap the yarn, insert the hook into the ring, pull up a loop, and yarn over to pull through all three loops).
- Increase the Rounds:
- Row 2: Make 6 HDC increases (2 HDC in each stitch) to total 12 stitches.
- Row 3–6: Crochet 12 HDC stitches per row without increasing.
- Row 7: Alternate between one single HDC and one increase (two HDC in the same space). End the row with 18 HDC stitches.
- Slip stitch into the first HDC from the row.
- Add Texture:
- Begin crafting the rounded texture by working HDC stitches into the front-facing loops only. This creates the foundation for the flower petals. Continue completing the row.

- Begin crafting the rounded texture by working HDC stitches into the front-facing loops only. This creates the foundation for the flower petals. Continue completing the row.
3: Crafting and Shaping the Flower Petals
- Add the Flower Color:
- Attach your chosen color (e.g., red) for the petals.
- Row 1: Insert the hook into any stitch, make 3 double crochet (DC) stitches per stitch, and complete the row.
- Build Layers with Additional Rows:
- Row 2 and Row 3: Continue working 3 DC stitches into each stitch from the previous row. This creates more layers, giving the flower a full, curly carnation-like effect.
- Finishing Touches:
- Add texture to the edges by working decoration chains: chain 3, single crochet into the next stitch, and repeat across the row.
- Finish off by threading ends into the flower and lightly gathering with the yarn if desired.

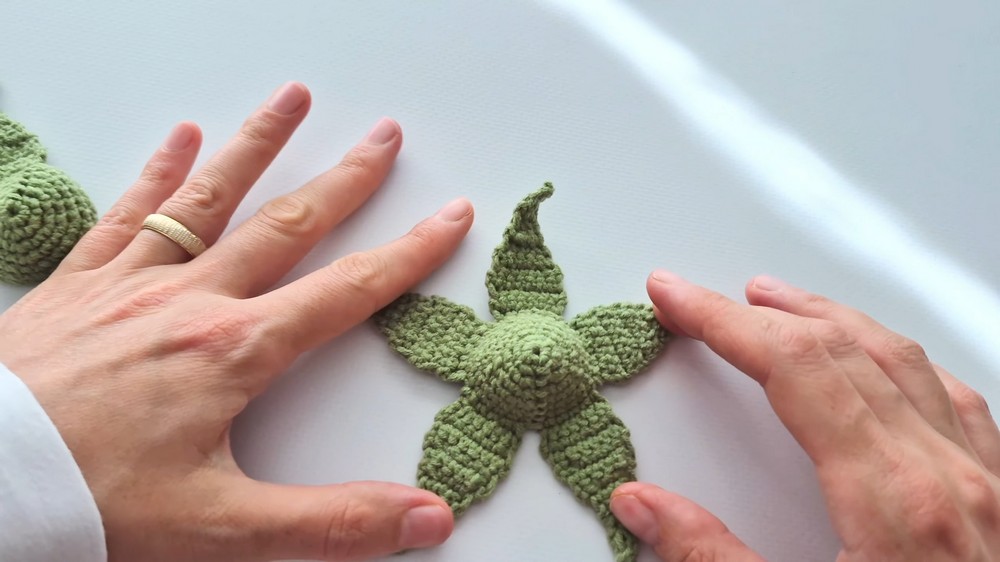
4: Making the Leaves
- Create the Chain Base and Add Wire:
- Make a chain of 16 stitches with green yarn.
- Place floral wire along the chains, leaving extra wire at the end.
- Work Single Crochets with the Wire Embedded:
- Begin from the 15th chain, crocheting one single crochet (SC) per chain stitch, working until the end (14 SC stitches in total).
- Begin from the 15th chain, crocheting one single crochet (SC) per chain stitch, working until the end (14 SC stitches in total).
- Create Leaf Shaping:
- At the last chain, make 3 SC stitches into the same stitch to create a round, curved edge.
- Crochet along the opposite side of the main chain (14 SC stitches), encasing the wire in the process.
- Finalize the Leaf:
- Slip stitch into the first stitch, cut the yarn, and secure by bending and wrapping the wire at the edges.
- Repeat the process to create two leaves.

5: Assembling the Flower
- Attach the Stem Wire:
- Poke the wire stem through the flower's base, applying silicone glue as needed to secure the structure.
- Add fiberfill into the base to provide shape and firmness, then gather the flower petals tightly with a thread or yarn.
- Wrap the Stem:
- Use green yarn to wrap the wire stem, starting from the flower base and working downward.
- Attach the leaves to the opposite sides of the stem while wrapping.
- Finish the Stem:
- Secure the bottom with glue, cut the excess yarn, and ensure the wrapping is tight to give a neat look.
- Secure the bottom with glue, cut the excess yarn, and ensure the wrapping is tight to give a neat look.
Special Features
- The flower uses 3D crochet techniques for a realistic appearance.
- Incorporating wire ensures the flower and leaves retain their structure and can be shaped as desired.
- Versatility: You can customize the flower colors, sizes, and arrangement to suit your preferences.
Level of Difficulty
This project is intermediate-level. While the tutorial uses basic crochet stitches (half double crochet, double crochet, single crochet, slip stitch), it includes advanced techniques like magic rings, working on wire, and constructing layered petals.
Tutor’s Suggestions
- For better visibility and ease, use light-colored yarns while practicing the technique.
- Secure attachments (like the flower and leaves) with both a thread and glue to ensure durability.
- Take your time while wrapping the wire to make the flower stem look smooth and seamless.
Uses and Materials
- Uses:
- Perfect for home decor, bouquets, or table centerpieces.
- A unique handmade gift idea for special occasions.
- Great for crafting realistic-looking everlasting arrangements.
- Materials:
- Cotton yarn in multiple colors (flower, stem, and leaves).
- Floral and stem wire.
- Fiberfill.
- 2 mm crochet hook.
- Cold silicone glue or hot glue.
Tip
While working with wires, leave extra length to make handling and crafting easier. You can always trim the wire later, ensuring the final piece is neater and more manageable.
Conclusion
This carnation flower crochet tutorial is an inspiring and rewarding project, giving you the ability to craft a lifelike, everlasting flower using simple materials and techniques. The step-by-step process allows you to perfect your crochet skills while experimenting with floral designs. Whether for personal use or as a heartfelt gift, this handmade carnation will brighten any space.


