
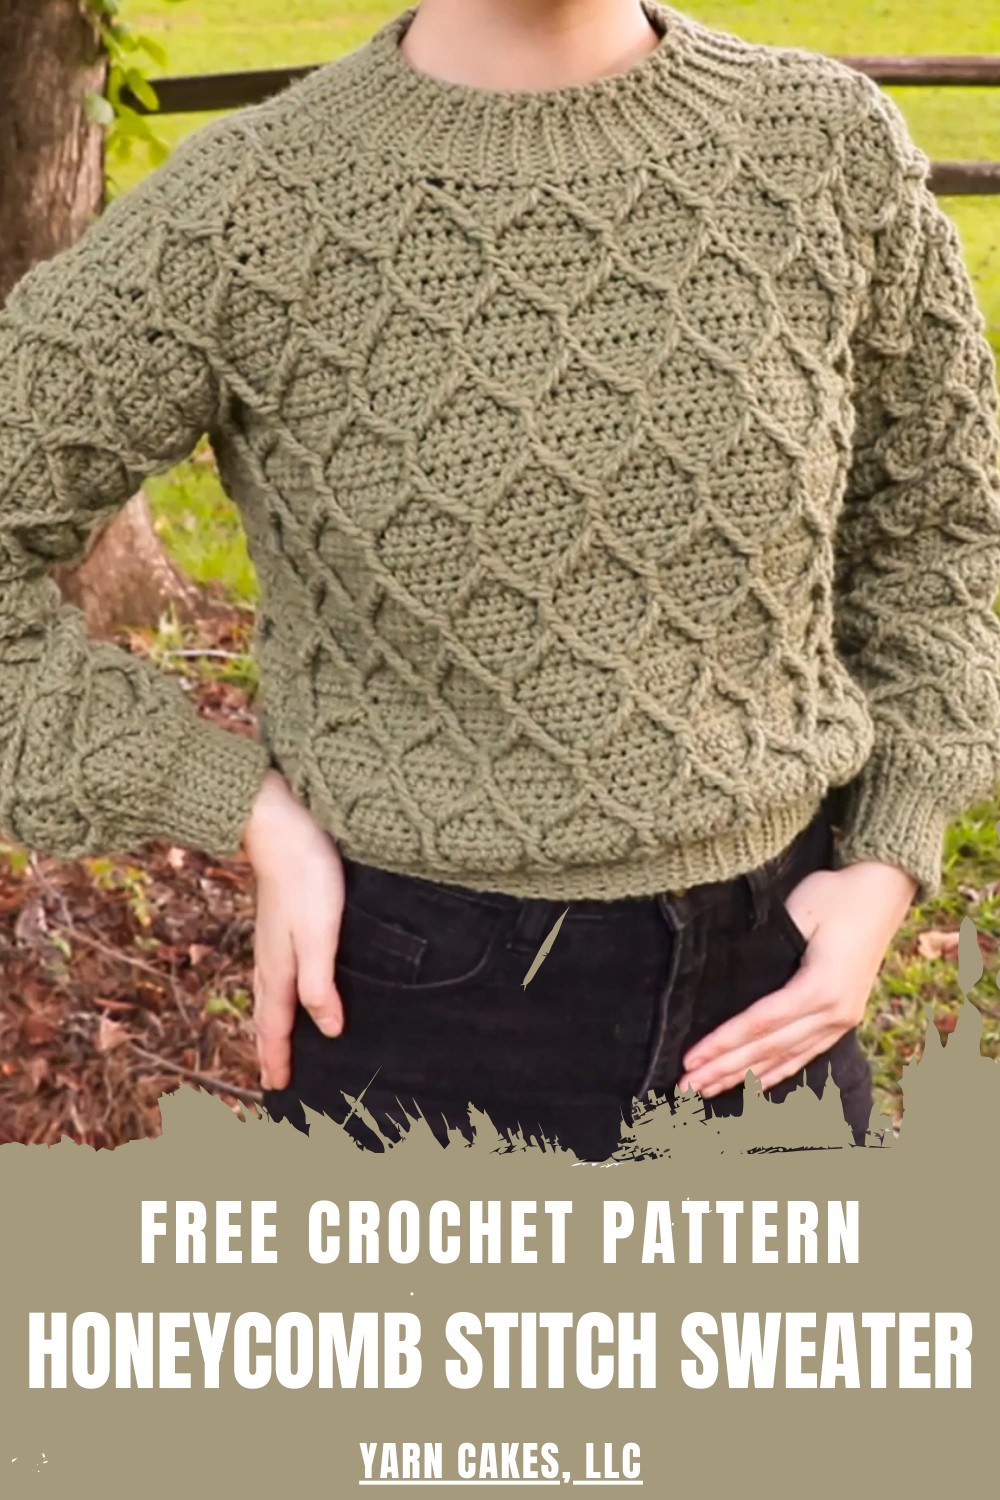
Elevate your wardrobe with this Crochet Honeycomb Stitch Sweater Pattern, featuring textured warmth, comfort, and a cozy style for cool days.
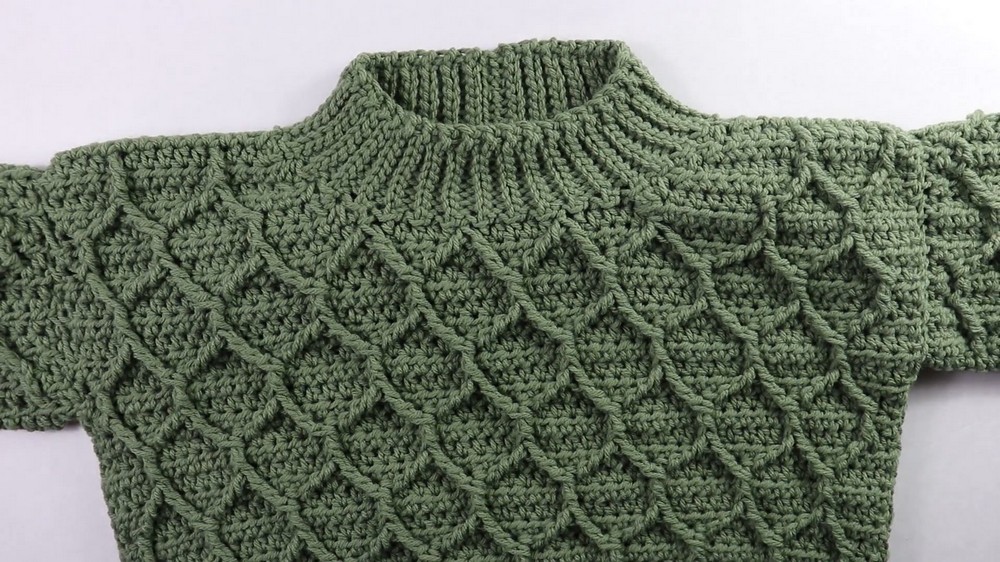
Developing a luxurious, high-texture garment for your permanent wardrobe is an achievable goal when utilizing a Crochet Honeycomb Stitch Sweater Pattern. This sophisticated guide provides the structural framework for a dense, hexagonal cell-like fabric that offers a three-dimensional depth rarely found in standard apparel. The finished piece serves as a heavy-duty layer of warmth, perfect for crisp autumn mornings or snowy winter evenings, while maintaining a refined, boutique-style aesthetic.
Soft Crochet Honeycomb Stitch Sweater Pattern for Everyday Wear
A primary benefit of this design is its incredible thermal efficiency; the interlocking nature of the cells creates natural air pockets that trap body heat without adding excessive bulk. By choosing a premium wool or a silk-blend yarn, you produce a breathable, supple fabric that drapes elegantly over the body.
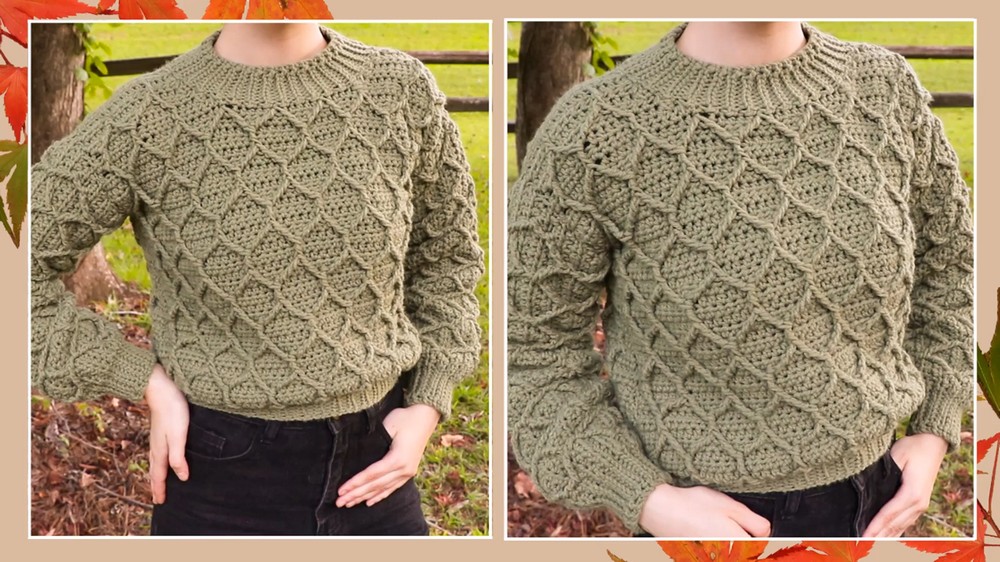
The overall look is one of artisanal excellence, featuring a rich, geometric surface that coordinates beautifully with both casual denim and formal trousers, ensuring a polished, high-end appearance for any occasion.
Step-by-Step Details
Materials Needed
- Yarn: Category 4 yarn.
- Crochet Hooks: 5.5 mm for the main project and 4.5 mm for tighter edges.
- Tools: Scissors, tapestry needle, measuring tape for size adjustments.
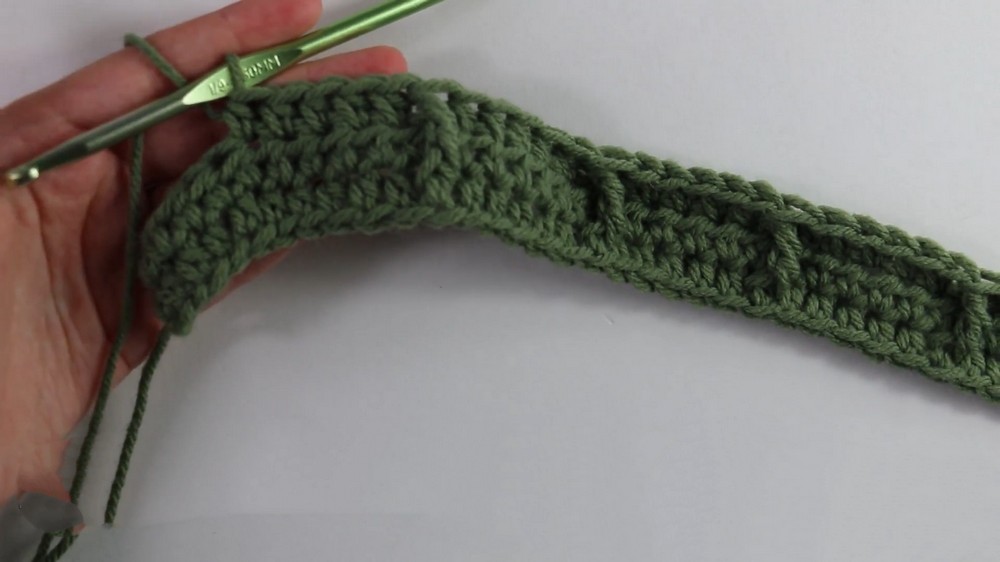
Step 1: Create the Back Panel
- Foundation Chain: Start with a chain of 55 stitches (adjust for your desired size).
- Rows 1-2: Work half double crochets (HDC) into each chain, beginning with the second chain from the hook.
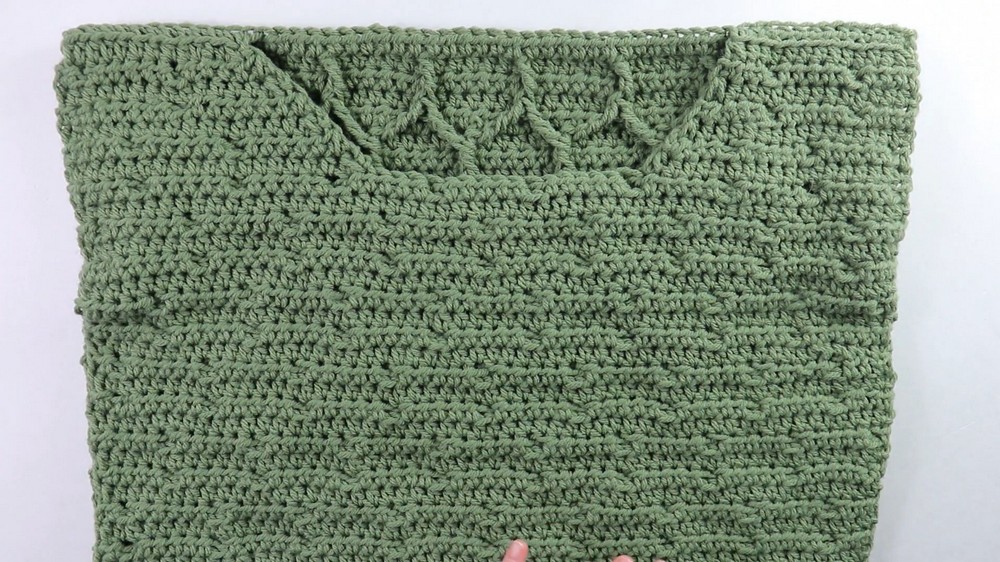
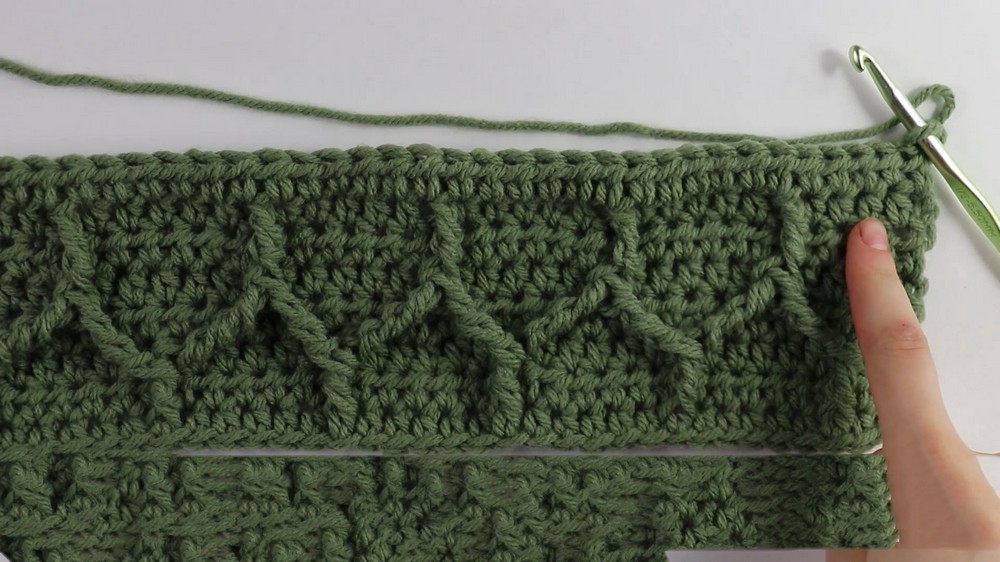
- Row 3: Begin the honeycomb pattern:
- Start with 1 HDC in the first stitch.
- Work a front post treble crochet (FPTC) into the second stitch.
- Add 5 HDCs into the following stitches, then repeat the pattern (1 FPTC followed by 5 HDCs) across the row.
- Row 4: Turn and crochet HDCs across the row (worked on the backside of the pattern).
- Repeat Rows 3-4: Continue alternating cable rows (FPTC + HDCs) and regular HDC rows until the back panel has 44 rows in total (adjust for desired length).
Step 2: Create the Front Panel
- Follow the same steps as the back panel until 37 rows (instead of 44 rows, making it shorter).
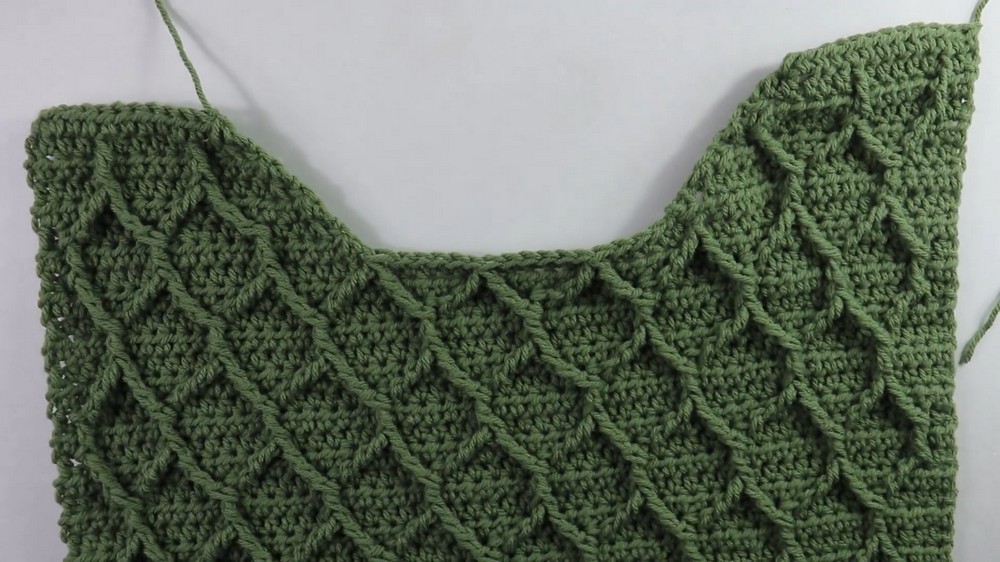
- Work Shoulder Straps:
- Divide the panel into two sections, starting with 17 HDCs on one side.
- Regularly decrease stitches at the beginning and/or end of rows while maintaining the honeycomb pattern for 7 rows.
- Repeat the same process for the second shoulder strap.
3: Create the Sleeves
- Foundation Chain: Work a chain of 58 stitches.
- Cuff: Create slip stitches for 9 chains at the start and end of each row. Use back-loop slip stitches for a textured cuff.
- Honeycomb Stitch: Repeat the same honeycomb stitch pattern as the panels across the rest of the sleeve.
- Add regular increases as needed to adjust the width of the sleeve.
- Complete 33 rows per sleeve and repeat for the second sleeve.
4: Assembly
- Side Seams: Place the panels together (front and back) and align the edges. Whip stitch the sides up, leaving a 6.5-inch gap at the top for the armholes.
- Attach Shoulder Straps: Whip stitch the front-panel straps to the back panel.
- Seam the Sleeves: Fold each sleeve in half and whip stitch along the open seam. Attach sleeves to the armholes by whip stitching around the opening.
5: Add the Finishing Borders
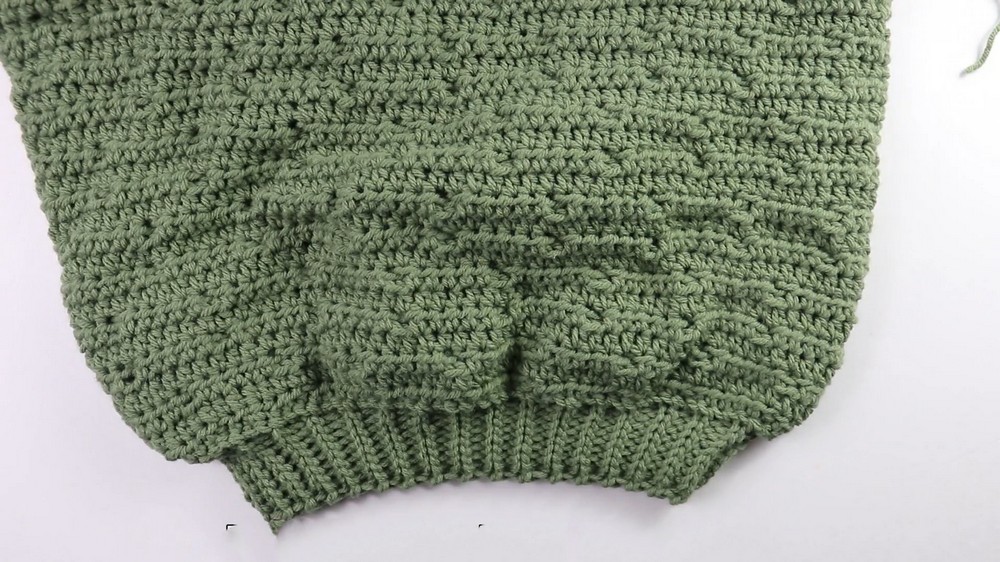
- Bottom Border:
- Attach yarn to the bottom edge, chain 10, and work slip stitches across the chain.
- Attach each row to the main body by slip stitching upward.
- Alternate back-loop slip stitches for texture and repeat until the entire bottom edge is surrounded.
- Collar:
- Attach yarn to the neckline and chain 10.
- Follow the same slip-stitch border process as the bottom edge but use 2 slip stitches per row instead of 3.
Special Features
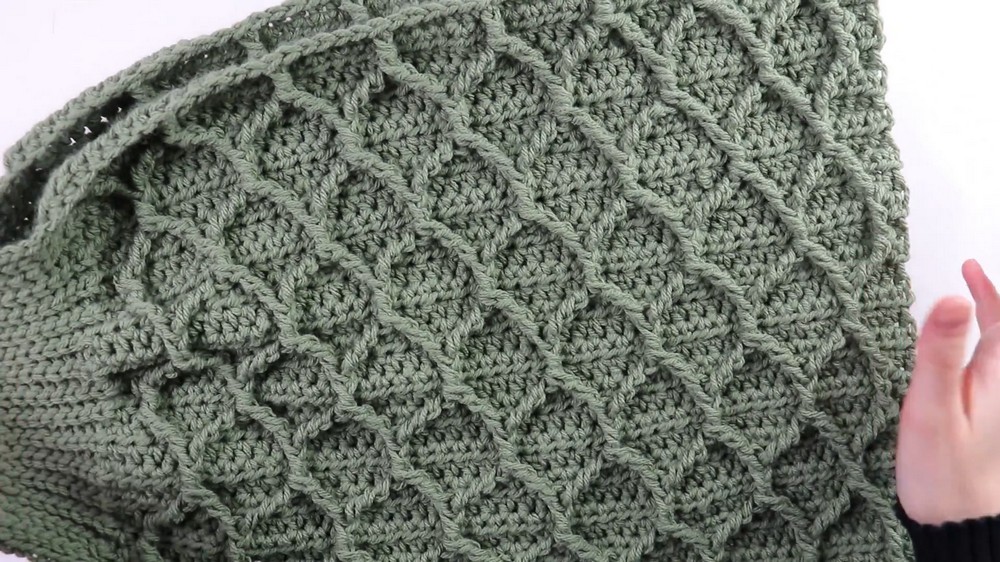
- Honeycomb Stitch: The distinctive honeycomb texture gives the sweater a dynamic and modern look.
- Cuffed Sleeves and Bottom Border: The ribbed pattern on the cuffs adds professional detailing.
- Front Post Trebles for Cabling: Adds depth and elegance, suitable for anyone wanting to hone their crochet skills.
- Custom Sizing: Accommodates a wide range of sizes (X-Small to 3X-Large).
Level of Difficulty
This project is intermediate-level. While the half-double crochets are straightforward, the honeycomb stitch requires working front post trebles, double trebles, and stitch decreases, which need precise attention to detail. Beginners may find it challenging but rewarding for skill-building.
Tutor’s Suggestions
- Anne advises practicing the front post treble crochet and double treble stitches before beginning the panel to avoid frustration.
- Test your gauge with scrap yarn to ensure the correct sizing.
- Periodically measure as you work to make adjustments to the overall length or width.
Uses and Materials
- Uses: This sweater is ideal for cool weather and can be made as a homemade gift or wardrobe addition.
- Materials: 5.5 mm and 4.5 mm hooks, Category 4 yarn, scissors, tapestry needle, and ruler or measuring tape.
Tip
Mark key sections like sleeve openings or where the cables start with stitch markers to stay consistent throughout. This will save time and prevent errors across the panels.
Conclusion
The Honeycomb Stitch Sweater is a chic and cozy addition to your wardrobe. Creator's pattern simplifies the process of creating a timeless garment with intricate cabling and neatly ribbed edges. Although this project challenges your crochet skills, the final result is incredibly rewarding. Whether for personal wear or gifting, this sweater is a work of art that showcases your talent and effort.


