
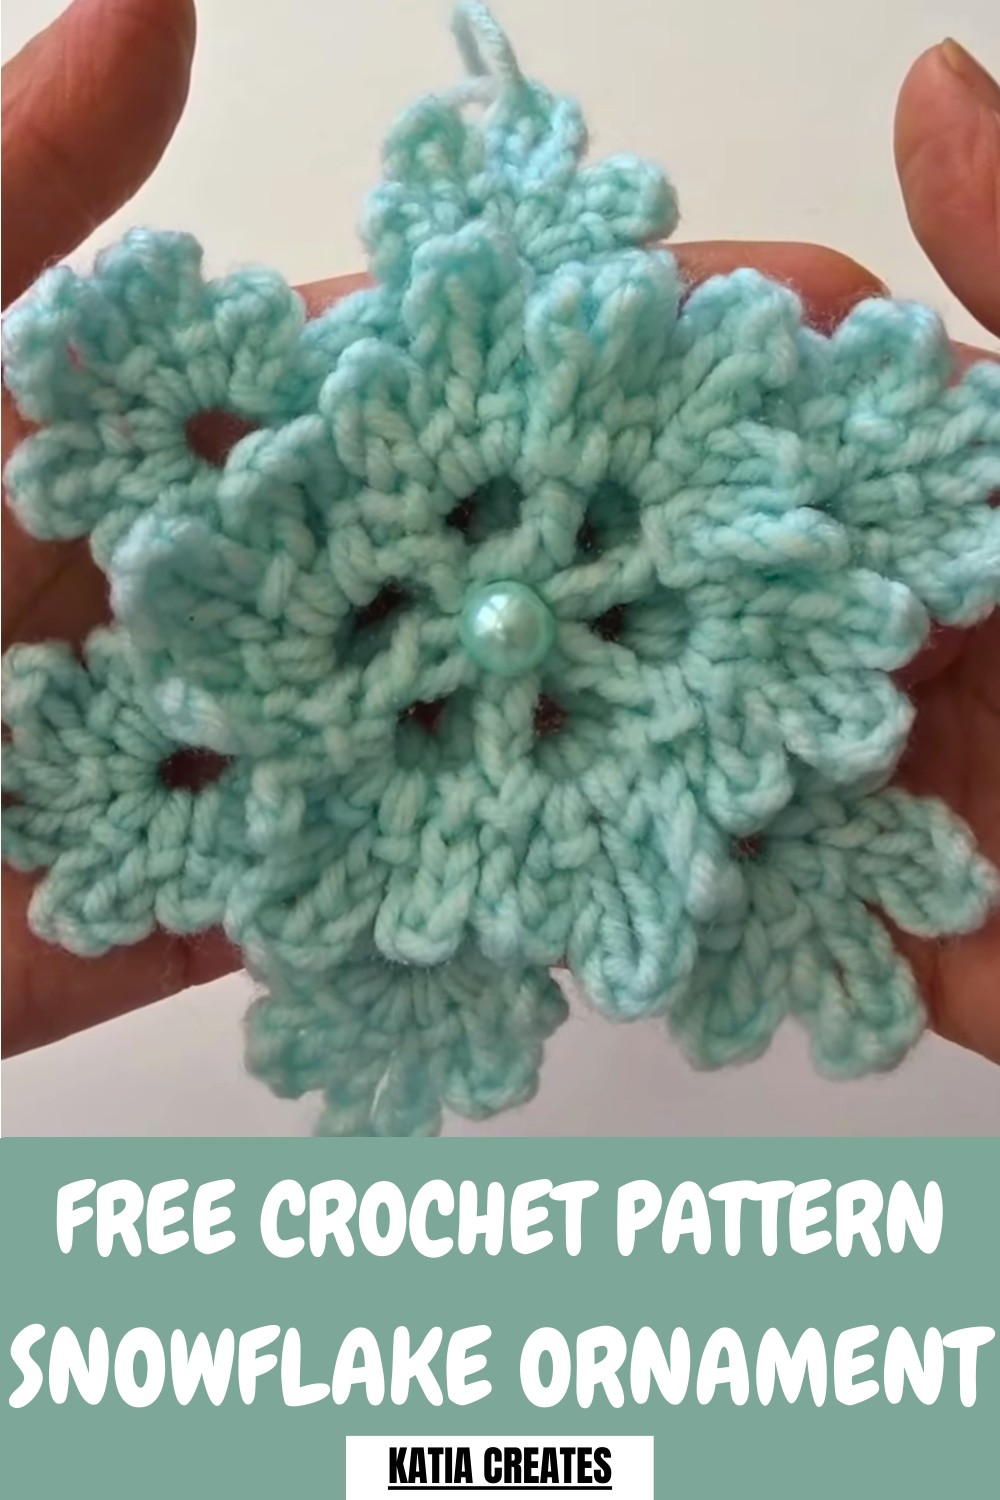
Sparkle your holidays with the Free crochet Snowflake Ornament Pattern, perfect for festive decor, gifting, or adding charming seasonal accents to your home.
Intricate designs and thoughtful skills turns simple yarn into a stunning creation that embodies the beauty of winter. Featuring a layered 3D structure, this crochet Snowflake Ornament combines elegance with charm, showcasing a snowflake-inspired pattern that adds a festive touch to any setting. Ideal for use as Christmas tree decorations, garlands, or wreath accents, it also serves as a meaningful handmade gift during the holiday season.
Holiday Magic Crochet Snowflake Ornaments to Try Now
Its affordability, minimal material requirements, and straightforward pattern make this project accessible to crocheters of all skill levels. Adding embellishments such as pearls or beads enhances its polished appearance, elevating the overall aesthetic.
With its timeless appeal, versatility, and ability to bring warmth and personality to seasonal décor, this creation becomes a cherished addition to holiday traditions and home displays.
How to Crochet a 3D Snowflake Ornament
Materials Required
You’ll need the following items for this project:
- Yarn: Crafter’s Square #4 medium-weight yarn (you only need a small amount).
- Crochet Hook: 4mm crochet hook.
- Pearl: One small pearl or a decorative bead for the center.
- Glue: Hot glue or any strong adhesive.
- Scissors: For cutting yarn.
Uses
This delicate snowflake not only makes a perfect holiday decoration but can also serve:
- As an ornament for your Christmas tree.
- A unique, handmade gift for loved ones.
- A decorative accent for winter-themed crafts or garlands.
Special Features
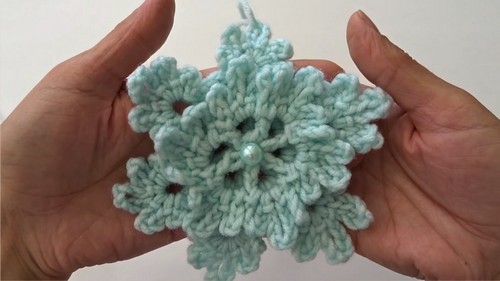
- The snowflake measures approximately 4 inches in size.
- It features a 3D design, achieved by layering two crocheted snowflakes.
- A touch of personalization is added with a pearl center and a loop for hanging.
Level of Difficulty
- Easy: This pattern is beginner-friendly. The creator shows each step in detail, making it accessible to crocheters with minimal experience.
Step-by-Step Process
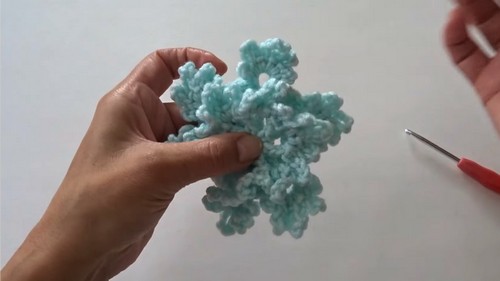
Step 1: Create the First Layer
- Start with a slip knot and a chain 5, then join the chain into a ring with a slip stitch.
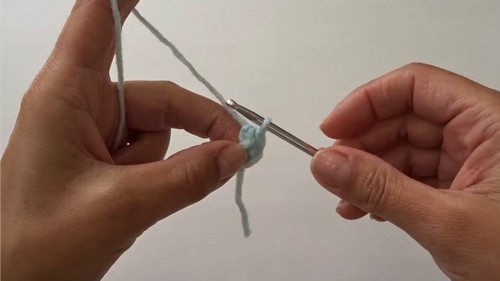
- Chain 5 again (this represents one double crochet + chain 2), and work a double crochet into the ring. Repeat this process (double crochet + chain 2) six times, creating 6 chain-2 spaces.
- Slip stitch into the third chain to complete the round.

- For Round 2, slip stitch into the first chain-2 space, chain 3 (counts as a double crochet), and add 4 double crochets into the same space. Chain 3, jump to the next chain-2 space, and repeat the pattern (5 double crochets + chain 3). Continue until you complete this round. Slip stitch into the starting chain to finish.
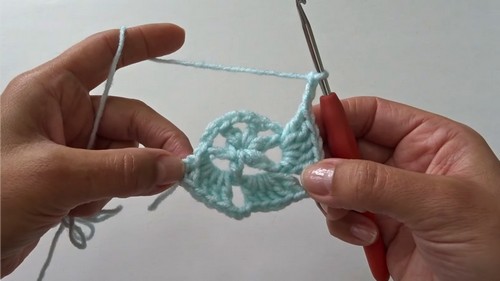
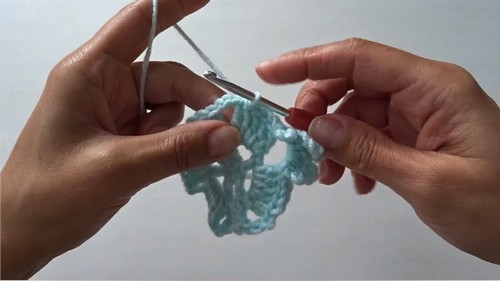
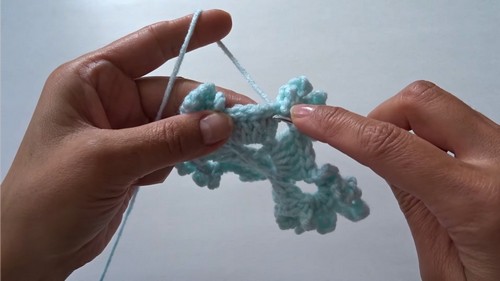
- For Round 3, work into each chain-3 space. Chain 4, slip stitch back into the same space. Then work chain lengths of 6, 8, and another 6 into the space, slip-stitching after each. Finish with a chain 4 and slip stitch. Repeat this pattern around each chain-3 space to create the points of the snowflake.
- Once finished, slip stitch to the beginning, chain 1, cut the yarn, and weave in the ends.
Step 2: Create the Second Layer
- The second snowflake follows a similar but simpler pattern:
- Start with a slip knot, chain 5, and join into a ring.
- Chain 5, work a double crochet into the center, chain 2, and repeat until you have 6 chain-2 spaces.
- For the final row, slip stitch into each chain-2 space, working chains of 6, 8, and another 6. Slip stitch to complete, cut the yarn, and weave in the ends.

- Start with a slip knot, chain 5, and join into a ring.
Step 3: Attach Both Layers
- Using hot glue, apply a small bead of glue to the center of one snowflake and carefully align the second layer on top. Press down gently to secure.
- Glue the pearl to the snowflake's center for added charm.
Step 4: Add a Hanging Loop
- Take a 12-inch piece of yarn, slip it through one of the chain-8 spaces on the snowflake, and tie a knot to create a hanging loop.
Tutor’s Suggestions
- Katie recommends blocking your snowflake to stiffen and shape it. She personally uses steam and hairspray for this, but any blocking method will work.
- Be gentle when tightening knots or pulling on the snowflake to avoid damaging the delicate design.
Conclusion
This 3D snowflake ornament is a simple and rewarding project that can be completed in no time. Its intricate layers add a handmade elegance to your home or holiday gifting. The step-by-step instructions ensure that crocheters of any skill level can follow along successfully.
Tip:


