
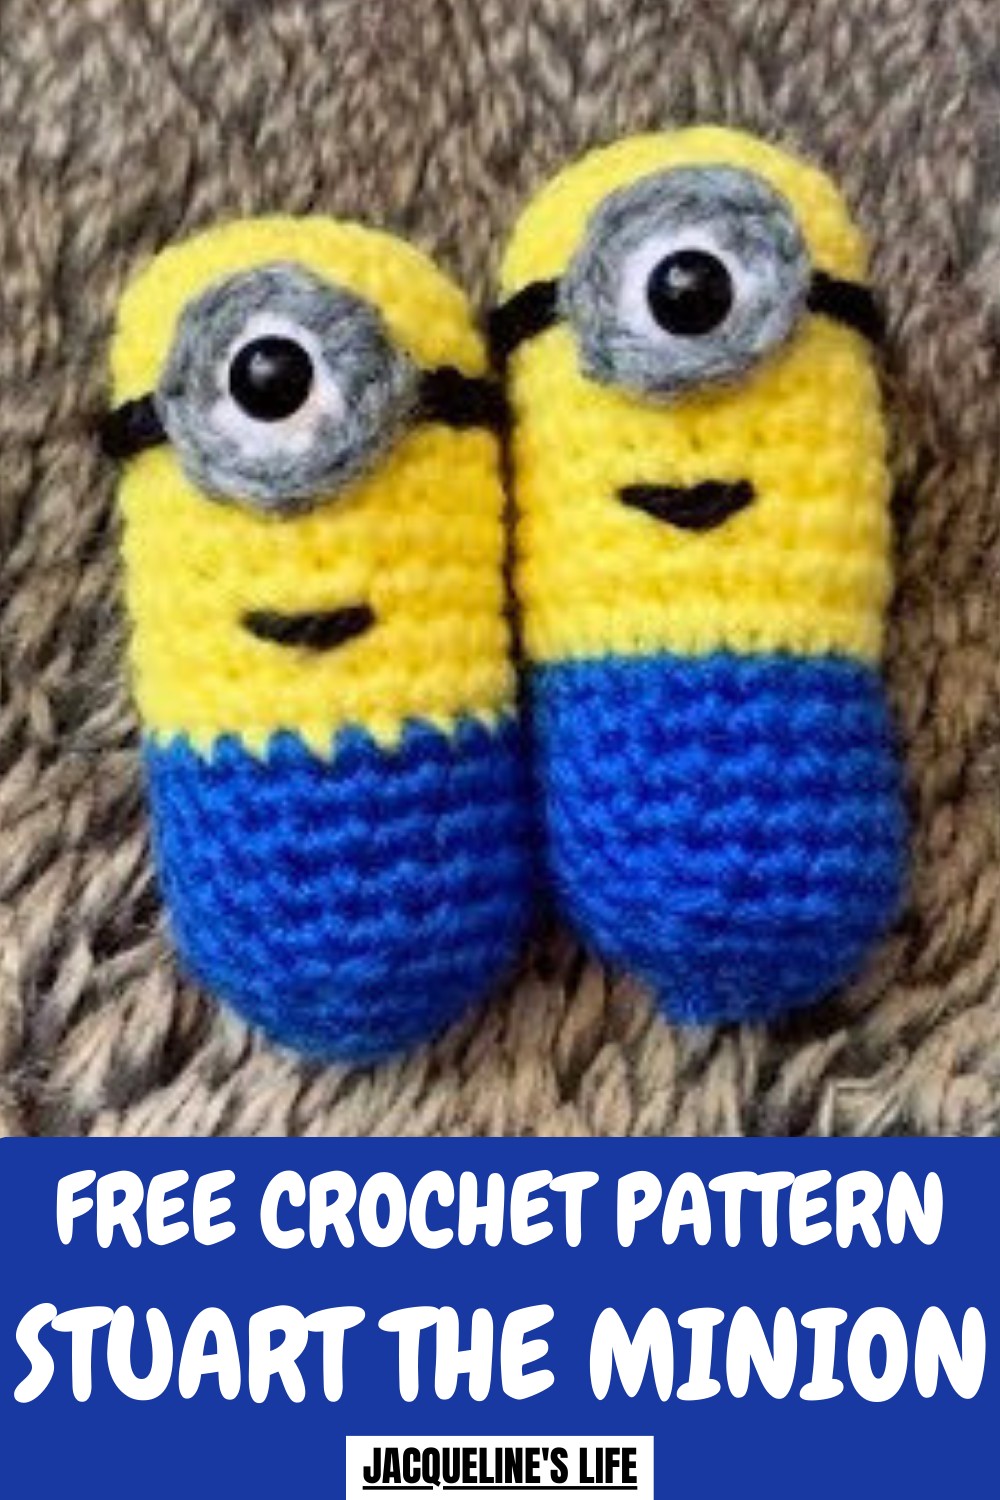
He can become a quirky gift, a cheerful desk buddy, or a unique decoration that sparks conversations. Following this pattern blends humor, artistry, and practicality, turning simple yarn into a lively, personality-filled Minion. Each stitch adds charm and character, making the final piece irresistible. This project delivers fun, satisfaction, and a whimsical creation that delights both maker and recipient alike.
How to Crochet Stewart – Step-by-Step Guide
Materials Needed
To crochet Stewart, you’ll need the following tools and materials:
- Yarn:
- Yellow, Blue, Black, White, and Gray yarns to create Stewart’s body, overalls, and details.
- Ensure medium-weight yarn for a well-formed structure.
- Crochet Hook:
- 4.5mm crochet hook (as used in the tutorial) or adjust based on your preferred size for Stewart.
- Safety Eye:
- Use a safety eye for Stewart's signature look.
- Fiberfill Stuffing:
- Used to stuff the body and keep its shape.
- Hot Glue Gun:
- For securely attaching the safety eye and other small components.
- Additional Tools:
- Scissors.
- Stitch Marker (optional, for tracking rounds).
Uses for the Crochet Stewart
- Decorations: Use it as a fun decorative piece for your workspace, bookshelf, or desk.
- Gifts: Perfect for fans of “Minions” or as a handmade gift for friends and family.
- Skill Practice: A great project to practice techniques like the magic circle, color changes, and invisible decreases.
- Toys: Lightweight and child-friendly, it makes a vibrant, soft toy for kids.
Special Features
- Magic Circle Foundation: This technique helps form a seamless, tight base for Stewart’s cylindrical body.
- Precise Color Changes: The tutorial teaches how to change yarn colors cleanly without leaving gaps.
- Body Shaping with Invisible Decreases: This advanced crochet method minimizes visible stitches for smooth and even shaping.
- Hot Glue Attachment: Creative use of a hot glue gun for securely attaching details like the safety eye and accessories.
- Customizable: Change the yarn thickness, hook size, or colors to make Stewart in varying sizes or styles.
Level of Difficulty
Beginner to Intermediate
- The project starts with simple techniques like single crochet stitches and increases, making it beginner-friendly.
- Intermediate-level skills are required for seamless color changes, handling invisible decreases, and assembling the details (like the eye and band).
Tutor’s Suggestions
- Practice the Magic Circle First: The project begins with the magic circle for the body and eye. If you’re unfamiliar with this technique, practice it before starting.
- Count Stitches Carefully: Use a stitch marker to avoid skipping or misplacing stitches, particularly during increases, decreases, and color changes.
- Adjust Overalls’ Length: Vary the number of blue yarn rounds for the overalls based on tension or your personal preference.
- Match Hook Size to Yarn: Adjust the hook size for the thickness of your yarn if needed. A smaller hook will result in tighter, more structured stitches.
- Use Hot Glue for Stability: The tutor suggests using hot glue to secure the safety eye and band, especially if the closure on the safety eye isn’t long enough.
- Be Patient with Color Changes: The video shows a specific method to reduce gaps during color changes. This method may take extra effort but results in a smoother transition.
Step-by-Step Instructions
Step 1: Crochet the Body
- Start with Yellow Yarn and a Magic Circle:
- Wrap yarn around three fingers to form an “X.” Insert your hook under the circle, pull the yarn through, and twist to form a loop.
- Chain 1 and single crochet 6 times into the loop. Pull the yarn tight to close the circle.

- Increase Rounds:
- Round 2: Work 2 single crochets (SC) into each stitch (12 stitches total).
- Round 3: Crochet 1 SC in the first stitch and 2 SC in the next. Repeat around (18 stitches total).
- Round 4: Crochet 1 SC into the next 2 stitches, then increase in the third. Repeat around (24 stitches total).
- Create the Body Shape:
- Complete rounds 5–9 by crocheting 1 SC into each stitch. Crochet tightly to build a cylindrical body for Stewart.
- Complete rounds 5–9 by crocheting 1 SC into each stitch. Crochet tightly to build a cylindrical body for Stewart.
- Color Change:
- Switch from yellow to blue yarn in Round 10 to start Stewart’s overalls. Use a slip stitch with the blue yarn and continue single crocheting. Follow the video’s method for a clean color transition.
- Crochet the Overalls:
- For Rounds 10–15, crochet 1 SC into each stitch using blue yarn. Adjust the number of rounds based on your tension and desired length.
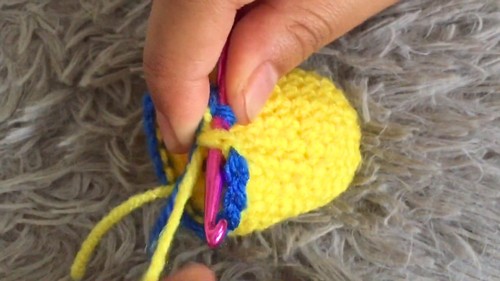
- For Rounds 10–15, crochet 1 SC into each stitch using blue yarn. Adjust the number of rounds based on your tension and desired length.
- Decreases and Stuffing:
- Round 16: Begin with 1 SC, then perform an invisible decrease by working into only the back loops of stitches. This helps narrow Stewart’s body.
- After the first round of decreasing, stuff the body with fiberfill to maintain its structure.
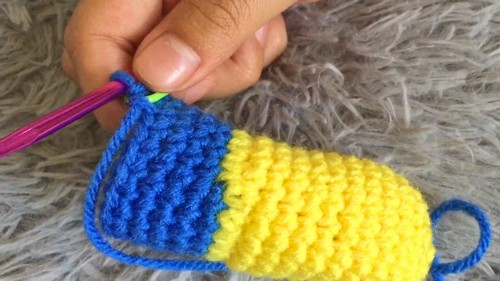
- Continue to alternate single crochet rows and decreases until the bottom of the body is closed.
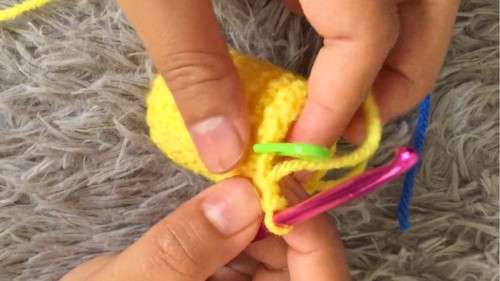
Step 2: Create the Eye
- Make a White Eye Base with a Magic Circle:
- Crochet 6 SC into a magic circle and finish with a slip stitch.
- Attach Gray Yarn:
- Join gray yarn using the same color change method. Crochet into the white base with a combination of single crochets and increases to expand the eye slightly.

- Join gray yarn using the same color change method. Crochet into the white base with a combination of single crochets and increases to expand the eye slightly.
- Attach the Safety Eye:
- Apply hot glue to the back of the crocheted eye and attach the safety eye securely in the center.
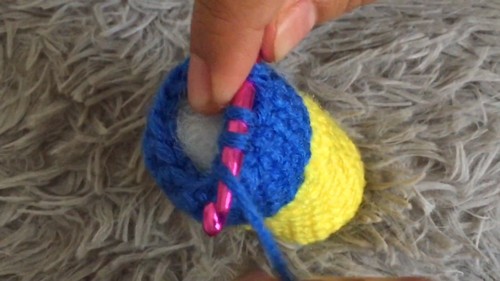
Step 3: Create and Attach the Eye Band
- Chain the Band Using Black Yarn:
- Create a chain that fits around Stewart’s head.
- Attach the Band:
- Wrap the band around the head and secure it using a hot glue gun. Then glue the crocheted eye to the center of the band.

- Wrap the band around the head and secure it using a hot glue gun. Then glue the crocheted eye to the center of the band.
Conclusion
Congratulations! You’ve now crocheted Stewart, complete with his overalls and signature eye. This Minion-inspired project is a fun and creative way to practice essential crochet techniques, including the magic circle, color changes, and invisible decreases. With a bit of patience and practice, you can create your own collection of Stewarts in varying sizes or designs.
Making Stewart allows you to refine your amigurumi skills while creating a decorative piece or gift that will bring a smile to anyone who sees it.
Pro Tip
To avoid visible gaps in color changes, follow the slip stitch method shown in the tutorial and practice it on a small test piece beforehand. Tightening the first stitch of the new color also helps create a seamless transition.


