
Bring buzzing joy with the Free crochet Bee Amigurumi Pattern, guiding you to create a cheerful little bee perfect for gifts, desks, and decor.
A soft, buzzing character comes to life through gentle curves and bright, happy colors that instantly catch the eye. With its plump striped body, tiny wings, and sweet expression, this little bee has a playful look that feels comforting and full of personality. It works beautifully as a shelf accent, nursery decoration, desk companion, or a heartfelt handmade gift.
Sweet Crochet Bee Amigurumi Pattern Perfect for Kids
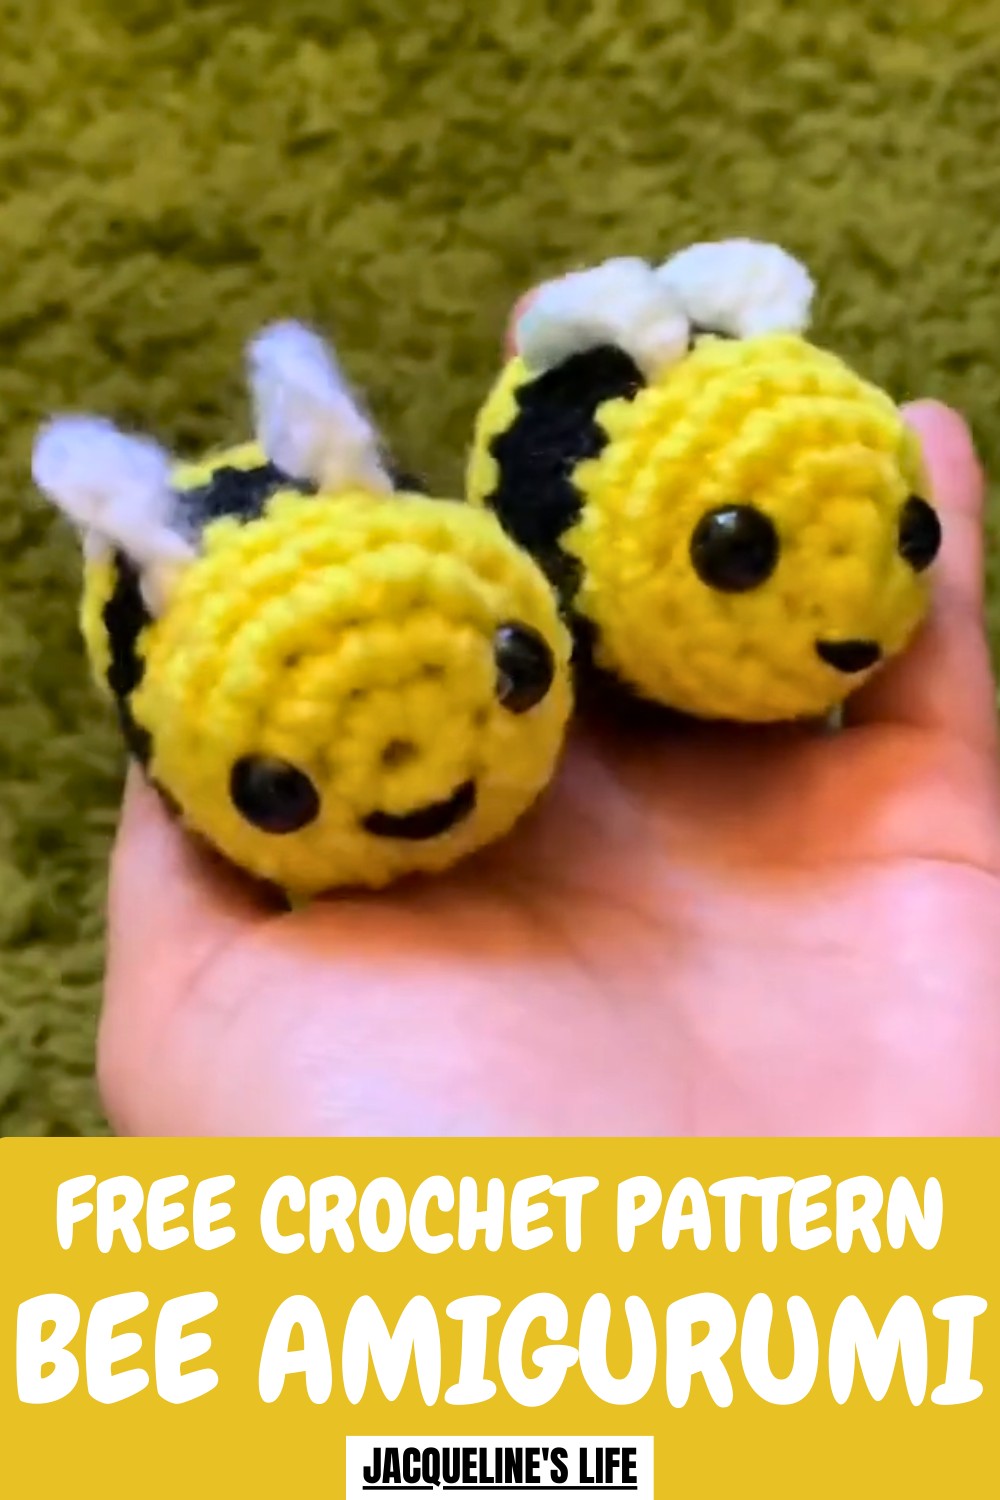
Small in size yet full of charm, it’s easy to display or carry without taking up space. Making this piece offers a calm and satisfying experience, helping improve hand coordination and stitch confidence while producing a clean, well-shaped result. The contrast between the stripes and wings adds visual interest, while neat finishing keeps the bee sturdy and long-lasting. This adorable bee brings together beauty and usefulness, adding warmth, cheer, and a handmade touch to everyday spaces in a way that feels joyful and inviting.
Materials Needed
The tutor lists the following materials to complete the crochet bee:
- 5mm Crochet Hook
- Yellow, Black, and White Yarn (Weight: One Pound)
- Scissors
- Stitch Marker
- Fiberfill or Stuffing
- Safety Eyes (purchased online)
Uses
- Can be turned into a keychain.
- A personalized and cute handmade gift.
- Decor for kids' rooms or craft displays.
Special Features
- Simple Customization: Add antennas, additional stripes, or adjust the wing placement for a unique look.
- Beginner-Friendly Techniques: Uses single crochet, half-double crochet, increases, decreases, and basic color changes.
- Compact Design: Small and lightweight, perfect for keychains.
- Creative Face Placement: The tutor highlights how slight changes in face placement can make the bee unique.
Level of Difficulty
Beginner-Intermediate
While this tutorial is beginner-friendly overall, color changes and placing safety eyes may require additional focus for those just starting out. The tutor shares helpful guidance to simplify these steps.
Tutor’s Suggestions
- Face Placement: Adjust the placement of safety eyes and the mouth before finalizing to avoid positioning mistakes.
- Securing Color Changes: Tie the color-changing yarn pieces together for better stability.
- Wing Curve: Avoid tightening your half-double crochet stitches during wing creation to maintain a natural curve.
Step-By-Step Process
1. Creating the Body
Rounds 1-11 (Yellow and Black Yarn):
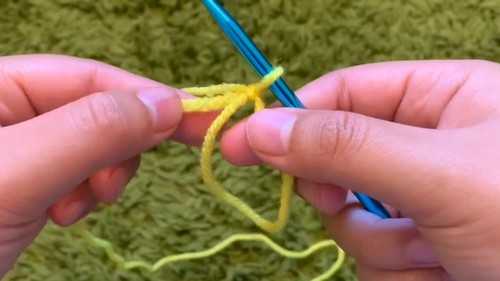
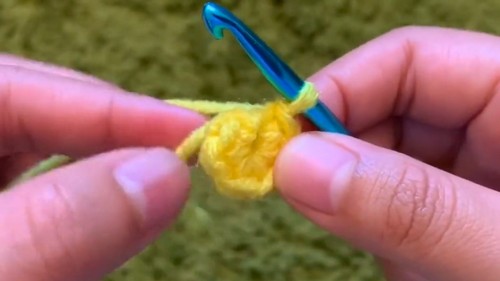
- Start with a magic circle using yellow yarn. Crochet 6 single crochets into the circle and close with a slip stitch.
- Round 2: Increase into every stitch and end with 12 stitches.
- Round 3: Alternate between single crochet and increase; end with 18 stitches.
- Rounds 4-5: Single crochet around (maintain 18 stitches).
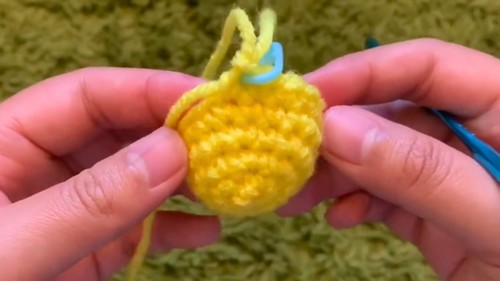
- Round 6: Start the color change by switching to black yarn seamlessly. Single crochet around.
- Rounds 7-8: Single crochet in black.
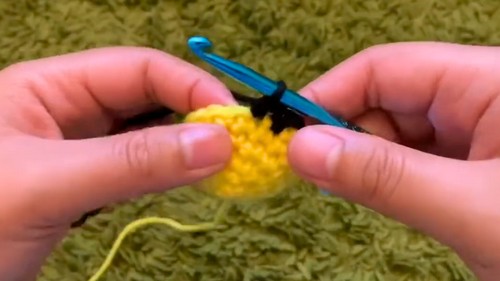
- For broader stripes, alternate two rounds of black with two rounds of yellow.
2. Transition Back to Yellow
Rounds 9-11 (Yellow Yarn):
- Cut off black yarn after Round 8 and reattach yellow. Single crochet for the remaining rounds until Round 11.
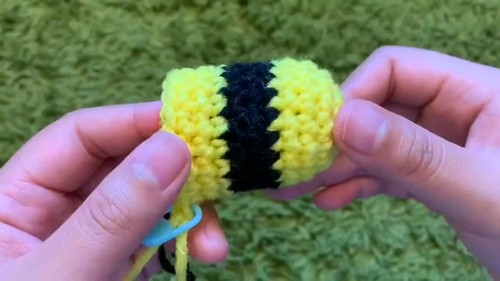
- At the end of Round 11, the body should take form.
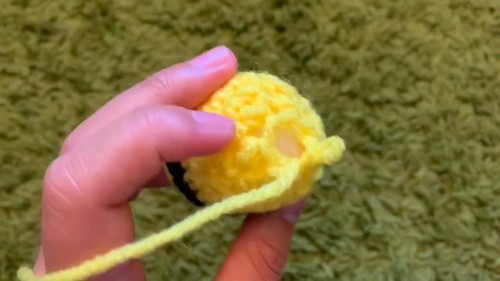
3. Adding the Face
- Insert safety eyes into the yellow section thoughtfully, adjusting placement before securing.
- Add a little smile using thread or yarn.
4. Shaping the Body with Decreases
Rounds 12-13:
- Begin decreasing stitches to shape the bee.
- Round 12: Single crochet in the first stitch and decrease in the next; repeat until you have 12 stitches.
- Round 13: Decrease all stitches until 6 remain. Add fiberfill stuffing to the bee before closing.
- Cut off extra yarn and use threading techniques to secure and close the hole.
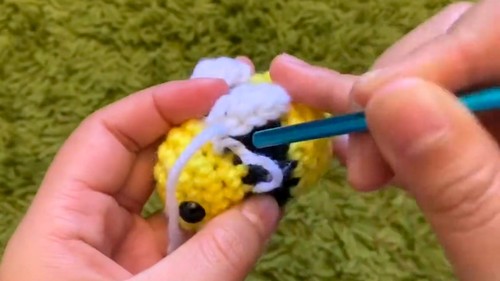
Making the Wings
White Yarn:
- Create a slipknot and chain 5 stitches.
- Work single crochet into the second chain, followed by two half-double crochets into the next stitches, and a single crochet into the last stitch.
- Tie off the yarn to create a wing.
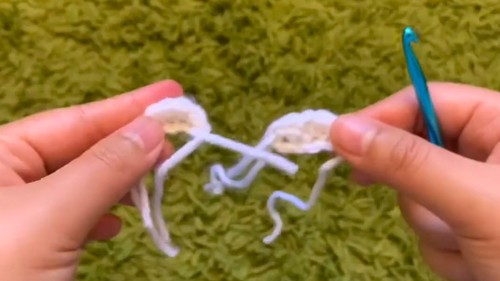
- Make two wings and tie them onto the bee's back, ensuring proper placement and alignment.
Final Assembly
- Secure the wings’ placement on both sides of the bee with yarn or your hook.
- Hide remaining excess yarn inside the bee for a cleaner look.
Conclusion
Your crochet bee is now complete and ready to “buzz" with cuteness! This project is quick, satisfying, and fun, combining beginner techniques with opportunities for customization. Whether you turn it into a keychain or gift it, this little bee is sure to spread joy.
Pro Tip
Tie color-changing yarn securely during transitions to minimize unraveling. If you're unsure about stripe placement, add extra rounds of the chosen color to balance the design!


