
Make a lovable galactic figure with this Free crochet Baby Yoda Amigurumi Pattern, adding cute personality to shelves, desks, and cozy displays for fans of soft decor.
Soft curves, wide ears, and a peaceful expression give this little character a magical charm that feels instantly lovable. Its balanced proportions and gentle colors create a soothing, cute appearance that stands out without being loud. The overall look feels cozy and collectible, making it appealing to both kids and adults who enjoy character-based handmade items.
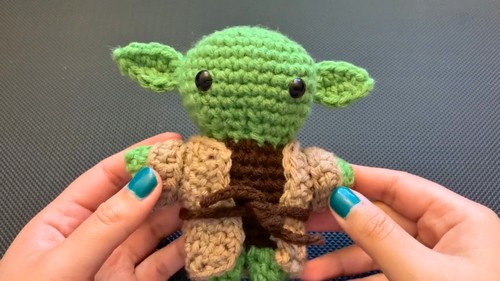
Tiny Crochet Baby Yoda Amigurumi Pattern with Big Cuteness
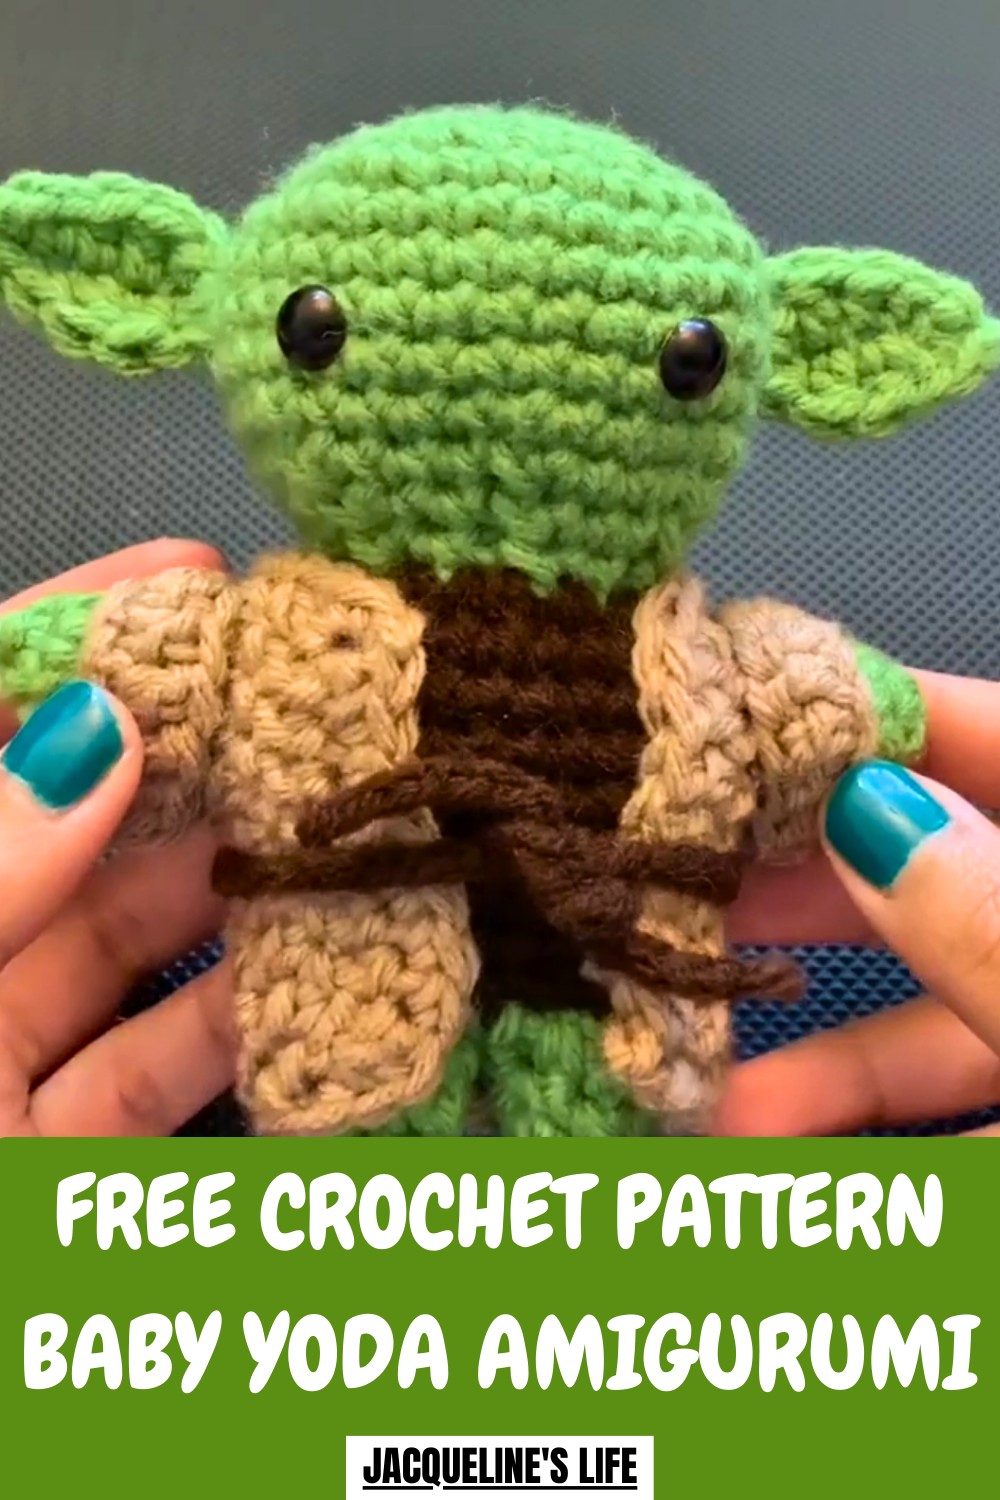
This amigurumi works beautifully as room décor, a desk companion, or a thoughtful themed gift. Its small size makes it easy to display, while the sturdy form helps it keep its shape over time. One of the main benefits is its emotional appeal—it adds warmth, personality, and a sense of comfort to any space.
The finished piece feels polished and detailed without looking busy, which enhances its long-lasting charm. Overall, it combines visual beauty, practical display use, and fan appeal, resulting in a cute handmade figure that feels special, memorable, and enjoyable to have around every day.
How to Crochet a Baby Yoda – Step-by-Step Guide
Materials Used
To complete this Baby Yoda crochet project, you will need:
- Yarn:
- Grass Green Yarn: For the head, arms, legs, and ears (Karen 1-Pound Yarn; Weight size: 4).
- Dark Brown Yarn: For the body.
- Light Brown Yarn: For the jacket and cuffs.
- Tools:
- 5mm Crochet Hook.
- Safety Eyes.
- Stitch Marker.
- Threaded Needle.
- Hot Glue Gun.
- Scissors.
- Stuffing/Fiberfill.
Uses for the Crochet Baby Yoda
- Decorative Item: Place Baby Yoda on a shelf, desk, or table for a charming visual treat.
- Personalized Gift: It’s a great handmade gift for fans of "The Mandalorian" or Star Wars.
- Toys or Collectibles: Works as a soft toy for kids or part of a crochet collectibles set.
- Crochet Practice: Helps enhance your crochet skills by practicing different techniques and shapes.
Special Features
- Customizable Design: Adapt the size of the head, body, or jacket for personalization.
- Jacket and Belt: Baby Yoda’s outfit includes a removable light brown jacket and a simple belt that can be tied.
- Simplified Assembly: The arms are glued to the jacket for ease, eliminating the need for sewing.
- Compact and Adorable: The finished product is a cute, compact-sized Baby Yoda, perfect for carrying around or displaying.
- Beginner-Friendly Magic Circle: Learn to use the magic circle technique for crocheting a rounded head.
Level of Difficulty
Beginner to Intermediate
- Most of the work involves single crochet stitches, increases, and decreases (invisible and normal).
- Some assembly is required to attach separate components.
- Handling smaller pieces like ears and arms can be a bit tricky for beginners.
Tutor’s Suggestions
The instructor provides helpful pointers throughout the video:
- Use a Stitch Marker: Always mark the end of your rounds to avoid errors in your stitch count.
- Work Tight and Even Stitches: Maintain consistent tension for small projects to achieve a clean finish.
- Add Safety Eyes Early: Place the safety eyes before stuffing the head to avoid difficulties post-stuffing.
- Glue for Simplicity: Glue Baby Yoda’s arms to the jacket for easier assembly instead of traditional sewing.
- Customize Height/Width: Add or subtract rows as needed to adjust the doll’s proportions to your liking.
- Neat Borders: Single crochet around the edges of the jacket for a clean and polished finish.
Step-by-Step Instructions
Step 1: The Head
- Create a magic circle with green yarn.
- Wrap yarn around your fingers to create an "X", insert a hook into the loop, and grab yarn to form the circle.
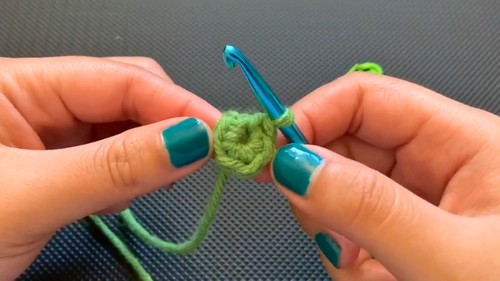
- Wrap yarn around your fingers to create an "X", insert a hook into the loop, and grab yarn to form the circle.
- Round Instructions:
- Round 1: Single crochet (SC) 6 times into the circle. Slip stitch into the first stitch to close the round.
- Round 2: Increase in every stitch (12 stitches).
- Round 3: Alternate 1 SC and 1 increase (18 stitches).
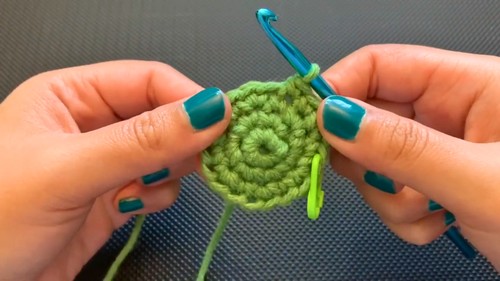
- Round 4: Alternate 2 SCs and 1 increase (24 stitches).
- Round 5: Alternate 3 SCs and 1 increase (30 stitches).
- Continue SC rows (30 stitches per round) for Round 6 to Round 10 to create length.
- Decreasing Rounds:
- Round 11: Use an invisible decrease every 3 stitches (24 stitches).
- Round 12: Invisible decrease after every 2 stitches (18 stitches).
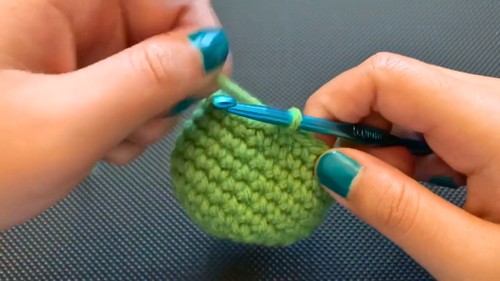
- Round 13: Invisible decrease followed by 1 SC (12 stitches).
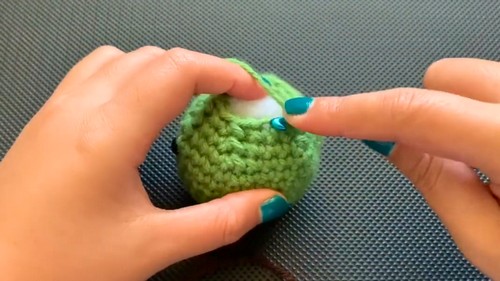
- Add safety eyes and stuff the head before closing it. Adjust eye placement for the desired look.
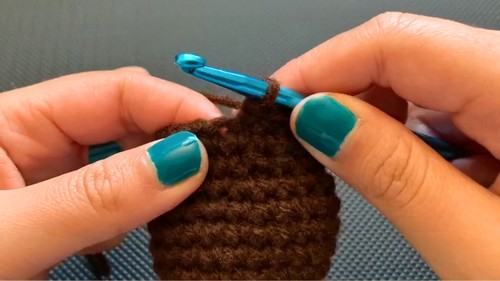
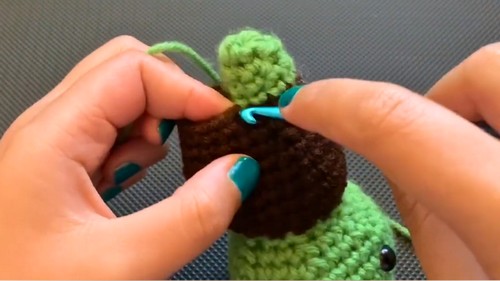
Step 2: The Body
- Attach dark brown yarn to the head’s last stitch to begin the body.
- Round 1 to Round 6: SC in each round (24 stitches per round).
- Begin decreasing:
- Round 7: Invisible decrease every 2 stitches (18 stitches).
- Round 8–9: SC to add body length.
- Stuff the body lightly, and switch back to green yarn for the legs.
Step 3: The Legs
- Split the body (18 stitches total) into two halves (9 stitches each) for the legs.
- For each leg:
- Round 1: SC the first 9 stitches.
- Round 2: Follow decrease rounds to reduce stitches for shaping.
- Stuff the leg lightly before closing.
- Repeat the process for the second leg.
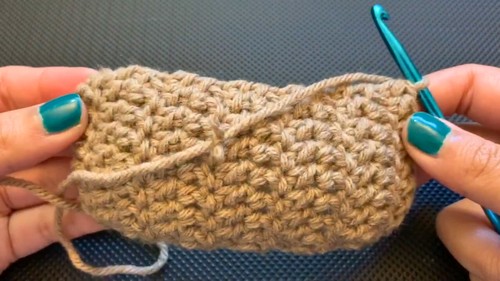
Step 4: The Jacket
- Use light brown yarn and chain 10 stitches for the base.
- Work 9 double crochets (DCs) across the chain, skip the first stitch, and repeat 13 rows to create the jacket base.
- Add a SC border around the jacket for tidy edges.
- Optionally, adjust the number of rows to make the jacket longer or wider.
Step 5: The Belt
- Use dark brown yarn and chain 43 stitches or adjust the chain length to fit around Yoda’s waist.
- Tie the belt around the finished jacket.
Step 6: The Arms
- Create a magic circle with green yarn and SC 4 times into the circle.
- Work SC rounds to give length to the arm.
- Make light brown arm cuffs: Create a chain of 14, SC along the chain, and attach it to the arm.
- Stuff the arms lightly, and glue them to the jacket for easier assembly.
Step 7: The Ears
- Chain 6 stitches with green yarn for the ear base.
- Alternate SC, half-double crochet (HDC), and double crochet (DC) to shape the ear.
- Create a second ear the same way and attach them to Yoda’s head with hot glue.
Conclusion
Congratulations on completing your crochet Baby Yoda! This adorable creation is a perfect project for Star Wars lovers or anyone who enjoys making quirky handmade gifts. Crocheting Yoda helps to practice working in rounds, handling tight spaces, and assembling different pieces altogether. Thanks to its customizable design, you can tweak sizes, colors, and the jacket's fit for your unique touch.
Pro Tip
When working on tiny pieces like the arms or ears, keep your stitches tight and use a stitch marker to avoid losing count. Additionally, plan your safety eye placement before adding stuffing to make adjustments easier!


