
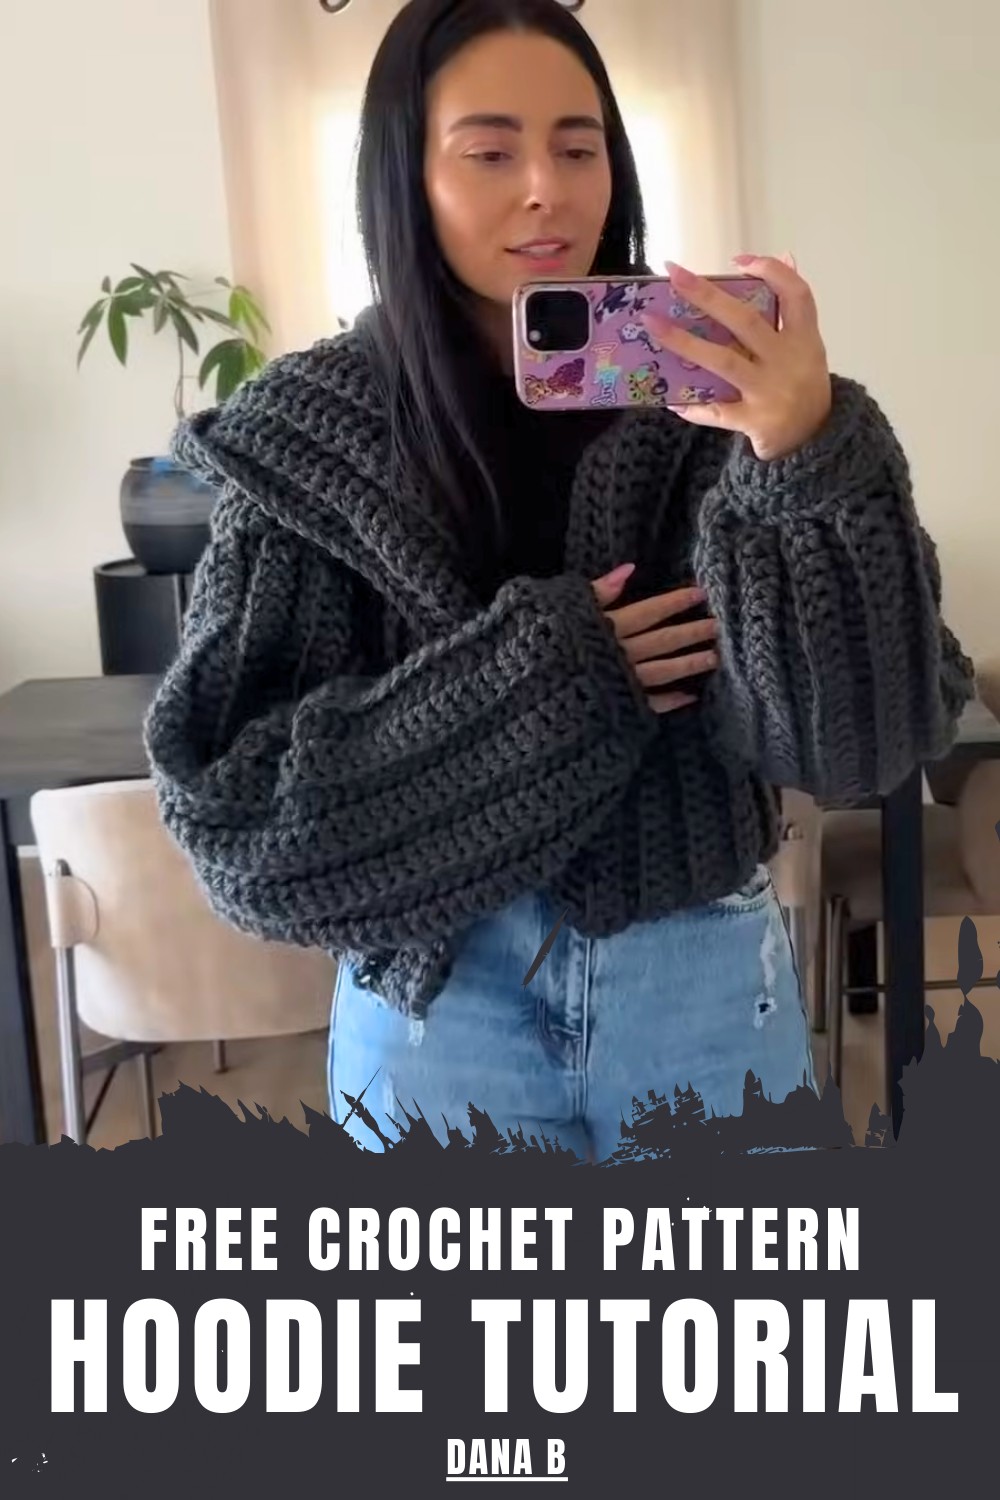
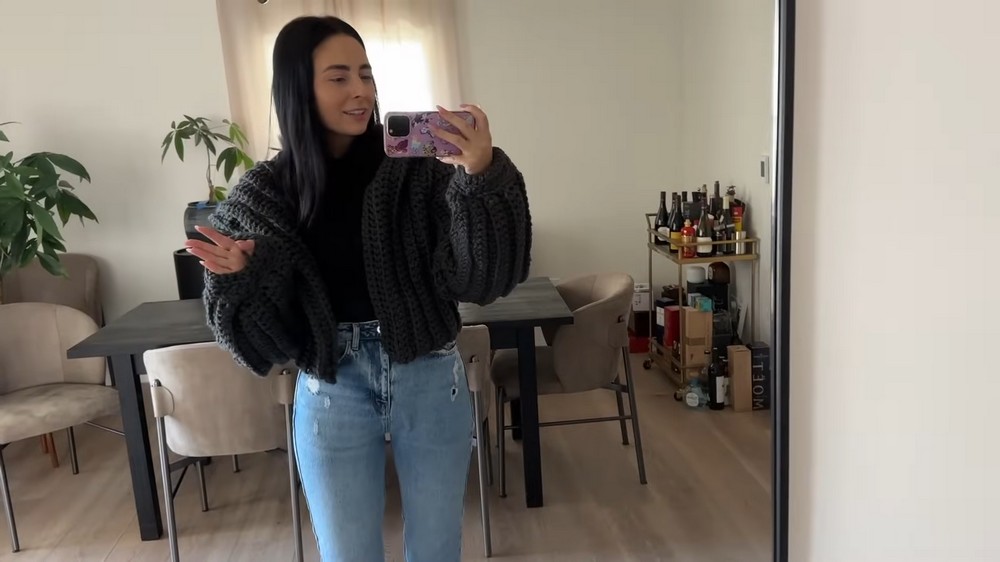
Layer up comfortably with this Free Crochet Hoodie Pattern for cozy, textured hoodies that offer warmth, casual style, and everyday comfort.
Crocheters enjoy the flexibility to customize colors, yarn types, and details, resulting in a truly personalized creation. Beyond its visual charm, the design provides durability and softness, ensuring it remains a favorite wardrobe staple over time.
Ideal for both beginners and experienced crocheters, the process feels rewarding as each row brings the garment to life. It reflects a perfect balance of creativity, comfort, and contemporary handmade fashion that never goes out of style.
Step-by-Step Details
1. Materials Needed:
- Yarn: Paintbox Yarns Simply Super Chunky (16 balls for a small/medium size; yarn weight 6).
- Cost: $5 per roll, often on sale for $3.
- Crochet Hook: 8mm hook.
- Optional Tools: Scissors and a yarn needle for weaving in ends.
2. Making the Sleeves:
- Begin with a chain of 43 for the sleeve. Adjust this number based on how baggy or tight you want it to be (ensure the chain count is even).
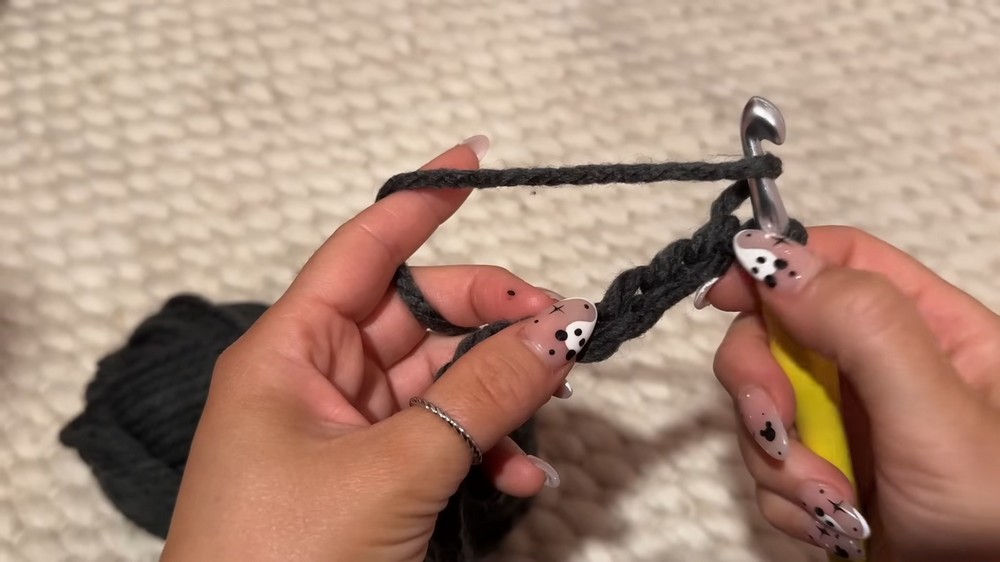
- Work double crochet stitches in each chain, skipping the first chain next to the hook.
- For the second row onward, use back loops only to create a “faux-knit” look.
- Chain 2 to start each row, skip the first stitch, and continue with double crochet stitches into the back loops.
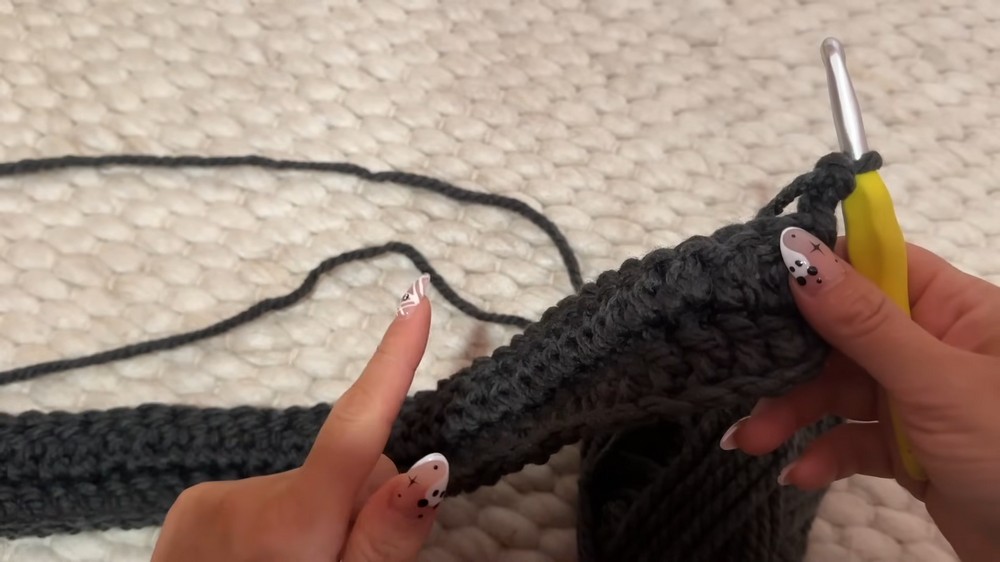
- Repeat for a total of 19 rows for each sleeve.
- Make two sleeves using the same process.
3. Front Panels:
- Start by chaining 34 stitches (or adjust for your desired length; tutor’s version is cropped).
- Similar to the sleeves, skip the first chain and work double crochets across the entire row.
- Continue working in back loops only, following the same pattern as the sleeves, for 5 rows to create the shoulder sections.
- For a smooth and modern look, the hood is connected seamlessly, requiring a chain of 34 stitches off the body to extend into the hood.
4. Hood Construction:
- Work double crochets into the chain created for the hood, and then return to the body using the back-loop pattern.
- Continue this pattern for 8 rows total to construct the front portion of the hood.
- For the back of the hood, attach the yarn where the front hood ends and continue crocheting in decreasing rows:
- Decrease at the start and end of each row to shape the hood.
- Decrease for a total of 7 rows, alternating between skipping a stitch and combining two stitches for a seamless design.
5. Back Panel:
- Start with a chain of 34 stitches, matching the front panels' length.
- Work double crochet in back loops only, replicating the earlier technique.
- Crochet for 23 rows for the back, considering your chosen crop length.

6. Assembly:
- Lay out all the panels:
- Two sleeves, two front panels with hoods attached, and one back panel.
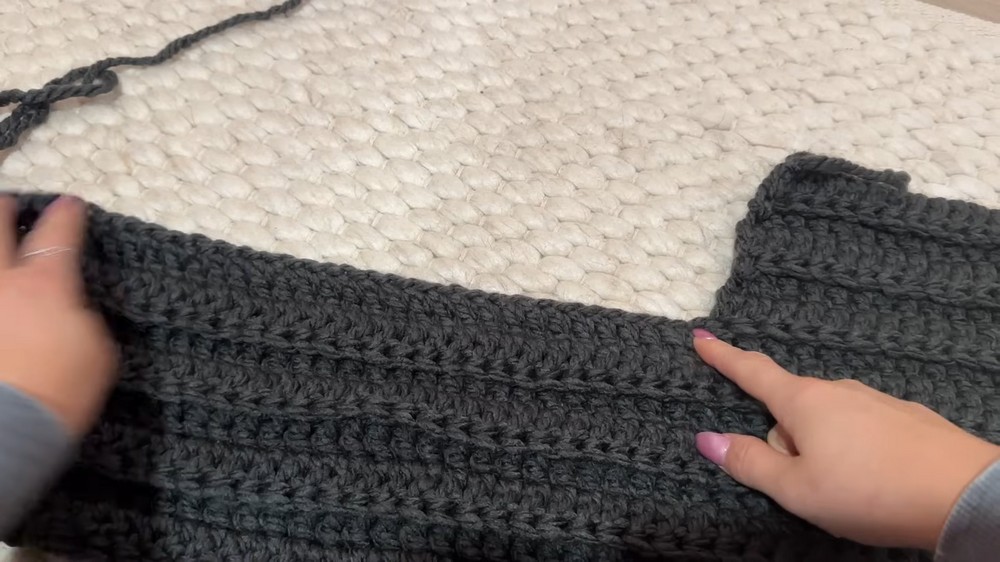
- Connect the front panels to the back panel along the shoulder seams using single crochet stitches.
- Attach the sleeves to the shoulder seam and align them along the body. Fold and seam sections together, working along the sides and sleeves in one single stitch path to reduce reattaching yarn.
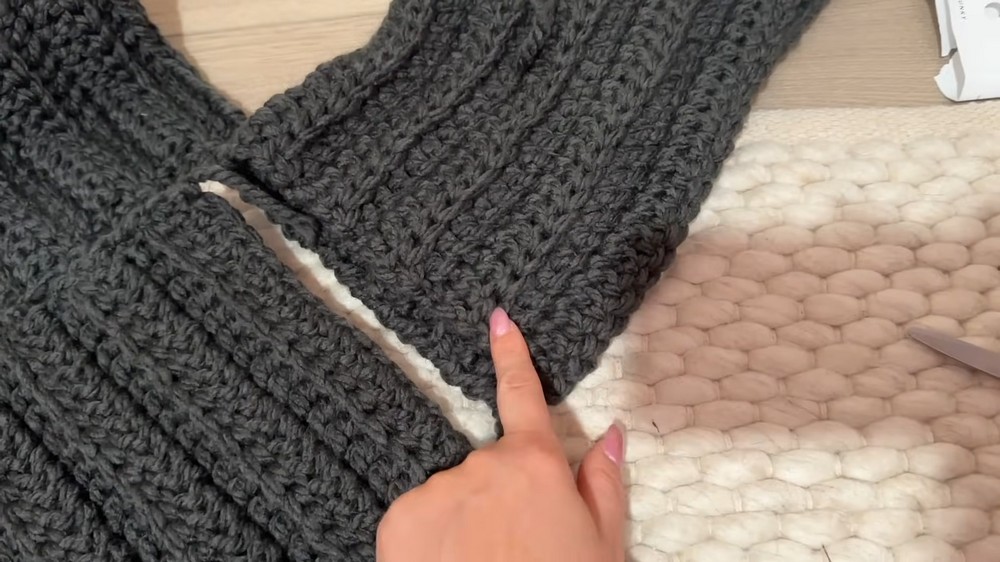
- Attach the hood sections together:
- Fold the hood upward and seam the top edges using single crochet stitches.
- Weave in any loose ends.
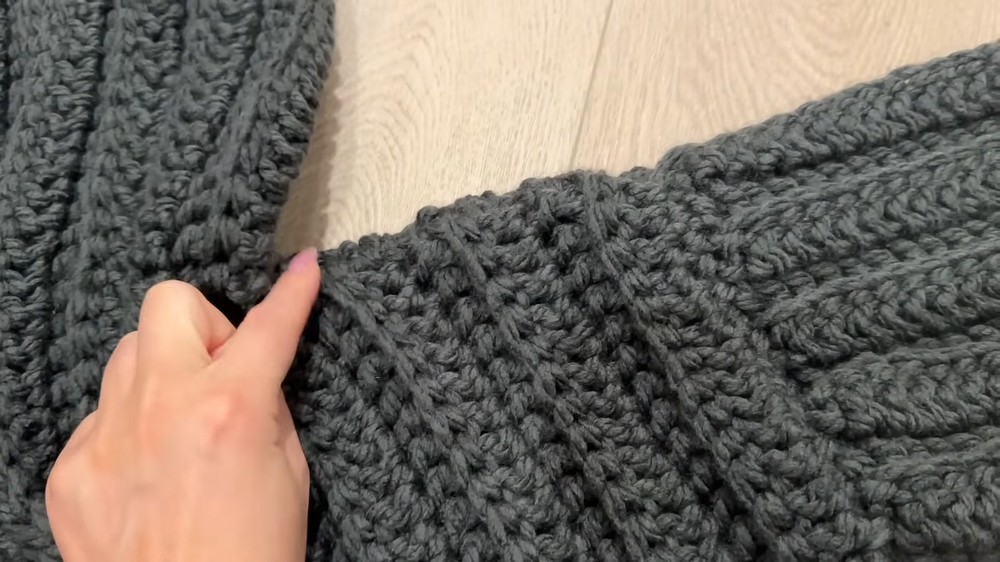
7. Sleeve Cuffs:
- Work a row of single crochet evenly around the sleeve’s wrist edge.
- Follow with double crochets in the back loops only, alternating rows of:
- Three standard double crochets and a decrease (to taper the end).
- Finish with a single crochet row through front loops only for a decorative finish.
Special Features
- Oversized Fit: The sweater has a cozy, baggy design perfect for layering.
- Seamless Hood: The hood flows smoothly from the front panels for a clean, professional look.
- Faux-Knit Design: The back-loop-only crochet creates a knit-like texture.
- Customizable: The pattern allows you to tweak the length, width, and sleeve size.
Level of Difficulty
The tutorial is suitable for intermediate crocheters. Beginners may find it slightly challenging due to the seamless hood construction and pattern consistency. However, the clear instructions on decreasing stitches and attaching panels make it approachable with practice.
Tutor’s Suggestions
- Use back loops only to achieve the knit-style finish.
- Adjust the lengths by increasing or decreasing chains as required for your size.
- For a seamless look, reattach yarn or tie knots at the edges to avoid visible joins in the middle of rows.
- Replay difficult sections of the video to fully grasp techniques such as decreases and assembling panels.
Uses and Materials
- Uses:
- Perfect for fall and winter wear, providing warmth and style.
- A great gift idea for loved ones.
- A trendy addition to your handmade wardrobe that's both functional and fashionable.
- Materials:
- Paintbox Yarns Simply Super Chunky yarn (bulk weight).
- 8mm crochet hook.
- Scissors and needle for finishing.
Tip
Before starting the sweater, practice working with back-loop-only crochet on scrap yarn to get comfortable with the faux-knit texture. It will greatly improve your confidence when working on the actual project.
Conclusion
This chunky oversized hooded sweater is the ultimate cozy and stylish addition to your wardrobe, making it a worthwhile project for crocheters looking to challenge themselves. Its faux-knit finish, seamless construction, and customization options set it apart as a unique and fun creation. Follow the step-by-step instructions, experiment with sizing and colors, and enjoy crocheting a piece that's both functional and fashionable.


