
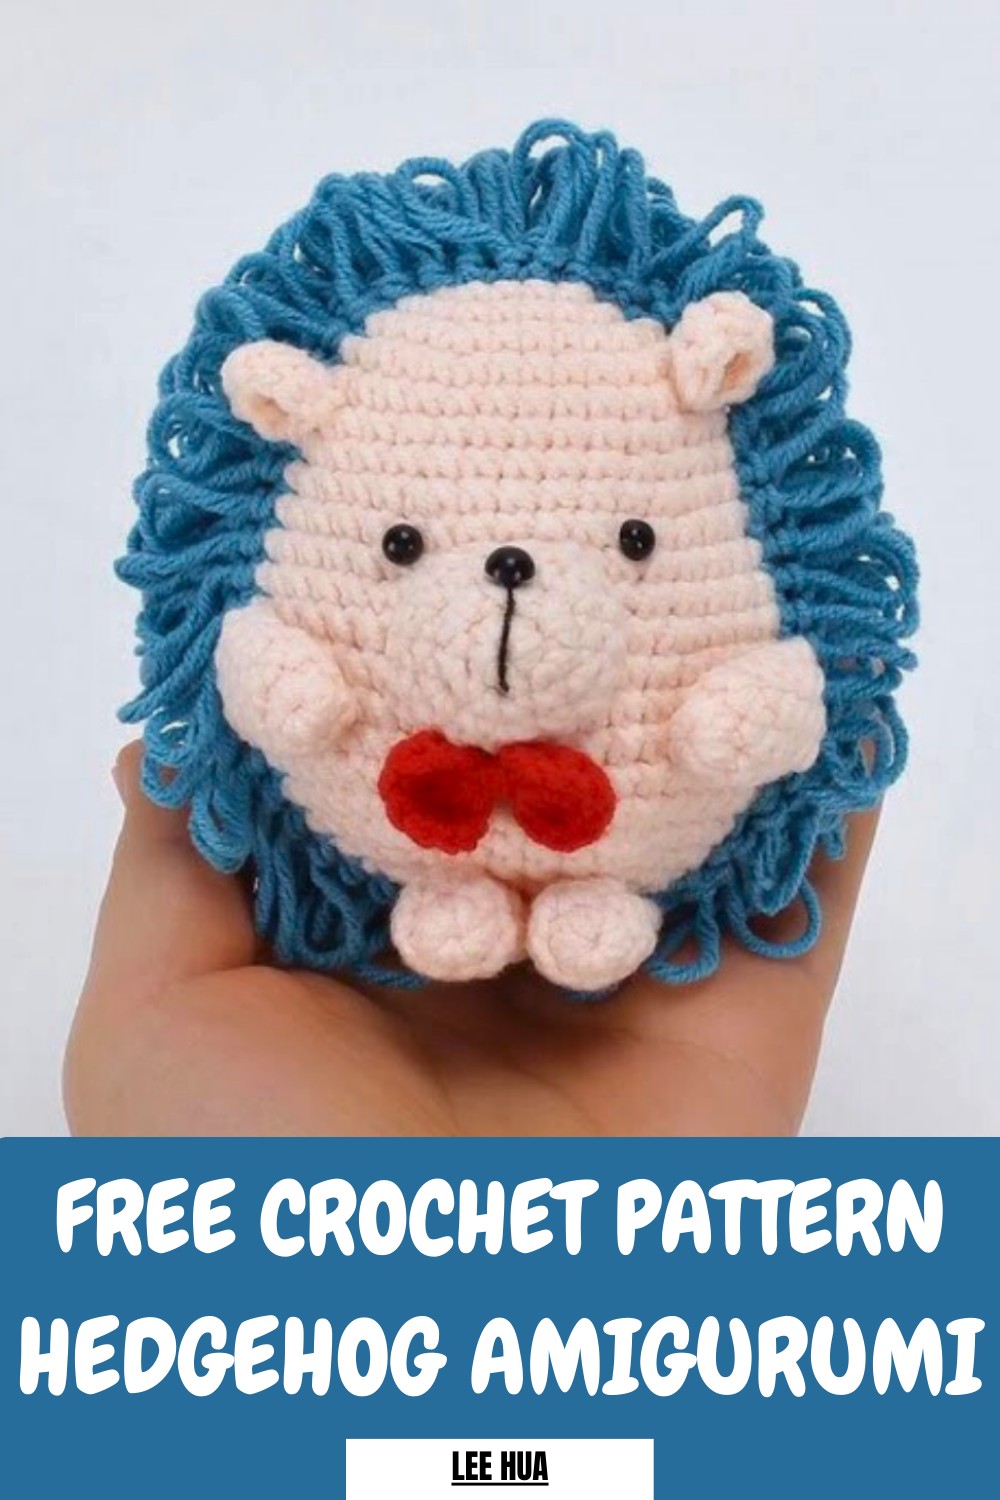
Sprinkle fun and cuteness into your space with this Crochet Hedgehog Pattern featuring simple stitches and adorable details on playful toy.
Soft textures and charming details create an adorable hedgehog that adds warmth and personality to any project. The Crochet Hedgehog Pattern transforms yarn into a delightful piece perfect for toys, decorative accents, or thoughtful gifts that appeal to both children and adults. Its rounded body and detailed features give it a playful yet lifelike appearance, making it an eye-catching addition to nurseries, cozy corners, or handmade collections.
Charming Crochet Hedgehog Pattern Bring Cuteness to Your Shelf
Working on this design encourages patience, focus, and fine motor skill development, providing a relaxing and satisfying experience. The pattern allows for creativity through variations in colors, sizes, and finishing touches, making each hedgehog unique and personal. Combining charm, elegance, and versatility, the finished piece is more than decoration—it becomes a heartwarming creation that brings joy and delight to both the maker and the recipient, turning simple yarn into a memorable keepsake.
Step-by-Step Details
1. Crocheting the Body
- Start with the Magic Ring: Wrap the thread around your finger, pull it off, and hold the yarn with your left hand to form a magic ring.
- Hook the First Round (6X): Crochet a chain stitch to secure the ring, then hook six single crochets (denoted as "X") into the loop. Tighten the loop by pulling the yarn tail.
- Second Round (6V): Crochet six increases (each marked as "V," meaning two single crochets in one stitch). By the end of this round, you will have 12 single crochets.
- Third Round (1X, 1V x 6): Alternate between one single crochet and one increase six times. This round brings the total crochet count to 18 stitches.
- Rounds 4-20: Follow the diagram provided in the tutorial. Each round continues with varying combinations of single crochets and increases to expand the body, reaching 48 single crochets by round 20.
2. Shaping the Body – Decreases
- Round 21 (6X, 1 Decrease): Crochet six single crochets followed by one decrease. A decrease involves crocheting two stitches together: thread the hook through the front loops of two stitches, crochet the yarn across, and pull through all loops. Repeat this sequence six times.
- Rounds 22-26: Gradually decrease the stitches by following the diagrams shown in the tutorial.
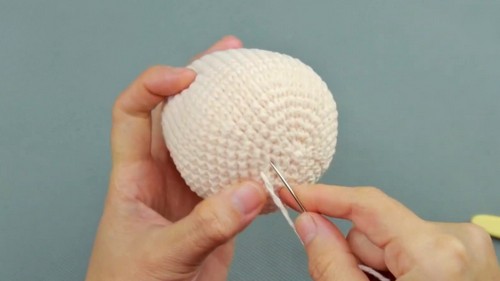
- Round 27 (6 Decreases): To close the bottom of the body, crochet six consecutive decreases. Pull the yarn tightly, leaving a long tail for sewing. Sew the small gap closed using a needle to finish.
3. Crocheting the Ears
- Form the Magic Ring: Start with the magic ring and secure it with a chain stitch. Then crochet six double crochets (denoted as "F") into the ring.
- Add Chains and Close: Hook three chain stitches and connect them back to the ring using a slip stitch. Leave a long yarn tail for sewing.
- Repeat: Create a second ear using the same process.
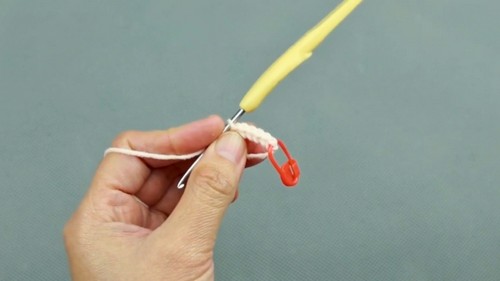
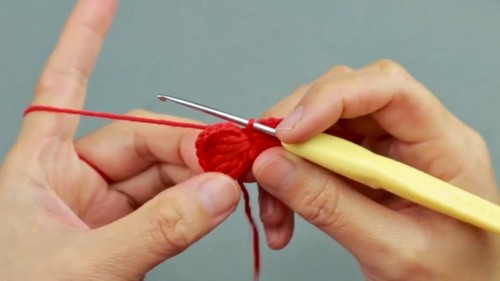
4. Crocheting the Bow
- Chain 5 Stitches: Begin with five chain stitches for the base of the bow.
- Work Triple Crochets: Crochet four triple crochets (three yarn overs to make taller stitches). Repeat this on both halves of the bow.
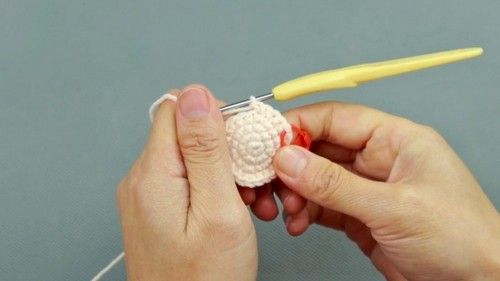
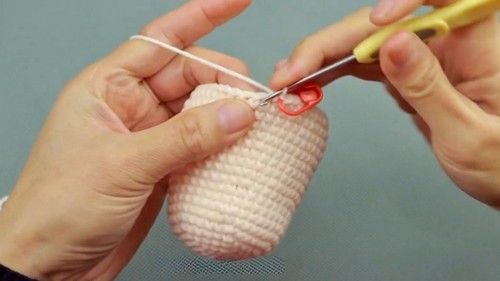
- Finishing the Bow: Wrap yarn around the center of the bow several times and secure it tightly. Leave a long tail to sew it onto the body.
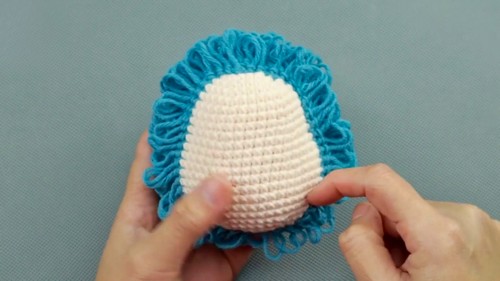
5. Crocheting the Hedgehog's Thorns
- Start with the Magic Ring: Hook six single crochets into the ring for the base of the back thorns. Mark the first stitch.
- Use the Looping Technique: With a piece of folded paper (like a label), wrap the yarn around the paper to create loops for the hedgehog’s thorns. Crochet single stitches while looping the yarn around the paper.
- Hook Increasing Rounds: Follow the same diagram method as the body, increasing loops in each stitch. By the second round, you will have 12 loops in total.
- Continue to Round 14: Follow the tutorial diagrams to form the thorns. Once completed, remove the paper and leave a long yarn tail for sewing.

6. Assembling the Doll
- Attach the Thorns to the Body: Lay the thorn piece over the body and sew it on securely using the yarn tail.
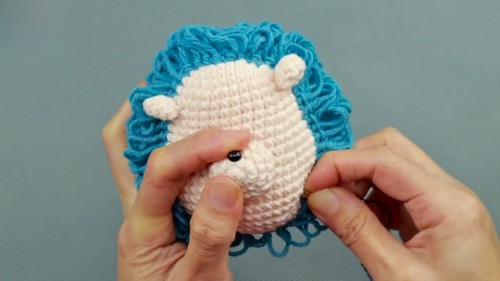
- Sew the Ears: Position the ears symmetrically on the body, aligned with the fourth row of stitches. Sew them on tightly.
- Attach the Bow (Optional): Sew the bow below the ears for a playful touch.
- Add the Nose and Eyes:
- Stitch the nose below the ears, leaving enough space to add PP cotton inside. Sew a black button on the nose for extra detail.
- Place small, symmetrical safety eyes 1-2 rows above the nose. Sew them securely.
- Attach the Legs: Crochet and sew the four legs (also starting from a magic ring) symmetrically below the body. No need to stuff them with PP cotton.
Special Features
- Customizable Thorns: The looping technique allows for playful and varied color combinations, adding uniqueness to your hedgehog.
- Compact and Detailed Design: The combination of small features like the bow, ears, nose, and legs makes the hedgehog intricate and adorable.
- Beginner-Friendly: The tutorial introduces foundational crochet techniques like single crochet, magic ring, increasing, and decreasing.
- Decorative and Functional: The hedgehog can double as both a toy and a decorative piece.
Level of Difficulty
The project is beginner-friendly. Although it involves assembling parts and using a new technique (the shredded paper loop for the thorns), the tutorial breaks it down step by step, making it easy to follow.
Tutor’s Suggestions
- Follow the Diagram: Pay close attention to the crochet diagrams provided in the video for rounds, especially for decreases and increases.
- Use Stitch Markers: Mark the first stitch in each round to prevent confusion when working in spirals.
- Secure Loose Ends: Always leave long yarn tails for easier sewing and secure any loose threads to avoid unraveling.
- Choose Contrasting Colors: Use contrasting colors for the thorns and body to make the hedgehog’s design pop.
Materials Needed
- Yarn: Multiple colors for the body, thorns, bow, and other features. (Example: brown for the body, blue for the thorns, yellow for the nose.)
- Crochet Hook: 2.5 mm or a size suitable for your yarn.
- Safety Eyes or black buttons for the eyes.
- Black Button or Thread: For the nose.
- PP Cotton: For stuffing the body.
- Needle and Scissors: For sewing and finishing.
- Piece of Paper: To assist in creating uniform thorn loops.
Uses of the Hedgehog Doll
- As a Decorative Ornament: Add it to a shelf, table, or workspace to brighten up the room.
- As a Gift: Perfect for children or friends who love handcrafted items.
- As a Toy: Its soft, lightweight design makes it ideal for young kids.
Tip
For the thorn loops, carefully wrap the yarn around the paper without making it too tight. This makes it easier to pull the loops free later while ensuring consistency in thorn length.
Conclusion
Making this cute crocheted hedgehog is a rewarding experience that combines essential crocheting techniques and creativity. Its simple yet detailed design, coupled with customizable features like looped thorns, ears, and a bow, result in a delightful finished product.


