
Fill your space with charm using this Crochet Owl In A Wizard Hat Pattern that adds playful, and cozy magical vibes in your helloween decor.
A whimsical owl perched in a pointed wizard hat brings charm and personality to any handmade project. The Crochet Owl In A Wizard Hat Pattern transforms simple yarn into a playful and eye-catching creation that works beautifully as a decorative piece, a unique gift, or an enchanting addition to a nursery or cozy space. Its detailed design, featuring expressive eyes and a distinct hat, gives the finished piece a magical and endearing appearance that captures attention instantly.
Magical Crochet Owl in a Wizard Hat Fun Project for Beginners

Creating this design encourages focus, patience, and dexterity, while offering a calming and satisfying experience. The pattern also allows for personalization through variations in colors, yarn types, and sizes, making each owl truly one-of-a-kind. Perfect for animal lovers, whimsical décor, or imaginative gifts, it blends creativity, elegance, and playful charm. Every stitch contributes to a memorable and heartwarming result, turning yarn into a captivating and delightful treasure.
Step-by-Step Details
1. Crocheting the Head and Body
- Create the Base Loop: Form a basic loop and thread your crochet hook through it. Make the loop smaller and wrap the yarn around your left hand.
- Hook Chain Stitches: Crochet 10 chain stitches.
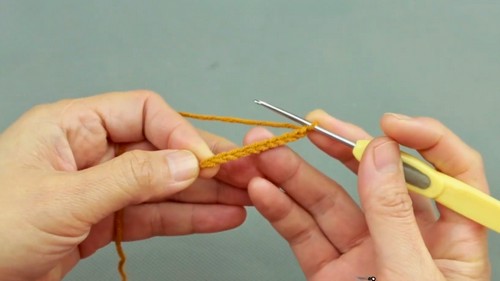
- Turn and Add Three Single Crochets: In the ninth chain stitch, hook three single crochets to begin shaping the body. Use a stitch marker to mark the first stitch.
- Work Backward: Hook a single crochet into the next seven stitches. This rounds out the first row.
2. Building the Body (Rounds 2-16)
- Round 2:
- Add three single crochets in the first stitch (indicated as "W").
- Crochet seven single crochets into the next stitches to continue shaping the base.
- Repeat the same steps for a second round. After this round, you should have 20 single crochets in total.
- Using Spiral Stitching: Without connecting the rounds, continue working in a spiral.
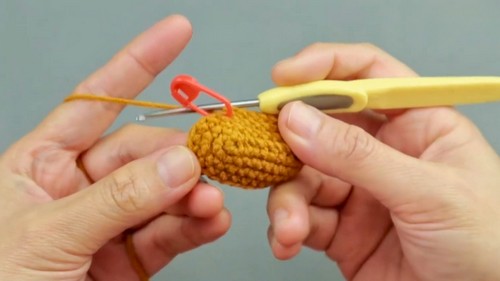
- Rounds 3-4: Follow the provided stitch diagram to increase stitches systematically using combinations of single crochets and "W" stitches. The body expands evenly.
- Rounds 5-8: Continue working single crochets in each stitch to add height to the owl’s body.
- Round 9: Start practicing decreasing. Decrease on the left and right sides of the owl’s body while maintaining 14 single crochets in the center. This forms the owl's body shape.
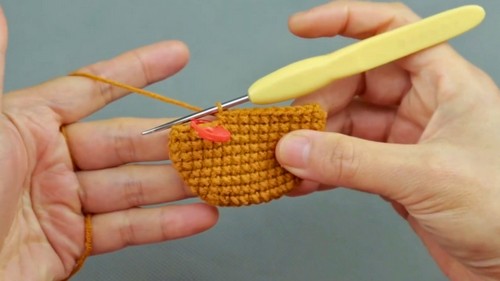
- Rounds 10-16: Continue working according to the diagram, gradually decreasing the number of stitches to close the body shape. Once at the 16th round, you should have 16 single crochets left. Stuff the body with PP cotton to give it structure.
3. Closing the Body (Round 17)
- On the 17th round, crochet eight decreases consecutively. For each decrease:
- Insert your hook into the front loops of two stitches, crochet the yarn through the loops, and pull it through the last two loops on your hook. This reduces two stitches into one.
- Continue the decreases along the round until only eight stitches remain.
- Close the remaining stitches by threading the yarn through the front loops of all stitches, then tighten and secure the closure.

4. Crocheting the Mouth
- Use yellow yarn to create a loop. Hook three chain stitches.
- In the first chain stitch, hook two half-double crochets to form the triangular shape of the beak.
- For half-double crochet: Wrap the yarn around the hook, pull it through the chain, and pull through all three loops on the hook.

- For half-double crochet: Wrap the yarn around the hook, pull it through the chain, and pull through all three loops on the hook.
5. Crafting the Feet
- Start with a magic ring, wrapping the yarn around your finger to form the ring. Hook a single chain stitch to secure the ring.
- Within the magic ring:
- Crochet one single crochet.
- Crochet two half-double crochets.
- Crochet one double crochet (wrap yarn twice around the hook).
- Crochet one triple crochet (wrap yarn three times around the hook). Follow by fastening with a dog-tooth stitch to form the shape of the foot.
- Repeat the steps to make the second foot and leave a long yarn tail for sewing.
6. Making the Eyes
- Begin with white yarn and a magic ring. Hook six single crochets into the ring, tightening it to form a small disc.
- Second Round:
- In the first stitch, make one single crochet, followed by one half-double crochet.
- In the second stitch, reverse the previous steps (hook one half-double crochet, then one single crochet). Repeat for each stitch to give the eye its shape.
- Cut the yarn, leaving a long tail for sewing. Crochet another eye using the same process.
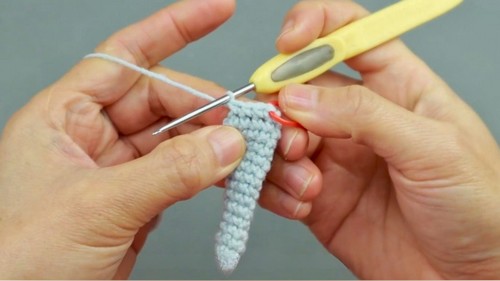
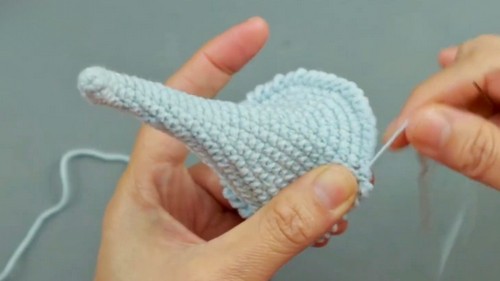
7. Crocheting the Long Hat (Rounds 1–33)
- Begin with a magic ring and crochet six single crochets. Mark the first stitch to keep track.
- Work single crochets in each stitch from Round 2 to 7 to create the initial length of the hat.
- From Round 8 onward, begin increasing stitches using the “V” method (two single crochets in the same stitch).
- Follow the provided pattern chart from Round 9 to Round 33, alternating between increases and single crochets, to shape the tall, whimsical hat.
- Use reverse single crochet stitches (hooking backward) to add texture to the brim in the final round. Sew the hat onto the owl’s head after lightly stuffing it with PP cotton.
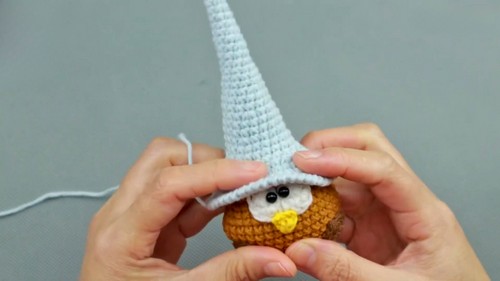
8. Assembling the Owl
- Sew the Eyes: Position the eyes symmetrically on the owl's face, leaving six rows of space at the top. Add small black beads to the center of each eye as pupils.
- Attach the Mouth: Sew the triangular beak directly beneath the eyes.
- Position the Feet: Sew the feet symmetrically to the bottom sides of the owl’s body.
- Fix the Hat: Secure the hat on the owl’s head, bending it slightly to one side for a playful appearance.
Special Features
- Detailed Design: The owl includes tiny features like a long, bendable hat, expressive eyes, a triangular beak, and feet in various crochet styles.
- Customizability: You can use different yarn colors to personalize the owl.
- Portable Size: The owl is small enough to use as charms for bags, keychains, or ornaments.
- Playful Hat: The bendable, pointed hat gives the owl a whimsical and unique character.
Level of Difficulty
This project is Intermediate due to the combination of techniques such as creating complex shapes, working with magic rings, reverse single crochet, and assembling multiple small parts. Beginners might find it challenging but can still follow along with patience and practice.
Tutor’s Suggestions
- Use Stitch Markers: Always mark the first stitch of each round to avoid errors, especially during spiral stitching.
- Practice Decreases: Pay close attention to the technique for decreases (front loop stitching) to ensure the owl retains its shape during rounds.
- Be Patient with Small Parts: Working on the feet, eyes, and mouth can be fiddly, so take your time.
- Customize Freely: Don’t hesitate to use different colors for the hat, body, or beak to match personal preferences.
Materials Needed
- Yarn: Colors of your choice (e.g., grey, red for the body, white for the eyes, yellow for the beak, black for the bead pupils and details).
- Crochet hook: Size suitable for your yarn, often 2.5mm or 3mm.
- Safety Beads or Buttons: For the pupils of the eyes.
- PP Cotton: For stuffing the owl and the hat.
- Scissors, stitch markers, and a darning needle for assembly.
Uses
- Keychains
- Bag Charms
- Decorative Ornaments
- Handmade Gifts
Tip
When creating small details like the eyes, feet, or beak, always leave long tails of yarn at the end of your stitches. These tails are useful for securely sewing the parts onto the body and keeping the owl’s features durable.
Conclusion
This crochet owl pattern is perfect for anyone looking to improve their crochet skills while creating something fun and functional. From learning about magic rings to combining different stitch techniques, this project offers both a challenge and room for creativity.


