
Delight in handmade charm with this Free Crochet Hedgehog Amigurumi Pattern, featuring an adorable design perfect for gifts, decor, and play.
Bringing a sense of woodland magic into your home is effortless with this adorable handmade companion, which captures the whimsical beauty of nature in a soft, huggable form. This charming project serves as more than just a toy; it is a heartwarming gift for children, a unique desk accessory for nature lovers, or a cozy addition to a nursery theme.
Radiant Crochet Hedgehog Amigurumi Pattern That Stands Out
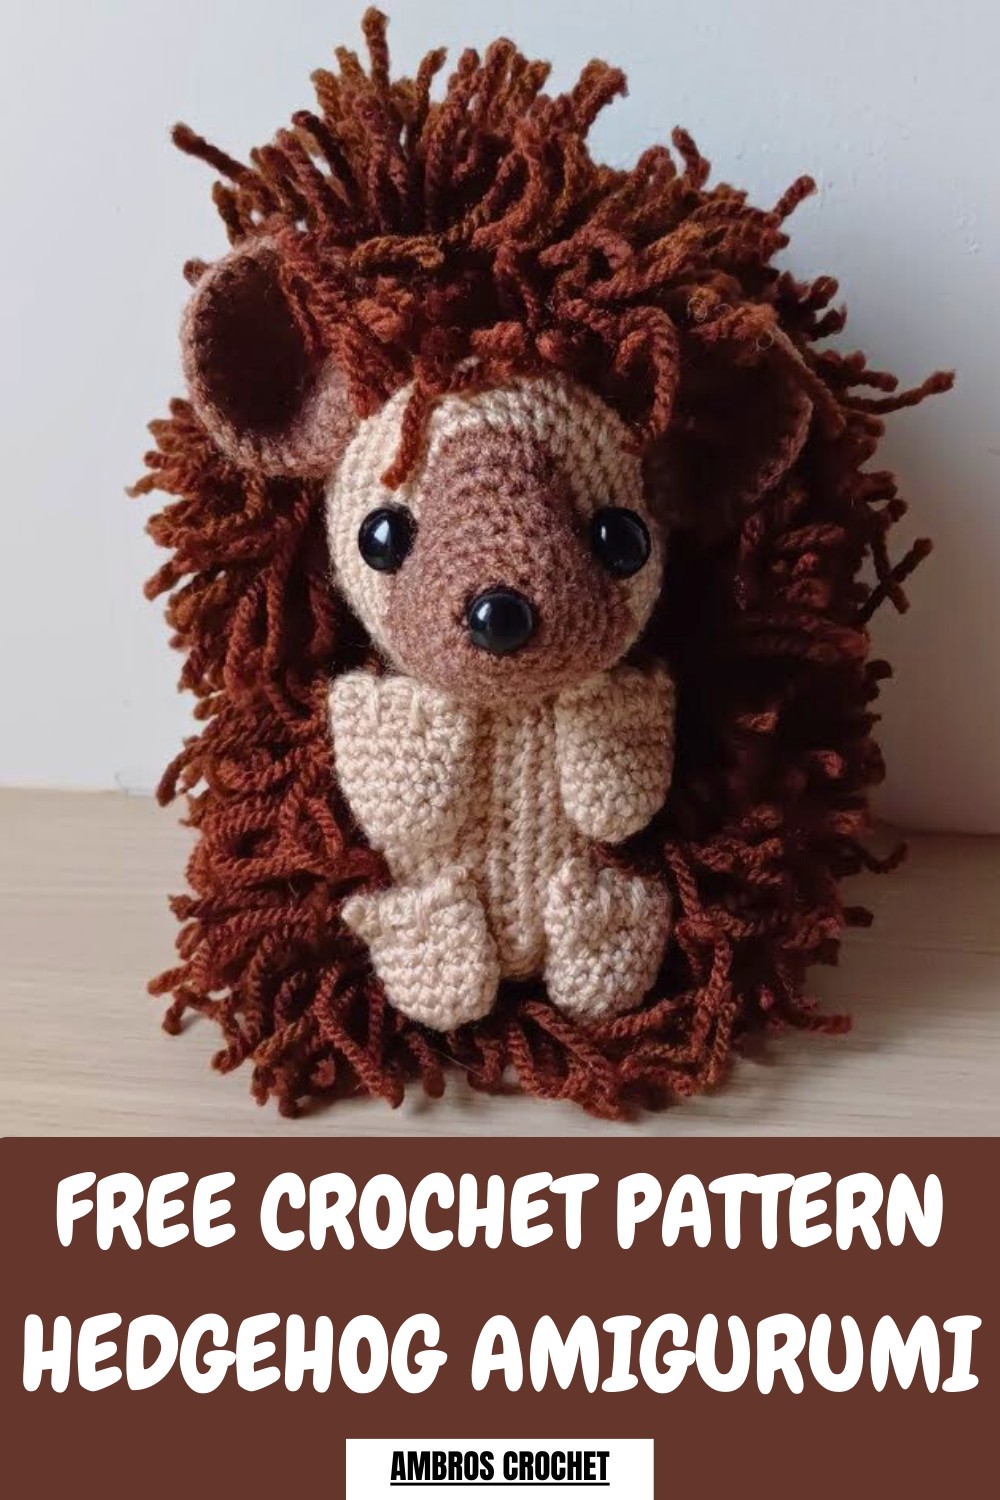
To complete the Crochet Hedgehog Amigurumi pattern, you will master the "fringe" technique, where individual strands of dark yarn are looped through the stitches to simulate thousands of tiny, soft spikes. By opting for a handmade version over a store-bought one, you gain the benefit of a fully customized treasure where you can select safe materials and choose earthy color palettes that perfectly match your personal style
Embarking on this Crochet Hedgehog Amigurumi pattern is a rewarding journey that utilizes accessible techniques like the magic ring and single crochet to build a sturdy, rounded base.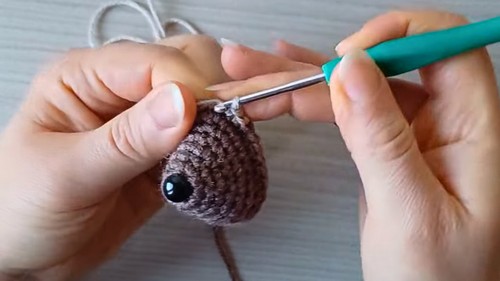
Tutor's Suggestions
-
Spike Density: To prevent the base fabric from stretching too much, use one strand of yarn per stitch most of the time. Every four stitches, you can use two strands at once to add extra volume.
-
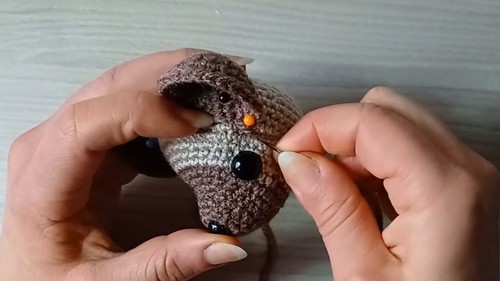
Sewing Twice: The tutor recommends sewing the head to the body twice. The weight of the added spikes can make the head floppy, so a second pass with the needle ensures stability.
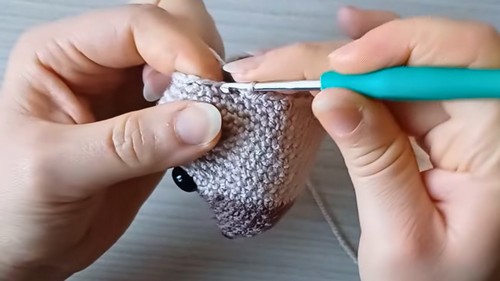
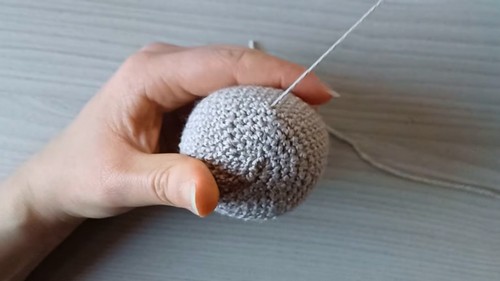
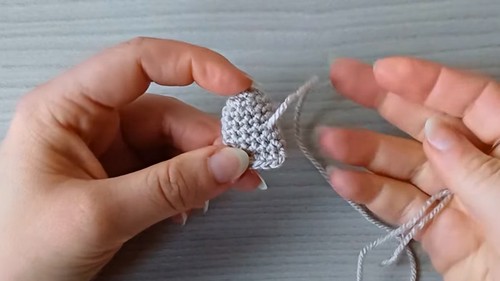
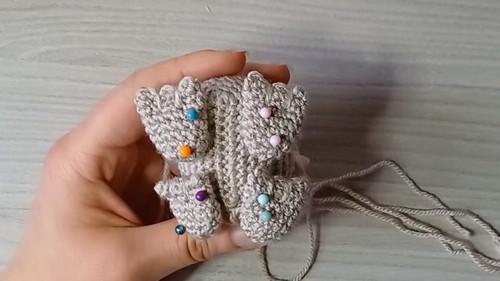
The process begins by shaping a tapered head with a cute 12mm safety eye nose, followed by a soft, bean-shaped body and four tiny, detailed paws.
Special Features
-
Latch-Hook Spikes: Instead of using specialized "eyelash" yarn, this pattern uses individual yarn strands to create a dense, "shaggy" texture that looks like real hedgehog quills.
-
Stitched Toes: The simple technique of wrapping yarn around the paws to define toes adds a high level of detail to the amigurumi.
-
Anatomical Shaping: The use of staggered increases and specific color changes creates a realistic silhouette of a hedgehog's snout and rounded back.
A standout feature is the clever use of three different brown yarn shades to add depth and realism to the design.
Level of Difficulty
-
Intermediate: The crochet stitches themselves are basic (SC, increases, decreases), but the assembly, facial sculpting, and the sheer patience required for the spikes make this a project for someone with some experience.
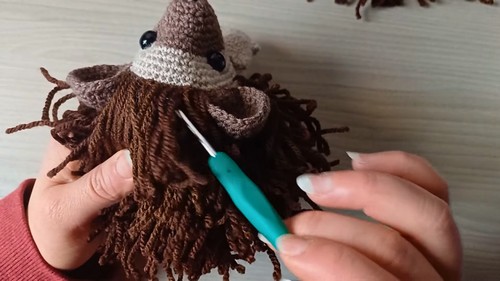
While this meticulous step takes time, it results in a rich, textured coat that makes the finished hedgehog look incredibly lifelike yet irresistibly squishy. This small-scale project measures just a few inches, making it a portable and delightful memento of your skill.
Materials
-
Yarn: Three shades of brown cotton or acrylic yarn (referred to as lightest, middle, and darkest shades).
-
Hook: 3.0 mm crochet hook (or one that matches your yarn weight).
-
Eyes/Nose: Two 12 mm safety eyes for the face and one 12 mm safety eye (the tutor uses 10 mm as a substitute) for the nose.
-
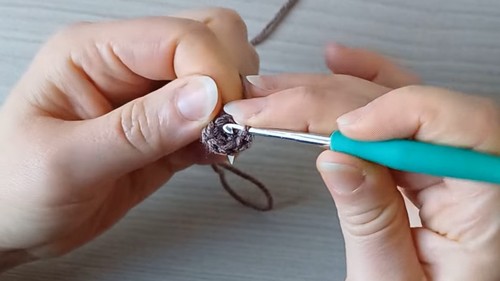
Notions: Polyfill toy stuffing, tapestry needle, scissors, pins for positioning, and 15 cm strands of the darkest brown yarn for the spikes.
Uses
-
Amigurumi Collection: A high-quality piece for collectors or craft markets.
-
Educational Toy: A soft, tactile toy for children to learn about woodland animals.
Step-by-Step Details
This comprehensive tutorial demonstrates how to crochet an adorable amigurumi hedgehog featuring realistic "spikes" and a charming, detailed face. The project involves creating several individual components—the head, body, ears, and four paws, before assembling them and painstakingly adding yarn strands to create a thick, textured coat.
Conclusion
While adding the spikes requires significant patience, the result is a beautifully textured and sturdy amigurumi. The combination of facial sculpting and detailed paw-stitching elevates this from a simple toy to a professional-grade craft project.
Pro Tip
When placing the spikes on the forehead, work them in a "fringe" pattern slightly in front of the ears and down toward the eyes. Trimming these forehead spikes shorter than the rest of the body quills helps maintain visibility of the face and keeps the character looking "cute" rather than overgrown.


