
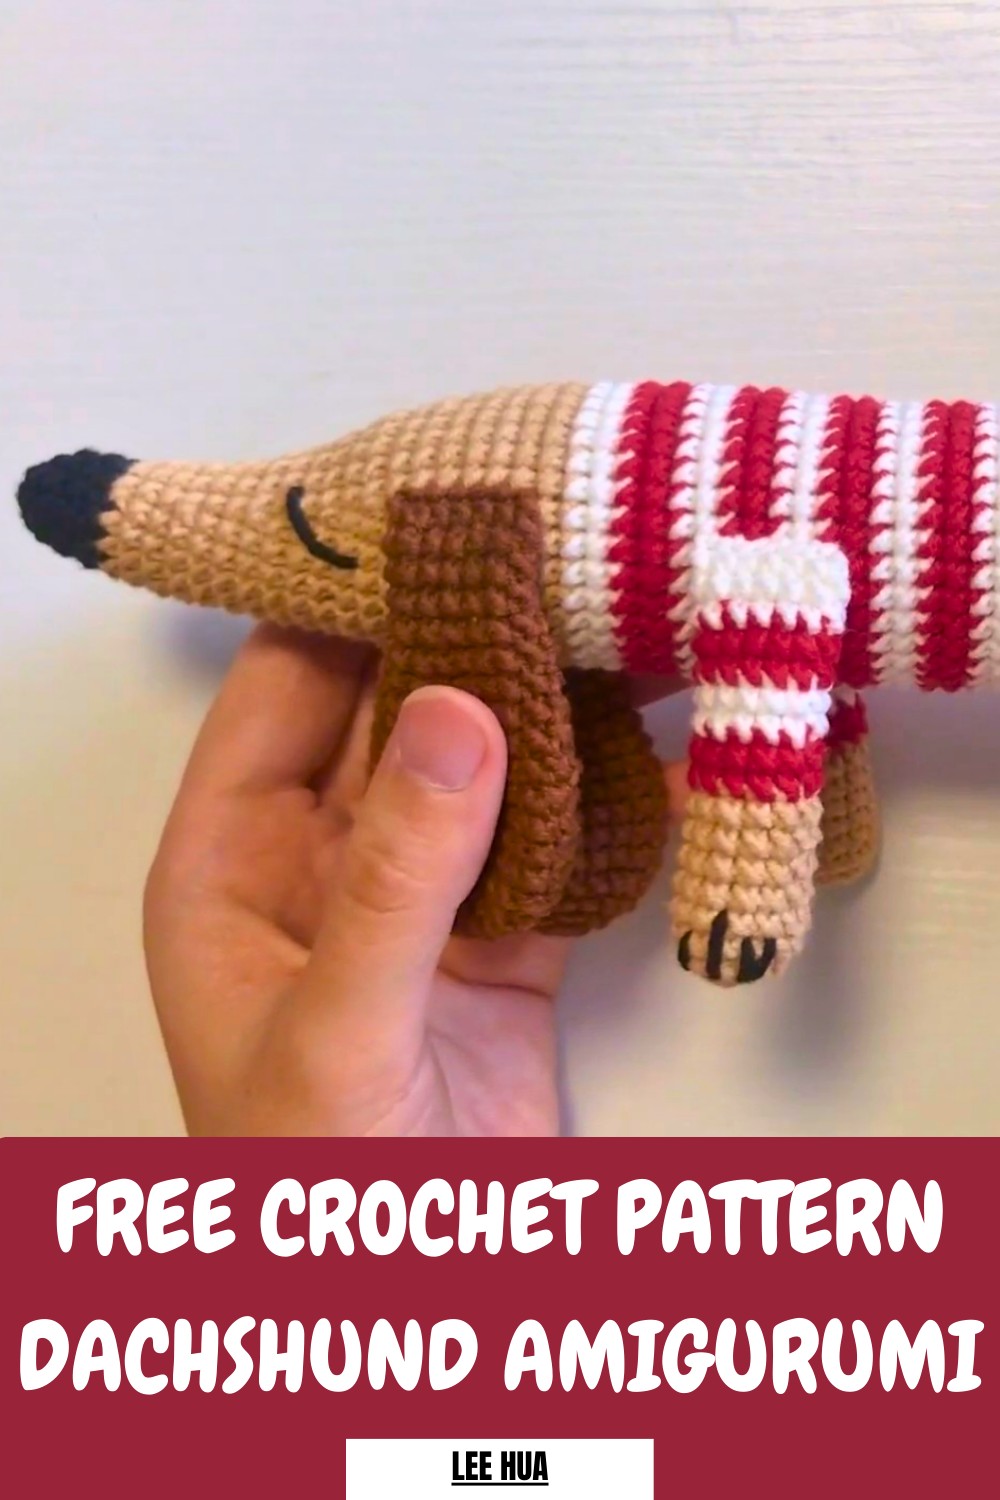
Experience hours of fun with this Free Crochet Dachshund Amigurumi Pattern that's fills your project with happiness and cute joyful vibes.
An adorable long-bodied dog takes shape with carefully designed features that capture the charm of a dachshund in miniature form. The Crochet Dachshund Amigurumi Pattern transforms simple yarn into a lovable and visually appealing piece, perfect for decorative accents, cuddly toys, or unique gifts that bring joy to both children and adults.
Precious Crochet Dachshund Amigurumi Pattern For Tiny Companion
Its elongated body, expressive eyes, and playful posture give it a lifelike yet whimsical appearance, making it a standout addition to any collection. Working on this pattern encourages focus, patience, and the development of fine motor skills, offering a calming and satisfying experience. The design also allows for personalization through different colors, sizes, and finishes, making each dachshund unique.

Combining charm, creativity, and practicality, the finished amigurumi becomes more than a decorative item—it is a heartwarming piece that delights both the maker and the recipient, turning simple yarn into a memorable keepsake full of personality.
Step-by-Step Details
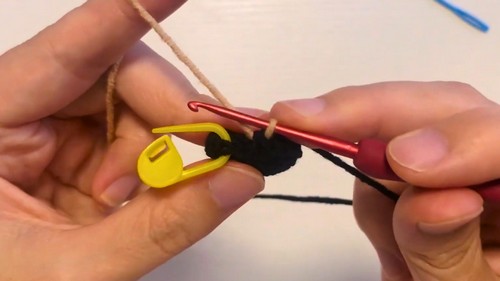
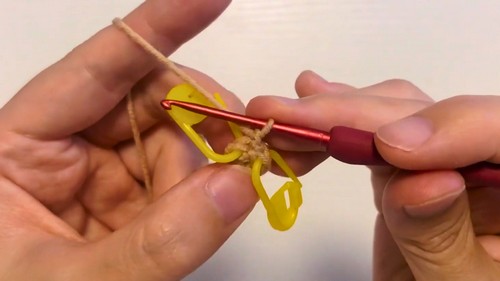
1. Making the Nose and Starting the Head
- Begin with black yarn for the nose.
- Magic Ring: Create a magic ring by looping yarn and securing a slip knot. Crochet 6 single crochets (SC) into the loop and pull it tight.
- Use a marker to indicate the first stitch.
- Connect the first and last stitches with a slip stitch through the back loop to complete the round.
2. Adding Rounds to the Head
- Round 2: Work one single crochet into the first stitch, mark it, then increase (2 single crochets in the next stitch). Repeat the pattern (SC, increase) 3 times to complete the round (9 stitches total).
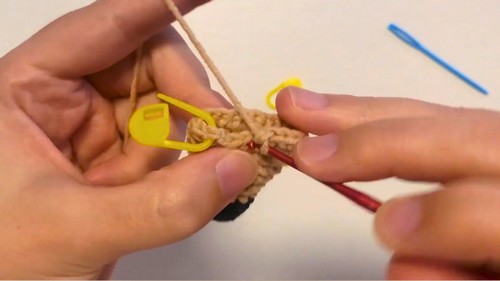
- Round 3: Alternate 2 single crochets and an increase 3 times for a total of 12 stitches.
- Rounds 4–5: Crochet one single crochet in each stitch around (12 stitches per round).
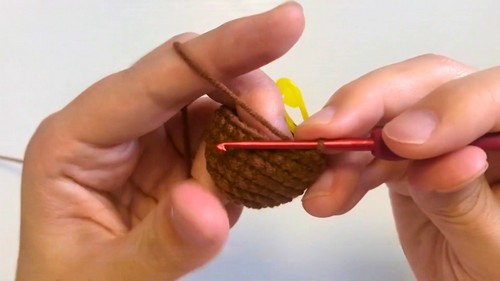
3. Changing Yarn for the Head and Body
- Before completing the last stitch of Round 5, switch to the brown yarn for the body. Wrap the new yarn around your hook and pull through the loops to secure it.
- Work in continuous rounds to build the shape of the head and connect it to the body.
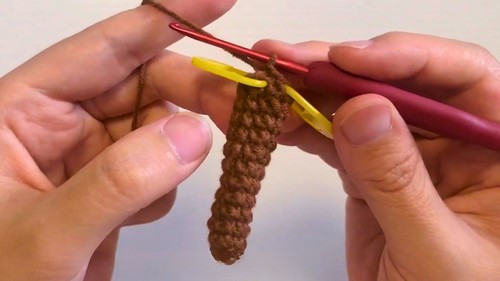
4. Shaping and Expanding Rounds for the Body
- Follow the pattern to gradually increase the number of stitches per round:
- Round 6: 5 single crochets, 3 increases, and finish with 4 single crochets (15 stitches total).
- Round 7–8: Crochet 15 single crochets in each round.
- Round 9: Increase to 18 stitches using the pattern: 6 single crochets, alternating increases and single crochets, then finishing with 3 single crochets.
- Round 10–17: Continue working single crochets in a sequence to shape the body. The stitches expand steadily to 33 by Round 17.
5. Adding Striped Patterns
- Switch between white and red yarn to create a striped pattern for the body. Alternate between 2 rounds of white and then 2 rounds of red.
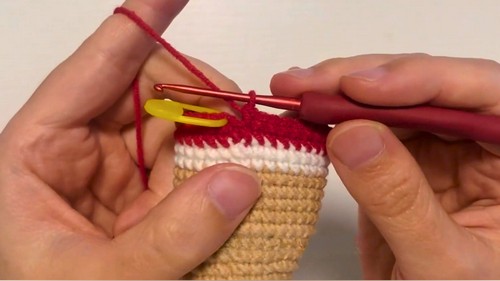
- Each round maintains 33 stitches in sequence.
- Repeat until reaching Round 54, creating the full striped effect for the main body.
- Finish the body with 15 additional rounds using brown yarn (Rounds 55–68).

6. Closing the Body
- Gradually decrease the stitches to shape the bottom of the plushie:
- Round 69: Alternate 9 single crochets and 1 decrease.
- Round 70: Alternate 3 single crochets and 1 decrease.
- Round 71–73: Continue decreasing until you close the opening completely.
- Leave a long tail of yarn to sew the remaining gap, and secure it by weaving in the loose ends.
7. Creating the Legs
- Step 1: Start each leg with a magic ring and crochet 6 single crochets.
- Step 2: Gradually increase to 12 stitches by following the pattern (6 increases in the second round).
- Step 3: Crochet single crochets in sequence for 6 rounds to create the front legs.
- Step 4: Change yarn color as required (red or white), and continue working for 5 more rounds. Fill lightly with fiberfill for firmness before closing.
- Step 5: Follow the same steps to create the back legs, but these don’t require color changes.
8. Making the Ears
- Crochet the ears the same way as the legs, up to 12 stitches. Increase and fold them in half for the proper shape. No stuffing is required for the ears. Leave a long yarn tail for sewing them to the head.
9. Creating the Tail
- Start with a magic ring and crochet 6 single crochets.
- Gradually increase the stitches over several rounds to reach a total of 9 stitches. Then continue crocheting single crochets in 8–10 rounds to form a slender tail.
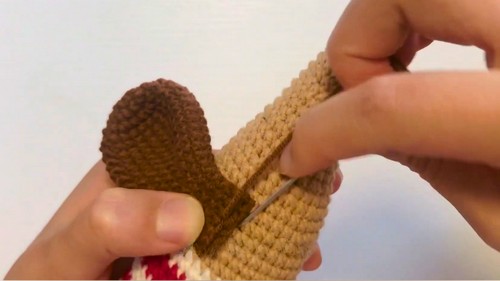
10. Assembling the Parts
- Ears: Sew the ears onto the sides of the head, starting at Round 19, for a symmetrical look. Hide the yarn ends by weaving them into the fabric.
- Legs: Attach the front legs on opposite sides near the bottom of the head, between the 9th and 10th rounds. The back legs are positioned slightly lower, on the body.
- Tail: Sew the tail to the rear of the body, centering it between rounds 2–5.
- Eyes and Nose:
- Use black yarn or safety eyes to create a playful expression. Embroider the nose just below the center of the head using a tapestry needle.
- Use black yarn or safety eyes to create a playful expression. Embroider the nose just below the center of the head using a tapestry needle.
Special Features
- Customizable Stripes: You can experiment with different colors for the striped body to personalize the plushie.
- Realistic Shape: The gradual increases and decreases create a lifelike plushie without sharp angles.
- Compact Design: The plushie is lightweight and compact, making it great for kids or décor.
- Practical Techniques: Learn essential crochet techniques like magic rings, increases, decreases, yarn color changes, and part assembly.
Level of Difficulty
This project is beginner-friendly but requires patience due to the detailed assembly and color changes. It’s also a great practice for intermediate crocheters looking to improve their shaping and finishing techniques.
Tutor’s Suggestions
- Use Stitch Markers: Always mark the first stitch of each round to avoid losing your place in the pattern.
- Count Regularly: Keep track of stitches in each round to ensure proper shaping.
- Take Breaks: This project can be time-consuming, so work in stages to avoid errors and hand fatigue.
- Stuff Firmly: Use fiberfill to stuff evenly, maintaining consistent tension for a smooth plushie.
Materials Needed
- Yarn: Multiple colors (brown, black, white, red, etc.) for the body, nose, and stripes.
- Crochet Hook: Recommended size 2.5mm–3mm or suited to your yarn.
- Fiberfill: For stuffing the body, legs, and tail.
- Tapestry Needle: To sew parts together and finish details.
- Scissors: For cutting yarn.
- Safety Eyes (optional): For adding playful eyes, or use black yarn for embroidery.
Uses of the Crochet Dachshund Plushie
- Toys for Children: Safe and soft handmade toy for kids.
- Decorative Item: A charming addition to desks, shelves, or living spaces.
- Unique Gift: Perfect for dog lovers or fans of classic amigurumi crochet projects.
Tip
When changing yarn, avoid cutting the previous color unless necessary. Instead, weave the yarn into the fabric to save time and maintain a neat appearance.
Conclusion
This detailed crochet pattern for creating a lovable Dachshund plushie is both fun and fulfilling. It combines essential techniques with creative opportunities for customization. Ideal for both beginners and intermediate crocheters, this project allows you to craft a unique handmade gift or decorative item.


