
Step up your daily style with this free crochet tote bag pattern, featuring a sturdy design that is perfect for carrying all your essentials.
Blending a timeless aesthetic with the demands of a busy lifestyle a crochet tote bag pattern offers a detailed guide for a sophisticated carryall that excels in both form and function. The design yields a spacious interior and comfortable handles making it an ideal companion for a morning at the farmer's market, a professional commute, or a relaxing day by the shore. Its visual charm stems from the complex and rhythmic textures of the stitches which range from sturdy solid columns to airy decorative motifs that catch the eye.
Aesthetic Crochet Tote Bag Pattern for perfect beach day
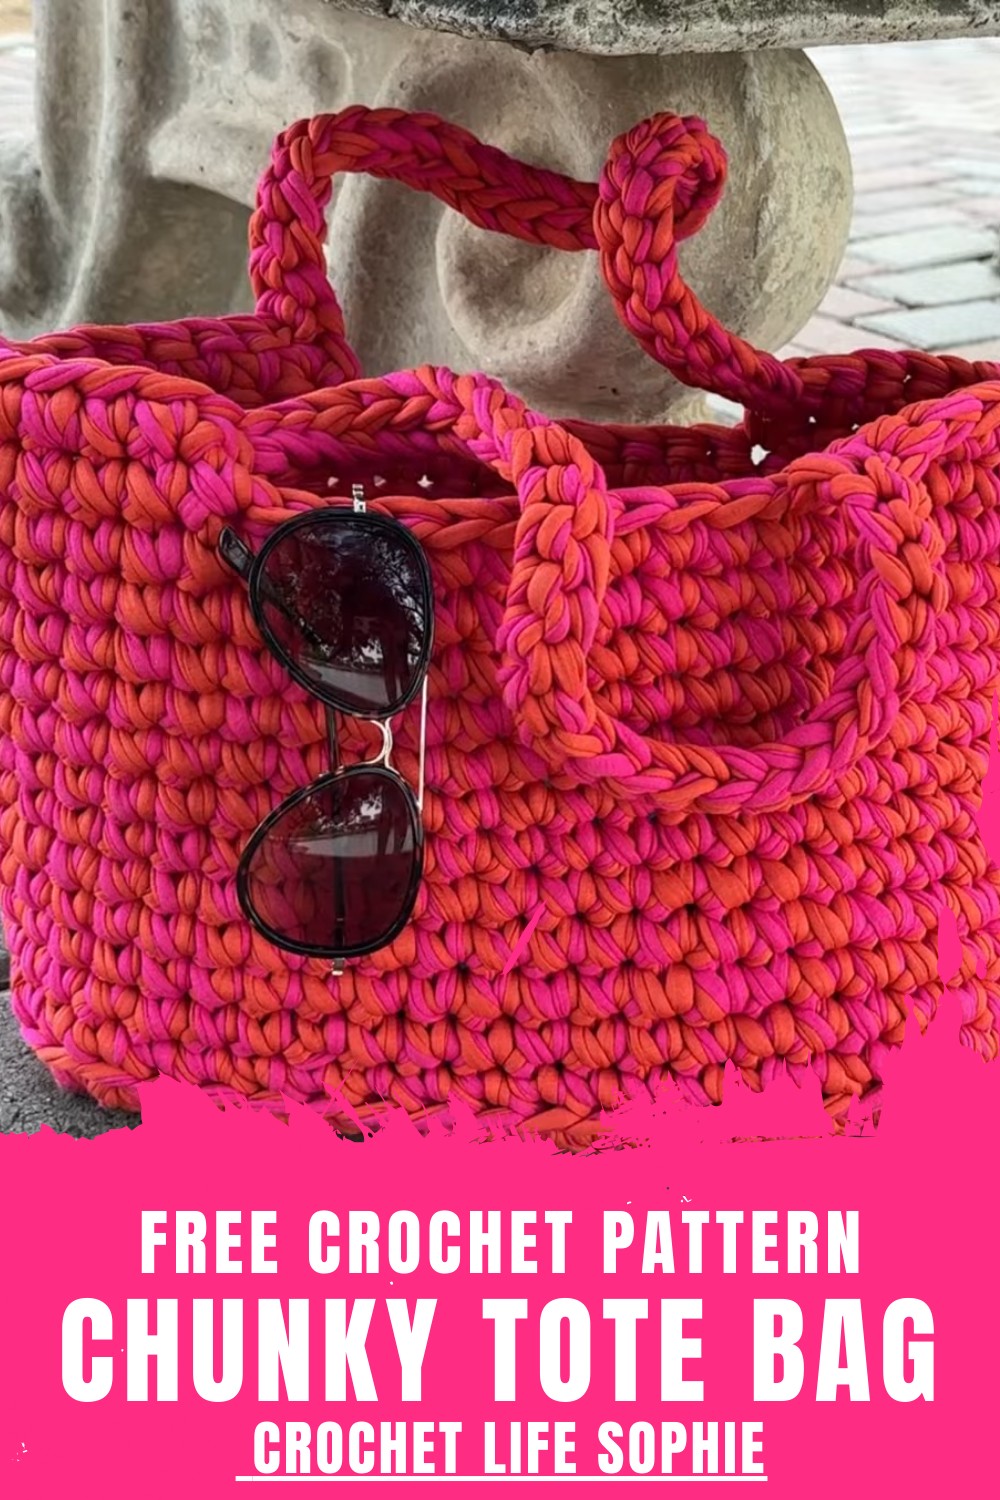
This accessory provides a sustainable high-quality alternative to disposable carriers offering a robust strength that easily supports books, groceries, or tech devices. The overall look is one of effortless polish featuring a soft yet structured silhouette that adds a layer of curated style to any ensemble.
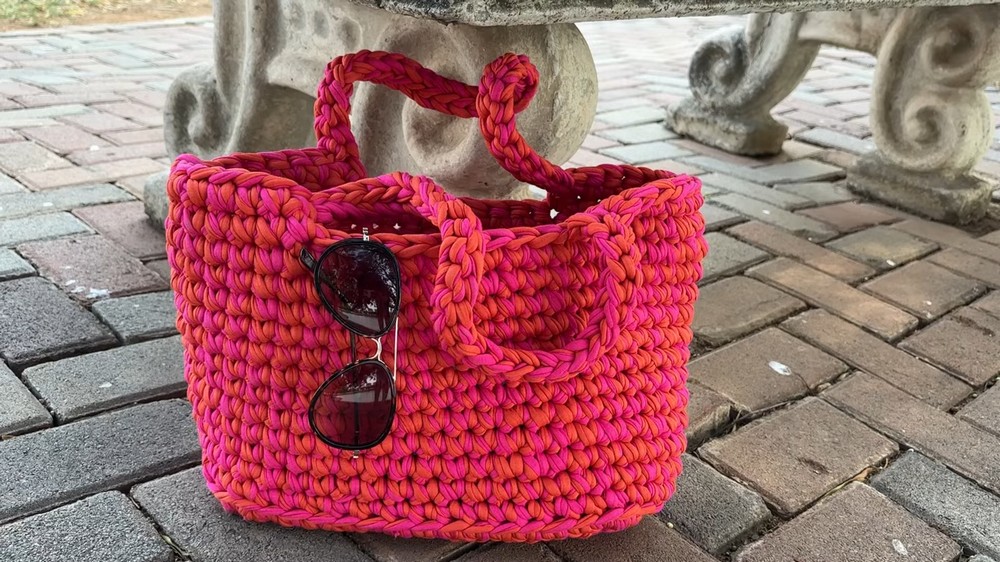
Because the piece is lightweight and breathable it remains a comfortable choice for all-day use ensuring that practicality never comes at the expense of an elegant and bespoke appearance.
Step-by-Step Details
Materials Needed
- Yarn: Fabric t-shirt yarn (the tutor uses two strands held together for a chunkier look and extra durability).
- Crochet Hook: A 15 mm crochet hook.
- Scissors: For cutting yarn.
- Tapestry Needle: For weaving in loose ends.
- Measuring Tape & Stitch Markers: To help with spacing and symmetry.
Steps to Create the Tote Bag
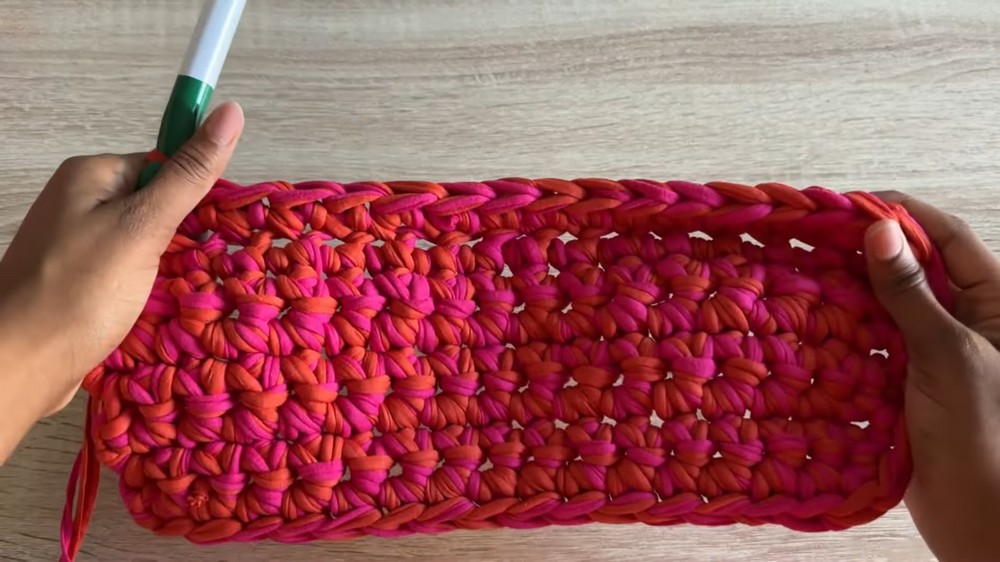
- Starting with the Base
- Begin with a slipknot.
- Chain 17 stitches.
- Insert a single crochet (SC) into the second chain from the hook and continue single crocheting across the row.
- At the end of the row, chain 1, turn your work, and repeat single crochets across each stitch. Continue this process for seven rows. This forms the rectangular base of the bag.
- Adding Rounds and Increasing at Corners
- To add depth to the bag, switch to crocheting around the edges.
- Place an additional single crochet at each corner (for four corners) to allow the sides of the bag to shape upward.
- The tutor recommends using the loose yarn tail by crocheting over it or weaving it in with a tapestry needle.
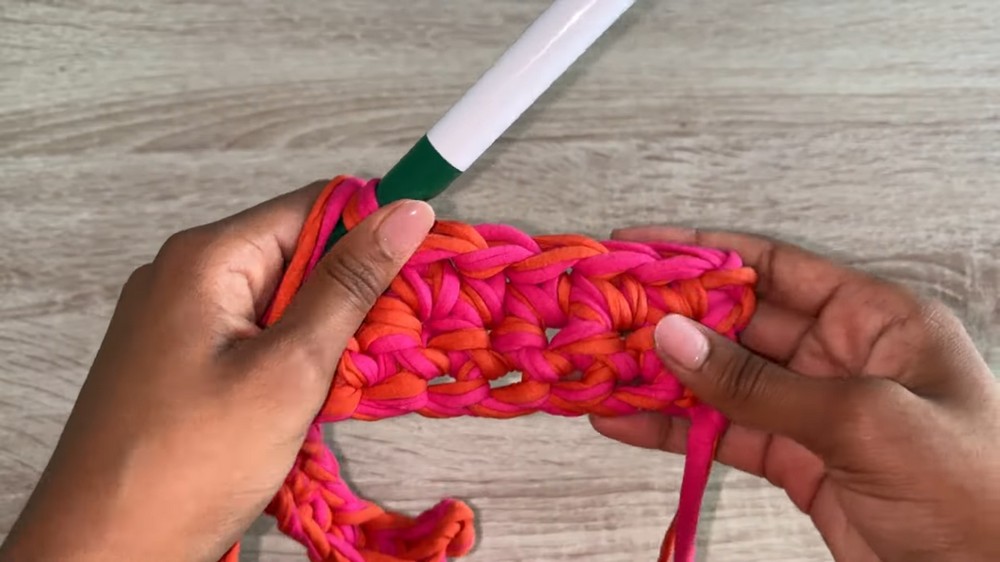
- Working the Sides of the Bag
- After the first edge round is complete, work a round of single crochets in the back loop only (BLO) to help define a clean edge between the base and sides.
- For the following round, switch back to working through both loops of each stitch.
- Continue crocheting in the round for a total of 10 to 12 rows (you can adjust this depending on how tall you want your tote bag to be).
- Use a stitch marker to note where each round begins and ends for consistency.
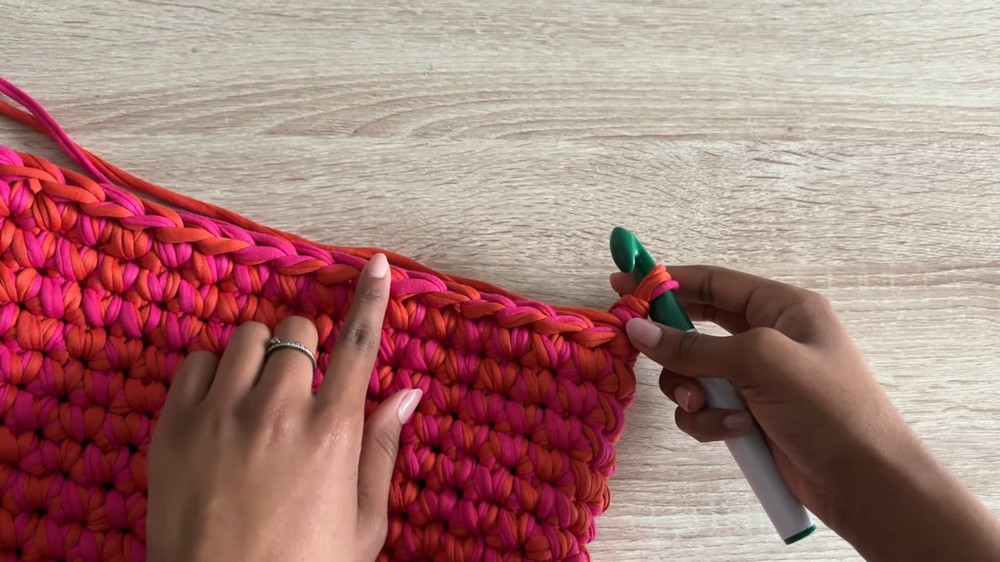
- Shaping the Handles
- Determine the sides of the bag by folding it flat and marking the bag's midway points with stitch markers.
- From the stitch marker, single crochet seven stitches to create the handle placement.
- Chain 30 stitches (or any preferred number to adjust the handle length). Attach the chain to the seventh stitch on the opposite side of the marker using single crochet.
- Single crochet another seven stitches beyond the chain to create space between the handles.
- Repeat the same process for the second handle on the opposite side, ensuring that both handles and gaps are symmetrical.
- Finishing and Reinforcing the Handles
- Once both handles are in place, work slip stitches into the back bumps of the chains for added strength and a cleaner look.
- When you complete the round near the stitch marker, slip stitch, chain 1, and cut the yarn, leaving a long tail for weaving.
- Weave in loose ends using a tapestry needle to ensure a polished finish and durability.

Special Features
- Chunky & Durable Design: Using t-shirt yarn and holding two strands together creates a sturdy tote that can carry heavy items.
- Clean Edge Transition: The back-loop-only round at the base creates a distinct, seamless edge.
- Customizable Handles: You can easily adjust the length or width of the handles for personalization.
- Roomy Interior: The design ensures ample space for groceries, books, or other essentials.
Level of Difficulty
This project is beginner to intermediate. The techniques, such as single crochet, slip stitching, and working in the round, are beginner-friendly. However, attention to symmetry and working with chunky yarn require more precision, making it slightly advanced for absolute beginners.
Tutor’s Suggestions
- Stretch the Yarn: If the t-shirt yarn appears uneven or curled, stretch it out before crocheting. This ensures an even gauge.
- Use Stitch Markers: Mark the corners of the base and the starting point of your rounds to help maintain symmetry and prevent mistakes.
- Secure the Loose Ends: Weave in yarn tails carefully for a sturdy finish, particularly at the handles, where tension is higher.
- Customize Freely: Adjust the size of the base, the height of the body, or the handle length to meet your needs.
Uses
- Everyday Bag: Perfect for carrying groceries, books, or personal items.
- Beach Tote: Its spacious interior and lightweight material make it ideal for summer outings.
- DIY Gift: This handmade piece is a thoughtful, stylish gift for friends and family.
- Eco-Friendly Option: The reusability and durable material make it a sustainable alternative to plastic bags.
Crochet Tip
When working with chunky or t-shirt yarn, use a light grip on your hook to avoid wrist strain, and keep your tension relaxed for even stitches.
Conclusion
This crochet chunky tote bag tutorial by Sophie is the perfect project for anyone seeking to blend functionality and style. With simple stitches, customization options, and Sophie's clear guidance, you'll have a beautiful, practical bag in no time. Whether you're a beginner or an advanced crocheter, this project offers the joy of creating something both useful and visually appealing.


