
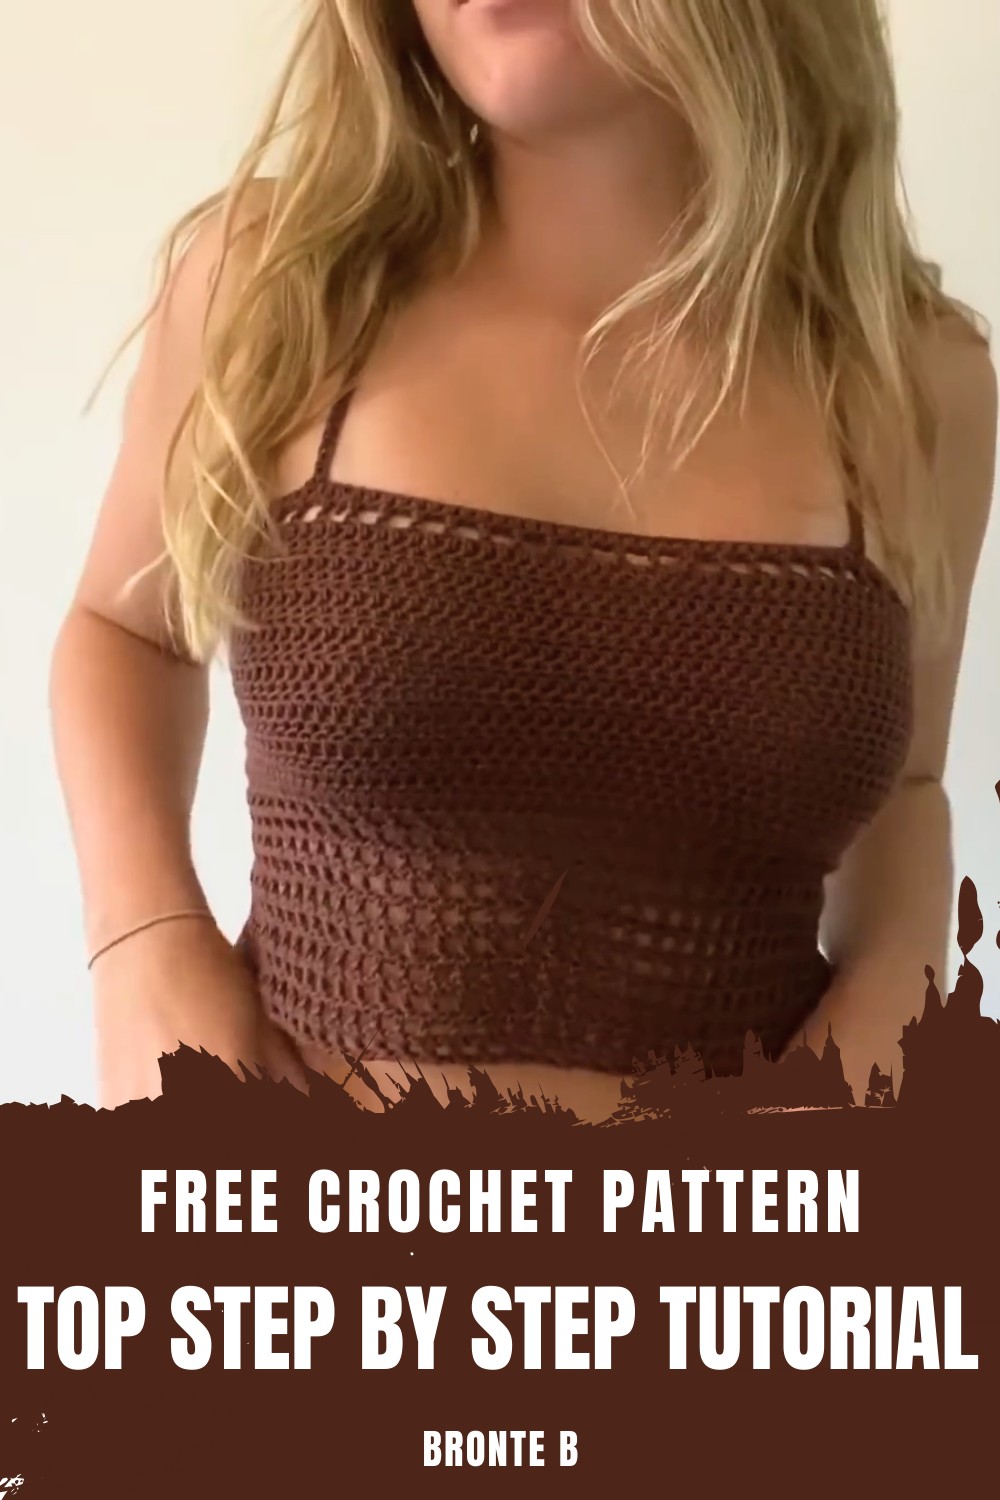
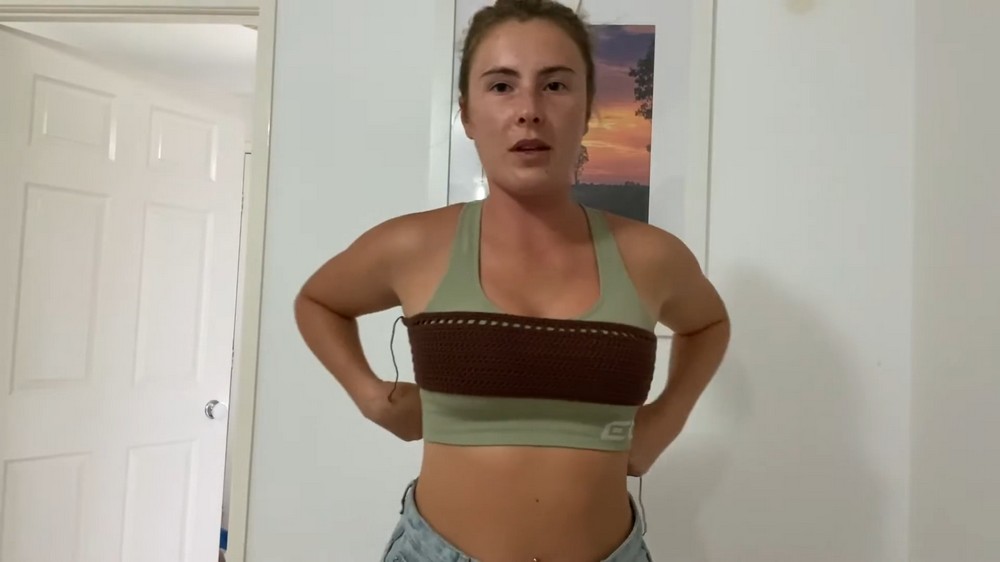
Cozy Crochet Top Pattern That Brings Out Your Best Style
What’s exciting about this pattern is its accessibility for both beginners seeking a simple project and seasoned crocheters wanting to experiment with customization. With just a crochet hook and some soft yarn, you can crochet something beautiful without breaking the bank.
The satisfaction doesn’t end with the final stitch—you’re left with more than just a handmade top. It adds purpose to your wardrobe and the joy of knowing you’ve crocheted an item that has both aesthetic charm and practical use. It’s not just fashion; it’s wearable creativity that brings endless possibilities with every loop and weave.
Materials Needed
To crochet this mesh top, gather the following materials:
- 100g of cotton yarn (tutor recommends Four Seasons Blenders, 8-ply; acrylic yarn is also acceptable).
- 4mm crochet hook, ideal for the recommended yarn size.
- Stitch markers, which help place straps and ensure symmetry.
- Yarn needles for weaving in ends.
- Scissors for trimming excess yarn.
Special Features
- Adjustable Size: Chain an even number of stitches that fits across your chest from armpit to armpit.
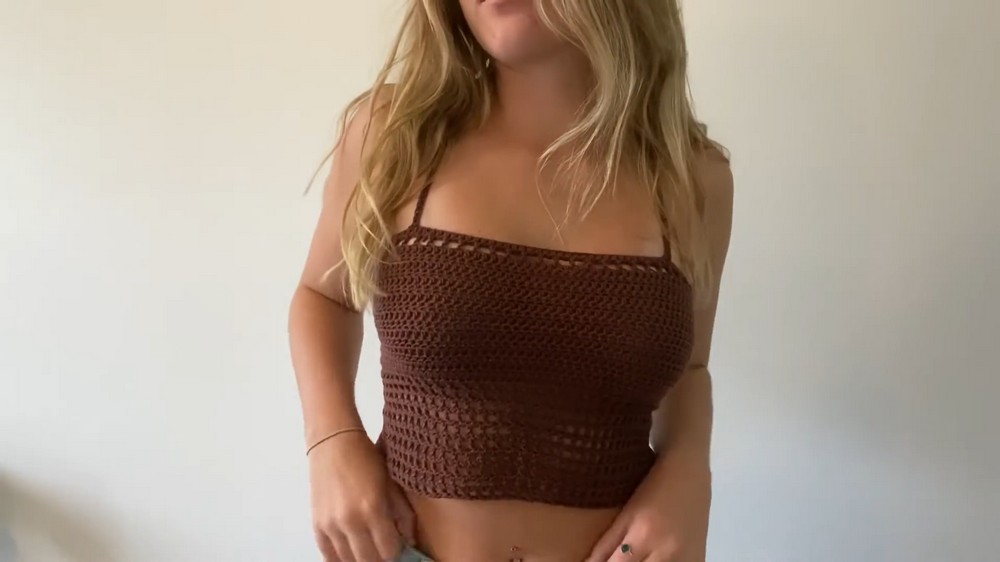
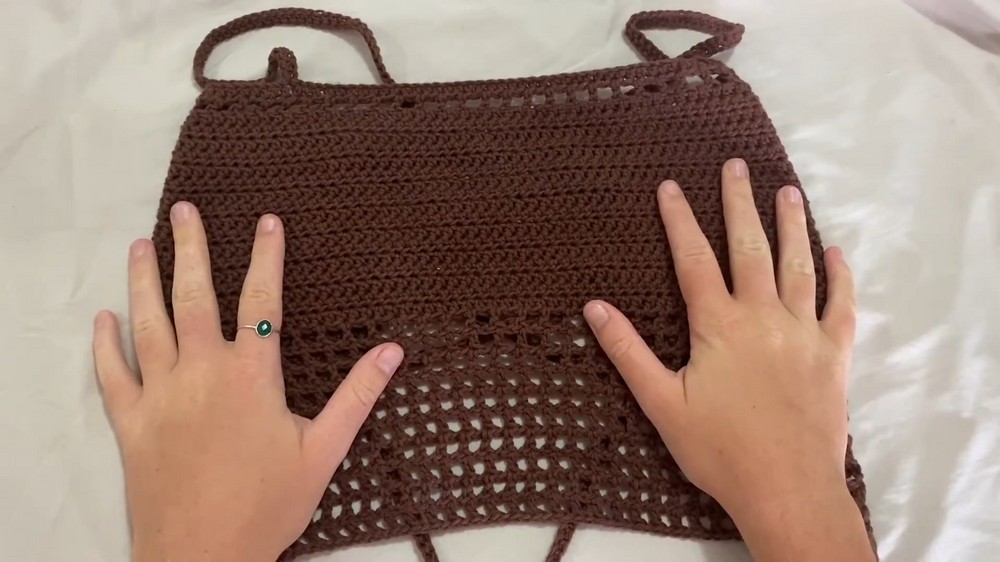
- Mesh Pattern: A breathable and lightweight design that adds elegance.
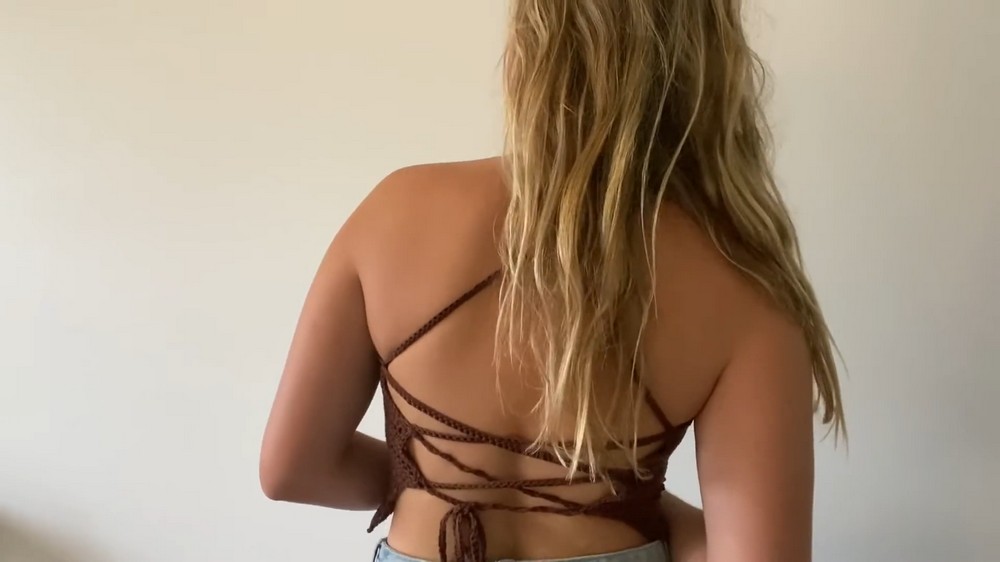
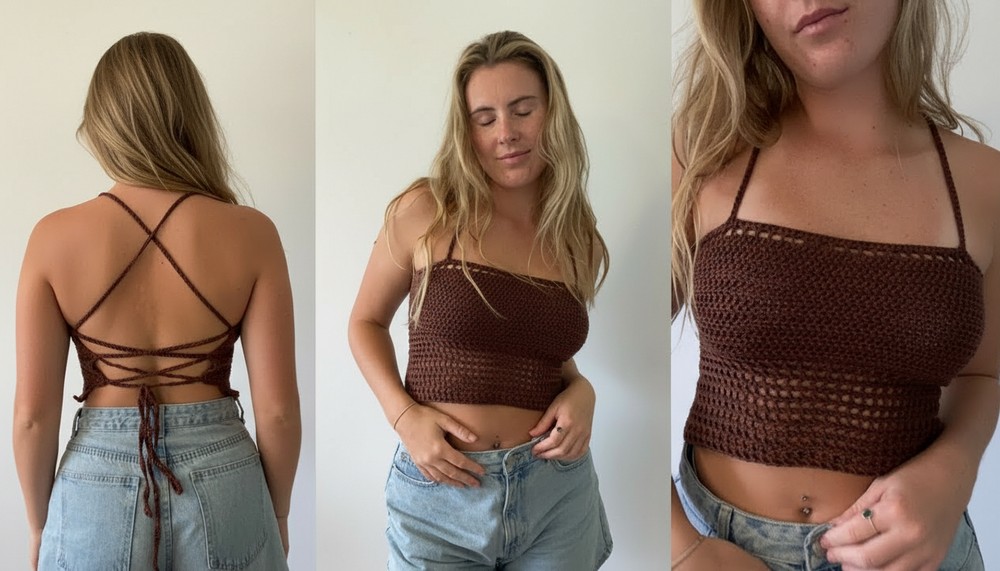
- Customizable: Adjustments for strap placement, back crisscross, and top length are easily made.
- Strategic Increases: Add stitches every second row for a perfect fit around the chest.
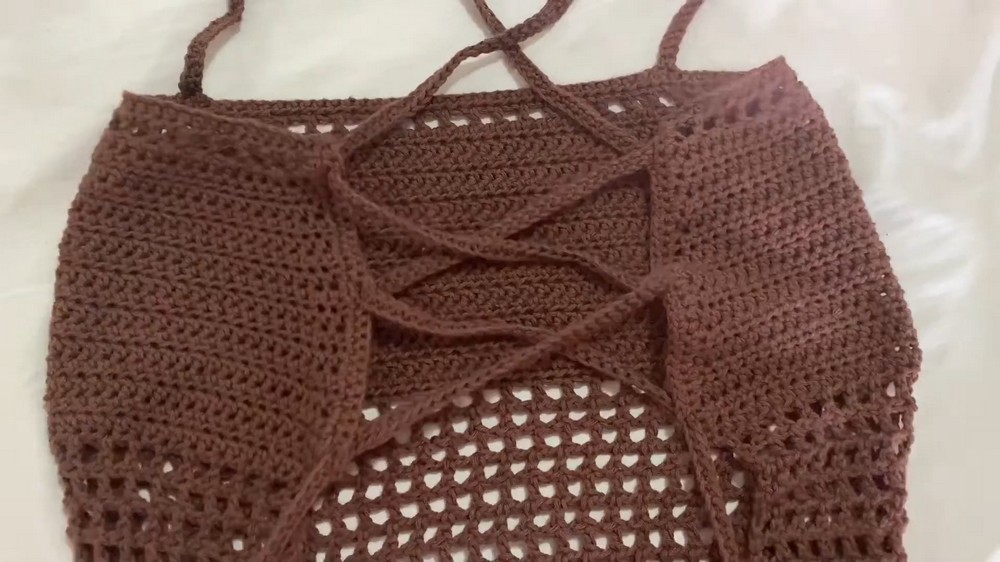
- Detailed Side Holes: Side gaps allow for easy threading of straps, creating a beautiful lace-up effect at the back.
Step-by-Step Instructions
Step 1: Make the Base Chain
- Start with a slip knot and chain an even number of stitches (approximately 60–70 chains recommended).
- Measure the chain length across your chest from one armpit to the other. Adjust the chain length for your desired fit.
- Ensure the chain isn't too tight and has smooth, equal-sized stitches.
2: Create the First Rows
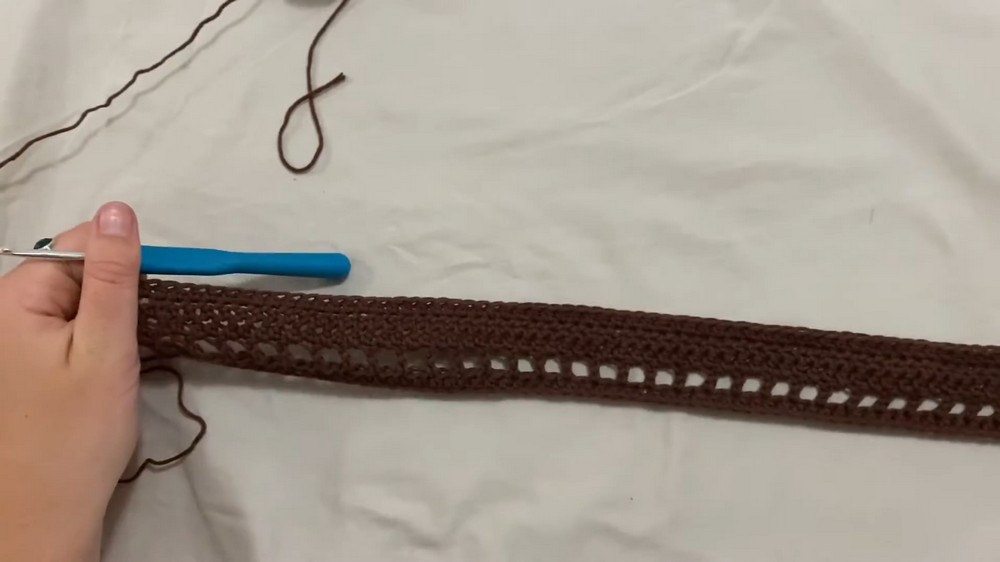
- Row 1: Work half-double crochets (HDC) starting with two chains, skipping two stitches, and going into the third chain.
- Repeat HDC to the end of the row.
- Row 2: Begin the mesh stitch: chain three (counts as the first double crochet). Skip a stitch, perform a double crochet (DC), and chain one. Repeat until the end of the row.

3: Alternate Between Mesh and Solid Rows
- As you progress, alternate between solid rows (half-double crochets in each stitch) and mesh rows (double crochet with chain spaces).
- Increase Strategy: Add two stitches every second row on both sides of the top for a better chest fit.
- Example: In row six, perform normal HDCs throughout, but add two stitches by putting two HDCs into one stitch in the second and second-to-last stitch.
4: Continue Crocheting Until Full Chest Coverage
- Make rows until the solid section covers your upper chest completely.
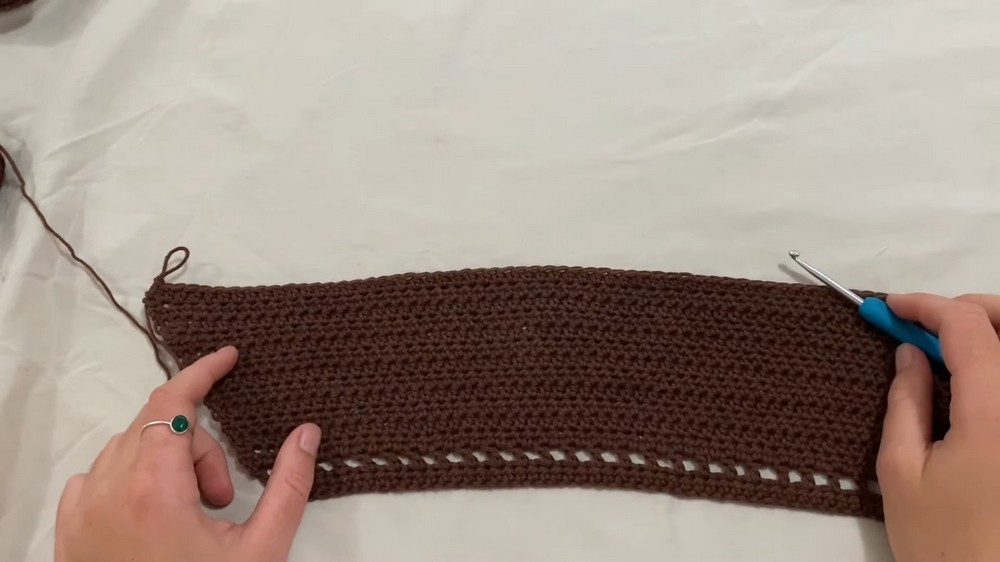
- For a back-space effect, ensure there is a gap in coverage for the straps, roughly 4–5 inches.
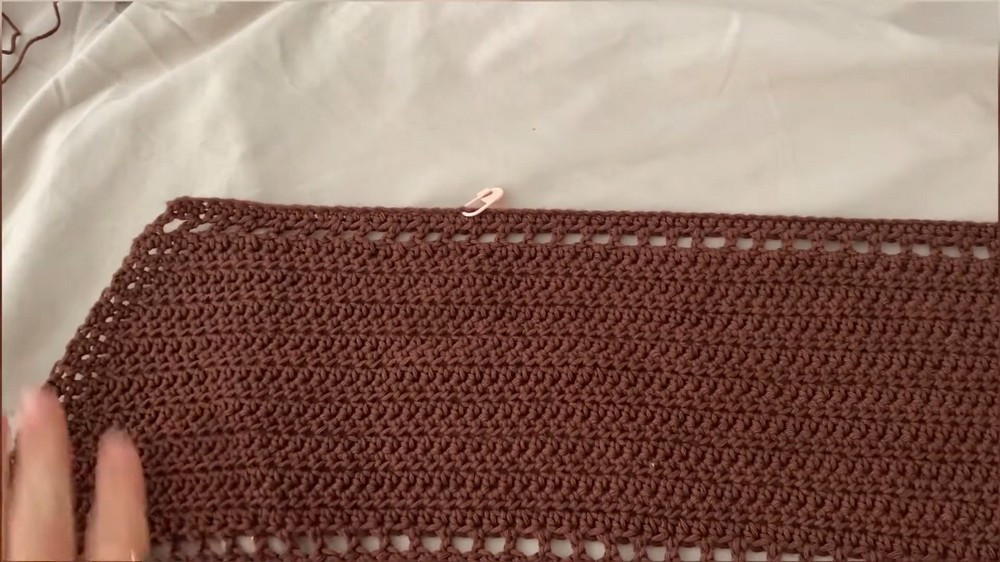
5: Create Side Holes for Straps
- Add single crochet stitches into the edges of the sides.
- Create gaps by chaining two and skipping two stitches, followed by a single crochet. These gaps form holes where straps can thread through.
6: Crochet the Straps
- Strap Chains: Chain 280 stitches for a long strap. Adjust based on your fit.
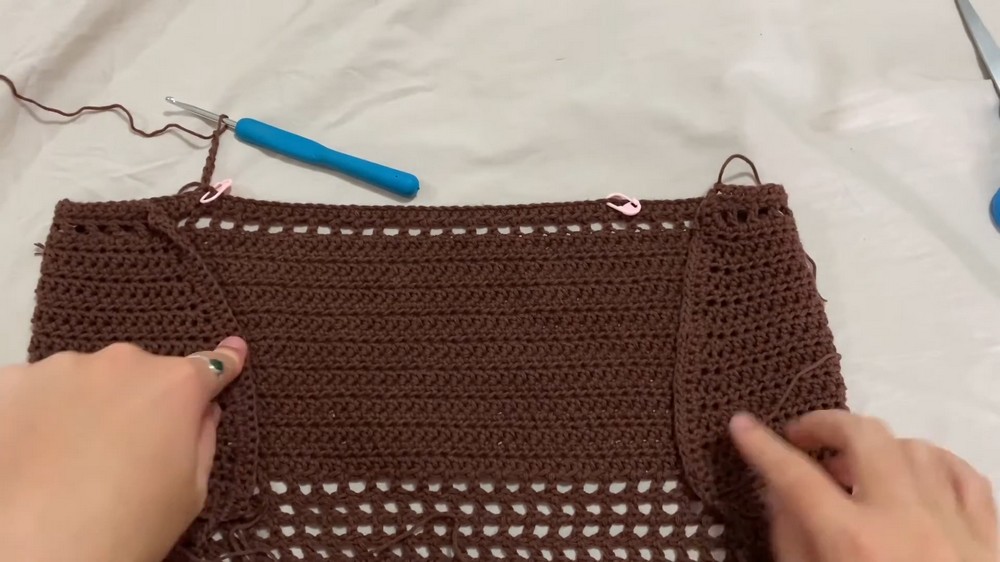
- Reinforce the straps with single crochets along the chain for durability.
- Attach the straps securely by slip stitching onto the marked stitch positions.
7: Prepare Final Adjustments
- Use stitch markers to evenly place straps on the top. Count stitches on each side to ensure symmetry.
- Weave Ends: Secure all loose ends using a yarn needle, threading through several directions for a stable finish.
Tutor's Suggestions
- Size Suggestions: Always try on the top and check its fit after completing each major section.
- Chain Tips: Add extra chains to account for slight shrinkage when single crochet is added for straps.
- Strap Placement: Experiment with strap positions using stitch markers to ensure the fit matches your desired look.
Uses and Style
This crochet mesh top is ideal for:
- Casual Summer Wear: Lightweight and breathable for hot weather.
- Layering: Perfect for pairing with tank tops, swimsuits, or dresses.
- Custom Gifting: A handmade gift that can be personalized easily with colors and strap styles.
Difficulty Level
Beginner-friendly, with simple techniques such as slip knots, chains, half-double crochets, single crochets, double crochets, and increases. Detailed instructions ensure ease of understanding for new crocheters.
Final Tip
Consistency in tension is crucial to ensure equal-sized stitches and a uniform finish. Take breaks during long sections (e.g., straps) to avoid fatigue, ensuring neat and precise work.
Conclusion
This crochet mesh top is a rewarding project that combines functionality and style. With its customizable design and detailed tutorial, even beginners can crochet a top that stands out. Grab your materials and start crocheting your new favorite summer outfit!


